هل سبق لك أن بدأت مشروعًا DIY وأدركت في منتصف الطريق من خلال هذه الخطوة المفقودة يمكن أن تحول ترقية بسيطة إلى صداع كبير؟ التثبيت Z لوحات غالبًا ما يتعثر حتى أصحاب الأعمال اليدوية ذوي الخبرة - فالأسطح غير المستوية أو المحاذاة الصعبة أو التشطيبات الفوضوية يمكن أن تعرقل المظهر بأكمله. إن الجدار المجهز بشكل سيء أو الاختيار الخاطئ لللاصق يحول بسرعة فوزًا في تحسين المنزل إلى نجاح “اتمام المهمة” الموقف.
إذا كنت تريد أن يبدو جدارك المميز احترافيًا - وليس جيدًا بما فيه الكفاية - فأنت بحاجة إلى أكثر من مجرد الحماس. إن التخطيط الواضح والأدوات المناسبة والتقنيات الذكية مثل استخدام مقاطع Z للتركيب السلس، كلها أمور تُحدث فرقًا. في هذا الدليل، سنرشدك خلال كل خطوة، ونشارك النصائح حول التثبيت الآمن والدقيق، ونغطي كيف يمكن للوحات عالية الجودة وخيارات الشحن العملية (مثل المجموعات ذات الحجم المسبق من الموردين الرائدين) أن تجعل تركيب لوحة Z DIY التالية أمرًا سهلاً “لا داعي للتفكير”. فلنبدأ في تحويل رؤيتك إلى واقع.
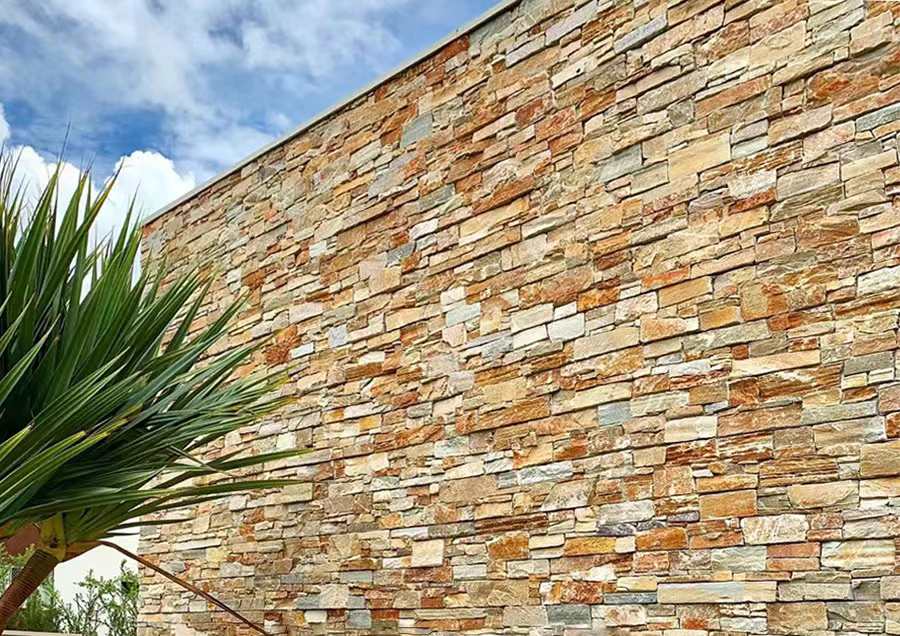
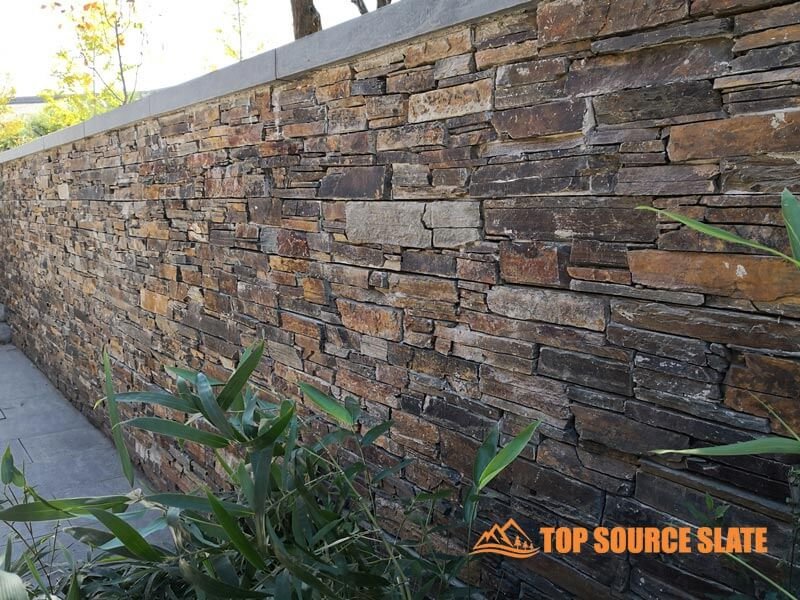
ارفع مساحتك باستخدام لوحات Z
إذا كنت تبحث عن طريقة لإضافة كل من الأسلوب والقيمة العملية إلى مساحتك الخاصة، فقد تكون لوحات Z هي الحل الأمثل لك. تكتسب هذه الألواح الحجرية متعددة الاستخدامات شعبية في تحسين المنزل بنفسك نظرًا لعملية تركيبها السهلة ومظهرها الطبيعي المذهل. سواء كنت ترغب في جعل جدار غرفة المعيشة بارزًا، أو تحويل المدفأة إلى قطعة مركزية، أو ترقية المظهر الخارجي لمنزلك، فإن لوحات Z توفر نهجًا مرنًا ومتينًا يناسب أي رؤية تصميم تقريبًا.
“تمزج لوحات Z بين جمال الحجر الطبيعي والتركيب الخالي من المتاعب، مما يجعلها مثالية لأي شخص يرغب في الارتقاء بتحسين المنزل دون الاستعانة بالمحترفين.”
ما هي لوحات Z؟
لوحات Z عبارة عن بلاطات حجرية متشابكة، مصممة لتتلاءم معًا مثل قطع الألغاز. أنها تتميز عادة ب “ز”حافة على شكل، مما يجعل محاذاتها واضحة وتبقي الدرزات غير مرئية تقريبًا. معظم لوحات Z مصنوعة من حجر حقيقي - مثل الأردواز أو الكوارتزيت أو الحجر الرملي - مما يمنح كل جدار إحساسًا حقيقيًا وقويًا. حتى أن بعضها يأتي مزودًا بمشابك معدنية مدمجة في الخلف، بحيث يمكنك تركيبها بسرعة وأمان باستخدام الأدوات الأساسية؛ ليست هناك حاجة إلى معدات فاخرة.
-
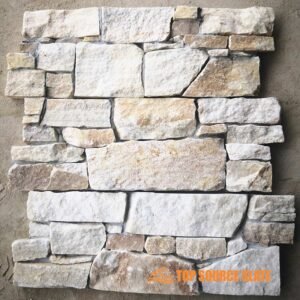
 سعر الجملة الكسوة الحجر الطبيعي الخارجي
 -
 ألواح أويستر كوارتز Z الحجرية مقاس 550 × 200
 -
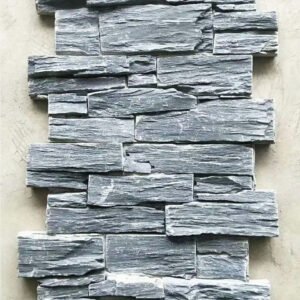
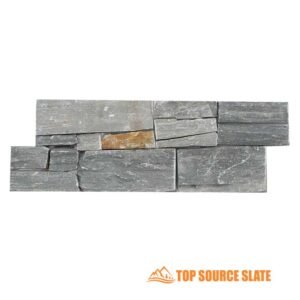
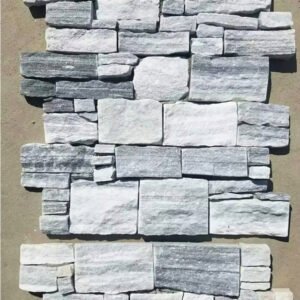 ألواح تكسية من الحجر الطبيعي على شكل حرف Z من الكوارتز باللون الرمادي الغائم
 -
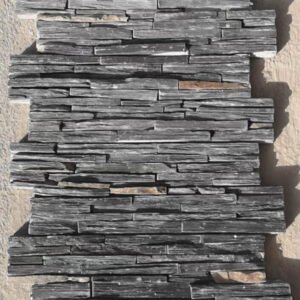
 كسوة لوحة Z باللون الأسود
 -
 الكسوة حجر الكوارتز الأبيض الطبيعي
 -
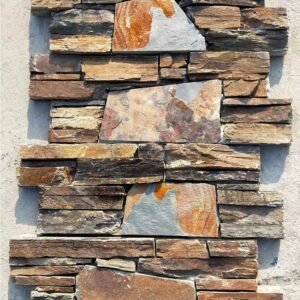
 الكسوة حجر الكوارتز الماس الأزرق لتزيين الجدران الخارجية
 -
 ألواح تكسية من الحجر الطبيعي من الكوارتز الأخضر
 -
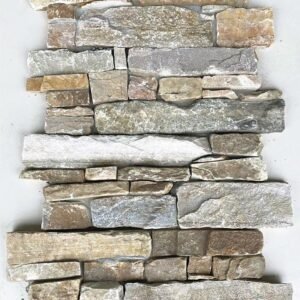
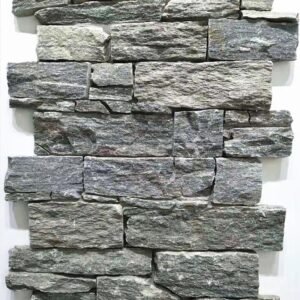
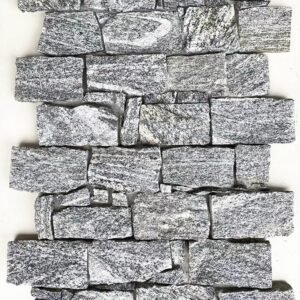
 ألواح الحجر Z الطبيعية من المصنع الصيني
 -
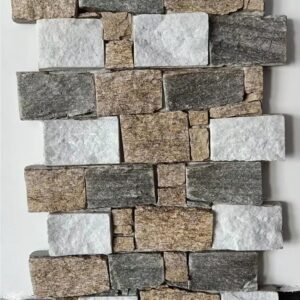
 تتميز ألواح تكسية الجدران بميزة حجر الحافة الأكثر مبيعًا
 -
 لوحة على شكل حرف Z مكدسة بالكسوة الحجرية
 -
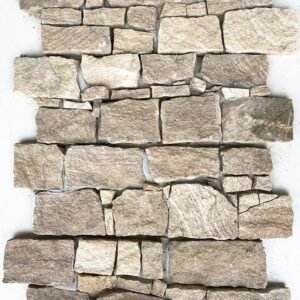
 بلاط الحائط Ledgestone Stackstone الطبيعي المدعوم بالأسمنت
 -
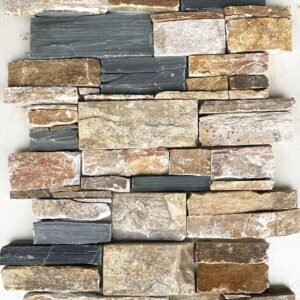
 حجر متعدد الألوان مدعوم من الأسمنت الطبيعي المتشابك
 -
 ألواح قشرة حجرية مدعومة بالأسمنت الأردواز الأسود
 -
 واجهة خارجية من القشرة الحجرية الجافة ذات الأردواز الريفي
 -
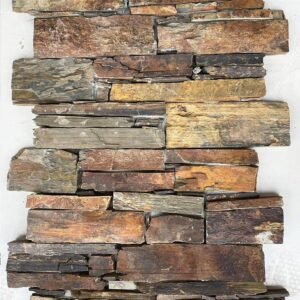
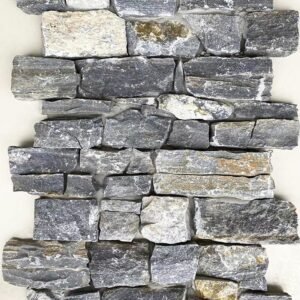
 الصين شعبية لوحات Z الكسوة الحجر المتشابكة
فوائد استخدام لوحات Z: المظهر الجمالي، وسهولة التركيب، والمتانة
أحد الأسباب التي تجعل الأشخاص يختارون Z Panels هو جاذبيتها الخطيرة. إذا كنت تهدف إلى الحصول على مظهر راقي وخالد، فإن هذه اللوحات توفر عمقًا محكمًا وشخصية ترابية. ويعني تصميمها المتشابك أيضًا أنك لست مضطرًا إلى أن تكون محترفًا —تركيب لوحة Z DIY بسيطة، مع الحد الأدنى من خطر الفوضى أو الأخطاء. بالإضافة إلى ذلك، فإن المادة الحجرية المتينة تصمد بشكل جيد في الداخل والخارج، وتقاوم التشققات والبهتان بحيث يدوم استثمارك لسنوات.
أين يمكنك استخدام لوحات Z؟
- الجدران الداخلية
- جدران اللكنة
- المواقد
- الكسوة الخارجية
أتساءل أين تستخدم لوحات Z في منزلك؟ إنها رائعة للجدران المميزة في غرف المعيشة أو غرف النوم، ولكنها أيضًا تعمل العجائب على المواقد أو سبلاش المطبخ أو حتى جدران الفناء. لأولئك الذين يحرصون على تحسين المنزل باستخدام لوحات Z، فإن الاحتمالات تتجاوز مجرد غرفة واحدة - فكر في المداخل، أو محيط الحمام، أو المطابخ الخارجية. بفضل مقاومتها القوية للطقس، تعد لوحات Z خيارًا ذكيًا للإدلاء ببيان في الداخل والخارج.
فهم الأنواع المختلفة من لوحات Z: المواد والأنسجة والأنماط
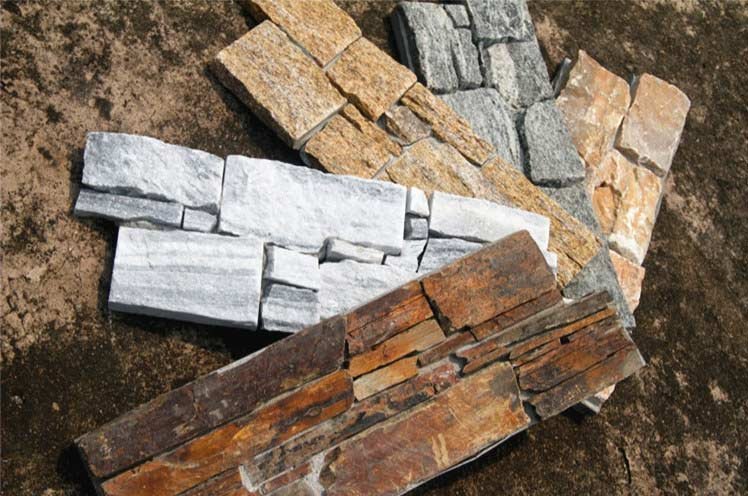
لا توجد لوحة Z مقاس واحد يناسب الجميع. ستجد خيارات مصنوعة من جميع أنواع الحجارة، بألوان تتراوح من الرمادي البارد إلى الذهبي الغني. تختلف التشطيبات أيضًا، بدءًا من صلابة الوجه المقسم إلى الأنماط الأكثر سلاسة؛ وهذا يعني أنه يمكنك مطابقة أي نكهة تصميمية، بدءًا من المقصورة الريفية وحتى الدور العلوي الحديث. لأي شخص يتساءل عما مصنوعة من ألواح z، فإن معظم المنتجات عالية الجودة تستخدم قطعًا حجرية طبيعية تم اختيارها بعناية من أجل القوة وتناسق الألوان.
رؤية التثبيت: توفير الوقت باستخدام المشابك المدمجة
تتميز العديد من لوحات Z اليوم بمشابك معدنية مدمجة تمسك بالحائط، بحيث تقضي وقتًا أقل في القياس أو الحفر أو التعامل مع الأقواس الإضافية. هذه الميزة تجعل تركيب لوحات Z سهل للمبتدئين والمجددين المتمرسين على حد سواء، مما يتيح لك قضاء وقت أطول في الإعجاب بعملك بدلاً من التعرق على الأدوات.

قائمة المصدر الأعلى: شريكك في لوحات Z عالية الجودة
تتمتع شركة Top Source Slate بخبرة تزيد عن 15 عامًا في توفير حلول Z Panel الموثوقة والقابلة للتخصيص. من خلال اتباع نهج مباشر من المصنع، فإنهم يحافظون على التكاليف تحت السيطرة مع تقديم جودة الحجر الحقيقية التي يتوقعها العملاء. يمكن لأصحاب المنازل والبنائين والمصممين الاستفادة من كتالوجهم العميق، بدءًا من الألوان القياسية وحتى الطلبات المخصصة الفريدة، مع العلم أنهم سيحصلون على المساعدة والتوجيه الصادق في كل خطوة على الطريق.
نظرة عامة على لوحات Z: الأنماط والمواد & التطبيقات
| مادة اللوحة | التشطيبات الشعبية | التطبيقات المشتركة | نطاق الحجم النموذجي | معيار الصناعة (المتانة) |
|---|---|---|---|---|
| لائحة | انقسام الوجه | الموقد، لهجة الجدار | 6″x24″ | عالية (الماء & مقاومة للتجميد) |
| الكوارتزيت | خشن & سلس | الكسوة الخارجية | 6″x24″; مخصص متاح | عالية جدًا (مقاومة للخدش) |
| الحجر الرملي | شق طبيعي | الجدران الداخلية | 6″x24″ | متوسط (الأفضل للداخل) |
| رخام | شحذ | الميزات الفاخرة | 4″×18″ إلى 6″x24″ | متوسط (يلزم الختم العادي) |
| الجرانيت | ملتهب/التقطت غرامة | واجهات خارجية ذات حركة مرور عالية | 6″x24″ | عالية جدًا (الأشعة فوق البنفسجية & مقاومة التأثير) |
ملحوظة:
يسلط الجدول الضوء على المواد الرئيسية للوحة Z، وتشطيباتها المشتركة، ومجالات التطبيق، وكيفية أداء كل منها وفقًا لمعايير المتانة الصناعية. تعكس القياسات معايير الشركة المصنعة النموذجية؛ خيارات التخصيص متاحة على نطاق واسع.
التحضير للتثبيت: الأدوات والمواد وإعداد السطح
إن بدء مشروع ترقية المنزل باستخدام Z Panels يعني الاستعداد كالمحترفين للحصول على تلك النتيجة المصقولة. قبل الغوص في تركيب لوحات Z، ستحتاج إلى ضبط الترس المناسب واختيار مواد عالية الجودة وإعداد سطحك لتجنب حدوث عوائق على الطريق. إن تخصيص الوقت للتخطيط الدقيق يضمن أن كل حجر يناسبك تمامًا وأن جدارك المميز يدوم لسنوات.
“يتم تنفيذ روتين إعداد متين - الأدوات جاهزة، وفحص السطح، والتخطيط المخطط له تركيب لوحات Z أسهل ويساعد على تجنب الهدر أو المهام المكلفة.”
جمع أدواتك: قائمة مرجعية شاملة
يبدأ كل إعداد ناجح للوحة Z بجمع الأدوات اللازمة لتثبيت لوحة z. إليك قائمة الانتقال:
- المستوى - لخطوط مستقيمة تمامًا
- شريط قياس - لزيادة حجم المساحة الخاصة بك
- منشار البناء أو طاحونة الزاوية – للتقطيع المخصص
- مادة لاصقة للحجر - النوع الصحيح مهم (سنفصل ذلك لاحقًا)
- مجرفة مسننة - لتوزيع المادة اللاصقة بالتساوي
- نظارات وقفازات السلامة – استخدمها دائمًا بطريقة آمنة
- مقاطع Z أو أقواس تثبيت معدنية - إذا كانت الألواح الخاصة بك بحاجة إلى دعم إضافي
تأتي العديد من لوحات Z الآن مزودة بمشابك معدنية مدمجة، لذلك إذا تعطلت مجموعة Top Source Slate، فستجد أن عملية التثبيت تتحرك بشكل أسرع.
اختيار المادة اللاصقة المناسبة: الأنواع والتطبيقات والتوافق
عندما يتعلق الأمر بتأمين تلك الحجارة، باستخدام أفضل مادة لاصقة لتثبيت لوحة Z أمر بالغ الأهمية. بالنسبة للجدران الداخلية، يعمل لاصق البناء عالي الجودة المعتمد على البوليمر بشكل جيد، بينما قد تحتاج المناطق الخارجية أو الرطبة إلى مادة لاصقة حجرية خارجية متخصصة. تحقق دائمًا من التوافق، فبعض المواد اللاصقة ليست مصنوعة لأسطح معينة من الجدران. انشر المادة اللاصقة باستخدام مجرفة مسننة للحصول على قبضة متساوية وأغلق كل لوحة في مكانها قبل أن تبدأ في المعالجة.
إعداد السطح: التنظيف والتسوية والتأكد من السلامة الهيكلية
الآن يأتي العمل القانوني. قم بتنظيف الجدار الأساسي الخاص بك لإزالة الغبار أو الزيوت أو أي شيء يمكن أن يفسد الالتصاق. تأكد مرة أخرى من أن السطح مستوي؛ استخدم مركب الترقيع لملء الانخفاضات أو الثقوب. بالنسبة للطوب القديم أو الخرسانة أو الحوائط الجافة، تأكد من أنها قوية بما يكفي لتحمل وزن الحجر. لا تتخطى هذا: القاعدة المعيبة تؤدي إلى ألواح متذبذبة أو فضفاضة لاحقًا. ل تركيب لوحة Zتصنع الجدران المستقرة والنظيفة الفرق بين التثبيت السريع والسهل والصداع الحقيقي.
قياس وتخطيط التصميم الخاص بك: تقنيات التنسيب الدقيق والحد الأدنى من النفايات
للحصول على مظهر احترافي، التخطيط هو أمرك “ركوب أو دي” يتحرك. استخدم شريط قياس ومستوى لتحديد المكان الذي ستهبط فيه لوحات Z الخاصة بك. ابدأ من المركز أو نقطة محورية رئيسية وقم بتجفيف الصف الأول قبل لصق أي شيء. قم بتمييز قطعك مسبقًا لتجنب القطع الصغيرة والغريبة عند الحواف. هذا الحذر إعداد لوحة Z سيوفر المواد ويضمن بقاء الطبقات غير مرئية تقريبًا.
لائحة المصدر الأعلى: مجموعات ودعم لوحات Easy Z
ضيق في الوقت المحدد؟ يقدم Top Source Slate مجموعات Z Panel ذات الحجم المسبق، مكتملة بالمشابك وأدلة التثبيت التفصيلية لجميع أنواع المساحات. توفر هذه الحزم الوقت وتقلل من التخمين بالنسبة إلى أصحاب الأعمال اليدوية. تحقق من بهم صفحة المنتج لاستكشاف أنماط اللوحات أو الدردشة مع الدعم حول اختيار المجموعة المناسبة للمساحة الخاصة بك.
الأدوات الأساسية & الخطوات الإعدادية لتثبيت لوحات Z
| أداة/مادة | لماذا هو مطلوب | المواصفات/العلامة التجارية الموصى بها | طريقة القياس/الاستخدام | أفضل ممارسات الصناعة |
|---|---|---|---|---|
| مستوى | يضمن صفوفًا متساوية ومستقيمة | مستوى الصندوق 24-48 بوصة | تحقق من المحاذاة الأفقية في كل صف | أعد الفحص بعد كل 3-4 لوحات |
| لاصق الحجر | رابطة قوية للحجر على الحائط | Mapei Ultralite (للاستخدام الداخلي والخارجي) | انتشار مع مجرفة حقق 1/4 بوصة | اختبار على لوحة الخردة قبل الاستخدام الكامل |
| المنشار / المطحنة | قطع مخصصة للزوايا والحواف | منشار البلاط الرطب (DeWalt، QEP) | سجل وقم بقص عرض لوحة واحدة على الأقل من الحواف | ارتداء نظارات السلامة وقطع في الهواء الطلق إذا كان ذلك ممكنا |
| منظف الأسطح | يحسن التصاق اللوحة | مزيل شحوم خفيف أو ماء صابون | امسح الحائط واتركه حتى يجف تمامًا | قم بتقييم تلف العفن أو الماء قبل البدء |
| مقاطع Z / مقاطع مدمجة | توصيل اللوحة بشكل أسرع | الفولاذ المقاوم للصدأ أو المجلفن | نعلق 4-6 بوصات من كل نهاية لوحة | قياسي في مجموعات لائحة المصدر الأعلى |
ملحوظة:
يلخص هذا الجدول الأدوات والمواد والنصائح المهنية الواقعية لضمان بدء مشروع Z Panel الخاص بك بالطريقة الصحيحة. استخدم هذه التفاصيل كقائمة مرجعية قبل كل مرحلة من مراحل التثبيت.

دليل خطوة بخطوة: تثبيت لوحات Z مثل المحترفين
هل أنت مستعد لتعزيز مساحتك بالحجر الطبيعي؟ اتبع دليل التثبيت السهل للوحة z للحصول على لمسة نهائية نظيفة تبدو وكأنها محترفة تعاملت مع كل التفاصيل. مع القليل من التخطيط والتقنية القوية، لا يلزم أن يمثل تثبيت لوحات Z مشكلة - مجرد مشروع مباشر يمكن لأي شخص إدارته.
“يشكل التركيب الجاف الدقيق، والاستخدام الذكي لمشابك z، والعمل اللاصق للمريض العمود الفقري لتركيب ألواح الحجر الطبيعي الآمنة وعالية الجودة.”
التركيب الجاف: التخطيط لترتيبك قبل وضع المادة اللاصقة
ابدأ بوضع لوحات Z على الأرض أمام الحائط. يساعدك هذا على معاينة الشكل النهائي وضبط الألوان أو الأنسجة. يُظهر التركيب الجاف أيضًا المكان الذي ستحتاج فيه إلى تقليم الألواح بحيث تكون الحواف ضيقة ومحاذاة الزوايا. خذ وقتك خلال هذه الخطوة حتى لا ينتهي بك الأمر بوجود فجوات صغيرة متبقية في الأماكن الصعبة
تطبيق المادة اللاصقة: تقنيات التثبيت المتسق والآمن
بعد ذلك، قم بإعداد الجدار كما هو موضح سابقًا واحصل على المادة اللاصقة الحجرية المتميزة. قم بتوزيعه باستخدام مجرفة مسننة، مع تطبيق ما يكفي لبضعة صفوف في المرة الواحدة. اضغط على كل لوحة بقوة في السرير اللاصق لتثبيتها جيدًا، واستخدم حركة خفيفة من جانب إلى آخر لمساعدة الحجر على الإمساك به. تذكر، مع تثبيت لوحات Z، فإن وجود طبقة موحدة من المادة اللاصقة هو المفتاح لتحقيق ثبات طويل الأمد - لا تتجاهل هذه الخطوة
استخدام مقاطع Z: ضمان المحاذاة السلسة وسهولة التركيب
إذا كانت اللوحات أو نظام الحائط الخاص بك يستخدم مشابك على شكل حرف z للألواح، فقم بتوصيل قاعدة المشبك بالحائط كل 12 إلى 16 بوصة وقم بتركيب المشابك المثبتة على اللوحة فوقها. تأتي العديد من لوحات Z عالية الجودة، خاصة من Top Source Slate، مزودة بمشابك معدنية مدمجة - مما يجعل كل شيء أسهل على أصحاب الأعمال اليدوية. يحمل هذا النظام الحجر بقوة مع الحفاظ على كل شيء مستقيمًا، مما يجيب على السؤال الشائع حول كيفية ربط الألواح Z بالجدار في حركة واحدة. إنه قريب من “اضبطه ثم انساه” كما يمكنك الحصول عليها
ألواح القطع: تشذيب دقيق للحواف والزوايا
لا يتناسب كل جدار تمامًا مع أحجام الألواح القياسية. استخدم منشارًا مبللاً أو مطحنة زاوية بشفرة ماسية للحصول على قطع سلس. قم بالقياس بعناية، ضع علامة على اللوحة الخاصة بك، ثم اقطعها ببطء لتجنب التقطيع. دائما ارتداء حماية العين. يجب أن يتم دمج اللوحات المقطوعة بدقة في تخطيطك مباشرةً، مما يؤدي إلى إنشاء لمسة نهائية سلسة تقريبًا في الزوايا والحواف - والحفاظ على مظهر مشروعك حادًا وليس متقلبًا
للحصول على نصيحة: بمجرد وضع الألواح في مكانها، قم بالرجوع إلى الخلف لفحص الخطوط للتأكد من مستواها واستقامتها قبل أن يجف اللاصق بالكامل. إن إجراء تعديلات سريعة هنا يمكن أن ينقذ الموقف ويساعدك على تجنب الصفوف المنحرفة أسفل الجدار. بالصبر، يصبح تثبيت لوحات Z مشروعًا مُرضيًا في عطلة نهاية الأسبوع - حتى للمبتدئين.
هل تبحث عن خيارات خالية من المتاعب؟ تتميز لوحات Top Source Slate بالحجم الدقيق ومشابك Z جاهزة للتركيب، لذلك ستقضي وقتًا أطول في الإعجاب بجدارك الجديد ووقتًا أقل في التعامل مع الأجهزة الإضافية.
طرق تركيب لوحة Z & مقارنة النتائج
| طريقة التثبيت | الأدوات اللازمة | متوسط وقت التثبيت (لكل 10 قدم مربع) | جودة التشطيب (معيار الصناعة) | أفضل حالة استخدام |
|---|---|---|---|---|
| لاصق فقط | مجرفة، لاصقة، المستوى | ساعاتين | جيد (يتطلب تسوية دقيقة) | جدران لهجة داخلية |
| مقاطع Z فقط | الحفر، مفك البراغي، مقاطع، المستوى | 1.5 ساعة | جيد جداً (تعديلات سهلة) | المواقد والتركيبات المؤقتة |
| لاصق + مقاطع Z | لاصق، مجرفة، مقاطع، الحفر | 1.2 ساعة | ممتاز (معيار الصناعة) | الكسوة الخارجية والجدران عالية الحركة |
| هاون تقليدي | هاون، تعويم، مستوى | 2.5 ساعة | جيد (يعتمد على المهارة) | الواجهة الخارجية |
| مثبتة على المسمار | مسدس لولبي، بين قوسين، المستوى | 1.8 ساعة | جيد جداً (قابل للترقية/الإزالة) | مساحات تجارية وتأجيرية |
ملحوظة:
يوضح هذا المخطط كيفية تكديس أنظمة التثبيت المختلفة للوحات Z من حيث الجهد المطلوب وجودة التشطيب وأفضل التطبيقات - مما يساعدك على اختيار التقنية المناسبة لأهداف مشروعك.

تحقيق مظهر سلس: نصائح وحيل لإتقان عملية التثبيت
إذا كنت تسعى للحصول على تلك اللمسة النهائية الاحترافية التي لا تشوبها شائبة عند تثبيت لوحات Z، فإن معرفة التقنيات الصحيحة يمكن أن تُحدث فرقًا كبيرًا. لا يقتصر تركيب الألواح الحجرية الطبيعية على لصق الألواح على الحائط فحسب، بل يتعلق أيضًا باللمسات الصغيرة التي تبقي اللحامات مخفية، والزوايا مريحة، والنتيجة النهائية تبدو من الدرجة الأولى. يقدم هذا الدليل نصائح حول التثبيت السلس للوحة z، بدءًا من العمل في الزوايا الصعبة وحتى اختيار أفضل المواد المانعة للتسرب للحماية من الطقس.
“إن إتقان الزوايا والمحاذاة السلسة والإغلاق الدقيق سيمنح إعداد لوحة Z مظهرًا مثاليًا يدوم طويلاً دون أي متاعب.”
العمل مع الزوايا والحواف: تحقيق ملاءمة مريحة وسلسة
الزوايا والحواف هي المكان الذي تتألق فيه براعتك. قم دائمًا بالقياس مرتين وقم بتجفيف جميع قطع الحواف قبل وضع المادة اللاصقة. بالنسبة للزوايا الداخلية، يتم ربط اللوحة البديلة للحصول على تداخل طبيعي، بحيث لا تتكدس الخطوط أبدًا. تبدو الزوايا الخارجية أفضل مع الألواح المخصصة على شكل حرف L، أو يمكنك استخدام قطع الزوايا المعدة مسبقًا. عندما تكون في شك، يوفر Top Source Slate زوايا دقيقة للحصول على هذا المظهر المخصص دون بذل جهد إضافي.
إخفاء اللحامات: تقنيات للحصول على مظهر طبيعي مستمر
التخطيط الجيد للتخطيط هو المفتاح لإخفاء اللحامات. قبل تثبيت الألواح، قم بوضع العديد منها لخلط ظلال الألوان والأنسجة وإنشاء ترتيب عشوائي. ترنح المفاصل كلما أمكن ذلك. للحصول على نتائج أفضل، اضغط بلطف على الألواح المجاورة معًا بينما يكون اللاصق مبتلًا لتقليل الخطوط المرئية. تعمل هذه الخطوة على تحسين إعداد لوحة Z الخاصة بك وتمنح أعمالك الحجرية تدفقًا حقيقيًا ومتواصلًا.
الحشو والختم: الحماية من الرطوبة وتعزيز طول العمر
بمجرد تركيب الألواح، لا تستخدم الجص إلا في الأماكن الموصى بها - عادةً ما يخفي التصميم Z معظم الوصلات، لذلك يلزم الحد الأدنى من الجص. استخدم ملاطًا غير رملي لسد الفجوات الضيقة وامسح الفائض على الفور. للحفاظ على حجرك نقيًا ومقاومًا للماء، اختر مادة مانعة للتسرب للحجر قابلة للتنفس. توصي شركة Top Source Slate بمنتجات مثل Mapei Ultracare Stone وTile & الجص العازل أو ما شابه ذلك، الذي يعزز اللون ويحمي من البقع. ضعيه بمجرد جفاف الألواح ثم أعيدي وضعه كل بضع سنوات للحصول على أفضل النتائج.
استكشاف مشكلات التثبيت الشائعة وإصلاحها: الأسطح غير المستوية والألواح السائبة ومشكلات اللصق
لا تسير كل المهام بسلاسة، لذا إليك كيفية إصلاح التثبيت غير المتساوي للوحة z أو العوائق الأخرى:
- سطح غير مستوي؟ تحقق مع مستوى طويل. بالنسبة للمناطق المرتفعة، قم بالرمل الخفيف أو الطحن، وبالنسبة للمناطق المنخفضة، استخدم حشو البناء قبل إعادة ربط الألواح.
- لوحات فضفاضة؟ قم بإزالة القطعة، وأضف مادة لاصقة جديدة، ثم اضغط بقوة مرة أخرى في مكانها - لا تبخل في وقت التجفيف.
- لاصق لا الترابط؟ أعد التفكير في اختيار المادة اللاصقة وتأكد من أن الجدار خالي من الغبار وجاف. بالنسبة للأماكن الصعبة، استخدم مشابك Z الميكانيكية (المضمنة مع العديد من منتجات Top Source Slate) لمزيد من الثبات.
تذكر أن اللمسة النهائية السلسة تنتج عن الصبر والطرق الصحيحة. للحصول على تركيبات دائمة وجاهزة للطقس، استثمر في المواد المانعة للتسرب والجص عالية الجودة واستفد إلى أقصى حد من تلك المشابك المدمجة لسهولة التركيب القوي. إذا واجهت عقبة، يمكن أن يرشدك دعم Top Source Slate إلى النجاح.
تحديات لوحة Z الشائعة & حلول برو
| تحدي | السبب المشترك | نصيحة الخبراء | القياس/الاختبار | معيار الصناعة/المرجع |
|---|---|---|---|---|
| طبقات مرئية | تخطيط سيء، محاذاة غير متناسقة | مفاصل متداخلة، مزج ألوان/تشطيبات اللوحة | الفحص البصري قبل علاجات لاصقة | خط مرئي أقل من 2 مم (هدف الصناعة) |
| لوحات فضفاضة | مادة لاصقة غير كافية، جدار غير مستوي | أعد وضع المادة اللاصقة عالية الجودة، واستخدم مشابك Z للألواح | اختبار النقر للصوت المجوف | 99% من الألواح صلبة عند اللمس بعد ضبطها |
| فجوات الزاوية | قطع / قياس غير لائق | ميتري أو استخدم زوايا مقطوعة مسبقًا، تحقق جيدًا من الملاءمة | تناسب المحاكمة قبل التثبيت | الفجوات أصغر من 1 مم القياسية |
| تلطيخ المياه | لا يوجد/سوء السداد على الحجر أو الجص | تطبيق مانع التسرب الحجري الموصى به | اختبار التنقيط بعد علاج مانع التسرب | صد الماء مع <نسبة الامتصاص 2% |
| فشل لاصق | مادة لاصقة خاطئة، سطح متسخ | قم بالتبديل إلى المنتج المعتمد، وجدار نظيف | انتظر 24 ساعة، واختبر السند يدويًا | يجب أن تتطلب الألواح القوة لإزالتها |
ملحوظة:
يشارك هذا الجدول مشكلات العالم الحقيقي وأفضل الحلول المعترف بها في معايير الصناعة حتى يتمكن أصحاب الأعمال اليدوية من حل المشكلات بسرعة والانتهاء بكل فخر.
الحفاظ على لوحات Z الخاصة بك: ضمان طول العمر والجمال
بمجرد الانتهاء من تركيب لوحات Z، يجب أن يكون الحفاظ على مظهرها حادًا جزءًا من روتين منزلك المعتاد. مع بعض العادات الجيدة ومنتجات الصيانة المناسبة، يمكن أن تظل ميزة الحجر الخاص بك مذهلة وسليمة من الناحية الهيكلية لسنوات قادمة - في الداخل أو الخارج. دعنا نحلل أساسيات التنظيف والحماية وتحقيق أقصى استفادة من استثمارك في لوحة Z.
“تجعل إجراءات التنظيف المنتظمة والحماية الذكية من تركيب لوحة Z DIY عرضًا دائمًا للجمال الطبيعي، سواء كانت الألواح بالداخل أو معرضة للعناصر.”
التنظيف المنتظم: إزالة الغبار والأوساخ والبقع
إن معرفة كيفية تنظيف لوحات Z أمر أساسي لإطالة العمر. ابدأ بتنظيف الغبار باستخدام فرشاة ناعمة أو قطعة قماش من الألياف الدقيقة. بالنسبة للأوساخ الخفيفة، اشطفها بالماء النظيف. إذا لاحظت بقعًا، استخدم منظفًا خفيفًا للحجر، وتجنب المنتجات الحمضية أو الكاشطة، لأنها قد تلحق الضرر بسطح الحجر. بالنسبة للتطبيقات الخارجية، فإن شطف الخرطوم بلطف كل بضعة أسابيع يمنع الأوساخ وحبوب اللقاح من الاستقرار. تخطي غسالة الضغط؛ إنها مبالغة ويمكن أن تؤدي إلى تفكيك الحجارة الفردية.
الحماية ضد الرطوبة: المواد المانعة للتسرب والعزل المائي
يعد منع مشكلات الرطوبة أمرًا مهمًا بشكل خاص لتحسين المنزل باستخدام ألواح Z في الهواء الطلق أو الحمامات أو سبلاش المطبخ. اختر مادة عازلة للحجر عالية الجودة وقابلة للتنفس (مثل تلك الموجودة في Mapei أو Laticrete، والتي أوصت بها Top Source Slate) وأعد تطبيقها كل 2-3 سنوات. ضعيه بعد أن تصبح الألواح نظيفة وجافة، باستخدام إسفنجة أو فرشاة للحصول على تغطية متساوية. يعد العزل المائي أمرًا ضروريًا للحفاظ على اللون والسلامة الهيكلية: فالألواح محكمة الغلق بشكل صحيح تقاوم دورات التجميد والذوبان والبقع في كل من المناطق الرطبة والجافة.
فحص الأضرار: تحديد المشكلات المحتملة ومعالجتها
حتى الحجر القاسي يمكن أن يواجه مشاكل مع مرور الوقت. حدد موعدًا لإجراء فحص سنوي للوحات Z الخاصة بك - في الداخل أو الخارج - لاكتشاف القطع السائبة أو الملاط المفقود أو الشقوق أو بقع الماء. بالنسبة للإعدادات الخارجية، تأكد من التحقق بعد طقس الشتاء القاسي. عند اكتشاف مشكلة ما، قم بإعادة تثبيت الحجارة السائبة بمادة لاصقة للبناء أو استبدل الأحجار المتشققة قبل وصول الرطوبة إلى الأسفل. تعد مراقبة عملية التثبيت عادة بسيطة توفر المال وتحافظ على مظهر اللوحات بشكل حاد.
الرعاية طويلة الأمد: نصائح للحفاظ على جمال تركيب لوحة Z الخاصة بك
للحصول على سحر مستمر، تجنب الرش الكيميائي القاسي ولا تسمح للنباتات المتسلقة أو الكروم بالتجذر بين الحجارة في الهواء الطلق. حافظ على نظافة المزاريب فوق المنشآت الخارجية لتجنب جريان المياه والبقع. إذا كنت تتساءل، هل يمكن استخدام لوحات Z في الهواء الطلق؟ بالتأكيد - ما عليك سوى الالتزام بدورات منع التسرب المنتظمة وفحص المفاصل للتأكد من إحكامها. التخطيط للصيانة السنوية أو الموسمية يحافظ على الألواح الداخلية والخارجية في أفضل حالاتها، مما يقلل من احتياجات الإصلاح لاحقًا.
لزيادة عمر مشروعك إلى أقصى حد، تقدم Top Source Slate أدلة فيديو ونصائح الخبراء والمواد المانعة للتسرب المناسبة لتثبيت الألواح الحجرية الطبيعية على مواقعها. صفحة موارد الصيانة. يسعد فريق الدعم الخاص بهم بالإجابة على أسئلة الرعاية الخاصة بالمشروع عبر البريد الإلكتروني أو الهاتف، تمامًا كما لو كنت جزءًا من العائلة.
قائمة مراجعة صيانة اللوحة Z & معايير الصناعة
| مهمة الصيانة | التردد الموصى به | الأداة/المنتج | أفضل الممارسات/الطريقة | معيار الصناعة/الهدف |
|---|---|---|---|---|
| الغبار/المسح | شهريا | فرشاة ناعمة، قماش من الألياف الدقيقة | قم بتمشيط السطح بلطف، بدون فرك قاسي | إزالة الغبار والحطام بنسبة 100% |
| التنظيف العميق | مرتين سنويا | منظف الحجر المعتدل، الماء | بلل، امسح، اشطف، جفف على الفور | لا توجد خطوط أو بقايا |
| الختم/العزل المائي | كل 2-3 سنوات | مانع التسرب الحجري (قابل للتنفس) | ضعيه على الألواح الجافة، حتى يغطيه | حبات الماء على السطح، <امتصاص 2% |
| التفتيش عن الأضرار | سنويًا (وبعد العواصف) | فحص بصري، اختبار النقر الخفيف | ابحث عن الشقوق والمفاصل السائبة والبقع | جميع اللوحات ثابتة في مكانها |
| إصلاح / إعادة التوصيل | حسب الحاجة | لاصق البناء، لوحة بديلة | قم بإزالة المنطقة وتنظيفها وإعادة توصيل اللوحة الجديدة | الإصلاح يتطابق مع النهاية الأصلية |
ملحوظة:
يلخص هذا الدليل توقيت الصيانة والأدوات والمعايير التي يمكنك توقعها من لوحات Z المُصانة جيدًا، استنادًا إلى توصيات خبراء الصناعة وأفضل ممارسات Top Source Slate.
خاتمة
بعد توجيه عدد لا يحصى من العملاء من خلال لوحة Z المشاريع، أعلم بشكل مباشر أن النتيجة الجيدة تأتي من التخطيط السليم، والأدوات الصحيحة، والرغبة في معالجة التفاصيل بشكل مباشر. عندما تتعامل مع عملية التثبيت بعناية - من خلال القياس والتحضير واستخدام التقنيات الذكية - تحصل مساحتك على تلك اللمسة النهائية الاحترافية المصقولة التي تجعل كل هذا الجهد يستحق العناء.
أعتقد أن أي شخص يمكنه تحويل غرفة باستخدام لوحات Z، سواء كنت من هواة الأعمال اليدوية لأول مرة أو محترفًا متمرسًا. إن المزيج بين جمال الحجر الطبيعي والتركيب المباشر يضع مظهرًا مخصصًا في متناول الجميع. إذا كنت مستعدًا لترقية حائطك، فتذكر: الصبر والقليل من المعرفة يحولان هذا المشروع إلى حقيقة “يفوز”.
التعليمات
س 1: ما هي استخدامات لوحات Z؟
A1: تُستخدم لوحات Z في المقام الأول لإنشاء مظهر سلس على الجدران أو الأسقف، غالبًا لأغراض الديكور أو الصوت. وهي تتألف من لوحات متشابكة توفر عملية تركيب سهلة، وتستخدم بشكل شائع في كل من الإعدادات الداخلية والخارجية.
س2: كيف تقوم بتثبيت لوحات Z؟
A2: لتثبيت لوحات Z، ابدأ بوضع علامات على نقاط التثبيت على الحائط. استخدم المواد اللاصقة أو البراغي المناسبة لربط مقاطع Z أو أشرطة Z بكل من الألواح والجدار. قم بمحاذاة الألواح وحركها في مكانها. تأكد من أنها مستوية وثابتة بشكل آمن.
س 3: ما هي المادة اللاصقة التي يجب استخدامها لتثبيت لوحة Z؟
A3: المادة اللاصقة الموصى بها لتركيب لوحة Z هي لاصق PL Premium Construction، الذي يوفر ترابطًا قويًا للأسطح الحجرية والمعدنية. تأكد من أن أسطح الجدران والألواح نظيفة قبل التطبيق.
س 4: هل يمكن استخدام ألواح Z في المناطق الرطبة مثل الحمامات؟
A4: نعم، يمكن استخدام ألواح Z في المناطق الرطبة إذا كانت مصنوعة من مواد مقاومة للماء مثل الحجر الطبيعي أو الخشب المعالج. تأكد من استخدام تقنيات الختم والعزل المناسبة أثناء التثبيت لمنع تلف الرطوبة.
س 5: هل لوحات Z صديقة للبيئة؟
A5: نعم، لقد تم تصميم لوحات Z لتكون صديقة للبيئة. تأتي عادةً مع دليل تثبيت مباشر وتتطلب أدوات أساسية مثل التدريبات والمستويات. ومع ذلك، من الضروري اتباع تعليمات التثبيت بعناية لضمان السلامة والمتانة.
س6: ما هي تكلفة تركيب لوحات Z؟
A6: تختلف تكلفة تركيب لوحات Z حسب المادة والحجم. في المتوسط، يمكن أن تتراوح المواد من 8 دولارات إلى 15 دولارًا للقدم المربع، ولا تشمل العمالة في حالة استخدام عامل تركيب محترف. تركيب DIY يمكن أن يقلل من التكاليف الإجمالية.
س7: هل تحتاج لوحات Z إلى صيانة؟
A7: تتطلب لوحات Z بشكل عام الحد الأدنى من الصيانة. يكفي إزالة الغبار بانتظام والتنظيف العرضي بقطعة قماش مبللة. بالنسبة للألواح الخارجية، قد يكون الختم الدوري ضروريًا للحفاظ على مظهرها ومقاومة التآكل البيئي.
س8: ما هي فوائد استخدام لوحات Z؟
A8: توفر لوحات Z مظهرًا جماليًا نظيفًا وحديثًا مع سهولة التركيب والحد الأدنى من الصيانة. كما أنها تعزز عزل الصوت عند استخدامها كلوحات صوتية، وتوفر سطحًا متينًا للتطبيقات الداخلية والخارجية.
روابط خارجية
- دليل تركيب لوحات Z | مكموناجل ستون
- تركيب Z-Clip للألواح الحجرية – ستونبلي
- PDF: دليل تثبيت اللوحة Z
- تثبيت دليل Z-Bars – كونويد
- نظام التثبيت على الحائط Z-Clips – تجار السقف
- تركيب ألواح حجرية داخلية كبيرة الحجم
- إرشادات تثبيت Gage Z-bar
- كيفية تركيب Z Stone Wall Cladding
