
بناء أ جدار حجري جاف هو مشروع يمزج بين الحرفية والتصميم الوظيفي. يتم بناء هذا النوع من الجدران بدون ملاط، ويعتمد على الموضع الدقيق للحجارة لإنشاء هيكل قوي. سيرشدك هذا الدليل خلال العملية خطوة بخطوة، ويتضمن التفاصيل المهمة للتأكد من أن حائطك متين وجذاب.
التخطيط والإعداد
يعد التخطيط السليم أمرًا بالغ الأهمية لنجاح مشروع الجدار الحجري الجاف. ابدأ بحساب إجمالي المساحة المربعة لجدارك. قياس الطول والارتفاع مع الأخذ في الاعتبار أي منحدرات أو مخالفات في التضاريس. ستساعدك هذه القياسات على تقدير كمية الحجر والمواد الأخرى التي ستحتاج إليها.
المواد والأدوات
You’ll need several tools and materials:
- أدوات: Shovels, rock hammer, small sledgehammer, chisel, string line, level, gloves, safety goggles, trowel, rubber mallet, and a mixing drill with a mortar paddle
- مواد: Dry stack stones, gravel for the foundation and backfill, perforated drain pipe (if necessary), and modified mortar or adhesive if additional stability is needed
Dry Stack Stone Selection
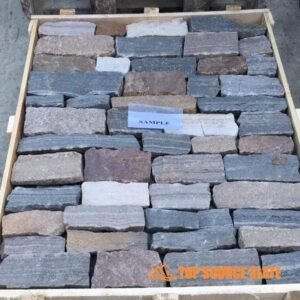
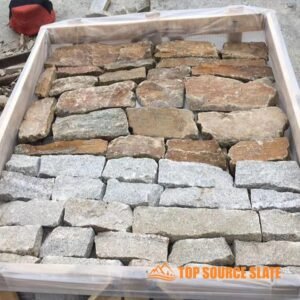
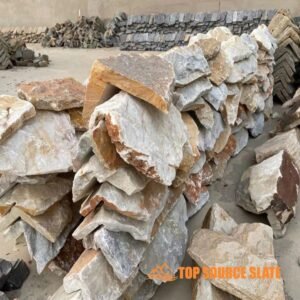
Choose dry stack stones that are flat on the top and bottom for easier stacking. Stones that are blocky or more uniform in shape will speed up the building process. Irregular stones can be used for a more rustic appearance, but they require more skill and time to fit together properly
-
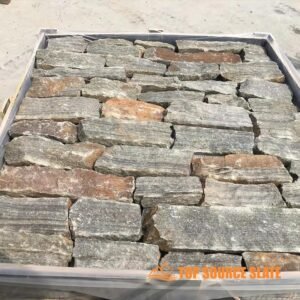
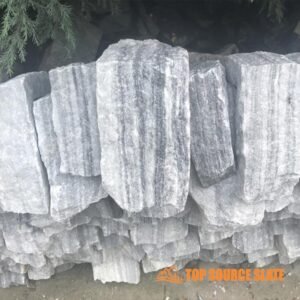
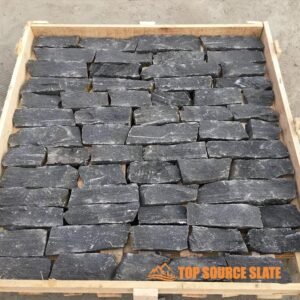 الجملة الكسوة العشوائية من الكوارتزيت الأسود الجاف
 -
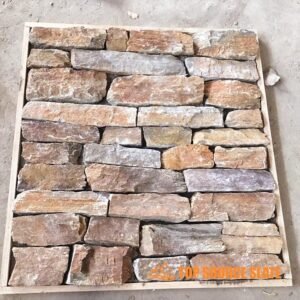
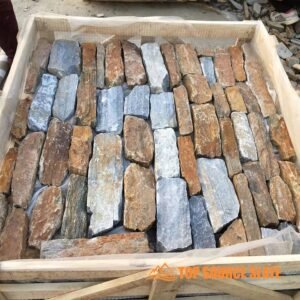
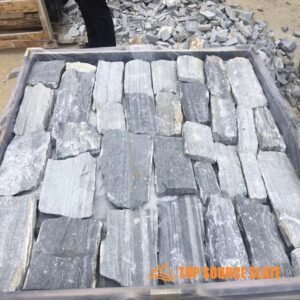
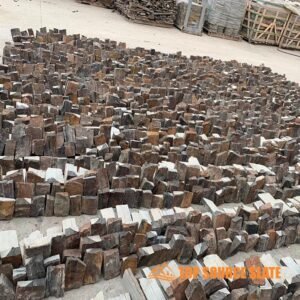
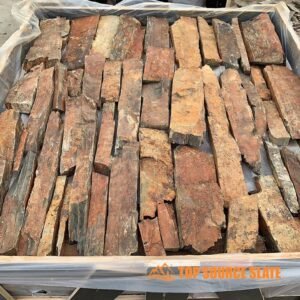 أفضل نوعية الكسوة الجدار الحجري الجاف
 -
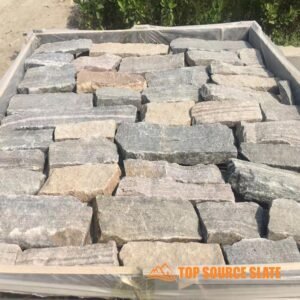
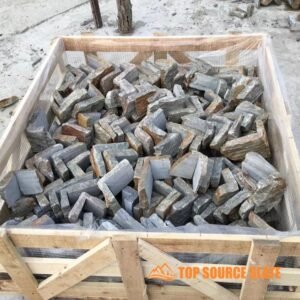
 بيع المصنع مباشرة الكسوة الجدار الحجري الرخيص
 -
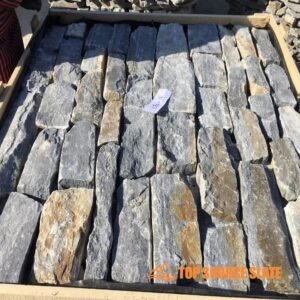
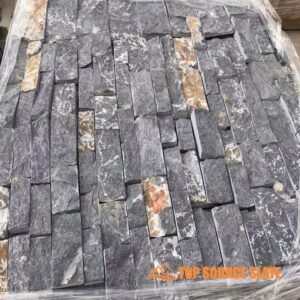
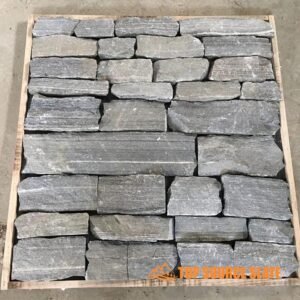
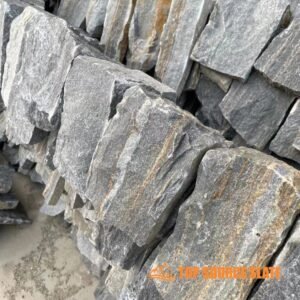
 تكسية جدران من الحجر الطبيعي العشوائي مباشرة من المصنع
 -
 الكسوة الحجرية ذات الحواف الجافة المزخرفة الخارجية
 -
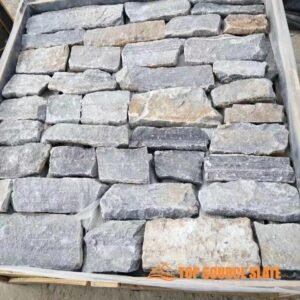
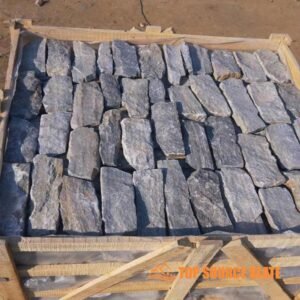
 الصين المورد غير النظامية الجدار الكسوة القشرة الحجرية
 -
 الصين الصانع الخارجي الكسوة الجدار الحجري الطبيعي فضفاض
 -
 الصين الصانع فضفاض الحافة الحجر القشرة الحجر الطبيعي
 -
 مدفأة حجرية خارجية جافة من البائع في الصين
 -
 الصين مصدر فضفاض جدار الاحتفاظ بالحجر المكدس الجاف
 -
 الصين بالجملة البيت الحجري المكدس الجاف الخارجي
 -
 الصين بالجملة قشرة الحجر الطبيعي مكدسة الجافة
 -
 الصين الصانع الكسوة الحجر المكدس الجاف
 -
 بلاط حجري جاف داخلي وخارجي
 -
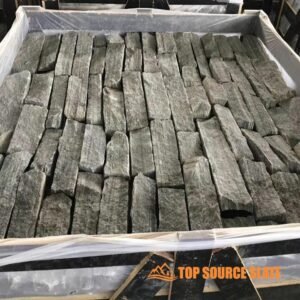
 حجر أخضر سائب داخلي وخارجي لتكسية الجدران
 -
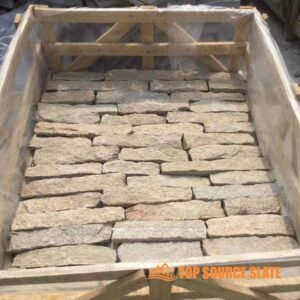
 يتميز الحجر الطبيعي السائب بشرائط تكسية الجدران
Preparing the Foundation
The foundation is the most critical part of your جدار حجري جاف. Begin by digging a trench along the length of the wall, approximately 4 to 8 inches deep. The trench should be wide enough to accommodate the largest stones. Fill the trench with compacted gravel, which will serve as a stable base and help with drainage
Drainage Considerations
If the wall is located in an area prone to heavy rain or poor drainage, it’s essential to install a drainage system. Place a perforated drain pipe at the base, wrap it in a filter cloth, and cover it with additional gravel. This setup will guide water away from the wall, reducing the risk of erosion and instability.
Laying the First Course
The first course of dry stack stone veneer is the foundation upon which the entire wall is built. Place the largest, flattest stones directly on the compacted gravel base. Ensure each stone is level and securely in place, as the stability of the entire wall depends on this first layer.
Using Adhesive or Mortar
For added stability, especially in walls that are tall or exposed to harsh weather conditions, consider using a modified mortar or adhesive. Spread the mortar with a notched trowel, creating a full bed under each stone to lock them in place while maintaining the appearance of a dry stack stone wall.
Stacking the Stones
مرحلة التراص هي حيث تنبض الحياة الفنية الحقيقية ببناء جدار حجري جاف. يجب اختيار كل حجر وتشكيله ووضعه بعناية لضمان الثبات والملاءمة المناسبة والمظهر الجمالي. في هذه الخطوة، ستقوم بتحسين أسلوبك أثناء تقدمك من الدورة الأولى إلى أعلى الجدار. اتبع هذه الإرشادات التفصيلية لضمان جدار جيد البناء ومتماسك بصريًا.
وضع الحجارة المكدسة الجافة لتحقيق الاستقرار
عند تكديس الحجارة، من الضروري إعطاء الأولوية للاستقرار. ضع كل حجر دائمًا بحيث يتم تثبيته بشكل آمن على الحجارة الموجودة أسفله. لكل حجر جديد، استخدم التقنيات التالية:
- تذبذب من أجل التنسيب: After placing each stone, give it a slight wiggle to ensure it settles firmly onto the stones below. This helps to eliminate any air gaps and creates a more secure bond, even without mortar.
- Testing Stability: Check each stone for movement. If it wobbles, either reposition it or adjust the stones underneath to create a more stable base. You can also use smaller stones as shims to fill gaps beneath larger stones.
Breaking the Joints
One of the key principles when stacking stones is to avoid lining up vertical joints from one course to the next. This technique, known as “breaking the joints,” increases the wall’s stability and strength. Here’s how:
- Offset Each Stone: Each stone should overlap the joint between the dry stack stones directly below it. This method distributes the load more evenly across the wall and prevents weak spots from forming.
- Vary Stone Sizes: Use a combination of large and small stones to achieve the desired offset pattern. Large stones act as stabilizing anchors, while smaller stones fill gaps and create a more intricate design
Leaning the Wall Back (Batter)
To enhance the structural integrity of your dry stack stone wall, lean it slightly back into the embankment or hillside, known as creating a “batter.” This is especially important for retaining walls:
- Angle of the Lean: For every foot of height, the wall should lean back about 2 inches into the embankment. This lean helps counteract the pressure from the soil behind the wall, preventing it from toppling forward.
- Consistency: Use a string line and level to check the wall’s batter regularly as you build. This ensures a consistent lean and prevents sections of the wall from being overly vertical, which could lead to instability.
Dead-man Stones for Reinforcement
To further enhance the wall’s strength, periodically insert “dead-man” stones. These are longer stones that extend from the face of the wall into the embankment behind it.
- Dead-man Stone Placement: Every few feet, place a long stone that extends deep into the earth behind the wall. These stones act as anchors, tying the wall into the embankment, and help distribute the weight of the wall.
- تكرار: Depending on the wall’s size, place dead-man stones every 3 to 5 feet horizontally and vertically. These stones are critical for taller walls and those retaining significant amounts of soil.
Shaping Dry Stacked Stones for a Tighter Fit
While stacking the stones, you’ll occasionally need to shape them for a tighter fit. The goal is to create a smooth, interlocking wall surface with as few gaps as possible.
- Using a Chisel and Hammer: For dry stack stones that don’t fit perfectly, use a rock hammer and chisel to chip away excess material. Take small pieces off at a time to avoid cracking the stone.
- Filling Gaps: Use smaller stones or stone chips to fill in gaps between larger stones. This not only tightens the structure but also enhances the wall’s aesthetic appeal.
Layering the Backfill
As you build the wall, it’s important to backfill with gravel at regular intervals. Backfilling serves multiple purposes, including providing additional support for the wall and improving drainage.
- Backfill Every Few Courses: After laying a few courses of dry stack stone, add a layer of gravel behind the wall. The gravel should extend a few inches behind the stones and be compacted to provide support.
- Drainage Function: The gravel also helps water drain through the wall rather than accumulating behind it, which could increase pressure and cause the wall to lean or collapse.
Dealing with Irregular Stones
If you’re using irregular stones, you’ll need to be more strategic with placement. The aim is to achieve a balance between aesthetics and stability:
- Random Pattern for Natural Look: قم بترتيب الحجارة الجافة المكدسة بطريقة تتجنب إنشاء خطوط أفقية أو رأسية طويلة غير متقطعة. سيعطي هذا حائطك مظهرًا طبيعيًا أكثر مع الحفاظ على قوته.
- خلط الأحجام والأشكال: استخدم مجموعة متنوعة من أحجام وأشكال الحجر لإضفاء اهتمام بصري وتقليل الحاجة إلى عمليات قطع واسعة النطاق. يمكن للحجارة الأكبر حجمًا تثبيت الجدار، بينما تملأ الحجارة الصغيرة الفجوات وتضيف نسيجًا.
الحفاظ على الارتفاع المستمر
أثناء التكديس، تحقق بانتظام من ارتفاع الجدار باستخدام خط أو مستوى. يضمن الحفاظ على كل مستوى من مستويات الدورة التدريبية أن يكون الجدار جذابًا بصريًا وسليمًا من الناحية الهيكلية.
- خط السلسلة للدقة: Stretch a string line along the length of the wall at the desired height for each course. Use this as a guide to ensure the dry stack stones are laid evenly.
- Adjusting with Shims: If a stone sits too low, use smaller stones or shims underneath to raise it to the correct height.
Finishing the Top Course
The final course of stones, known as the capstone, provides both a finished look and additional stability. Choose larger, flatter stones for the top course to lock everything in place.
- Capstone Placement: Set the capstones securely, ensuring they sit flat and are tightly fitted. This helps to bind the wall together and prevents dry stack stones from shifting over time.
- Optional Mortar for Capstones: بينما يكون باقي الجدار مكدسًا جافًا، يمكنك اختيار ملاط أحجار التتويج لمزيد من الأمان، خاصة إذا كان الجدار معرضًا لحركة مرور كثيفة أو للطقس.
من خلال اتباع هذه الخطوات بعناية، ستضمن أن يكون جدارك الحجري الجاف جميلًا ومتينًا، ويصمد أمام اختبار الزمن مع إضافة سحر خالد إلى المناظر الطبيعية الخاصة بك.
المتعلقة ب:
الحجر المكدس: دليل المشتري الكامل [تحديث]
كيفية اختيار الألواح الحجرية الطبيعية المكدسة لمنزلك
كيفية تثبيت Stacked Stone أو Ledge Stone
التعامل مع الزوايا والميزات الخاصة
Handling corners and incorporating special features such as windows, utility boxes, or light fixtures are crucial aspects of building a dry stack stone wall. Corners require precise planning and careful stone placement to maintain the wall’s structural integrity and aesthetic appeal. Likewise, working around special features demands creativity and precision to ensure seamless integration with the wall. Here’s how to tackle these challenges effectively.

Building Corners
Dry stacked stone corners are a critical part of the wall’s structure. Poorly constructed corners can compromise the stability of the entire wall, so it’s essential to approach them with care.
Starting with Corners
- Foundation First: ابدأ بوضع أساس متين في الزوايا، تمامًا كما تفعل مع بقية الجدار. تأكد من أن الطبقة الأولى من الحجارة مستوية ومثبتة بشكل آمن. يعتمد ثبات الزاوية على مدى جودة وضع حجارة الأساس.
- أحجار على شكل حرف L: إذا كان ذلك متاحًا، استخدم أحجار الزاوية على شكل حرف L المصممة خصيصًا للجدران الجافة. تلتف هذه الحجارة حول الزاوية، مما يوفر اتصالًا سلسًا وقويًا بين الجدارين المتقاطعين.
- دورات متناوبة: عند وضع الحجارة في الزاوية، قم بتبديل اتجاه التداخل مع كل دورة. على سبيل المثال، في دورة واحدة، اجعل الحجارة الموجودة على الجدار الأيسر تتداخل مع الزاوية، وفي الدورة التالية، تتداخل الحجارة الموجودة على الجدار الأيمن. هذا النمط المتناوب، المعروف باسم "الترابط"، يزيد من قوة الزاوية من خلال تشابك الحجارة.
كيفية تثبيت زوايا الألواح الحجرية المكدسة
الحفاظ على السلامة الهيكلية
- تجنب المفاصل العمودية: كما هو الحال مع بقية الجدار، تجنب محاذاة الوصلات الرأسية مباشرة فوق بعضها البعض عند الزاوية الحجرية الجافة. قم بإزاحة المفاصل في كل دورة لإنشاء هيكل أكثر استقرارًا وتشابكًا.
- استخدم أحجارًا أكبر: Whenever possible, use larger stones at the corners. These stones are more stable and provide a stronger anchor point for the rest of the wall.
- Checking for Level: Regularly check that the corner remains level both horizontally and vertically as you build up the wall. Use a string line or level to ensure accuracy, adjusting stones as needed.
Incorporating Special Features
Special features like windows, doors, utility boxes, and light fixtures add complexity to your project. Properly integrating these elements into the wall requires careful planning and precision cutting.
Windows and Doors
- Framing the Opening: عند البناء حول النوافذ أو الأبواب، ابدأ بتأطير الفتحة بالحجارة. استخدم أحجارًا جافة كبيرة الحجم قدر الإمكان لتوفير إطار ثابت. ستتحمل هذه الحجارة حمولة الجدار فوق الفتحة.
- قطع الحجارة لتناسب: قم بقياس المساحة حول النافذة أو الباب بعناية. قطع الحجارة لتتناسب بشكل مريح مع الإطار، مما يضمن عدم ترك أي فجوات يمكن أن تضعف الهيكل. استخدم منشار البناء أو طاحونة الزاوية للحصول على قطع دقيق.
- الأعتاب: فكر في استخدام عتب حجري (حجر أفقي يوضع فوق الجزء العلوي من النافذة أو الباب) لدعم الحجارة فوق الفتحة. يجب أن يمتد العتب بمقدار 6 بوصات على الأقل خارج الفتحة الموجودة على كل جانب لتوزيع الحمل بشكل فعال.
Utility Boxes and Light Fixtures
- Measuring and Marking: Accurately measure and mark the positions of utility boxes, light fixtures, or other obstructions on the dry stack stones that will surround them. Precision is key to ensuring these features fit seamlessly into the wall.
- Cutting Openings: Use an angle grinder or masonry saw to cut openings in the stones for these features. It’s often easier to make several small cuts rather than trying to remove a large piece at once. This approach helps prevent the stone from cracking or breaking.
- Tight Fitting: تأكد من أن الحجارة حولها مناسبة تمامًا. يضمن هذا التركيب الدقيق تثبيت صناديق المرافق أو التركيبات بشكل آمن في الحائط وأن يظل المظهر العام متماسكًا واحترافيًا.
تركيب الصرف الصحي (إذا لزم الأمر)
بالنسبة للجدران الاستنادية أو الجدران في المناطق ذات الأمطار الغزيرة، يعد الصرف المناسب أمرًا بالغ الأهمية. بعد وضع الطبقات القليلة الأولى من الحجر، قم بتركيب أنبوب تصريف ملفوف بقطعة قماش مرشحة خلف الجدار. يجب أن ينحدر هذا الأنبوب قليلًا للسماح بتصريف الماء بعيدًا عن الحائط. قم بتغطية الأنبوب بصخور التصريف واستمر في بناء الجدار كالمعتاد.
تغطية الجدار
The capstone is the finishing touch on your dry stack stone wall. It serves both a functional and aesthetic purpose, helping to lock the stones below in place and giving the wall a polished appearance. Choose stones that are slightly larger or of a contrasting color for a distinctive look. Use a level or string line to ensure the capstones are even and aligned.
Post-Installation: Sealing and Maintenance
Once your wall is complete, consider sealing the stones, especially if it is an exterior wall. Sealing helps protect the stones from moisture, stains, and efflorescence. Apply a high-quality penetrating sealer according to the manufacturer’s instructions. Sealed stone is easier to maintain, and the sealer can help repel stains.
Ongoing Maintenance
Regular maintenance is key to ensuring the longevity of your dry stack stone wall. Inspect the wall periodically for signs of settling or stone displacement, and make adjustments as needed. For exterior walls, occasional cleaning with water and a soft brush will help maintain their appearance. Avoid using harsh chemicals or high-pressure washing, as these can damage the stone.
Special Considerations for Different Substrates
Installing Over Open Stud Walls: When installing dry stack stone veneer over open stud walls, ensure the framework is structurally sound and capable of supporting the weight of the stone. Use cement board that is at least 1/2 inch thick, or a combination of wood sheathing, metal lath, and a scratch coat.
التثبيت فوق الخرسانة أو البلوك أو الطوب: التأكد من أن السطح نظيف وخالي من أي عوامل أجنبية. قد يتطلب ذلك السفع الرملي أو السفع المائي. إذا كان السطح غير مستوٍ، ضع خليط ملاط سميك لتسوية التناقضات قبل وضع الحجارة.
التثبيت فوق الصلب: تنظيف السطح من أي ملوثات مثل الصدأ أو الأوساخ أو الزيوت. إذا كان ذلك ممكنًا، قم بلحام شريحة سلكية على الفولاذ قبل وضع مزيج ملاط ذو طبقة سميكة. وبدلاً من ذلك، يمكن لصق الحجارة مباشرة على ركيزة فولاذية نظيفة باستخدام مادة لاصقة ذات أساس إيبوكسي.
خاتمة
بناء أ جدار حجري جاف is a rewarding project that combines artistry with engineering. By following these detailed steps and considering the specific requirements of your site, you can create a wall that is both beautiful and durable. Whether you’re constructing an interior dry stack stone wall for a cozy fireplace or an exterior dry stack stone garden wall, this guide will help you achieve a professional result that will stand the test of time.
أعلى مصدر قائمة تتفوق في جميع هذه المجالات، مما يجعلنا أفضل شريك في رغباتك في الكسوة الحجرية، سواء كنت تعمل على الكسوة الحجرية الخارجية للمنزل أو جدار داخلي مميز. اتصل بنا اليوم لمعرفة المزيد حول كيف سنساعدك في مهمتك القادمة.
