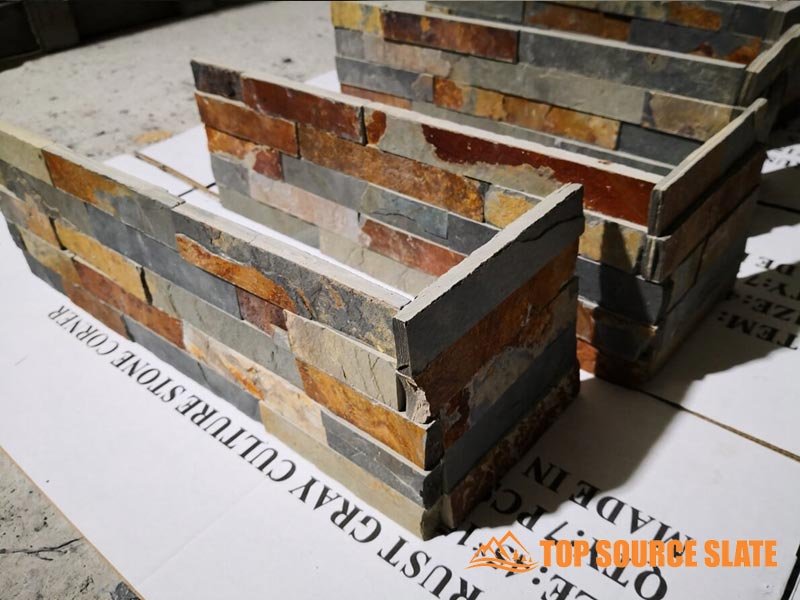
Corner installations make or break stacked stone projects. Even with perfectly aligned panels, mismatched corners can ruin the entire aesthetic, leading to costly rework and frustrated clients. For contractors and DIY enthusiasts alike, these troublesome transitions often become the most challenging aspect of stone veneer installation.
Achieving seamless حجر مكدس corners requires more than just basic construction knowledge. From selecting the right cutting tools and adhesives to mastering precise alignment techniques, the details matter. This comprehensive guide walks you through proven installation methods that ensure your corners look professionally finished while maintaining structural integrity for years to come.
Preparing for Stacked Stone Corner Installation
Before diving into a حجر مكدس project, proper preparation is essential for achieving professional results. Like any quality construction job, the success of your stone corner installation depends largely on the groundwork you lay. Taking time to prepare thoroughly will save you countless headaches and ensure your finished project looks “spot-on” for years to come.
Thorough preparation of wall surfaces and careful selection of materials are the foundation of a successful stacked stone corner installation, preventing future issues such as cracking, detachment, or uneven appearance.
Inspecting and Preparing the Wall Surface
The condition of your substrate is crucial for حجر مكدس corners to adhere properly. Begin by thoroughly cleaning the wall to remove dust, debris, and any loose material. For concrete or masonry surfaces, use a wire brush to create texture that improves adhesion. For drywall installations, ensure the wall can support the weight of stone (approximately 10-15 pounds per square foot).
After cleaning, check for level and plumb using a 4-foot level. Address any significant irregularities by applying a scratch coat—a thin layer of mortar applied with a notched trowel to create grooves. This coat should dry for at least 24 hours before stone installation begins, creating the ideal surface for adhesive to bond with both the wall and حجر مكدس corners.
Selecting the Right Stacked Stone Corners
Different projects demand different types of stacked stone corners. Consider factors like color consistency, size, weight, and material type. الحجر الطبيعي offers authentic variation but can be heavier, while manufactured stone provides consistency and lighter weight. For exterior applications, choose freeze-thaw resistant materials, especially in colder climates.
متى اختيار الحجر المكدسة corners, purchase approximately 10% more than your calculated square footage to account for cuts, breaks, and future repairs. Examine each piece before installation to ensure consistent quality and appearance.
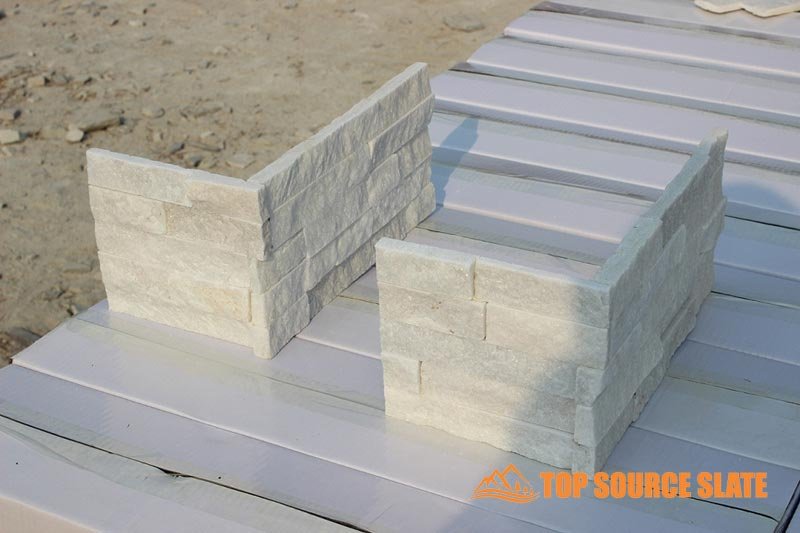
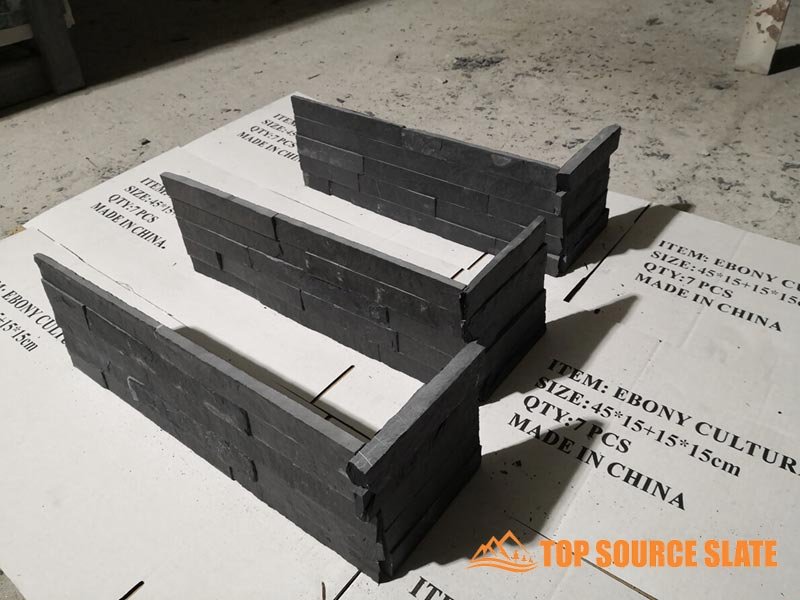
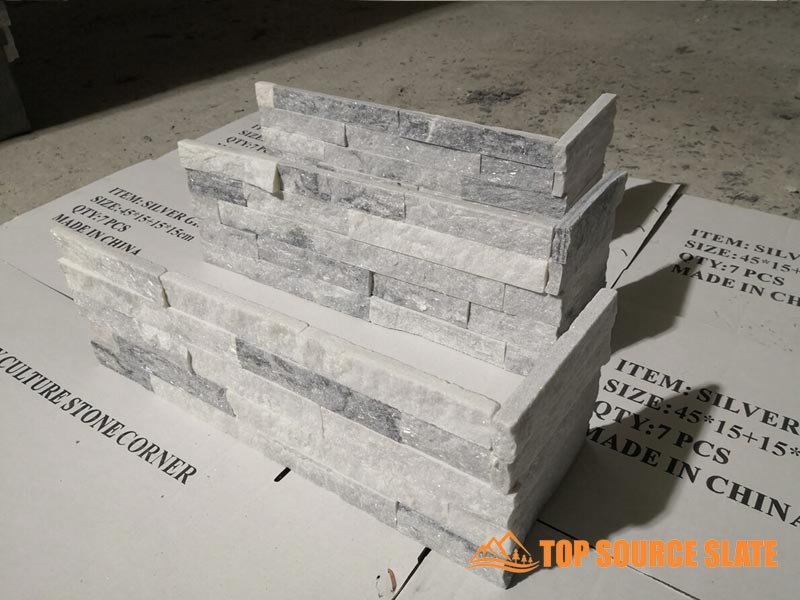

Comparison of Stacked Stone Corner Options
| ميزة | Natural Quartzite | لائحة | الحجر الجيري | الحجر المصنعة | Industry Standard |
|---|---|---|---|---|---|
| Weight (lbs/sq ft) | 13-15 | 10-12 | 12-14 | 7-9 | 8-12 |
| متانة التجميد والذوبان | ممتاز | جيد | عدل | جيد جدًا | جيد |
| اتساق اللون | معتدل | قليل | معتدل | عالي | معتدل |
| Compressive Strength (psi) | 15,000-20,000 | 10,000-15,000 | 8,000-12,000 | 5,000-7,000 | >8000 |
| Average Cost ($/sq ft) | 12-18 | 10-15 | 8-14 | 6-12 | 9-15 |
Gathering Essential Tools and Materials
Having the right tools on hand before starting will streamline your installation. Essential tools include a quality stone saw with diamond blade, safety goggles, work gloves, dust mask, levels (both torpedo and 4-foot), measuring tape, chalk line, and masonry trowels in various sizes. For cutting precision corners, a wet saw is preferable to minimize dust and achieve cleaner cuts.
For adhesives, polymer-modified thinset mortar offers superior bonding for حجر مكدس corners. Standard mortars may not provide adequate adhesion, particularly for vertical applications. Select a high-quality stone sealer to apply after installation, which helps prevent staining and water absorption.
Planning the Layout
Never skip layout planning—it’s crucial for balanced, professional results. Start by measuring your installation area and marking reference lines. For corners, work from the bottom up, alternating long and short sides at corners to create interlocking patterns.
Dry-lay several courses of stone to visualize the pattern before applying adhesive. This helps identify potential issues with fit, color distribution, and overall appearance. Consider the location of cuts to ensure they’re less noticeable, and plan stone placement to minimize visible seams at corners.
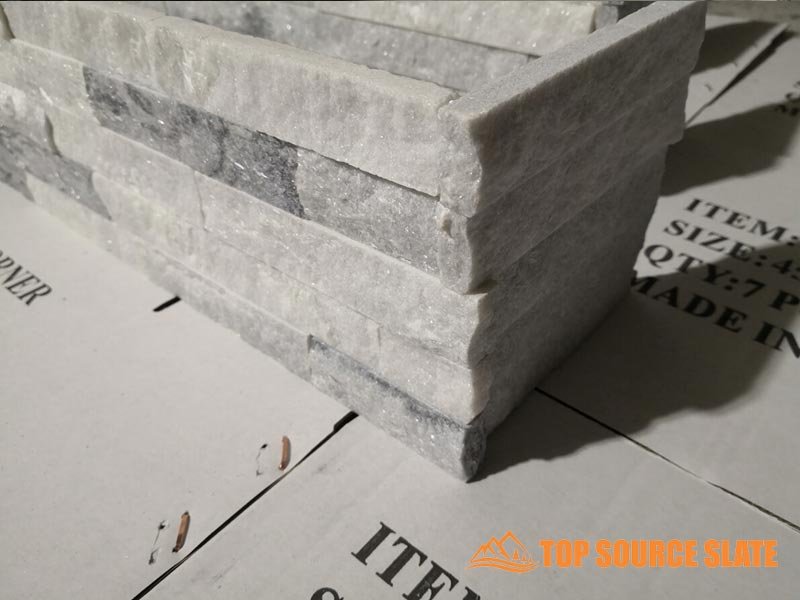
Step-by-Step Guide to Installing Stacked Stone Corners
Installing stacked stone corners correctly is vital for achieving that perfect finished look on your project. With the right techniques, you can transform ordinary corners into stunning architectural features. This guide breaks down the installation process into manageable steps that ensure professional results, even for those new to القشرة الحجرية installation.
Properly تثبيت الحجر المكدس corners create seamless transitions that enhance architectural appeal while ensuring structural integrity and longevity of the entire stone veneer installation.
Cutting Stacked Stone Corners
Precise cutting is fundamental to achieving those “killer” corner installations that look professionally done. When cutting حجر مكدس corners, always mark your cutting line clearly with a pencil, allowing for small adjustments. Use a wet saw with a diamond blade for clean, precise cuts that minimize chipping and breaking.
For angled cuts, adjust your saw to the exact angle needed rather than attempting freehand cuts. When working with الحجر الطبيعي, cut with the back of the stone facing up to preserve the finished face. After cutting, gently smooth any rough edges with a stone rub to ensure a perfect fit when pieces are placed together.
Applying Adhesive
The quality of your adhesive application directly impacts the longevity of your stone installation. Start by using a polymer-modified thinset mortar specifically formulated for القشرة الحجرية. Apply adhesive to both the wall and the back of each stone using the “butter and burn” technique—covering the entire back of the stone with adhesive, then pressing firmly with a twisting motion to create suction.
Maintain consistent adhesive thickness (typically 3/8 to 1/2 inch) to ensure proper adhesion and prevent stones from slipping. For corner pieces, apply extra adhesive on edges to prevent gaps and provide additional support. Allow 24-48 hours for proper curing before grouting or sealing.
Comparison of Stone Installation Adhesives
| ميزة | ثينسيت القياسية | Thinset المعدلة بالبوليمر | Mastic Adhesive | Epoxy Adhesive | Industry Recommendation |
|---|---|---|---|---|---|
| Bond Strength (psi) | 150-250 | 300-450 | 100-200 | 400-600 | >300 |
| Water Resistance | معتدل | عالي | قليل | عالية جدا | عالي |
| Working Time (minutes) | 30-45 | 20-30 | 15-20 | 10-15 | 20-30 |
| Temperature Resistance (°F) | -20 to 150 | -30 to 220 | 20 to 120 | -40 to 300 | -30 to 220 |
| Vertical Slip Resistance | عدل | ممتاز | جيد | ممتاز | ممتاز |
Aligning and Setting Stones
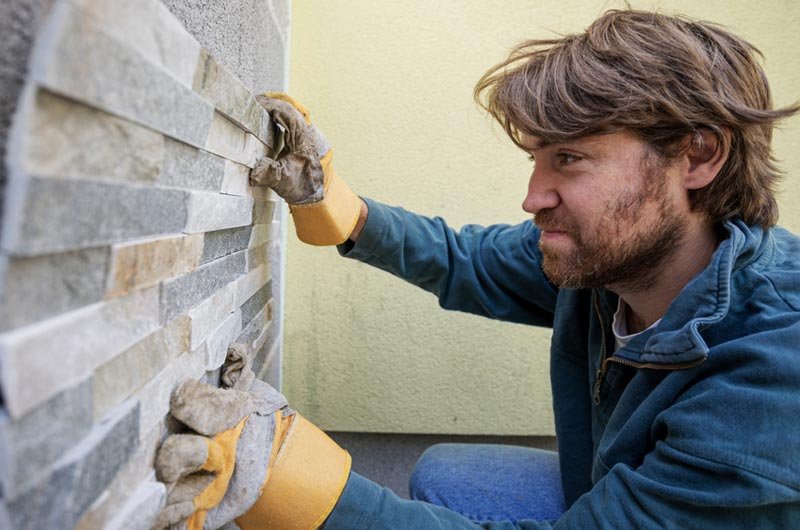
Perfect alignment creates that seamless look that distinguishes professional installations. Begin at the bottom and work your way up, alternating long and short returns at corners to create an interlocking pattern. Use spacers to maintain consistent joint widths and alignment throughout the installation.
Check frequently for level, plumb, and alignment using both torpedo and 4-foot levels. Step back regularly to view your work from a distance, which helps identify alignment issues not visible up close. When setting corner pieces, ensure they align perfectly with flat sections both horizontally and vertically.
Addressing Common Installation Challenges
Even the most carefully planned installations can encounter challenges. To prevent the “تأثير سحاب” (visible vertical seam at corners), stagger joints by varying the lengths of adjacent stones. For uneven surfaces, build up thinner areas with additional adhesive or use a scratch coat to level before installation.
To minimize visible gaps in حجر مكدس corners, slightly angle your cuts to create tight inside corners. If you encounter color inconsistency, mix stones from different boxes to create a more natural, blended appearance. For projects with multiple corners, complete one corner entirely before moving to the next to maintain consistency in technique.
Maintaining and Enhancing Your Stacked Stone Corners
سليم maintenance of stacked stone corners isn’t just about preserving beauty—it’s about protecting your investment. With the right care routine, your stone veneer can maintain its striking appearance and structural integrity for decades. This guide covers essential maintenance practices that help your installation stand the test of time.
Regular maintenance of حجر مكدس corners, including proper cleaning, sealing, and inspection, can extend the lifespan of your installation by 15-20 years while preserving the natural beauty and character of the stone.
Cleaning and Sealing
The key to maintaining stacked stone corners is regular, gentle cleaning. Start with a soft-bristled brush to remove dust and debris, working from top to bottom. For deeper cleaning, use a pH-neutral stone cleaner diluted according to manufacturer instructions—never use acidic cleaners like vinegar or lemon-based products as they can etch and damage natural stone surfaces.
Apply a high-quality penetrating sealer every 2-3 years for exterior applications and every 3-5 years for interior installations. When choosing a sealer, select one specifically formulated for your stone type that offers “الصخور الصلبة” protection against moisture and staining. Apply in thin, even coats, allowing proper drying time between applications as specified by the manufacturer.
التفتيش عن الأضرار
Regular inspection helps catch small issues before they become major problems. Check حجر مكدس corners quarterly, looking carefully for signs of damage like hairline cracks, efflorescence (white powdery deposits), or loose stones. Pay special attention to corners and edges where damage often begins.
Use a flashlight held at an angle to highlight subtle cracks or irregularities in the surface. For exterior applications, inspect after severe weather events, as freeze-thaw cycles can accelerate deterioration. Document any changes you notice with photos to monitor progression and determine if professional intervention is needed.
Common Stone Veneer Issues and Solutions
| Issue | Causes | Early Warning Signs | Preventative Measures | Remediation Method |
|---|---|---|---|---|
| إزهار | Water infiltration | White powdery residue | Proper sealing, drainage | Dry brushing, specialized cleaners |
| Mortar Cracking | Settlement, thermal expansion | Hairline fractures | Proper installation, expansion joints | Repointing affected areas |
| Stone Detachment | Inadequate adhesive, moisture | Hollow sound when tapped | Quality adhesive application | Remove and reinstall with proper technique |
| Discoloration | Biological growth, pollution | Green/black spots, darkening | Regular cleaning, sealing | Gentle cleaning with appropriate stone cleaner |
| Spalling | Freeze-thaw cycles, salt exposure | Flaking, pitting of surface | Quality sealer application | Replace damaged stones, improve drainage |
Enhancing Aesthetic Appeal
Strategic lighting can dramatically enhance the texture and dimension of stacked stone corners. Consider installing uplighting at the base of exterior corners or accent lighting for interior applications. LED strip lighting can create subtle highlights that emphasize the stone’s natural texture and color variations.
ل حجر مكدس داخلي corners, consider complementary decorative elements like floating shelves or art pieces that work with—not against—the stone’s natural beauty. For exterior applications, thoughtfully placed landscaping can frame and enhance stone corners while providing additional protection from soil splashback during heavy rain.
Long-Term Care
Preventing water damage is crucial for extending the life of your تركيب حجر مكدس. Ensure proper flashing is installed above exterior stone veneer, and check that gutters and downspouts direct water away from the stone surface. For interior applications near water sources, ensure proper sealing of joints between stone and fixtures.
In regions with harsh winters, avoid using de-icing salts near stacked stone corners as they can penetrate the stone and cause deterioration. Instead, use sand or calcium magnesium acetate, which are safer alternatives. For all installations, schedule a professional inspection every 5-7 years to assess condition and perform any necessary maintenance before minor issues become major repairs.


خاتمة
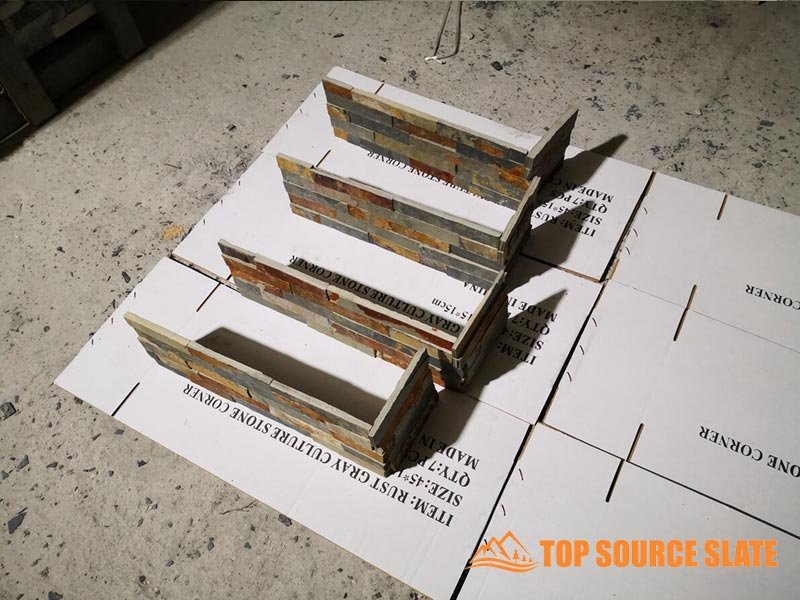
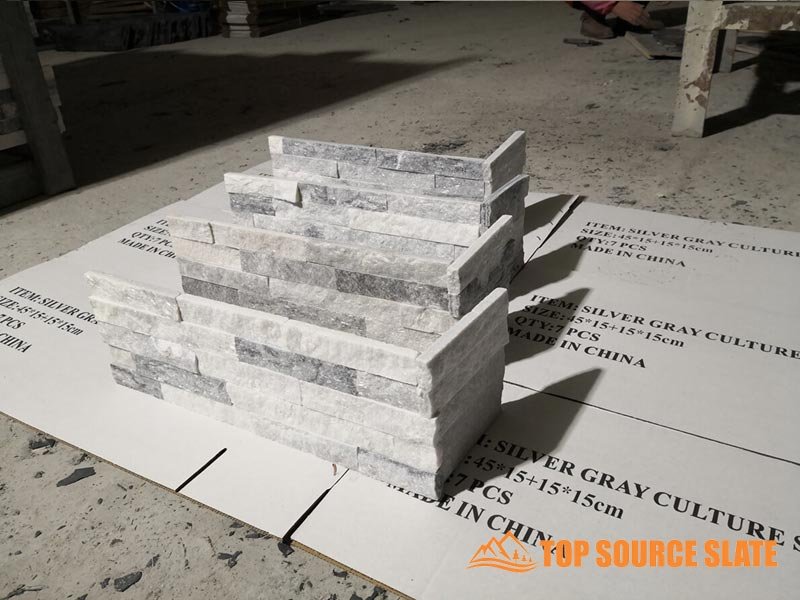
From my years in the حجر مكدس business, I’ve learned that corners can truly make or break a project. It’s not just about slapping stones together; it’s about precision, care, and understanding the materials you’re working with. A well-executed corner shows attention to detail and elevates the entire installation.
At Top Source Slate, we’ve always focused on providing the kind of quality and customization that makes these installations easier and more reliable for our clients. My goal is to ensure that every project not only meets but exceeds expectations—because in the end, a happy client is the real deal.
So, as you tackle your next حجر مكدس corner, remember: Preparation, precision, and a little bit of patience go a long way. Here’s to creating stunning, lasting corners that stand the test of time!

