تم تركيبها بشكل سيء حجر مكدس لا يبدو الأمر مجرد هواة، بل يمكن أن يؤدي إلى عمليات رد اتصال باهظة الثمن، وتشويه السمعة، وإهدار المواد. ما يقرب من 40% من تركيبات القشرة الحجرية تتطور إلى فجوات واضحة أو مشكلات في المحاذاة خلال السنة الأولى، مما يكلف المقاولين الآلاف من الإصلاحات وفقدان الإحالات.
يتطلب تحقيق تركيب حجري مكدس سلس حقًا أكثر من مهارات البناء الأساسية. يتطلب تقنيات دقيقة يتجاهلها العديد من القائمين على التركيب. بدءًا من إعداد الركيزة المناسب وحتى التطبيق الدقيق للمادة اللاصقة، تؤثر كل خطوة بشكل كبير على المظهر النهائي. يوفر هذا الدليل الشامل تقنيات احترافية منفصلة ركوب أو دي تركيبات عالية الجودة من محاولات متواضعة، مما يساعدك على تقديم نتائج تعرض براعة حقيقية وتصمد أمام اختبار الزمن.
-
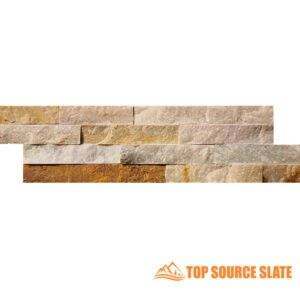 بلاط فسيفساء مقسم الوجه من كوارتز أويستر مقاس 360 × 100 مم
 -
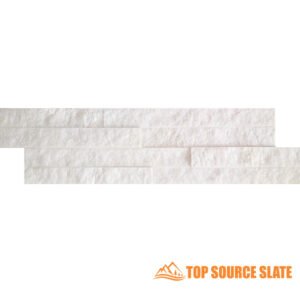 بلاط فسيفساء ذو وجه مقسم باللون الأبيض الجليدي اللامع
 -
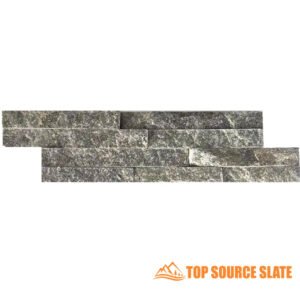
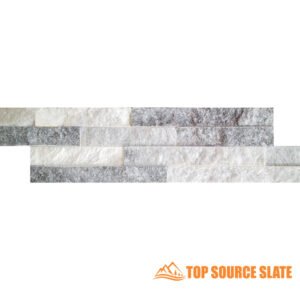 بلاط فسيفساء ذو وجه مقسم بلون رمادي ثلجي لامع
 -
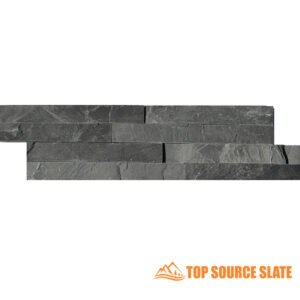 بلاط وجه سبليت كسوة لائحة سوداء 360 × 100 مم
 -
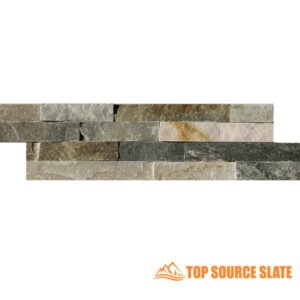
 وجه منقسم كسوة من الحجر الطبيعي متعدد الألوان
 -
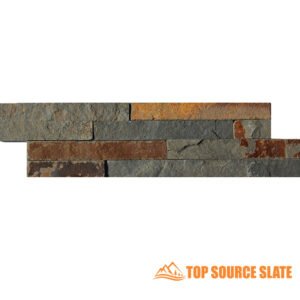
 تتميز بلاط الجدران من الكوارتز البرونزي المتألق بالجملة
 -
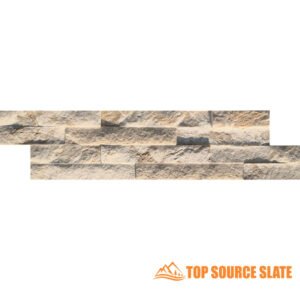
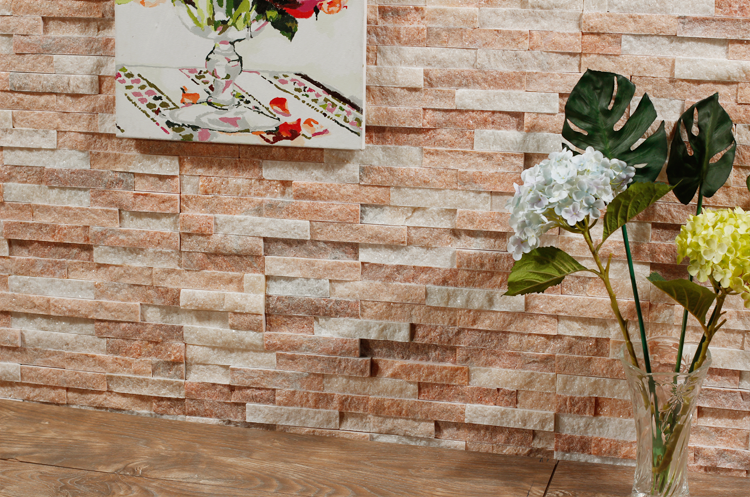
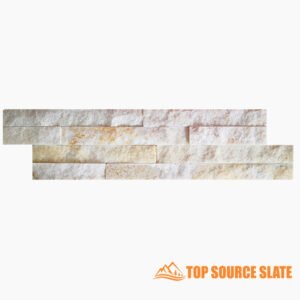 بلاط وجه منقسم كريم كوارتزيت من الشركة المصنعة في الصين 10 × 36 سم
 -
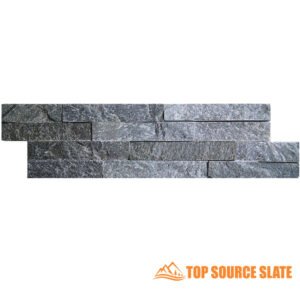
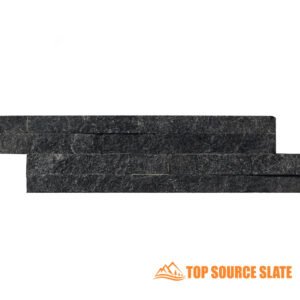 الصين الصانع الأسود الكوارتزيت بلاط سبليت صغير
 -
 الصين مصنع الكوارتزيت الأخضر سبليت الوجه بلاط جدران من الفسيفساء
 -
 China Factory Royal White Split Face Ledger Panel
 -
 تصنيع احترافي Rotia Gray Brick Prick Face Tile 10*36cm
 -
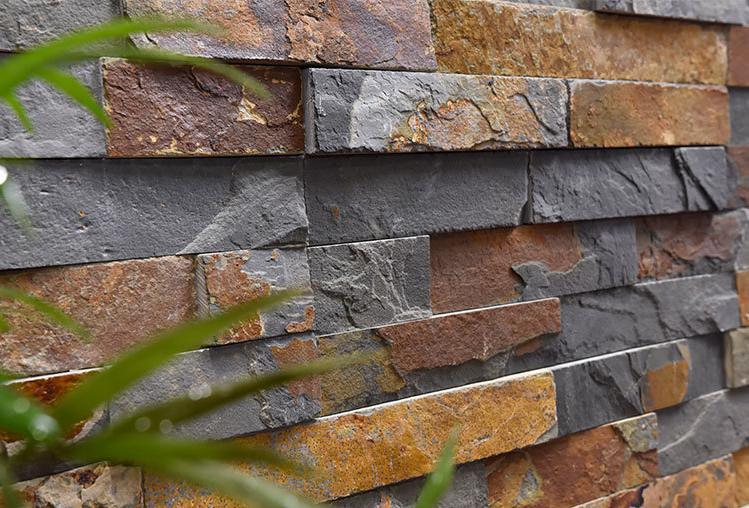
 الصين تصنيع المحار الانقسام الوجه ببلاط الفسيفساء الكوارتزيت
إتقان ما قبل التثبيت: التخطيط لمشروع حجري مكدس سلس
الحصول على الخاص بك تركيب حجر مكدس يبدأ اليمين قبل وقت طويل من صعود اللوحة الأولى. التخطيط السليم يمنع تلك “أخطاء المبتدئين” التي يمكن أن تصيب حتى المقاولين ذوي الخبرة. مع أكثر من 15 عامًا في هذا المجال، رأيت كيف يُحدث الإعداد الدقيق الفرق بين التركيب الذي يبدو وكأنه هواة والتحفة الفنية الاحترافية.
التخطيط الشامل قبل التثبيت ل مشاريع حجرية مكدسة يقلل وقت التثبيت بنسبة تصل إلى 30% مع تحسين الجودة الجمالية النهائية وطول عمر الأعمال الحجرية بشكل كبير.
تقييم الركيزة: ضمان السلامة الهيكلية
أساس أي ناجح تركيب حجر مكدس هي الركيزة المعدة بشكل صحيح. ابدأ بفحص سطح الحائط جيدًا بحثًا عن أي علامات تلف أو مشاكل في الرطوبة أو نقاط ضعف هيكلية. بالنسبة للتطبيقات الخارجية، تأكد من أن الركيزة مقاومة للماء وفقًا لقوانين البناء المحلية.
قم بإزالة أي طلاء أو ورق حائط أو حطام سائب يمكن أن يؤثر على الالتصاق. بالنسبة لتطبيقات الحوائط الجافة، تأكد من أن الجدار يمكنه تحمل الوزن الكبير للحجر (حوالي 12-15 رطلاً لكل قدم مربع). عند التثبيت فوق الحوائط الجافة، استخدم طرق التثبيت المناسبة لضمان بقاء الحجر آمنًا على المدى الطويل.
بالنسبة للركائز الخرسانية أو البناء، قم بإصلاح أي شقوق تتجاوز 1/8 بوصة والسماح لمركبات الترقيع بالشفاء التام قبل المتابعة. الركيزة المستوى أمر بالغ الأهمية – تتطلب الاختلافات التي تزيد عن 1/4 بوصة لكل 10 أقدام التصحيح قبل بدء التثبيت.
تقنيات القياس الدقيقة: حساب الاحتياجات المادية
القياس الدقيق ضروري للنجاح تركيب حجر مكدس. قم بقياس ارتفاع وعرض كل جدار في نقاط متعددة، حيث نادرًا ما تكون الجدران مربعة تمامًا. أضف 10% إلى حساب المساحة بالقدم المربع الخاص بك لحساب القطع والكسر والإصلاحات المستقبلية.
عند قياس الزوايا، قم بحسابها بشكل منفصل لأنها تتطلب قطع زاوية متخصصة. تتطلب كل قدم خطية من الزاوية الخارجية عادةً حوالي قطعتين من الزوايا. إن التخطيط لتخطيطك لتقليل القطع المرئية سيخلق مظهرًا أكثر طبيعية وسلاسة.
مقارنة تخطيط مشروع الحجر المكدس
| عنصر التخطيط | نهج DIY | الطريقة المهنية | استثمار الوقت | التأثير على النتائج |
|---|---|---|---|---|
| تقييم الركيزة | الفحص البصري الأساسي | اختبار الرطوبة & التحليل الهيكلي | 2-4 ساعات | عالي (يمنع الفشل في المستقبل) |
| حساب المواد | مساحة الجدار + 5% | مساحة الجدار + 10-15% مع تحليل الأنماط | 1-2 ساعة | متوسط (يمنع النقص) |
| تخطيط التخطيط | الرسم الأساسي | العرض الرقمي مع اختلافات النمط | 3-6 ساعات | عالية (يحسن الجماليات) |
| إعداد الأداة | أدوات القطع الأساسية | المنشار الرطب وأدوات البناء المتخصصة | 1-2 ساعة | متوسط (يحسن الكفاءة) |
| اختبار المحاكاة | نادرا ما يتم تنفيذها | تركيب قسم صغير بمدافع الهاون المختلفة | 4-8 ساعات | عالية جدًا (تؤكد التقنيات) |
قائمة مراجعة الأدوات والمواد: جمع اللوازم الأساسية
ناجح تركيب حجر مكدس يتطلب تجهيز الأدوات المناسبة قبل البدء. تشتمل الأدوات الأساسية على منشار مبلل عالي الجودة بشفرة ماسية، ومجرفة مسننة (1/2 بوصة)، ومجرفة هامشية، ومستوى، وشريط قياس، ومعدات أمان، ودلاء خلط.
بالنسبة للمواد، اختر ملاط ثينسيت معدّل بالبوليمر مُصمم خصيصًا للتركيبات الحجرية. إذا كان مشروعك يتطلب الجص، فاختر الجص الرملي الذي يتناسب بشكل وثيق مع لون حجرك. احتفظ بمادة مانعة للتسرب في متناول اليد للحماية بعد التثبيت، خاصة لتطبيقات المطبخ أو الحمام.
اعتبارات التصميم: تقنيات مذهلة للنداء الجمالي
التأثير البصري الخاص بك تركيب حجر مكدس يعتمد بشكل كبير على تخطيط التخطيط الخاص بك. قم بترتيب المفاصل الرأسية بين الصفوف لإنشاء نمط عشوائي طبيعي. تجنب إنشاء أنماط واضحة أو خطوط عمودية مستمرة تجذب الانتباه غير المرغوب فيه.
قبل التثبيت الدائم، قم بإجراء تخطيط جاف على الأرض لتجربة ترتيبات مختلفة. قم بخلط الحجارة من صناديق مختلفة لضمان تناسق الألوان في جميع أنحاء المشروع. هذه الخطوة في الخاص بك عملية تركيب الحجر المكدس يمكن أن يمنع التحولات المتناقضة بصريًا بين دفعات المواد.
عند تخطيط الزوايا، حدد ما إذا كنت تريد استخدام قطع الزوايا المصنعة أو أحجار الحقل المقطوعة بشكل ميتري. على الرغم من أنها تتطلب عمالة كثيفة، إلا أن القطع المتري غالبًا ما تخلق مظهرًا أكثر دقة للمناطق ذات الرؤية العالية. يمكن أن تساعد الخدمات الاستشارية التي تقدمها شركة Top Source Stone في تحديد النهج الأفضل لمتطلبات مشروعك المحددة.

تحقيق المحاذاة المثالية: التقنيات الأساسية لطبقات لا تشوبها شائبة
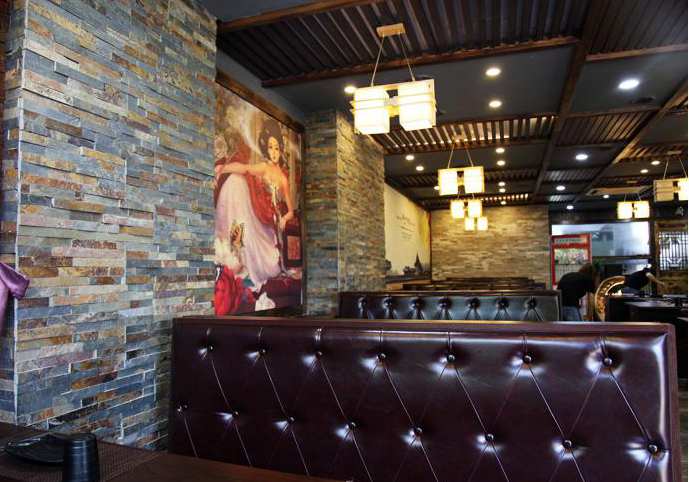
Nothing ruins the look of a beautiful stone wall faster than misaligned seams. بعد تركيب آلاف الأمتار المربعة من القشرة الحجرية، لقد وجدت أن تحقيق المحاذاة المثالية في تركيب الأحجار المكدسة يعتمد على الدقة في تقنيات الإعداد والتطبيق والقطع. عندما تعمل هذه العناصر معًا، يمكنك إنشاء لمسة نهائية احترافية سلسة يرغب العملاء في دفع أسعار مميزة مقابلها.
تقنيات المحاذاة المناسبة أثناء حجر مكدس يمكن أن يؤدي التثبيت إلى تقليل وقت التثبيت بنسبة تصل إلى 40% مع إزالة اللحامات المرئية، مما يؤدي إلى زيادة رضا العملاء بشكل كبير وتقليل عمليات الاسترجاعات.
تركيب لوحة دفتر الأستاذ: إعداد أساس المستوى
ابدأ الخاص بك تركيب حجر مكدس من خلال تأمين لوحة دفتر الأستاذ المؤقتة لتوفير نقطة بداية مستوية تمامًا. استخدم ميزان الليزر لوضع علامة على خط مستقيم على طول منطقة التثبيت، مع وضعه على ارتفاع صف واحد على الأقل من الأرضية. قم بتثبيت لوحة مستقيمة 1×2 أو 2×4 بشكل آمن على طول هذا الخط باستخدام أدوات التثبيت المناسبة للركيزة الخاصة بك.
تعمل لوحة دفتر الأستاذ كنقطة مرجعية مهمة، مما يضمن استواء الصف الأول بشكل مثالي. وهذا يمنع “تأثير الدومينو” حيث تتضخم المحاذاة الطفيفة في الصف الأول أثناء العمل للأعلى. بالنسبة للجدران الكبيرة، فكر في تركيب لوحات دفاتر إضافية على فترات زمنية محددة للحفاظ على المحاذاة أثناء تقدمك.
قم بإزالة لوحة دفتر الأستاذ فقط بعد معالجة المادة اللاصقة بالكامل، وعادةً ما يستغرق ذلك من 24 إلى 48 ساعة حسب الظروف البيئية ومواصفات الشركة المصنعة. أي فجوات تركتها يمكن ملء دفتر الأستاذ بقطع حجرية مقطوعة بعناية للحفاظ على سلامة النمط.
تطبيق اللاصق الأمثل: منع الانزلاق
تعد تقنية تطبيق اللاصق الصحيحة أمرًا بالغ الأهمية لمنع الألواح من الانزلاق مع السماح بإجراء تعديلات دقيقة على المحاذاة. قم بتطبيق ملاط ثينسيت المعدل باستخدام مجرفة مسننة مقاس 1/2 بوصة، مما يؤدي إلى إنشاء نتوءات متسقة على مساحة أكبر قليلاً من كل لوحة.
مقارنة أداء المواد اللاصقة لتطبيقات الحجر المكدس
| نوع اللاصق | وقت العمل (دقيقة) | قوة الاستيلاء الأولية | قوة السندات النهائية (PSI) | تصنيف المرونة | مقاومة الرطوبة |
|---|---|---|---|---|---|
| ثينسيت القياسية | 20-30 | قليل | 150-250 | الحد الأدنى | معتدل |
| Thinset المعدلة بالبوليمر | 30-40 | واسطة | 300-450 | جيد | عالي |
| قسط Thinset المعدل | 40-60 | عالي | 450-600 | ممتاز | أرقى |
| لاصق قائم على الايبوكسي | 60-90 | عالية جدا | 1000+ | محدود | ممتاز |
| لاصق البناء | 10-15 | عالية جدا | 350-500 | معتدل | عامل |
بالإضافة إلى ذلك، ضع طبقة رقيقة من المادة اللاصقة على الجزء الخلفي من كل قطعة لوحة حجرية (الزبدة الخلفية) لضمان تغطية 100% وإزالة الجيوب الهوائية التي قد تضعف الرابطة. تعمل طريقة التطبيق المزدوج هذه على تحسين الالتصاق بشكل كبير مع توفير وقت عمل كافٍ لإجراء تعديلات محاذاة دقيقة.
طرق القطع الدقيقة: إنشاء وصلات ضيقة
تحقيق طبقات غير مرئية في الخاص بك قشرة حجرية مكدسة يتطلب التثبيت تقنيات قطع دقيقة. استخدم دائمًا منشارًا مبللاً عالي الجودة بشفرة ماسية ذات حافة مستمرة مصممة خصيصًا لذلك الحجر الطبيعي. قم بعمل قطع مستقيمة وقياسية عن طريق وضع علامة على خط القطع على وجه الحجر وخلفه قبل القطع.
بالنسبة للقطع المعقدة حول المنافذ أو الزوايا، استخدم “النتيجة والمفاجئة” تقنية للفواصل المنظف دون تقطيع. سجل الحجر عدة مرات على طول خط القطع الخاص بك ، وزيادة الضغط تدريجيا حتى ينفصل الحجر بشكل نظيف. قم دائمًا بقطع الحجر مع الوجه النهائي لأعلى لتقليل التقطيع على السطح المرئي.
مذهلة وتباعد: إنشاء أنماط طبيعية
سر المظهر المهني حجر مكدس يكمن التثبيت في المذهل من المفاصل. تجنب محاذاة طبقات عمودية بين الصفوف ، مما يخلق مظهرًا اصطناعيًا يشبه الشبكة. بدلاً من ذلك ، تهدف إلى تعويض كل مفصل عمودي بمقدار 2-3 بوصات على الأقل من المفاصل في صفوف مجاورة ، ويحاكي الحجر الطبيعي بناء.
عند تثبيت لوحات متعددة ، تراجع بشكل دوري لتقييم النمط الخاص بك من مسافة بعيدة. يساعد هذا المنظور الأوسع في تحديد الأنماط أو المحاذاة غير المقصودة التي قد لا تكون واضحة عند العمل عن قرب. اضبط التصميم وفقًا لذلك قبل مجموعات لاصقة للحفاظ على مظهر طبيعي عشوائي.
التميز بعد التثبيت: إنهاء اللمسات للجمال طويل الأمد
العديد من المثبتين يخطئون في النظر في التثبيت الحجري المكدسة يكمل مرة واحدة اللوحة الأخيرة مؤمن. بعد 15 عامًا من صناعة الحجر ، علمت أن عملية ما بعد التثبيت هي ما يفصل حقًا عن عمل الهواة عن الحرفية المهنية. هذه الخطوات النهائية لا تعزز فقط النداء البصري الفوري ولكن أيضًا ضمان الحفاظ على جمالك الحجري لعقود.
يمكن أن تمتد تقنيات التشطيب بعد التثبيت بشكل صحيح المنشآت الحجرية المكدسة ما يصل إلى 15 عامًا مع الحفاظ على الجودة الجمالية الأصلية ومنع الإصلاحات المكلفة.
معالجة الثغرات والعيوب: فن الإصلاح السلس
حتى مع التثبيت الدقيق ، قد تظهر فجوات صغيرة أو عيوب بين الحجارة. معالجة هذه في غضون 24-48 ساعة بعد التثبيت بينما لا يزال لاصقة المعالجة. لإلقاء نظرة متماسكة ، استخدم مزيجًا من الملاط الذي يطابق لهجة اللون السائدة للحجر. امزج دفعات صغيرة في وقت واحد لمنع التجفيف المبكر.
قم بتطبيق الملاط باستخدام حقيبة الجص مع فتحة صغيرة للحصول على وضع دقيق. املأ الفجوات تمامًا ولكن تجنب تلطيخ الزائدة على الوجوه الحجرية. بالنسبة للنتائج الطبيعية المظهر ، اضغط على مدافع الهاون أقل قليلاً من سطح الحجر بدلاً من التدفق معه ، مما يخلق ظلالًا خفية تعزز البعد.
بالنسبة إلى تشققات شعري ، سد السيليكون المطابق بالألوان مصنوعًا خصيصًا لـ يوفر الحجر المرونة مع بقاء صريح بصري. هذا مهم بشكل خاص للتطبيقات الخارجية حيث تسبب تقلبات درجة الحرارة التوسع والانكماش.
تنظيف الملاط الزائد: منع تلطيخ دائم
التنظيف السريع يمنع الهاون أو اللاصقة من الترابط الدائم إلى الأسطح الحجرية المرئية. ابدأ في تنظيف 30-60 دقيقة بعد ملء الفجوات ، عندما تصل الهاون إلى حالة شبه جافة. استخدم فرشاة جافة ومخيفة لإزالة الجزيئات السائبة أولاً ، والعمل في حركات دائرية من أعلى إلى أسفل.
طريقة تنظيف السطح الحجرية مقارنة فعالية
| طريقة التنظيف | تصنيف الفعالية | خطر على الحجر | توقيت التطبيق | شدة العمل |
|---|---|---|---|---|
| تنظيف بالفرشاة جافة | 75 ٪ | منخفض جدا | 30-60 دقيقة بعد التطبيق | معتدل |
| تنظيف الإسفنج الرطب | 85 ٪ | قليل | 1-2 ساعة بعد التطبيق | عالي |
| محلول الخل المعتدل | 90 ٪ | معتدل | 24+ ساعة بعد التطبيق | معتدل |
| منظف الحجر التجاري | 95 ٪ | منخفض المعتدل | 48+ ساعة بعد التطبيق | قليل |
| غسل الضغط | 98 ٪ | عالي | 7+ أيام بعد التطبيق | قليل |
بالنسبة للبقايا العنيدة ، تخفف قليلاً (لا تنقع) اسفنجة ومسح المناطق المتأثرة بلطف. تجنب عمال النظافة الحمضية على الحجر الجيري أو الرخام لأنها يمكن أن تحفر السطح. للحصول على بقع صعبة بشكل خاص على الجرانيت أو الكوارتزيت ، يمكن تطبيق منظف حجري مصمم خصيصًا بعد المعالجة الكاملة (عادةً 7-10 أيام).
الختم للحماية: الحفاظ على الجمال الطبيعي
الختم ضروري لحماية الخاص بك حجر مكدس ضد تغلغل الرطوبة ، تلطيخ ، والأضرار البيئية. السماح للتثبيت بالعلاج بالكامل لمدة 7-14 يومًا قبل تطبيق السدادات. اختبر السطح عن طريق رش الماء - إذا أغمق على الفور ، فإن الحجر جاهز للختم.
اختر مانعة للتسرب المخترقة (وليس ملاذاً موضعيًا) تم صياغته خصيصًا لنوع الحجر الخاص بك. هذه السدادات تسمح للحجر “يتنفس” مع توفير الحماية. تنطبق باستخدام بخاخ مضخة منخفضة الضغط حتى للتغطية ، تليها المسح بقطعة قماش خالية من الوبر لإزالة الفائض قبل أن يجف.
تتطلب معظم التطبيقات الداخلية إعادة الاستمتاع كل 3-5 سنوات ، في حين أن المنشآت الخارجية قد تحتاج إلى إعادة عرض كل 1-2 سنوات حسب ظروف التعرض. توصي المصدر الأعلى بالحجر على السدادات المستندة إلى السيلوكسان للخارج التطبيقات بسبب مقاومة الأشعة فوق البنفسجية المتفوقة وطول العمر.
نصائح الصيانة: ضمان جمال دائم
الصيانة المنتظمة تمنع تراكم الأوساخ ويمتد عمرك حجر مكدس تثبيت. للتنظيف الروتيني ، استخدم مرفق فرشاة ناعمة على فراغ أو قطعة قماش ألياف دقيقة جافة. تجنب المواد الكيميائية القاسية التي يمكنها تجريد السدادات أو تلف الأسطح الحجرية.
يعالج الانسكابات على الفور لمنع تلطيخ ، وخاصة مع المواد الحمضية مثل النبيذ أو عصائر الحمضيات. للتنظيف العميق الدوري ، استخدم منظفات الحجارة المحايدة للأسفاطرة الرقمية بدلاً من المنتجات المنزلية متعددة الأغراض. Reseal على فترات موصى بها على أساس أنماط التآكل والتعرض.
خاتمة
منذ سنواتي في الأعمال الحجرية ، تعلمت أن ناجحة حجر مكدس التثبيت لا يتعلق فقط بصخور الصخور على الحائط. يتعلق الأمر بالتخطيط الدقيق والتنفيذ الدقيق وتلك اللمسات النهائية التي يتم التغاضي عنها في كثير من الأحيان والتي تحدث فرقًا كبيرًا.
في أعلى الحجر المصدر ، نرى هذه المنشآت كل يوم ، ويمكنني أن أخبرك أن قضاء الوقت للقيام بذلك بشكل صحيح - من الإعدادية على الركيزة إلى الختم - تقترب من الوقت الكبير. ثق بي ، ستتجنب الصداع والحصول على نتيجة تبدو محترفة وتستمر لسنوات.
لذا ، سواء كنت محترفًا محنكًا أو بدأت للتو ، تذكر أن الحرف اليدوية عالية الجودة “أين هو.” مع التقنيات الصحيحة ، سلس حجر مكدس التثبيت يمكن تحقيقه تماما. إذا كنت ترغب في رفع مشاريعك ، فركز على التفاصيل - إنها تستحق الجهد.
