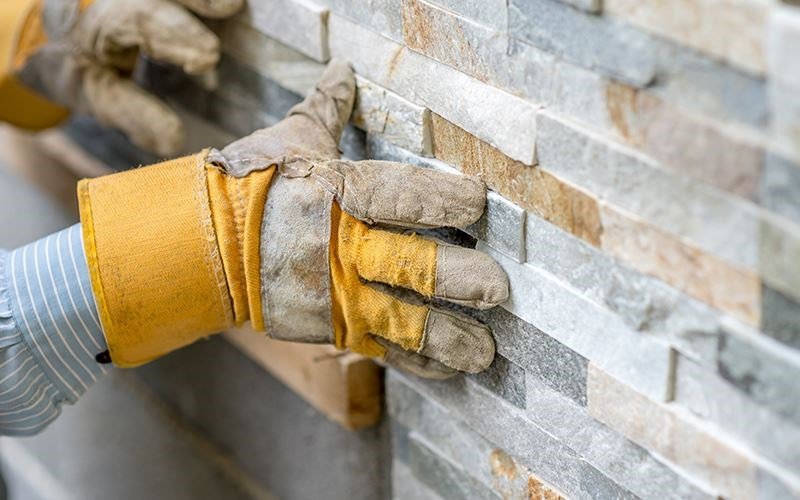
Gestapelter Stein ist das natürlichste und eines der ältesten Baumaterialien. Es wird seit Jahrhunderten in verschiedenen Projekten innerhalb und außerhalb Ihres Hauses verwendet. Stack -Steinpaneele können aus vielen Gründen eine gute Wahl sein: Es dauert für immer, es bietet eine breite Palette von Farben zur Auswahl und kann jedem Raum, in den Sie sie setzen, Schönheit verleihen.
Was ist gestapelt
Gestapelter Stein Wie wissen Stein, Hauptbuch, Steinfurnier, kultivierter Stein, gestapelte Steinescheiben, gestapelte Steinbuchscheine, Natursteinfurniere, Ledgestone -Wandpaneele, Hauptsteinfurnier, Hauptsteinstein, Steinverkleidungen, Steinvurniere, Natursteinkrüde, Wandklettern, Steinmäntel, Steinpaneel, Scheibenblätter, Schübel veneers usw. usw.
Ein natürlicher und zeitloser Look für Ihr Zuhause ist der beste Weg, um gestapelte Steinmauerverkleidungen zu beschreiben. Diese Art von Landschaftsgestaltung bietet ein einzigartiges, anderes Erscheinungsbild, das Sie bei keinem anderen Material oder Stil finden können. Das Gute an dieser Art von Design ist, dass sie vielseitig ist und auf viele verschiedene Arten angewendet werden kann. Schauen wir uns genauer an, was genau es bedeutet, sowie einige Ideen, wie man es anwendet!
-
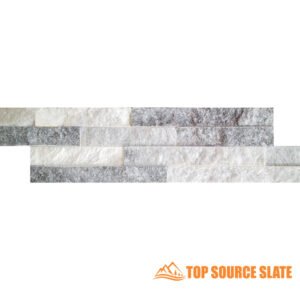 Glitzernde eisgraue Mosaikfliesen mit geteilter Oberfläche
 -
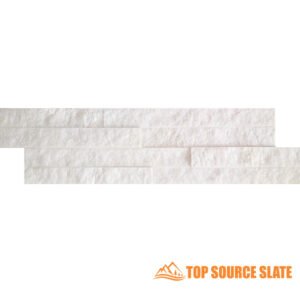 Glitzernde eisweiße Mosaikfliesen mit geteilter Oberfläche
 -
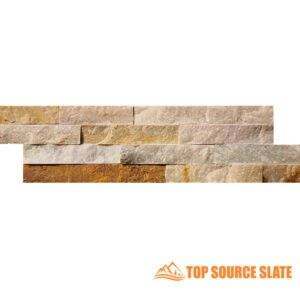 Austernquarz-Mosaikfliesen mit geteilter Oberfläche, 360 x 100 mm
 -
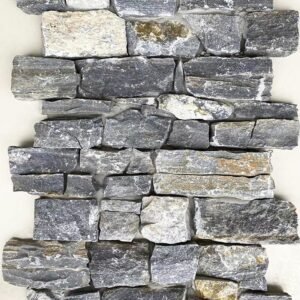 Blaue Diamantquarzsteinverkleidung für die Außenwanddekoration
 -
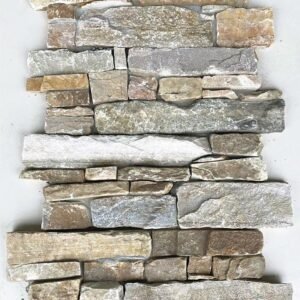 Oyster Quartz Z Stone Platten 550 x 200
 -
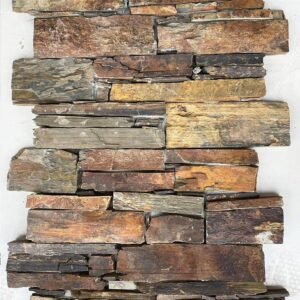 Außenverkleidung aus Naturstein zum Großhandelspreis
 -
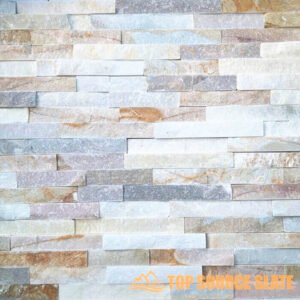 Gestapelter Stein aus goldenem Honigquarzit aus China
 -
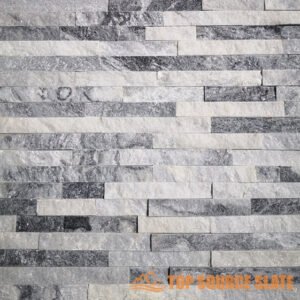 Moderne Außenwandverkleidung aus grauem Alaska-Stein
 -
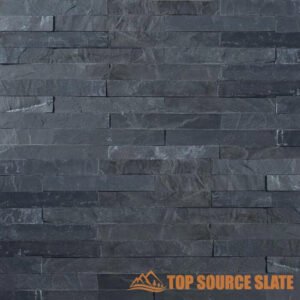 Moderner Außenkamin mit gestapeltem Steinfurnier aus schwarzem Schiefer
Wo Sie gestapelte Steine verwenden können
Eine der besten Möglichkeiten, Ihrem Hausdesign Textur hinzuzufügen, besteht darin, gestapelte Steine zu verwenden. Dies sind Natursteine, die so installiert sind, wie Sie eine Fliese installieren würden. Das Beste daran ist, dass Sie einen gestapelten Stein für jeden Designstil verwenden können.
Sie können die Stapelsteine -Ledger -Paneele im Freien und im Innenbereich verwenden, da es das ideale Material ist, um eine Feature -Wand zu erstellen. Sie können beispielsweise eine Feature -Wand um Ihren Kamin im Foyer, im Badezimmer erstellen oder sie als Backsplash in Ihrer Küche verwenden.
Andererseits können Sie es auch verwenden, um das Äußere Ihrer Häuser wie die Säulen, den Schornstein, die Haustür und vieles mehr hervorzuheben. Wenn Sie dieses Material in Ihrem Zuhause installieren möchten, sind Sie genau richtig.
Installation von gestapeltem Stein
Egal, ob Sie ein Profi oder ein Hausbesitzer sind, der ein DIY -Projekt aufgenommen hat, Sie können die folgenden Schritte befolgen, um gestapelte Steine in Ihrem Haus im Außenbereich oder in Ihrem Innenraum zu installieren.
Holen Sie sich alle Ihre Tools
Sobald Ihr Substratumfeld eingeführt wurde, müssen Sie alle Ihre Tools zusammenbringen. Dies ist so, dass Sie sofort mit dem Prozess beginnen und in kürzerer Zeit beenden können. Hier sind alle Werkzeuge, die Sie benötigen, um eine gestapelte Steinmauer in Ihrem Haus einzurichten:
- Winkelmühle
- Eimer mischen
- Bleistift
- Kelle
- Gerade Kante
- Maßband
- Stapelte Steine
- Haftpulver
- Wasser
Neben diesen wesentlichen Materialien sollten Sie alle Sicherheitsausrüstung im Auge behalten. Zum Beispiel ist es gut, Ohrschernungen und Sicherheitsbrillen zu tragen, wenn Sie einen Leded -Stein schneiden.
Halten Sie die Substratbereich Cmager
Wenn Sie gestapelte Steinefurnierplatten auslegen, können Sie als erstes den Substratbereich reinigen. Danach sollten Sie eine Siliziumsubstanz im Freien an den Rändern des Boards auftragen. Dadurch schließen alle Lücken zwischen der Wand und dem daran befestigten Substrat.
Denken Sie daran, das überschüssige Produkt mit einem Eisstock abzukratzen. Es ist der beste Weg, um die Flüssigkeit zu entfernen, ohne sie zu verbreiten.
Mischen Sie den Primer
Eine wichtige Sache, an die Sie sich erinnern sollten, wenn Sie gestapelte Steinefurnier auslegen, ist, dass Sie einen Grundierung auf die Substratwand auftragen müssen. Beachten Sie jedoch, dass Sie das Produkt zuerst mit Wasser verdünnen müssen.
In der Regel sind die Primerpackungen mit Bedienungsanleitungen ausgestattet. Sie sollten das mit Ihrem Produkt überprüfen, um die richtigen Verhältnisse zu erhalten. Sobald Sie sie kennen, sollten Sie das Wasser in einen Eimer gießen und den Primer hinzufügen.
Wenden Sie den Primer an
Nachdem Sie die Mischung hergestellt haben, müssen Sie sie auf die Substratkarte anwenden. Die Verwendung eines breiten Pinsels ist der beste Weg, um dies zu tun, da Sie eine größere Oberfläche abdecken können. Eine Walze ist ein weiteres Werkzeug, mit dem Sie die Grundierung problemlos anwenden können.
Sie sollten berücksichtigen, dass Sie den Primer gleichzeitig auf das gesamte Substrat anwenden. Normalerweise dauert es fünfzehn Minuten, bis die Oberfläche trocknen kann. Sie dürfen nicht damit beginnen, die gestapelten Steine -Hauptbuchstaben auszulegen, es sei denn, das Board ist völlig trocken.
Lag die Gestapelt Steine Panels
Stapelte Steine -Hauptbuchscheine sind aus Naturstein hergestellt, also unterscheiden sie sich in Textur, Dicke und Größe. Aus diesem Grund müssen Sie eine Reihe von gestapelten Steinen gegen das Substrat auslegen. Denken Sie daran, keinen Klebstoff auf sie anzuwenden.
Der Zweck, trockene Steine auszulegen, ist es, den besten Look für Ihre Wand zu finden. Sie können versuchen, die Teile in unterschiedliche Winkel zu stellen, um das richtige Erscheinungsbild auszuwählen. Sobald Sie wissen, welchen Look Sie möchten, können Sie mit der dauerhaften Anwendung beginnen.
Schneiden Sie den gestapelten Stein ab Furnier
Wenn Sie gestapelte Steinefliesen an die Wand legen, werden Sie feststellen, dass das letzte Stück länger ist als das Substrat. Aus diesem Grund müssen Sie es in der richtigen Größe schneiden. Sie können dies tun, indem Sie den Kanonenstein an die Wand legen und Klebeband messen, um den entsprechenden Schnittpunkt zu markieren. Dann können Sie den Schnitt mit der Winkelschleife machen.
Mischen Sie den Klebstoff
Jetzt, da Ihr ganzes Material fertig ist, sollten Sie den Klebstoff mischen, indem Sie das Pulver in den Eimer stellen, mit dem es geliefert wird, und Wasser hinzufügen. Sie müssen sicherstellen, dass die resultierende Mischung die Konsistenz von Zahnpasta hat. Dies ermöglicht eine reibungslose Anwendung.
Beachten Sie erneut, dass das Klebstoffpaket eine Bedienungsanleitung hat. Sie sollten das für die Mischverhältnisse verwenden. Wenn Sie sich an die richtigen Messungen halten, können Sie die richtige Konsistenz erzielen.
Wenden Sie den Klebstoff an
Nehmen Sie die Kelle auf und legen Sie ihn in den Klebereimer, um die Paste zu erhalten. Wenden Sie dies dann auf den Boden des Substrats an. Denken Sie daran, nur genug Klebstoff für die erste Reihe der gestapelten Steinmauern zu setzen.
Vielleicht möchten Sie stattdessen den Klebstoff auf der Rückseite des gestapelten Steinfurniers anwenden. Obwohl es keinen Schaden hat, empfehlen wir Ihnen, dies nicht zu tun. Dies liegt daran, dass der Vorgang sauberer ist und die Platzierung einfacher ist, indem der Klebstoff an der Wand angewendet wird.
Befestigen Sie die gestapelten Steine an der Wand
Nachdem Sie den Klebstoff eingestellt haben, sollten Sie die gestapelten Steine -Panels anbringen. Wenn Sie mit der ersten Reihe fertig sind, arbeiten Sie sich nach oben und setzen Sie mehr Klebstoff, während Sie gehen.
Eine gestapelte Steinfliese gibt es in verschiedenen Variationen. Machen Sie sich also keine Sorgen über einen offzentrierten Look bei Überlappungen. Legen Sie einfach die Steine so, wie sie ein natürliches Ergebnis erzielen sollen.
Legen Sie die obere Reihe
Wenn Sie die obere Reihe erreichen, finden Sie einen ungleichmäßigen Raum auf dem Substrat. So müssen Sie die gestapelten Steinplatten auf die richtige Größe schneiden. Sobald Sie dies tun, wenden Sie Klebstoff auf die Rückseite des Steins an. Dadurch erleichtert der Anhangsprozess für die Oberseite.
Nachdem Sie alle gestapelten Steine angebracht haben, sollten Sie ein Tuch verwenden, um die Ränder zu wischen. Als nächstes sollten Sie die Wand trocknen lassen, und Sie werden fertig sein.
bezogen auf:
Stacked Stone: Ein vollständiger Kaufratgeber (Aktualisierung)
Installationsrichtlinien für gestapelte Steinfliesen
So installieren Sie die Ecken von gestapelten Steinplatten
Letzte Worte
Dies ist Ihr vollständiger Leitfaden für gestapelte Stein und seine Anwendung. Sie kommen in unterschiedlichen Variationen. Zum Beispiel können Sie einen kultivierten Stein oder einen Leded -Stein für Ihr Haus bekommen. Sobald Sie über die gestapelten Steine verfügen, können Sie den früheren Anwendungsprozess problemlos eine neue Wand erstellen.
HINWEIS: Bitte überprüfen Sie alle gestapelten Steinpaneele vor der Installation. Natursteinprodukte haben von Natur aus eine Gleichmäßigkeit und unterliegen der Variation in Farbe, Schatten, Finish usw. Es wird empfohlen, bei der Installation gestapelte Steinfliesen aus verschiedenen Kisten zu mischen.
Als China Hersteller, Exporteur und Kultursteinfabrik, Ledge Stone, gestapelter Steinfurnier, willkommen, sich frei zu fühlen kontaktiere uns jederzeit.

