
Eine lose Steinverkleidung auf einer Gewerbeimmobilie birgt unmittelbare Sicherheitsrisiken und eine erhebliche rechtliche Haftung für Facility Manager. Wenn sich Steine lösen, deutet das oft eher auf eine tiefsitzende Feuchtigkeitsinfiltration oder strukturelle Verformung als auf einfaches Alter hin. Das Ignorieren dieser Anzeichen kann zu OSHA-Bußgeldern in Höhe von 12.471 US-Dollar pro schwerwiegendem Verstoß führen und schließlich zu einem vollständigen Ausfall der Fassade führen.
Dieser Artikel bietet einen technischen Rahmen zur Identifizierung von Grundursachen, z. B. zur Überprüfung von Substratfeuchtigkeitsmesserwerten über 15 % bis 20 % oder zur Messung von Durchbiegungsgrenzen anhand der NYC-Code-Standards. Wir erklären den Profi verfahren zum entfernen beschädigter platten Ohne das umgebende Mauerwerk zu beeinträchtigen, wird der Untergrund für eine erneute Verklebung vorbereitet und die Farben der Fugen werden angepasst, um die ästhetische Konsistenz und strukturelle Haltbarkeit im gesamten Außenbereich des Gebäudes aufrechtzuerhalten.
Identifizieren der Grundursache für losen Stein (Feuchtigkeit vs. Bindung)
Feuchtigkeitsinfiltration ist der häufigste Auslöser für Lockerungen Stein in Mauerwerksverkleidung. Während ein Versagen der Bindung typischerweise auf anfängliche Anwendungsfehler zurückzuführen ist, begünstigt das Eindringen von Wasser einen langfristigen strukturellen Abbau durch Gefrier-Tau-Ausdehnung und Salzkristallisation, die die Grenzfläche zwischen Stein und Substrat stark schwächt.
| Diagnosefaktor | Feuchtigkeitsinfiltration | Versagen der Klebeverbindung |
|---|---|---|
| Visuelle Indikatoren | Ausblühungen, feuchter Untergrund oder Schimmel. | Reinigen Sie die Fehleroberfläche mit minimalen Rückständen. |
| Substratmetriken | Messwerte des Feuchtigkeitsmessers über 15–20 %. | Grundfeuchtigkeit mit lokaler Ablösung. |
| Fehlerkatalysator | Gefrier-Tau-Zyklen und chemische Hydrolyse. | Inkompatible Materialien oder schlechte Aushärtung. |
Unterscheidung zwischen Feuchtigkeitsinfiltration und Klebeverbindungsversagen
Felddaten zeigen, dass Wasserinfiltration die Hauptursache für loses Gestein ist, insbesondere während saisonaler Veränderungen. Gefrier-Tau-Zyklen üben einen erheblichen Innendruck aus, da sich Wasser im Substrat ausdehnt, während die Salzkristallisierung die chemische Grenzfläche zwischen dem Stein und seiner Unterlage schwächt. Visuelle Anzeichen wie weiße Ausblühungen oder eine feuchte Rückseite deuten darauf hin, dass die äußere Versiegelung versagt hat und Feuchtigkeit die primäre Barriere umgangen hat. Umgekehrt sind primäre Verbindungsfehler typischerweise auf die Verwendung inkompatibler Materialien oder Fehler während der anfänglichen Installationsphase zurückzuführen und nicht auf Umwelteinflüsse.
Diagnoseprotokolle und Substrattests
Eine wirksame Diagnostik beginnt mit einem Klopftest, um hohle Geräusche zu erkennen, die auf eine lokale Ablösung hinweisen, auch wenn der Stein optisch an seinem Platz bleibt. Wir bestätigen das Eindringen von Feuchtigkeit, wenn die Messwerte des Substratmessgeräts 15 % bis 20 % überschreiten, und identifizieren Wasser als Ursache für den Fehler. Eine rückstandsreiche oder kalkhaltige Oberfläche deutet auf eine langfristige Versickerung hin, die den Untergrund im Laufe der Zeit aufgeweicht hat. Eine saubere Fehlerstelle ohne diese Indikatoren weist häufig auf ein mechanisches Verbindungsproblem hin, das normalerweise durch unzureichende Mörtelfestigkeit oder Oberflächenverunreinigungen während des Baus verursacht wird.
Sicherheit geht vor: Strukturelle Durchbiegung prüfen
Die Prüfung der strukturellen Durchbiegung gewährleistet Sicherheit, indem sie die Verformung von Balken, Platten oder Stützsystemen unter Last misst. Die meisten Normen, einschließlich BS 8110 und Eurocode 2, begrenzen die Gesamtdurchbiegung auf Spannweite/250, während strengere Anforderungen wie der NYC-Code Grenzwerte von 3/360 der Spannweite für bestimmte Aufhängungssysteme vorschreiben, um strukturelles Versagen oder Verbundverluste zu verhindern Steinverkleidung.
Etablierte Durchbiegungsgrenzen und Sicherheitsstandards
Die Einhaltung von BS 8110 und Eurocode 2 verhindert strukturelle Instabilität, indem die Gesamtdurchbiegung innerhalb der Schwelle von Spannweite/250 gehalten wird. Für Oberflächen und Steintrennwände beschränken die Ingenieure die Bewegung nach dem Bau auf eine Spannweite von 500 oder 20 mm. Diese Präzision verhindert ein Versagen der Verbindung zwischen Stein und Untergrund. Die Anforderungen des NYC-Codes für Akustik- und Steinaufhängungssysteme verschärfen diese Parameter weiter auf 3/360 der Spannweite, um eine langfristige Gebrauchstauglichkeit sicherzustellen.
Diagnosemethoden zur Substratstabilität
Wartungsteams verwenden statische Belastungstests mit Messuhren mit einer Auflösung von 0,001 Zoll, um Bewegungen in Spannweitenmitten- und Viertelspannweitenintervallen zu erfassen. Bei größeren Installationen beurteilen Fallgewichtsdeflektometer (FWD) die Gleichmäßigkeit und Nichtlinearität durch Impulsbelastung. Techniker führen auch Impulsplattenlasttests gemäß ASTM E2835 durch, um die spezifische Plattenverformung unter Impulskräften zu bestimmen und so empirische Daten für Stabilitätsbewertungen in stark frequentierten Zonen bereitzustellen.
Inspektionsworkflows für Wartungsteams
Das Erkennen struktureller Risiken beginnt mit dem Abblättern sichtbarer Risse oder Durchhängen, die die Spannweite/360 überschreiten, während der ersten Baustellenbegehungen. Wenn Messungen eine Durchbiegung von mehr als 1/4 Zoll über eine Spannweite von 10 Fuß ergeben, erfordert das Protokoll eine sofortige Rücksprache mit einem Statiker. Durch die Dokumentation von Last-Weg-Kurven und die Rückberechnung von Modulen wird ein professionelles Wartungsprotokoll erstellt, das dazu beiträgt, die Berufshaftung einzuschränken Steinreparaturen und Verkleidungen Wartung.
Beschädigte Platten entfernen, ohne den umgebenden Stein zu treffen
Isolieren Sie den Entfernungsbereich, indem Sie in der Mitte des beschädigten Steins beginnen und nach außen arbeiten, um Stöße auf angrenzendes Mauerwerk zu vermeiden. Verwendung einer Kombination aus Meißeln für die manuelle Extraktion und Nasssägen für Präzision Schnitte sorgen für eine saubere Substrat unter Beibehaltung der strukturellen Integrität des umgebenden Furniers.
Manuelle Extraktion mit der Center-Out-Methode
Setzen Sie einen Meißel in die Mitte der beschädigten Stelle Panel und klopfen Sie vorsichtig mit einem Hammer, um den Stein in kleinere Fragmente zu zerbrechen. Diese Technik leitet die Kraft von den Kanten weg, wo sie sonst auf benachbarte Einheiten übertragen werden könnte. Durch die Ausweitung des Entfernungsprozesses von der Mitte zu den Rändern werden Belastungen und Vibrationen auf das umgebende Furnier minimiert und die Aufprallzone effektiv isoliert.
Entfernen Sie lose Rückstände mit einer Drahtbürste, um einen sauberen Untergrund für den Ersatzkleber zu gewährleisten. Das Entfernen aller Spuren von altem Mörtel und Staub verhindert ein Versagen der Verbindung während der Neuinstallationsphase. Die Aufrechterhaltung eines sauberen Arbeitsbereichs während der Extraktion ermöglicht außerdem eine klarere Sicht auf die Gelenke und verringert so die Wahrscheinlichkeit versehentlicher Stöße auf gesunde Steine.
Präzisionssägen und Strukturextraktion
Für präzise Schnitte größerer Flächen verwenden Sie eine Nass- oder Handsäge Paneele, um ein versehentliches Brechen benachbarter Steine zu verhindern. Durch das Einritzen der Mörtellinien entlang des Plattenumfangs entsteht ein Entlastungsspalt, der Vibrationen beim mechanischen Herausziehen absorbiert. Tragen Sie bei Steinen, die Gewicht tragen, Epoxidharz-Injektionen oder Edelstahlstäbe auf, um die strukturelle Integrität während des gesamten Prozesses aufrechtzuerhalten.
Implementieren “Holländer” Patches für teilweisen Ersatz, um die natürliche Ästhetik des zu bewahren Wand, ohne dass eine vollständige Platte erforderlich ist Extraktion. Dies beinhaltet Entfernen Sie nur den beeinträchtigten Abschnitt und fügen Sie einen passenden Stein ein Stück ins Leere. Diese Methode ist besonders effektiv für das Erbe Stein oder komplexe Muster erfordern eine vollständige Ersatzplatte ist schwierig.
Erforderliche Werkzeuge und Untergrundvorbereitung
Stellen Sie die notwendige Ausrüstung bereit, darunter eine Schutzbrille, ein Meißelset und einen pH-neutralen Reiniger Schütze die Steine Oberfläche vor Ätzungen oder Verfärbungen. Schrubben Sie die freigelegte Untergrundoberfläche gründlich, um alten Mörtel zu entfernen und eine sichere Verbindung für den neuen polymermodifizierten Dünnschichtmörtel herzustellen. Diese Art von Klebstoff bietet die erforderliche Flexibilität, um Wärmeausdehnung und Gebäudebewegungen zu bewältigen.
Die Erstellung eines Inspektionsplans für das Jahr 2026 trägt dazu bei, lose Paneele frühzeitig zu erkennen und die Lebensdauer der Wand möglicherweise um bis zu 20 Jahre zu verlängern. Regelmäßige Kontrollen auf Ausblühungen oder kleinere Risse ermöglichen kleine Reparaturen, sodass keine großflächigen Plattenausbauten erforderlich sind. Die Dokumentation dieser Wartungsschritte sorgt für langfristige Sicherheit und regelt die Haftung der Gebäudeeigentümer.
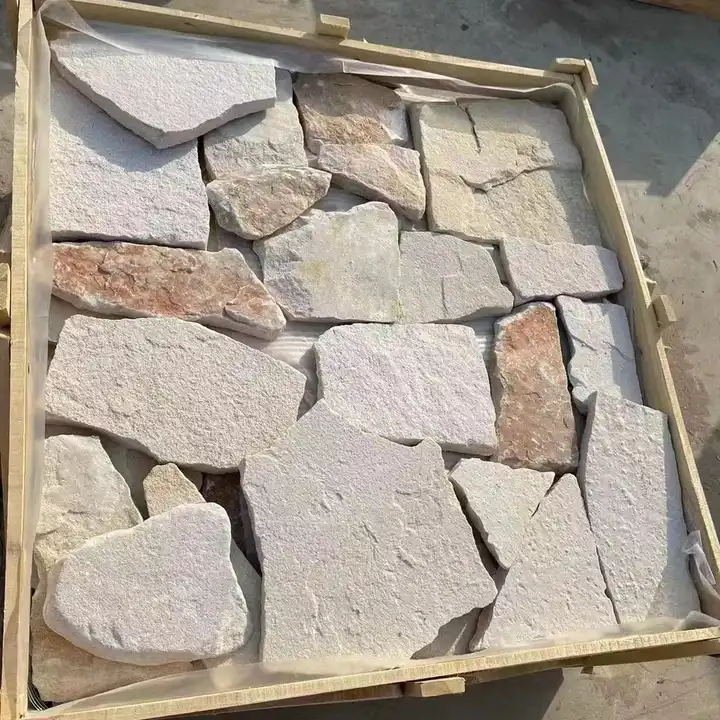
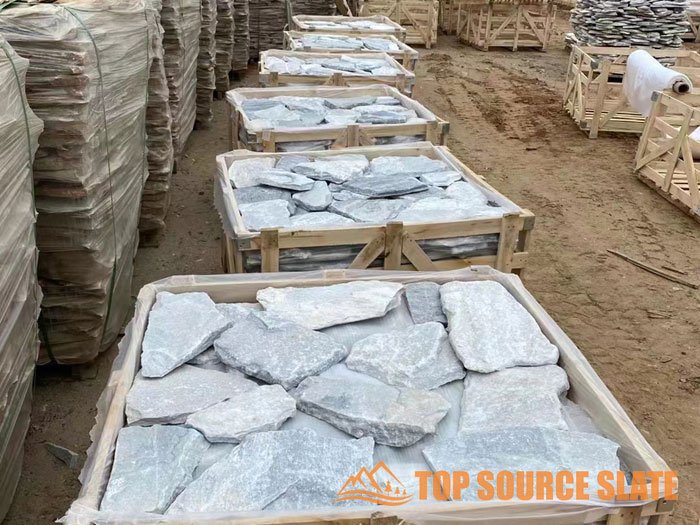
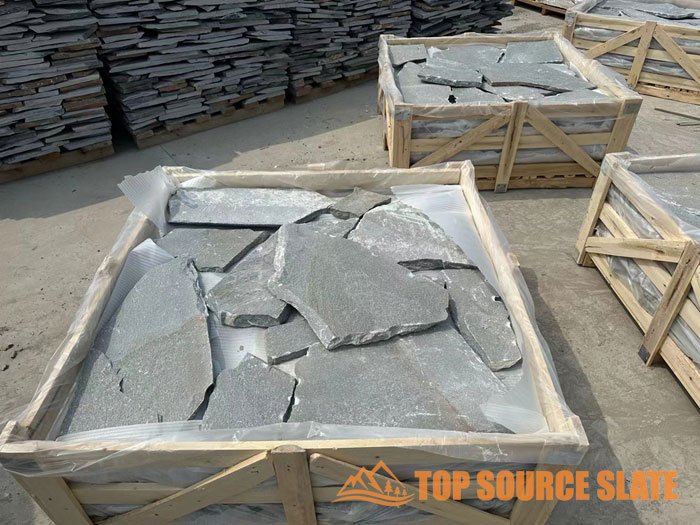
Werten Sie Ihre Projekte mit hochwertigem, direkt ab Werk gefertigtem Stapelstein auf

Reinigen des Untergrunds zur erneuten Haftung
Durch die Untergrundreinigung werden Schmutz, Fett und organische Rückstände entfernt, die als Bindungsbrecher wirken. Durch die Gewährleistung einer sauberen, trockenen Oberfläche erreichen die Klebstoffe einen maximalen Kontakt und verhindern so ein zukünftiges Ablösen von Steinen durch eindringende Feuchtigkeit oder anfängliches Versagen der Verbindung.
Standardprotokolle zum Entfernen von Oberflächenverunreinigungen
Um lose Partikel und Feinstaub zu entfernen, sind Trockenreinigungsmethoden vor dem Auftragen flüssiger Lösungsmittel erforderlich. Techniker verwenden Staubbindetücher oder Mikrofasertücher, um Schmutz anzuheben, ohne den Untergrund zu zerkratzen. Bei strukturierten Oberflächen verhindert ein Staubsauger mit weichem Bürstenaufsatz, dass sich Staub tiefer in den Poren des Materials festsetzt.
Wenn die Oberfläche Fingerabdrücke oder ölige Rückstände aufweist, tragen wir eine 70-prozentige Isopropylalkohollösung (IPA) auf. Diese Konzentration gleicht eine effektive Reinigung mit einer kontrollierten Verdunstungsrate aus. Bei starkem Fett oder hartnäckigen organischen Verunreinigungen sorgt eine Lösungsmittelsequenz aus Aceton und anschließend Isopropanol für eine aggressivere Reinigungswirkung. Wir wischen die Oberfläche mit fusselfreien Materialien in einer Richtung ab, um sicherzustellen, dass Verunreinigungen entfernt und nicht über den Klebebereich verteilt werden.
Materialvorbereitung und mechanische Verbindungsanforderungen
Poröse Substrate wie Stein oder Holz fangen Schmutz oft tief in ihrer Struktur ein. Es ist notwendig, diese Bereiche mit einer Seifenlösung zu schrubben, bis das Spülwasser klar bleibt. Nach dem Schrubben müssen diese Materialien vollständig an der Luft trocknen; Eine Heißluftpistole kann dabei helfen, Restfeuchtigkeit zu entfernen, die die chemische Aushärtung des Klebstoffs beeinträchtigen könnte.
Glatte oder nicht poröse Oberflächen erfordern eine mechanische Aufrauung “Zähne” für die Bindung. Durch die Verwendung von Schleifpapier mit einer Körnung von 180–220 entsteht eine ausreichende Oberfläche, damit der Kleber haften kann, ohne die strukturelle Integrität der Platte zu beschädigen. Für fortgeschrittene Verklebungen auf metallischen oder steinähnlichen Oberflächen verwenden wir eine Piranha-Ätzsequenz, um restliche Oxide zu entfernen. Das Auftragen spezieller Grundierungen im Anschluss an diese Vorbereitung gewährleistet eine langfristige Stabilität in Umgebungen, die anfällig für Wärmeausdehnung oder Feuchtigkeitszyklen sind.
Haftungsvalidierung und Wartungsdokumentation
Die Validierung des Reinigungsprozesses umfasst einen 24-Stunden-Abziehtest des Klebebands an einem kleinen Abschnitt des gereinigten Substrats. Dieser Test bestätigt, dass die Oberfläche frei von Verbindungsbrechern ist, bevor mit der vollständigen Neuinstallation begonnen wird. Wir tragen den ausgewählten Klebstoff unmittelbar nach Abschluss des Trocknungszyklus auf, um zu verhindern, dass sich neuer Staub auf der vorbereiteten Oberfläche ansammelt, da selbst eine Einwirkung von mehreren Stunden das Ergebnis beeinträchtigen kann.
Gebäude aktualisieren Wartungsprotokolle mit der spezifischen Reinigung Die verwendeten Mittel und Methoden liefern eine klare Aufzeichnung für zukünftige Inspektionen. Techniker prüfen vor dem erneuten Einbau der Platten auf Anzeichen von Lösungsmittel- oder Feuchtigkeitsrückständen, um häufige Verbindungsfehler zu vermeiden. Eine ordnungsgemäße Dokumentation und die strikte Einhaltung der Trocknungszeiten steuern die Haftung und stellen sicher, dass die Reparatur langfristig Umwelteinflüssen standhält.
Passende Fugen- und Mörtelfarben für Reparaturen
Eine erfolgreiche Mauerwerksanierung hängt von der Einhaltung ab ASTM C270- und C979-Standards um ästhetische Konsistenz und strukturelle Haltbarkeit zu gewährleisten. Durch die Verwendung vorgemischter Mischungen oder spezieller Pigmentbehältersysteme können Techniker bestehende Fugen anpassen und gleichzeitig die erforderliche Scherhaftfestigkeit aufrechterhalten und Probleme wie Ausblühungen verhindern.
ASTM-Standards für die Mörtelauswahl
Die Auswahl des richtigen Mörtels für Reparaturen im Jahr 2026 erfordert die strikte Einhaltung der ASTM C270-Standards für Mischungen vom Typ M, S oder N, um die Kompatibilität mit dem vorhandenen Untergrund sicherzustellen. Techniker müssen Pigmente verwenden, die ASTM C979 entsprechen, wobei die Gesamtpigmentkonzentration auf 10 % des Zementgewichts begrenzt ist. Eine Überschreitung dieser Grenze beeinträchtigt häufig die Integrität der zementären Verbindung. Der Mix-Design sollte ASTM C144-Sand und sauberes Trinkwasser enthalten. Um ein Versagen der Bindung und eine Salzkristallisierung zu verhindern, vermeiden Sie die Zugabe von luftporenbildenden Zusätzen oder Chloriden zur Mischung.
Mischtechniken und vorgefärbte Optionen
Werksgefertigte Produkte von Herstellern wie Daubois und Glen-Gery bieten Dutzende Standardfarbtöne, die bei großflächigen Mauerwerksfugen gleichmäßige Ergebnisse liefern. Für eine spezielle Abstimmung auf der Baustelle ermöglichen die SPEC MIX-Behältersysteme den Arbeitern, eine einzelne Farbeinheit zu einem 80-Pfund-Beutel mit grauem Mörtel vom Typ N oder S hinzuzufügen. Bei hochfesten Sanierungsprojekten werden häufig Pigmente der Solomon SGS A/H/X-Serie verwendet, die die Anforderungen von ASTM C979 übertreffen und eine beständige Farbgebung für verschiedene Mauerwerksumgebungen bieten. Diese vorberechneten Systeme reduzieren menschliche Fehler und Farbabweichungen während des Mischvorgangs.
Farbverifizierung und Feldanwendung
Zur Überprüfung des endgültigen Farbtons werden Mörtelbänder hergestellt und an identischen Mustern getestet Platten, bevor Sie mit der vollständigen Anwendung beginnen. Durch die Aufrechterhaltung einer Scherhaftfestigkeit zwischen 330 und 428 psi, wie in den ACI 530-Standards angegeben, wird sichergestellt, dass das Reparaturmaterial dauerhaft an der Gebäudefassade haftet. Techniker müssen vermeiden, farbigen Mörtel erneut zu temperieren, sobald die anfängliche Aushärtung beginnt. Die Zugabe von Wasser nach der Primärmischung führt zu erheblichen Farbschwankungen und schwächt das Material. Konsequente Dosierung und Feuchtigkeitskontrolle bleiben die effektivsten Methoden, um einen nahtlosen Übergang zwischen altem und neuem Mauerwerk zu erreichen.
Umgang mit Ausblühungen: Die Lösung mit weißem Pulver
Ausblühungen treten auf, wenn wasserlösliche Salze durch poröses Gestein wandern und während der Feuchtigkeitsverdunstung an der Oberfläche kristallisieren. Obwohl diese weißen, pulverförmigen Ablagerungen in erster Linie ein ästhetisches Problem darstellen, weisen sie auf zugrunde liegende Feuchtigkeitsprobleme hin, die vorbeugende Maßnahmen wie Dampfsperren, spezielle Mörtelauswahl und atmungsaktive Dichtstoffe erfordern, um eine langfristige Stabilität des Steins zu gewährleisten.
Ursachen der Salzoberflächenkristallisation
Wasserlösliche Salze bewegen sich durch Poren Steinplatten über Kapillarwirkung. Wenn die Feuchtigkeit im Stein an der Oberfläche verdunstet, hinterlässt sie mineralische Ablagerungen, die das charakteristische weiße Pulver bilden. Primäre Ausblühungen treten typischerweise innerhalb von 72 Stunden nach der Installation auf und werden häufig durch das Wasser verursacht, das in der ursprünglichen Mörtel- oder Fugenmischung verwendet wurde. Sekundäre Ablagerungen entstehen über längere Zeiträume durch ständige Umweltbelastungen wie Regen oder Grundwasserversickerung.
Mehrere Faktoren tragen zur Anreicherung dieser Salze bei. Hochalkalische Baustoffe wie Normalzement und bestimmte Untergründe stellen eine gute Mineralstoffquelle dar. Darüber hinaus gelangen durch den direkten Kontakt mit feuchtem Boden oder die Verwendung von mineralhaltigem, hartem Wasser bei der Standortpflege externe Salze in die Anlage Steinsystem. Wenn sich diese Quellen mit anhaltender Feuchtigkeit verbinden, setzt sich der Kristallisationszyklus auf unbestimmte Zeit fort.
Präventive Strategien für Steininstallationen
Die Eliminierung von Feuchtigkeitswegen ist die wirksamste Methode zur Verhinderung der Salzmigration. Installieren Sie Dampfsperren und geeignete feuchtigkeitsbeständige Schichten, um das Eindringen von Wasser zu verhindern Stein durch das Substrat. Eine ordnungsgemäße Geländeeinteilung und Entwässerungsgefälle verhindern, dass sich Wasser in Bodennähe ansammelt Steinfassaden und Wände, wodurch die Menge an Feuchtigkeit verringert wird, die in das Material eindringen kann. Durch diese baulichen Sicherungen bleibt das Innere erhalten Steinumgebung trocken.
Die Materialauswahl spielt eine entscheidende Rolle bei der Minimierung verfügbarer löslicher Salze. Wählen Sie polymerverstärkte Dünnbettmörtel und Fugenmörtel auf Calciumaluminatzementbasis anstelle von hochalkalischen Alternativen. Diese speziellen Bindemittel enthalten weniger Mineralien, die zur Auslaugung neigen. Behalten Steinelemente trocknen während der Lagerung und Installation Die Phasen verhindern auch die vorzeitige Aufnahme von Feuchtigkeit, die kurz nach Projektende zu primären Ausblühungen führt.
Sichere Entfernungs- und Oberflächenwiederherstellungstechniken
Die Reinigung von Ausblühungen erfordert einen Trockenstart, um zu verhindern, dass Salze tiefer in den Stein eindringen. Verwenden Sie zunächst eine steife, nichtmetallische Bürste, um losen Puder von der betroffenen Stelle zu entfernen. Tragen Sie Flüssigreiniger erst auf, nachdem die Oberflächenablagerungen mechanisch entfernt wurden. Bei hartnäckigem weißem Pulver verwenden Sie spezielle Reinigungsmittel für Mauerwerk oder milde saure Lösungen wie verdünnten weißen Essig. Testen Sie immer zuerst einen kleinen Bereich, um sicherzustellen, dass die Lösung die Oberfläche nicht verätzt Stein oder verändern Sie seinen natürlichen Zustand Farbe.
Sobald die Stein ist sauber und vollständig Nach dem Trocknen die Oberfläche mit einer hochwertigen, atmungsaktiven Natursteinversiegelung versiegeln. Diese Versiegelungen ermöglichen das Entweichen von Wasserdampf und verhindern gleichzeitig, dass flüssige Feuchtigkeit in die Poren aufgenommen wird. Diese Barriere minimiert die zukünftige Feuchtigkeitsaufnahme und unterbricht den Kreislauf der Salzmigration. Regelmäßige Inspektionen und Wartung Eine ordnungsgemäße Entwässerung rund um die Installation trägt dazu bei, dass der Stein erhalten bleibt Oberfläche frei von künftigen Mineralablagerungen.
Jährliche Inspektionscheckliste für Bereiche mit hohem Verkehrsaufkommen
Facility Manager sorgen für Sicherheit und reduzieren die Haftung, indem sie jährlich strenge Inspektionen von Gehwegen, Beleuchtungssystemen und Strukturverkleidungen durchführen. Zu den wichtigsten technischen Standards gehören die Einhaltung von Bordsteinhöhen von mindestens 6 Zoll, die Begrenzung der Türschwellenabweichungen auf 0,75 Zoll und die Überprüfung, dass FI-Schutzschalter innerhalb von 36 Zoll von Wasserquellen installiert werden.
Gehwegsicherheit und Oberflächengefahrenminderung
Die Aufrechterhaltung freier Durchgänge ist der erste Schritt zur Vermeidung von Ausrutsch- und Stolperunfällen in Bereichen mit hohem Verkehrsaufkommen. Wartungsteams müssen sicherstellen, dass alle Gänge und Laufflächen frei von Schmutz, verschütteten Flüssigkeiten und unerwarteten Hindernissen bleiben. Für Oberflächen, die häufig Feuchtigkeit ausgesetzt sind, sind Materialien mit hoher Traktion erforderlich, und Inspektoren müssen bestätigen, dass auf Fußgängerwegen keine losen Teppiche oder Bodenunebenheiten vorhanden sind. Um Sichtbarkeit und Sicherheit zu gewährleisten, sollten Bordsteine eine Mindesthöhe von 6 Zoll einhalten und mit Kontrastfarbe markiert sein. Reifenstopps müssen überprüft werden, um sicherzustellen, dass sie eine maximale Höhe von 6,5 Zoll nicht überschreiten, während Geschwindigkeitsbegrenzungen deutlich sichtbare Warnschilder für den herannahenden Verkehr erfordern.
Eingangsbereiche und Beleuchtungsstandards
Ausreichende Beleuchtung und funktionsfähige Türbeschläge sind für einen sicheren Ein- und Ausgang von entscheidender Bedeutung. Zu den Inspektionsprotokollen gehört das Testen bewegungsaktivierter Sensoren in der Nähe von Eingangspunkten und die Aktualisierung der Beleuchtungstimer, um den Sicherheitsplänen für 2026 Rechnung zu tragen. Notbeleuchtungssysteme müssen regelmäßig überprüft werden und Leuchten auf Parkplätzen sollten durch Kunststofflinsen oder Metallschirme geschützt werden, um Schäden zu vermeiden. Türen müssen reibungslos funktionieren, und Techniker sollten die Türschwellen messen, um sicherzustellen, dass die Abweichungen 0,75 Zoll nicht überschreiten. Alle Ausgangswege müssen völlig frei bleiben und die Ausgangsschilder müssen überprüft werden, um sicherzustellen, dass sie jederzeit sichtbar und ordnungsgemäß beleuchtet sind.
Strukturelle Integrität und Haftungsmanagement
Feuchtigkeit ist die Hauptursache für das Versagen von Mauerwerk und schwächt die Steinhaftung durch Frost-Tau-Wechsel häufig häufiger als das anfängliche Versagen der Verbindung. Jährliche Inspektionen von Dächern, Steinplatten, und Schindeln erkennen lose Bauteile oder Feuchtigkeitsschäden, bevor sie zur Sturzgefahr werden. Profis verwenden Klopftests, um hohl klingende Steine zu identifizieren, und Feuchtigkeitsmesser, um sicherzustellen, dass der Substratgehalt unter 15–20 % bleibt. Die elektrische Sicherheit wird dadurch gewährleistet, dass FI-Schutzschalter monatlich an Steckdosen mit einem Abstand von 36 Zoll zum Wasser getestet werden und brennbare Stoffe 36 Zoll von Schalttafeln entfernt gehalten werden. Die Dokumentation dieser Ergebnisse und des jährlichen durchschnittlichen täglichen Verkehrs (AADT) trägt dazu bei, die mit den von der OSHA genannten Gefahren verbundenen Risiken zu mindern, die zu Geldstrafen von 12.471 US-Dollar pro schwerwiegendem Verstoß führen können.
Häufig gestellte Fragen
Warum fällt mein gestapelter Stein herunter?
Stapelter Steinfurnier Typischerweise löst es sich aufgrund fehlerhafter Klebeverbindungen, die durch eindringende Feuchtigkeit, strukturelle Bewegungen oder unsachgemäße Installation verursacht werden. Häufige Probleme sind das Überspringen des Backbuttering-Prozesses oder die Verwendung von degradiertem Mörtel, der den Wetterzyklen 2026 nicht standhalten kann. Regulär Inspektionen helfen, schwache Bindungen vor Steinen zu erkennen fallen.
Wie repariert man einen losen Stein in einem Kamin?
Reinigen Sie die Stein und die Mauer Hohlraum gründlich reinigen, um alte Ablagerungen zu entfernen. Tragen Sie ein farblich abgestimmtes Zweikomponenten-Epoxidharz auf Mörtel Typ N auf die Rückseite des Steins auftragen und drücken Sie es fest an. Befestigen Sie den Stein bei Bedarf mit Klebeband und lassen Sie ihn mindestens 24 Stunden aushärten, bevor Sie die Fugen fertigstellen.
Kann man Steinfurnier ausbessern?
Ja, Sie können patchen Steinfurnier Verwenden Sie polymermodifiziertes Thinset für strukturelle Reparaturen oder Epoxidharz in Steinqualität für kleinere Absplitterungen. Bei Rissen verwenden Sie einen farblich passenden Steinspachtel und schleifen ihn nach dem Trocknen glatt. Testen Sie Farbpigmente immer zuerst auf einer kleinen Fläche, um sicherzustellen, dass das Pflaster mit dem Pflaster harmoniert Naturstein Textur.
Wie entfernt man weißes Pulver vom Stein?
Dieses weiße Pulver, Ausblühungen genannt, besteht aus Salzablagerungen, die durch Feuchtigkeit an die Oberfläche gelangen. Leichte Ablagerungen mit einer trockenen, nichtmetallischen Bürste oder Wasserspülung entfernen. Bei hartnäckigen Fällen eine verdünnte Essiglösung oder eine 1:12-Mischung aus Salzsäure und Wasser auftragen, anschließend mit Backpulver neutralisieren und abspülen.
Was führt dazu, dass Steinfurnier reißt?
Risse entstehen häufig durch Korrosion von Mauerankern, Untergrundbewegungen oder Wärmeausdehnung. Wenn sich das Trägermaterial und der Stein unterschiedlich schnell ausdehnen, entsteht Spannung, die die Verbindung aufbricht. Umweltfaktoren wie Gefrier-Tau-Wechsel und Salzkristallisation tragen im Laufe der Zeit ebenfalls zur Entstehung von Mikrorissen bei.
Wie ersetzt man eine einzelne Steinplatte?
Reinigen Sie die Wandoberfläche und befeuchten Sie die Rückseite der neuen Platte leicht, um die Haftung zu verbessern. Tragen Sie eine 1/2-Zoll-Schicht polymerverstärkten Mörtels vom Typ S auf die Platte auf, bilden Sie mit einer Kelle Grate und drücken Sie sie von unten beginnend fest. Füllen Sie die Fugen mit einem Fugenbeutel und glätten Sie sie, um ein nahtloses Erscheinungsbild zu erzielen.
Abschließende Gedanken
Lose Steinreparaturen erfordern einen präzisen Ansatz, der sowohl das Erscheinungsbild der Oberfläche als auch die zugrunde liegende strukturelle Gesundheit berücksichtigt. Gewerbliche Immobilienverwalter stellen oft fest, dass die Feuchtigkeitskontrolle die Langlebigkeit jeder Reparatur bestimmt. Durch die Identifizierung des spezifischen Fehlers – sei es eine wasserbedingte Zersetzung oder ein mechanisches Verbindungsproblem – können Teams die richtigen Mörtel- und Reinigungsprotokolle anwenden, um ein erneutes Auftreten zu verhindern. Durch die frühzeitige Behebung dieser Details wird verhindert, dass kleinere Ablösungen zu teuren Komplettersatzteilen werden.
Regelmäßige jährliche Inspektionen schaffen eine sicherere Umgebung und begrenzen die rechtlichen Risiken im Zusammenhang mit herabfallendem Mauerwerk. Die Einhaltung von Standards wie ASTM C270 und die Überwachung der Durchbiegungsgrenzen stellen dies sicher Steinverkleidung bleibt auch unter Umweltbelastungen sicher. Diese Wartungsabläufe schützen die Fassade des Gebäudes, verlängern dessen Lebensdauer und bieten eine zuverlässige Grundlage für ein langfristiges Facility Management.
