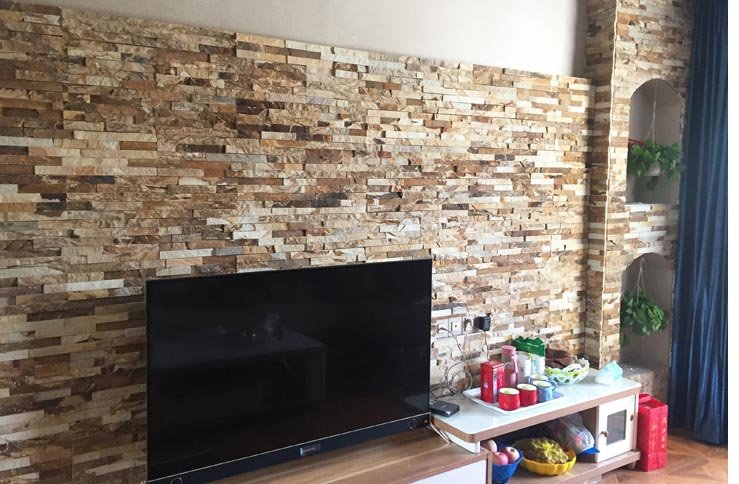
L'attrait de pierre empilée réside dans son élégance robuste et son attrait intemporel. Ce matériau polyvalent peut transformer des murs ordinaires en éléments architecturaux saisissants. Cependant, maîtriser l’art d’installer des coins de panneaux de pierre empilés est crucial pour obtenir un aspect professionnel et soigné. Une installation appropriée dans les coins garantit non seulement l’attrait esthétique, mais également l’intégrité structurelle.
Matériaux et outils requis
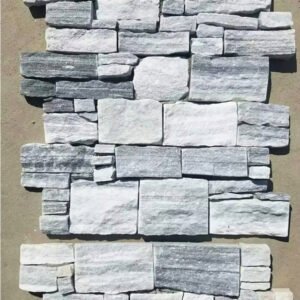
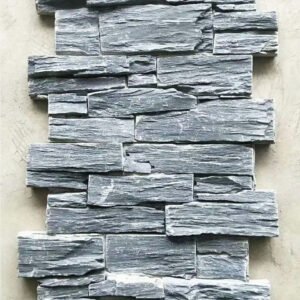
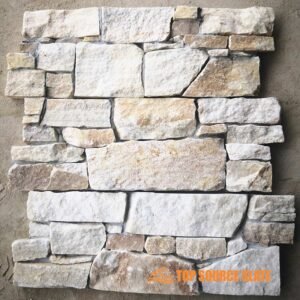
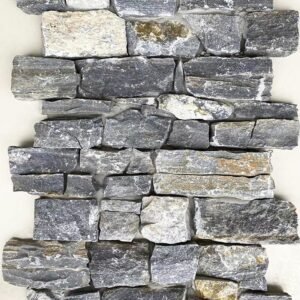
Choisir les bons matériaux est la première étape vers un projet réussi. Différents types de coins en pierre empilés, comme la pierre naturelle ou le placage manufacturé, offrent des textures et des couleurs variées. Les outils essentiels comprennent une scie à maçonnerie, des truelles et un niveau à bulle. N'oubliez pas l'équipement de sécurité : des gants, des lunettes de sécurité et un masque anti-poussière sont indispensables.

Préparation de la surface
Pour de meilleurs résultats de liaison, la surface doit être propre, sèche et présenter des pores ouverts pour l’adhérence. Il faut éviter d'adhérer aux surfaces lisses, non poreuses ou polies. Les installations intérieures de panneaux de pierre empilés imbriqués peuvent être installées sur des cloisons sèches en gypse ou du contreplaqué de qualité extérieure jusqu'à 10 pieds de hauteur. Un panneau de ciment est recommandé pour les murs intérieurs dépassant 10’ de hauteur. Pour les applications extérieures, les coins de panneaux de pierre empilés emboîtables peuvent être installés directement sur des briques, des blocs de maçonnerie, du béton durci ou des panneaux de ciment.
Commencez par nettoyer soigneusement le mur pour éliminer la poussière et les débris. Appliquez une barrière contre l'humidité pour protéger la structure sous-jacente des dégâts d'eau. Ensuite, installez une latte métallique, qui fournit une base solide à laquelle le mortier et la pierre peuvent adhérer. Cette étape est essentielle pour garantir que les panneaux de pierre empilés restent bien en place.
Planification de votre mise en page
Mesurez et marquez le mur pour planifier votre aménagement avec précision. La pose à sec des pierres empilées permet de visualiser l’aspect final et permet des ajustements avant l’installation permanente. Choisissez un motif qui complète votre espace, qu'il s'agisse d'une grille uniforme ou d'une disposition plus aléatoire pour un effet naturel.
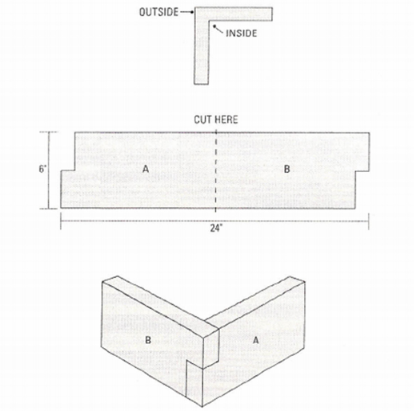
Couper un coin extérieur en onglet
1. Réglez la scie à un angle de 45 degrés. Avec la face texturée des panneaux de pierre empilés extérieurs tournée vers le haut et le rebord éloigné de vous, effectuez une coupe à 45 degrés.
2. Mettez le côté B de côté. Retournez le côté A de manière à ce que le devant texturé des panneaux de pierre empilés extérieurs soit orienté vers le bas et que le bord de la coupe précédente soit vers la lame de scie. Ajustez la scie à 90 degrés et effectuez une deuxième coupe à 45 degrés aussi près que possible de l'extrémité du panneau. Jetez le matériau qui a été coupé.
3. Montez la deuxième section en ajoutant de l'adhésif à l'arrière du panneau de pierre empilé et un petit cordon sur le bord où les panneaux se rencontreront.
4. Rapprochez les côtés coupés des panneaux et fixez-les avec des vis.
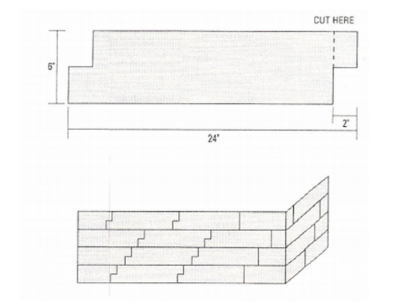
Couper un coin intérieur en onglet
1. Ajustez la scie à un angle de 45 degrés avec le côté texturé vers le haut et la lèvre éloignée de vous. Coupez à un angle de 45 degrés et placez le côté A sur le côté.
2. Retournez le côté B du panneau, avec la face texturée tournée vers le bas et le bord coupé précédent vers la lame de scie. Coupez l'extrémité des panneaux de pierre empilés intérieurs à un angle aussi proche de 45 degrés, puis jetez la section retirée.
3. Montez la deuxième section du panneau découpé et dissimulez le joint d'angle avec la peinture du kit de retouche.
-
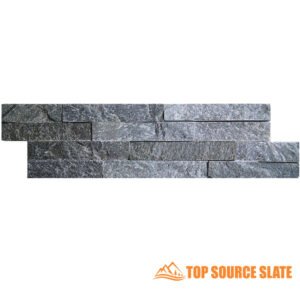
 Carreaux à face fendue 3D en grès de la meilleure qualité pour l'intérieur et l'extérieur
 -
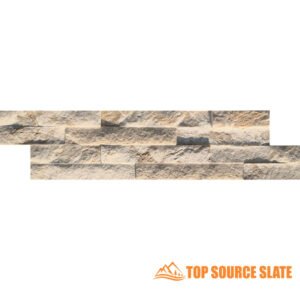
 Prix de gros Carreau de mosaïque à face fendue en quartz de cuivre rustique
 -
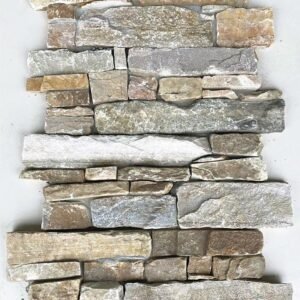
 Huître de carreaux de mosaïque à face fendue scintillante chinoise de haute qualité
 -
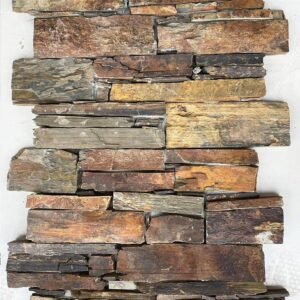
 La Chine fabrique des carreaux de mosaïque de quartzite à face fendue d'huîtres
 -
 Carreau de mosaïque à face fendue en brique grise rotia de fabrication professionnelle 10*36cm
 -
 Panneau de grand livre à face fendue blanc royal d'usine de Chine
-
 Prix de gros revêtement extérieur en pierre naturelle
 -
 Panneaux de pierre Oyster Quartz Z 550 x 200
 -
 Panneaux de revêtement en pierre naturelle de quartz en forme de Z gris nuageux
 -
 Bardage panneau Z ardoise noire
 -
 Bardage en pierre de quartz blanc naturel
 -
 Revêtement en pierre de quartz de diamant bleu pour la décoration de mur extérieur
Couper les panneaux de pierres empilées.
Veuillez suivre les étapes ci-dessous pour obtenir une apparence naturelle empilée à la main :
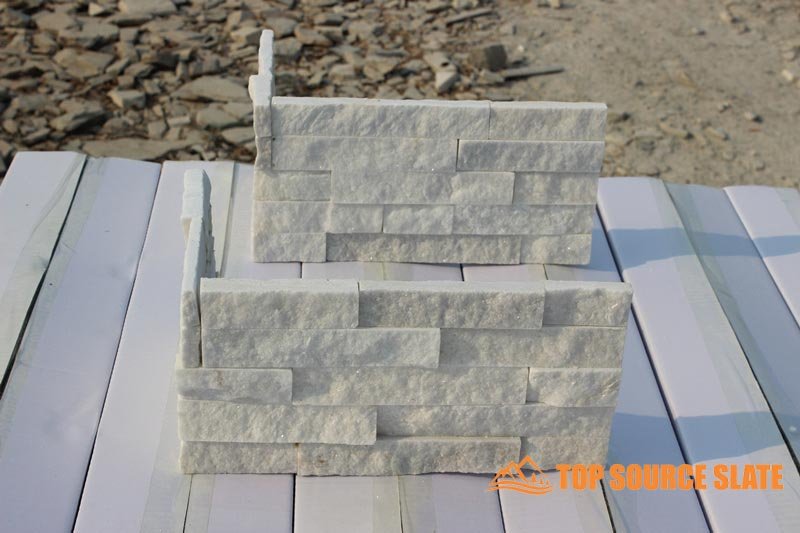
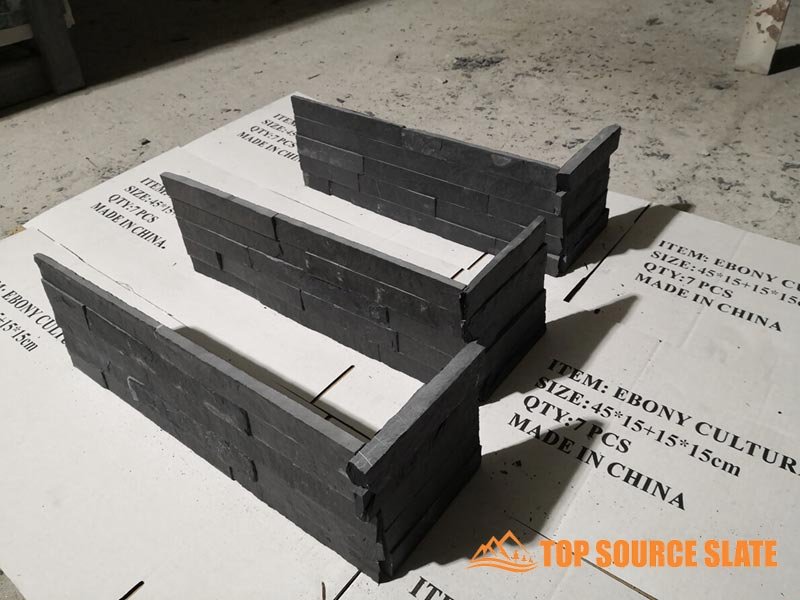
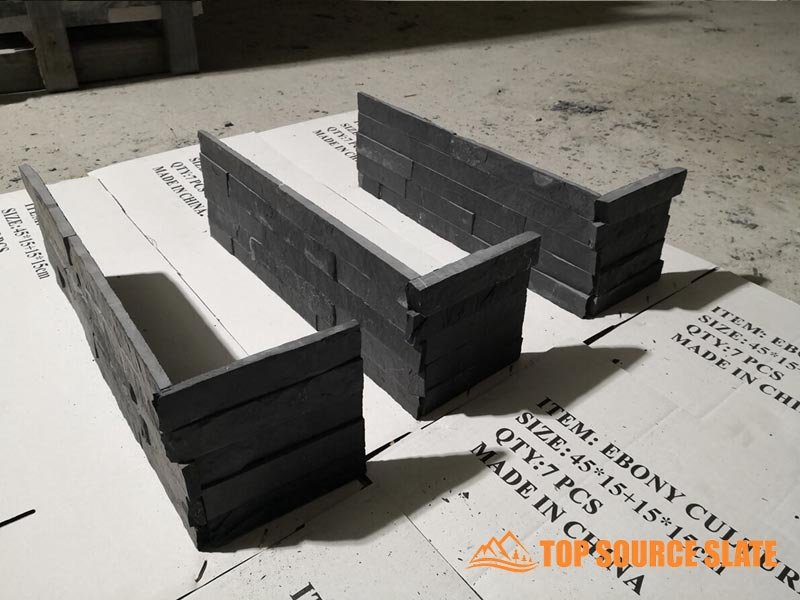
- Les coins de panneaux de pierre empilés sont utilisés pour finir les coins extérieurs avec des bords naturels. Les coins intérieurs doivent être coupés en onglet à partir de panneaux simples. Orientez le coin extérieur de manière à ce que les lèvres plates soient vers le haut.
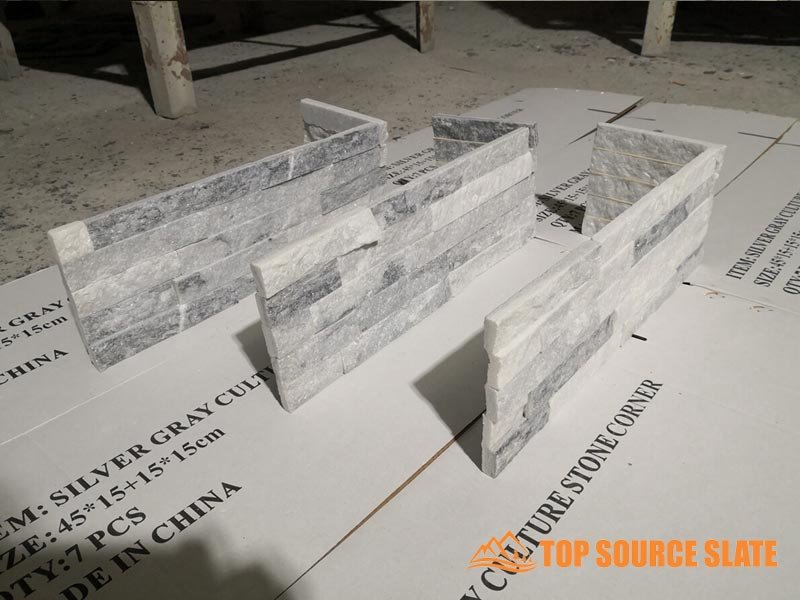
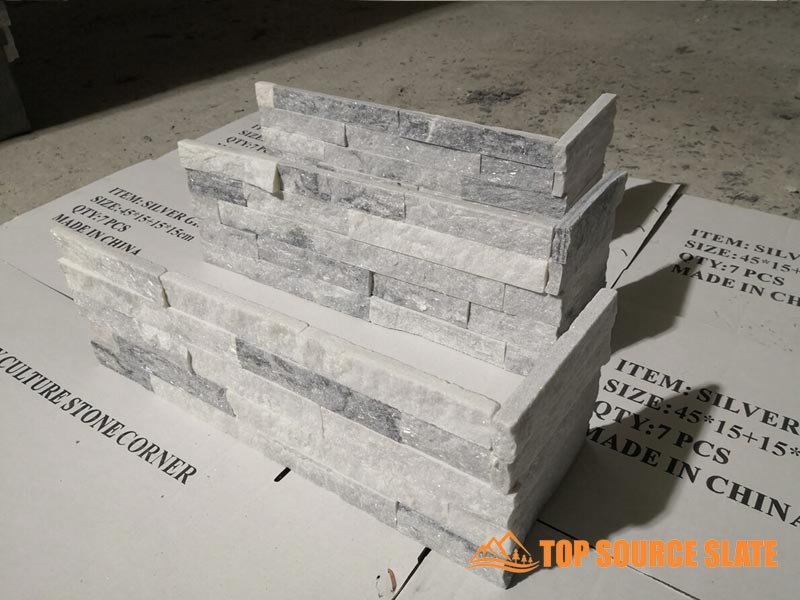
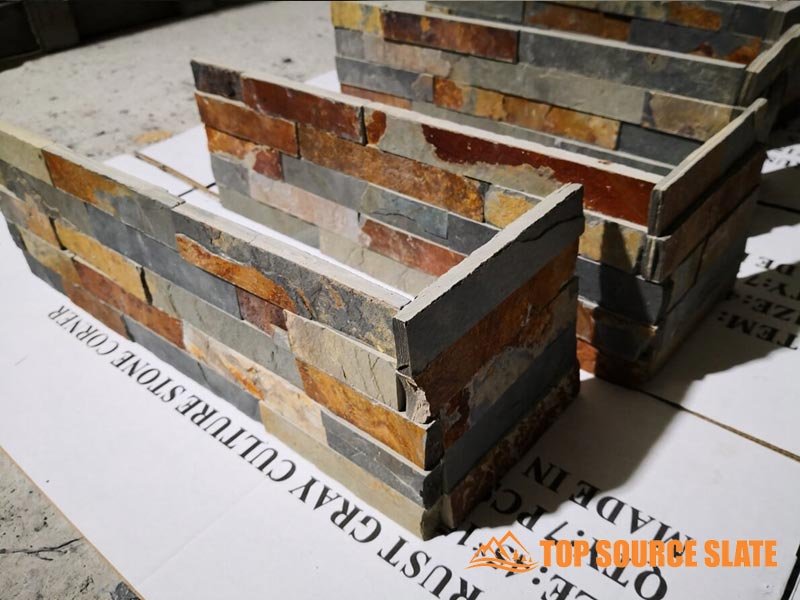
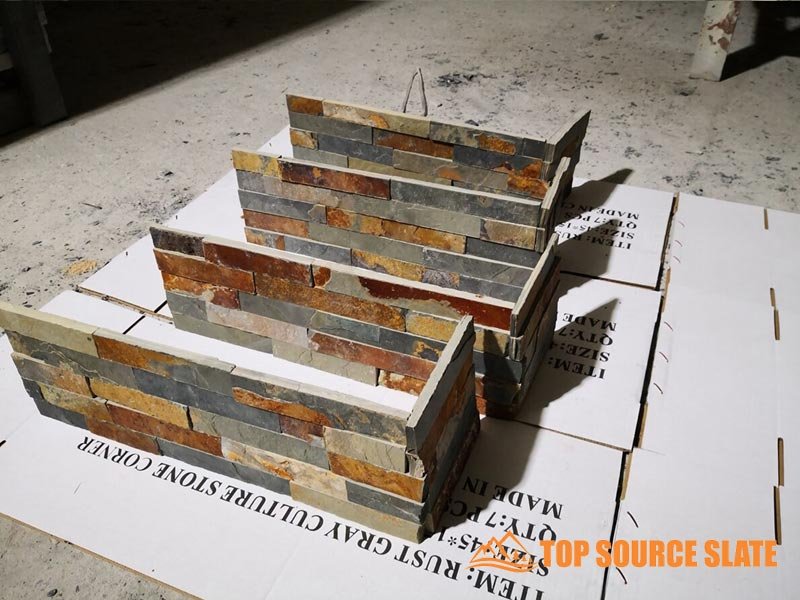
- Les panneaux d’angle empilés ont des extrémités rocheuses naturelles des deux côtés et ont la forme illustrée. Ils mesurent 24" de long et 6" de haut et couvrent environ un pied carré.
- Ajustement à sec de panneaux de pierre empilés 6 x 24 menant aux languettes de verrouillage du coin extérieur. Coupez le premier panneau pour aligner les fentes du dernier panneau avec les languettes de verrouillage du coin extérieur. Les panneaux de coin doivent être coupés en deux morceaux à la longueur désirée et assemblés à la main autour du coin extérieur, comme illustré. Un panneau de coin est nécessaire pour compléter le pied linéaire du coin extérieur.
- Continuez l'installation en retirant une extrémité décalée de la pièce de pierre empilée et placez-la à côté de la pièce d'angle installée pour continuer la même rangée. Utilisez un adhésif de construction et des vis pour installer la rangée de panneaux qui s'éloigne du coin.
- Alternez la taille des pièces de coin pour décaler les joints. Ne pas décaler comme une brique, mais modifier la taille au hasard pour masquer les motifs des joints.
Utilisez des outils comme une scie à eau ou une meuleuse d'angle pour couper les panneaux de pierre empilés emboîtables montés en rack à la taille requise. La sécurité est primordiale : portez toujours un équipement de protection lors de la coupe. Réaliser des coupes précises est essentiel pour un ajustement parfait, en particulier dans les coins où la précision compte le plus.
Mélanger et appliquer le mortier
Pour toutes les installations, un mortier modifié aux polymères est recommandé. Pour les installations commerciales, ainsi que
Pour les installations extérieures de plus de 10’ de hauteur, un mortier polymère avec additif au latex est fortement recommandé.
Choisir le bon mortier est crucial pour une adhérence solide. Suivez attentivement les instructions de mélange pour obtenir la bonne consistance : ni trop sèche, ni trop humide. Appliquez une couche de mortier sur le mur pour améliorer l'adhérence. Cette couche initiale maintiendra fermement en place les panneaux de pierre naturelle empilés.
Installation des pièces d'angle
Les pièces d'angle en pierre empilées sont la clé de voûte de votre projet. Ils fournissent le cadre et donnent le ton à l’ensemble de l’installation. Placez la première pierre avec soin, en vous assurant qu'elle est parfaitement alignée et de niveau. Cette étape est fondamentale pour une finition impeccable.
Comment installer la pierre empilée ou la pierre de rebord
Comment installer un foyer en pierre empilé
Les avantages et les inconvénients du revêtement extérieur en pierre moderne
Poser les pierres empilées
Commencez à poser les pierres de bas en haut. Cette méthode permet de maintenir la stabilité de la structure. Assurez-vous que chaque pierre est de niveau et maintenez des joints cohérents entre les coins des panneaux de pierre empilés en pierre de qualité. Vérifiez régulièrement le niveau et l'aplomb pour maintenir l'installation droite et uniforme.
Finir les coins de pierre empilés
Inspectez les coins pour déceler tout espace ou vide. Remplissez les petits espaces avec du mortier supplémentaire et lissez les joints pour un aspect propre et professionnel. L’attention portée aux détails lors de cette étape peut faire une différence significative dans l’apparence générale.
Nettoyage et étanchéité
Retirez l'excédent de mortier des pierres à l'aide d'une brosse douce ou d'une éponge. Un nettoyage minutieux des pierres révèle leur beauté naturelle. Enfin, appliquez un scellant pour protéger la pierre de l'humidité et des taches. Le scellant rehausse également la couleur de la pierre, lui donnant une finition éclatante.
Maîtriser l'installation de coins de panneaux de pierre empilés transforme un simple projet en une œuvre d'art. Avec une planification minutieuse, une exécution précise et une attention aux détails, vous pouvez obtenir une finition époustouflante et durable qui met en valeur n’importe quel espace.
FAQ
Comment réaliser des angles intérieurs avec de la pierre de culture ?
Les coins intérieurs avec de la pierre de culture peuvent être obtenus en coupant les bords des pierres à un angle de 45 degrés à leur point de rencontre. Cela crée un coin propre et homogène. Assurez-vous d'utiliser un adhésif puissant ou un mortier pour fixer les pierres en place.
Quelle est la meilleure façon de couper des pierres empilées ?
Les pierres empilées peuvent être taillées à l’aide de quelques outils différents selon le type de pierre :
- Pour la pierre naturelle : Une scie à eau équipée d'une lame diamantée est idéale pour des coupes précises.
- Pour la pierre reconstituée : Une meuleuse d'angle avec une lame diamantée peut être utilisée, ou une scie à carrelage pour les pièces plus fines.
- Portez toujours un équipement de sécurité approprié, notamment des lunettes et des gants, lorsque vous taillez de la pierre.
Que pouvez-vous faire avec la pierre empilée ?
La pierre empilée est polyvalente et peut être utilisée de différentes manières :
- Créez des murs d'accent à l'intérieur ou à l'extérieur.
- Couvrez les contours de la cheminée pour un look rustique ou moderne.
- Améliorez l'apparence des colonnes ou des piliers.
- Utiliser comme dosserets dans les cuisines ou les salles de bains.
- Décorez les murs du jardin ou les éléments paysagers.
Comment installer un coin en pierre de grand livre ?
L'installation de coins en pierre de rebord implique :
- Préparez la surface en la nettoyant et en vous assurant qu’elle est plate et sèche.
- Appliquez du mortier ou de la colle sur la pierre et le mur.
- Appuyez fermement sur les pierres d'angle en place, en vous assurant qu'elles sont de niveau et alignées.
- Remplissez les espaces avec du mortier ou du coulis et nettoyez l'excédent de matériau.
- Laissez l’installation sécher et durcir conformément aux instructions du produit.
Comment réaliser des coins avec des carreaux de pierre empilés ?
Les coins avec des carreaux de pierre empilés impliquent généralement :
- Couper les carreaux pour qu'ils s'adaptent parfaitement au coin.
- Utilisation de pièces d'angle spécialement conçues pour les pierres empilées afin de garantir un aspect homogène.
- Appliquer de la colle ou du mortier sur le carrelage et sur le mur.
- Appuyez fermement sur les carreaux pour les mettre en place, en vous assurant qu'ils sont de niveau et correctement alignés.
- Jointoyer entre les carreaux une fois la colle durcie et nettoyer tout excès de coulis.
Armé des connaissances acquises grâce à ce guide de l'acheteur complet, vous êtes maintenant équipé pour choisir, installer et entretenir en toute confiance des pierres empilées. Embrassez l'allure enchanteresse etpolyvalence de la pierre empilée, lui permettant de métamorphoser votre environnement en un chef-d'œuvre à couper le souffle et intemporel.
Si vous cherchezfabricants et fournisseurs de pierres empilées, nous vous recommandons de vérifier nos produits.
Nous avons plus de 15 ans d'expérience à l'exportation et offrons des échantillons avant de passer la commande. Pour obtenir un devis personnalisé,Contactez-nous maintenant!
