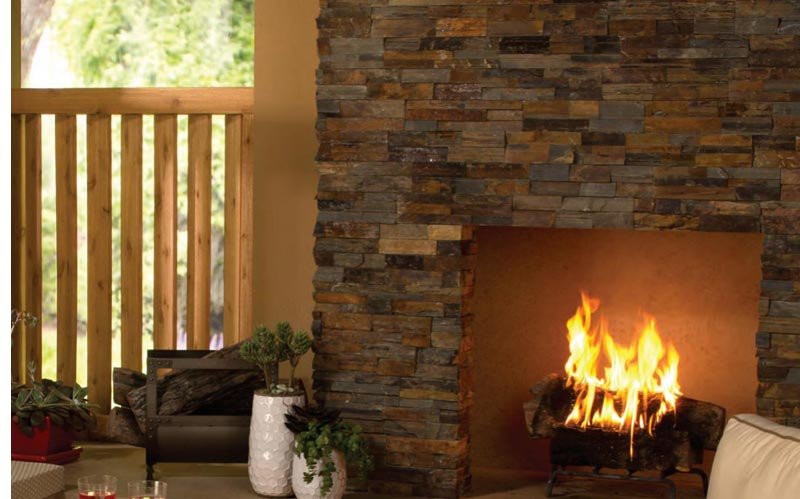
Installing stacked stone tiles is a rewarding process that enhances the aesthetic appeal of both interior and exterior spaces. However, following the correct installation procedures is essential to ensure a professional finish and long-lasting durability. This guide outlines the steps and considerations necessary to install stacked stone tiles successfully.
-
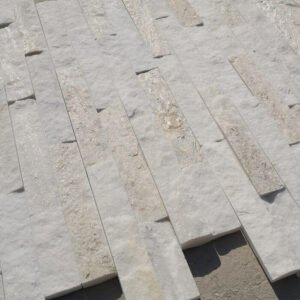 China new colors quartzite stacked stone panels
 -
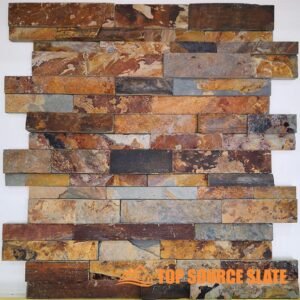 Rough rusty slate stacked stone ledger panel 6 in. x 24 in.
 -
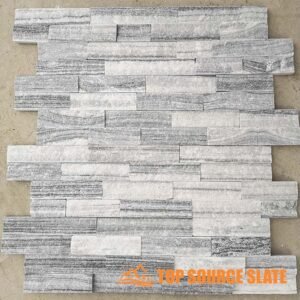 Rough alaska grey stacked stone ledger panel 6 in. x 24 in.
 -
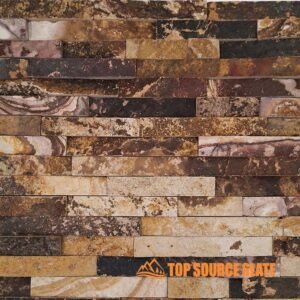 Rough sandstone stacked stone ledger panel 6 in. x 24 in.
 -
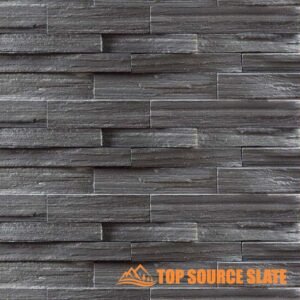 Natural black slate rough ledger panel 6 in. x 24 in.
 -
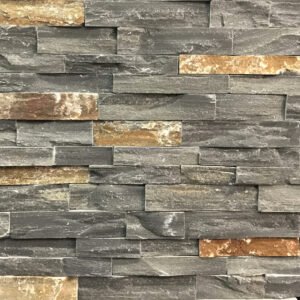 Sierra Blue Ledger Panel 6 in. x 24 in. Natural Stone Quartzite
 -
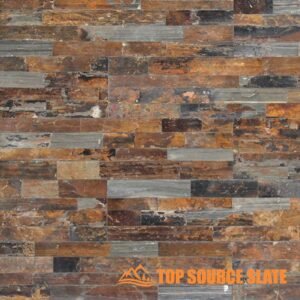 California gold slate natural ledge stone panels- 6 x 24
 -
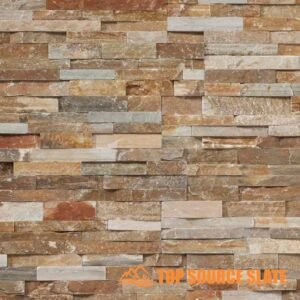 Golden harvest slate panel ledger – 6 x 24
 -
 High quality gray stacked stone exterior wall cladding
 -
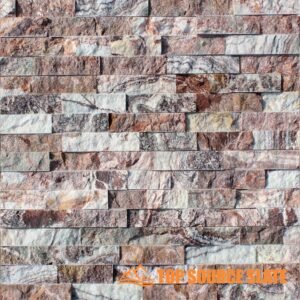 Interior and exterior natural stone walling products
 -
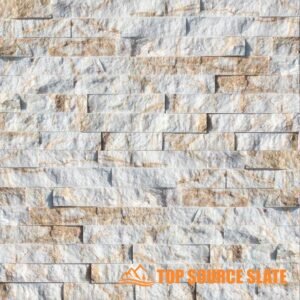 Chinese factory natural stone exterior wall cladding
 -
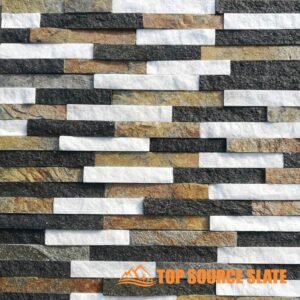 Hot selling mix quartz natural wall stone cladding
Stacked Stone: A Complete Buyer’s Guide【update】
8 Factors to Choose a Natural Stone Wall Cladding Wholesaler
How to Choose Natural Stacked Stone Panels For Your Home
1. Estimating Materials
Accurate estimation of materials is the first step toward a successful installation. Begin by measuring the height and width of the area to be covered. Multiply these measurements to determine the total square footage. If your project includes windows, doors, or other openings, subtract the square footage of these areas from your total.
Formula:
- Wall Area: Length x Height
- Opening Area: Width x Height
- Wall Area Covered by Corners: Linear Feet of Corners x 0.75
- Total Stone Needed: Wall Area – Opening Area – Wall Area Covered by Corners
Allow additional stacked stone tiles for cutting and trimming. Different manufacturers may have variations in packaging coverage based on joint type, so ensure you account for this when ordering.
2. Required Tools and Materials
The success of your installation depends on having the correct tools and materials. Below is a checklist of essential items:
- Tools:
- Safety Glasses & Gloves
- Dust Mask
- Tape Measure
- Level
- Hammer Stapler, Power Staple Gun
- Trowels (Mason’s, Margin, and Pointing)
- Grout Bag
- Masonry Saw with Diamond Blade
- Whisk Broom, Masonry Brush
- Materials:
- Stacked Stone Tiles
- Sheathing Membrane (Breather Type)
- Galvanized Metal Lath
- Type S or N Mortar
- Fasteners for Lath (Conforming to ASTM C1063)
- Flashing and Weep Screed (as required)
3. Surface Preparation
Proper surface preparation ensures that stacked stone tiles adhere correctly and maintain their integrity over time.
Wood or Steel Stud Walls
For both interior and exterior applications, a sheathing membrane (breather type) should be installed over the substrate. Galvanized metal lath is then attached using appropriate fasteners. Apply a scratch coat of mortar to the lath to create a rough surface for better adhesion of natural stacked stone tiles.
Concrete and Masonry
For untreated surfaces, a scratch coat is applied directly after ensuring the surface is clean. If the surface has been treated or painted, additional preparation such as sandblasting or applying a sheathing membrane and lath may be required.
Cement Board
Cement boards can be used as a substrate in place of a scratch coat and lath, particularly for interior installations like fireplaces. Ensure that the cement board is properly fastened and that seams are taped and sealed.
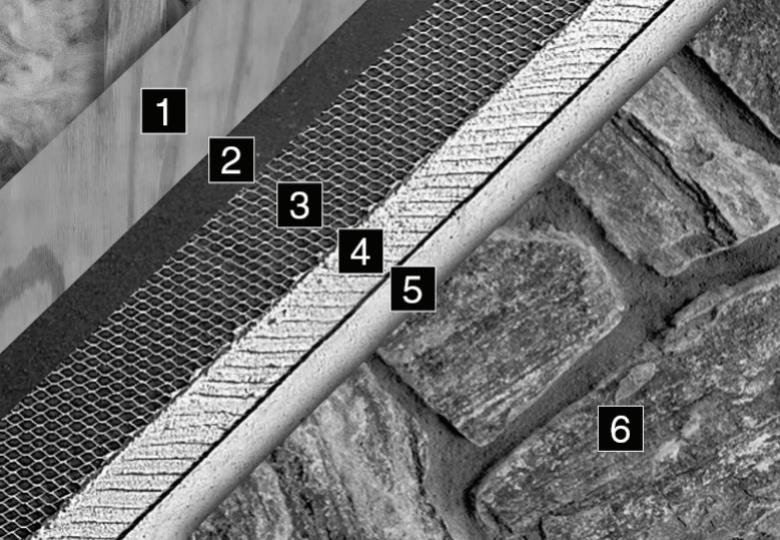
metal lath, [4] Mortar/scratch coat, [5]
Mortar setting bed, [6] NTSV
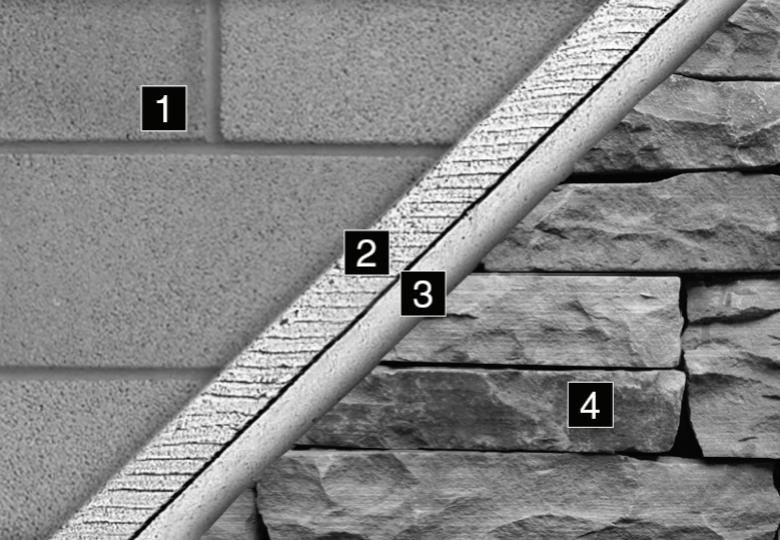
[2] Mortar/scratch coat, [3] Mortar setting
bed, [4] NTSV
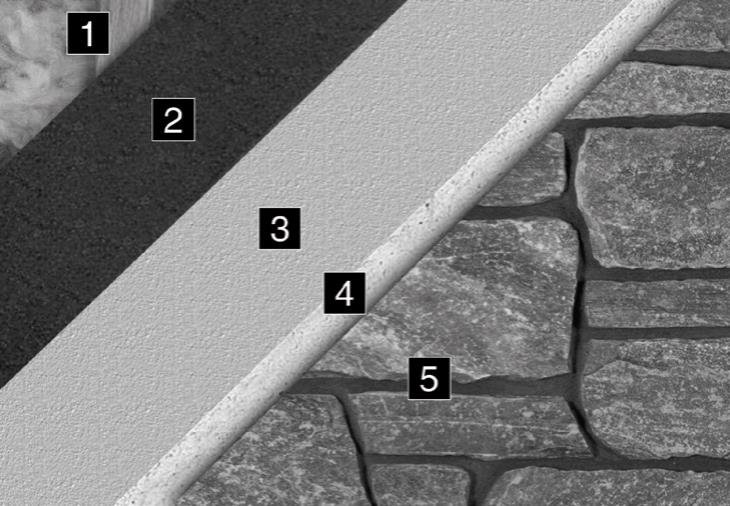
board, [4] Mortar setting bed*, [5] NTSV
*Mortars that meet the requirements of
ANSI A118.4 or ANSI A118.15
4. Mortar Mixing and Application
The correct mixing and application of mortar are critical to the success of a stacked stone tile installation. The mortar must provide strong adhesion, flexibility, and resistance to environmental conditions to ensure a long-lasting and visually appealing finish.
A. Types of Mortar
When working with stacked stone tiles, it’s essential to select the appropriate type of mortar:
- Type N or Type S Mortar: These are the most commonly used mortars for adhered stone veneer applications. Type S mortar is stronger and more durable, making it suitable for exterior installations or areas exposed to high stress. Type N mortar is easier to work with and is typically used for interior walls and general-purpose applications.
- Premixed Mortars: For convenience and consistency, premixed mortars that meet the requirements of ASTM C270 (for Type S or N mortars) or CAN/CSA-A179 are preferred. These products are factory-blended to ensure the right proportions of ingredients, which helps maintain uniform strength and performance across the installation.
- Polymer-Modified Mortars: For specific stone products, polymer-modified mortars that meet the requirements of ANSI A118.4 or A118.15 are recommended. These mortars offer enhanced bonding strength and flexibility, which are particularly useful in areas with high moisture levels or temperature variations.
Important: Always refer to the mortar manufacturer’s specifications to ensure compatibility with the type of stacked stone tiles you are using. Using the wrong type of mortar can lead to adhesion failure, cracking, or other issues over time.
B. Mixing Mortar
Proper mortar consistency is crucial for a successful installation:
- Proportions: Mix the mortar according to the manufacturer’s instructions. The ratio of water to mortar mix is key to achieving the correct consistency. Too much water will weaken the mortar, while too little will make it difficult to work with.
- Consistency: The mortar should be mixed to a firm, moist consistency. A good test is to hold the trowel vertically; if the mortar sticks to the trowel without dripping, it is the right consistency. Mortar that is too dry and crumbly will not bond well, and overly wet mortar will be weak and messy to apply.
- Mixing Technique: Mortar can be mixed in a mortar tray, wheelbarrow, or with a mechanical mortar mixer. Mix in small batches that can be used within a workable time frame to avoid it drying out. If the mortar begins to stiffen before application, re-temper it by adding a small amount of water and remixing.
Tip: Avoid re-tempering colored mortar, as this may cause the color to lighten and result in uneven finishes.
C. Applying the Mortar Setting Bed
Once the mortar is mixed to the correct consistency, it’s time to apply it:
- Scratch Coat: If a scratch coat is required, apply a 1/2-inch to 3/4-inch thick layer of Type N or Type S mortar over the prepared surface. The lath should be completely encapsulated with mortar. Once the mortar is thumbprint dry, score the surface horizontally to create grooves that will help the mortar setting bed bond effectively.
- Setting Bed: Apply a 1/2-inch thick mortar setting bed to the scratch coat or directly to the back of each stone. When applying mortar to the back of natural stacked stone tiles, ensure complete coverage to avoid open pockets where water could accumulate. This is especially important for exterior installations.
Tip: Do not spread mortar over more than a manageable area (8 to 10 square feet) at a time to prevent it from setting before the stone is applied.
5. Installing Stacked Stone Tiles
The installation of stacked stone tiles requires attention to detail and proper technique to ensure a durable and visually appealing finish. Below are the detailed steps involved in the installation process:
A. Apply the Mortar Setting Bed
Begin by applying a mortar setting bed to the prepared surface. This can be done in two ways:
- Direct Application to the Scratch Coat: Spread a 1/2-inch thick layer of mortar evenly over the scratch coat. Use a trowel to create a smooth, consistent surface that will allow the stone tiles to adhere securely.
- Back Buttering the Stone: Alternatively, apply the mortar directly to the back of each stacked stone tile, ensuring that the entire surface is covered. This method helps avoid any open pockets where water could accumulate, which is particularly important in exterior installations.
Note: The mortar setting bed should not be spread over more than a manageable area (approximately 8 to 10 square feet) to prevent it from setting before the stone is applied.
B. Place Corner Stones First
Corner stones should be installed before the flat stacked stones to create a clean, cohesive look:
- Alternate the Long and Short Ends: Start by placing the stacked stone tile corners, alternating the long and short ends to mimic the natural appearance of the stone. This staggered approach helps avoid the formation of visible vertical joints and ensures a more authentic stone pattern.
Tip: If working with heavy stones or if the wall surface is particularly large, consider using a temporary starter strip, such as a 2×4, at the bottom of the wall. This will help maintain a uniform, straight line and consistent clearance from the ground, preventing slippage of the stones before the mortar sets.
C. Install Flat Stacked Stone Tiles
Once the corner stones are in place, begin installing the flat stacked stone tiles:
- Work Inward from the Corners: Start from the corners and work toward the center of the wall. This ensures that the pattern remains consistent and well-balanced.
- Press Firmly: Set each stone into the mortar with a slight wiggle to establish a strong bond. Apply enough pressure so that mortar extrudes around the edges of the stone. Avoid moving the stacked stone tiles once it has been set, as this can break the bond and compromise the installation. If this happens, remove the stone, apply fresh mortar, and reset it.
Tip: For a tight-fitted or dry-stacked appearance, install the stones from the bottom up, ensuring that each row is level. Horizontal chalk lines every 12 to 16 inches can serve as a guide to keep the installation straight and even.
D. Installing with a Tight-Fitted Joint
Tight-fitted joints are a popular option for achieving a seamless, modern look with stacked stone tiles:
- Bottom-Up Installation: Begin the installation at the bottom of the wall, working your way up. This approach helps prevent mortar from dropping onto the stones below, which could cause staining.
- Remove Excess Mortar: As you place each stone, remove any excess mortar from the edges to allow the next stacked stone tiles to fit tightly against it. This process creates a clean, flush finish without visible grout lines.
- Stagger the Stones: When installing horizontally shaped stones like ledgestones, stagger them to avoid long, continuous vertical joints. This will enhance the natural look of the installation.
Tip: Running a level horizontal chalk line every 12 or 16 inches up the wall will help you maintain alignment and keep the joints consistently spaced.
Also explore the How to Install Stacked Stone or Ledge Stone
How to Install a Stacked Stone Fireplace
How to Install Stacked Stone Panels Corners
6. Grouting and Finishing
Once stacked stone tiles are securely in place, the next step is to grout the joints and apply the finishing touches. Proper grouting and finishing not only enhance the aesthetic appeal of the installation but also contribute to the longevity of the wall.
A. Grouting
Grouting the joints between the stacked stone tiles helps to stabilize the tiles and seal the wall from moisture:
- Use a Grout Bag: Fill a grout bag with the mortar mixture and cut the tip to create a 1/2-inch opening. This allows for precise application of the grout into the joints. Squeeze the bag gently to extrude the grout into the gaps between the stones, filling them.
- Control the Flow: Adjust the consistency of the grout as needed to ensure a smooth flow. The grout should be firm enough to stay in place but not too thick to prevent it from extruding easily. If the grout is too dry, it may not fill the joints; if too wet, it may sag or smear.
- Consistent Joint Width: Pay attention to the width of the joints, aiming for consistency throughout the installation. This will contribute to a professional and polished finish.
Tip: Work in small sections to ensure that the grout does not begin to set before you have a chance to finish smoothing and cleaning the joints.
B. Finishing the Joints
Once the grout has reached a thumb-print dry stage (firm enough to hold its shape but still workable), it’s time to finish the joints:
- Compact the Grout: Use a jointing tool to compact the grout into the joints. This ensures that the joints are filled and helps to create a solid bond between the stones. Compacting the grout also prevents water from seeping into the joints, which can lead to erosion over time.
- Smooth the Joints: After compacting, smooth the joints with a masonry brush or whisk broom. This will remove excess mortar and give the joints a clean, finished look. Take care not to use a wet sponge, as this can cause the mortar to smear and stain the stacked stone tile surface, leading to a less professional appearance.
- Final Cleaning: Once the mortar has been set, brush or wash the wall to remove any remaining loose mortar or dust. Avoid using harsh chemicals or acid-based cleaners, as they can damage the stone or alter its appearance. If additional cleaning is needed, consult with your stone dealer for recommended products that are safe to use on natural stone.
Tip: In some cases, colored mortar is used to enhance the overall appearance of the wall. If using colored mortar, ensure that it is mixed consistently to avoid variations in color throughout the installation.
7. Sealing and Maintenance
Proper sealing and regular maintenance are essential to preserving the beauty and durability of your stacked stone tiles installation. Sealing helps protect the stone from moisture, stains, and environmental damage, while maintenance ensures that the installation remains in excellent condition over time.
A. Sealing Stacked Stone Tiles
Sealing is an important step, especially in areas exposed to moisture or potential staining:
- Type of Sealer: Use a silane-based breathable sealer that is non-film-forming. This type of sealer penetrates the stone, creating a protective barrier that prevents moisture ingress without trapping it inside the stone, which can lead to damage in freeze-thaw cycles.
- Application: Apply the sealer evenly across the entire surface of the stacked stone tiles, ensuring thorough coverage. It’s advisable to apply a small test area first to check for any unwanted changes in appearance, such as a slight yellowing effect that some sealers can cause.
- Reapplication: Sealers typically need to be reapplied periodically, depending on the level of exposure and wear. Follow the manufacturer’s instructions regarding the frequency of reapplication to maintain optimal protection.
Tip: Some sealers may alter the appearance of the stacked stone slightly, so it’s important to choose a product that meets your aesthetic requirements. Always perform a test application on a small, inconspicuous area first.
B. Cleaning and Maintenance
Regular cleaning and maintenance are vital for keeping your stacked stone tiles installation looking its best:
- Routine Cleaning: To remove dust or light dirt, wash the stone surface with a garden hose, starting at the top and working your way down. For more concentrated dirt, wet the stone thoroughly and apply a mixture of detergent or granulated soap with water. Use a soft bristle brush to scrub the surface gently, and rinse off immediately with clean water.
- Avoid High-Pressure Washing: High-pressure washing or sandblasting can damage the stone and mortar joints. If using a power washer, choose a nozzle that produces a wash-type spray rather than a concentrated blast of water. Keep the spray nozzle at a safe distance to avoid damaging the stone surface.
- Efflorescence Removal: Efflorescence, a white powdery deposit that sometimes forms on stone surfaces, can be removed by scrubbing with a stiff bristle brush and clean water. For stubborn cases, use a mixture of five parts water to one part white vinegar. Rinse thoroughly with clean water immediately after treatment.
Tip: Avoid using harsh chemicals, such as acids, or abrasive tools like wire brushes, as they can damage the stone and alter its appearance.
C. Long-Term Maintenance
In addition to regular cleaning, some long-term maintenance considerations include:
- Inspect for Damage: Periodically inspect the installation for signs of damage, such as cracks or loose stones. Address any issues promptly to prevent further deterioration.
- Reapply Sealer: Depending on the environment and level of exposure, you may need to reapply the sealer every few years. Follow the sealer manufacturer’s guidelines for reapplication intervals.
- Avoid Harsh Environments: If the installation is located in an area with high exposure to chemicals, such as near a pool, take extra care with sealing and maintenance. Chemical exposure can lead to staining and degradation of the stone over time.
Tip: Consult with your stone supplier for specific maintenance recommendations based on the type of stone used and the environmental conditions it will be exposed to.
8. Additional Considerations
Expansion and Control Joints
Stacked stone tiles should not be installed over expansion or control joints. Consult local building codes or an engineer for specifications regarding these joints.
Installation Over Insulated Concrete Forms (ICF)
When installing over ICF, follow the specific guidelines provided by the ICF manufacturer. This may involve additional steps to ensure proper adhesion and waterproofing.
Watertable/Sills and Trim Stones
These elements add a finished architectural look to your project. Use galvanized metal support brackets and construction adhesive to install water tables/sills, ensuring they are properly flashed and caulked to prevent water intrusion.
Conclusion
Proper installation of stacked stone tiles enhances the durability and aesthetic appeal of your project. By following these guidelines, you’ll achieve a stunning result that adds value and beauty to any space. Always remember to consult local building codes and manufacturer recommendations for specific requirements tailored to your project.
Top Source Slate excels in all these areas, making us the best accomplice in your stone cladding wishes, whether you’re working on outside house stone cladding or an indoor characteristic wall. Contact us today to learn more about how we will help your next assignment.

