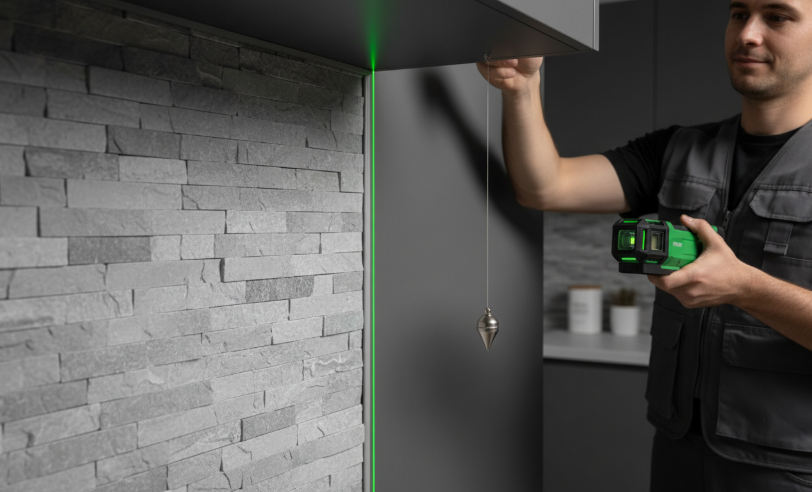
Precisione in curva & il dettaglio dei bordi funge da salvaguardia principale contro l'aumento dei costi di manodopera e la responsabilità del progetto nelle installazioni in muratura di cucine di fascia alta. Quando le squadre trascurano la fisica della transizione delle pietre, rischiano di creare bordi affilati ed esposti che non superano le ispezioni di sicurezza e raccolgono detriti organici in ambienti di preparazione degli alimenti ad alto traffico. Le risoluzioni eseguite in modo inadeguato portano a ritardi immediati, erodendo i margini di profitto del progetto attraverso ripetute visite in loco ed evitabili sprechi di materiale.
Questo guida stabilisce uno standard tecnico per la gestione di giunzioni murarie complesse, valutando nello specifico la scelta tra angoli ad L di fabbrica e tagli obliqui manuali. Analizziamo l'integrazione della pietra robusta con le superfici lisce del muro a secco e forniamo una procedura operativa standard per il rivestimento di davanzali profondi. Di confrontando la durabilità strutturale delle finiture metalliche con la pietra tradizionale toro, questo briefing fornisce i protocolli necessari per garantire che ogni finitura della muratura soddisfi i requisiti architettonici professionali.
Perché la finitura dei bordi è il segno distintivo di un lavoro di backsplash professionale
La terminazione professionale dei bordi differenzia le caratteristiche architettoniche di fascia alta della pietra dalle ristrutturazioni standard proteggendo il substrato dall'umidità e creando una transizione visiva senza soluzione di continuità tra strutture robuste e superfici interne lisce.
Flusso visivo e transizioni senza soluzione di continuità
I trattamenti sui bordi puliti forniscono la lucidatura visiva necessaria per elevare a installazione in pietra. I professionisti utilizzano queste transizioni per passare in modo naturale dalle robuste texture 3D dell'ardesia o della quarzite a faccia divisa al cartongesso piatto o ai mobili. Eliminando il supporto esposto e l'adesivo visibile, l'alzatina appare come un elemento architettonico deliberato piuttosto che come un'aggiunta a livello di superficie. Questo approccio è essenziale quando si lavora con materiali premium come Midnight Slate o Glacier White, dove l'obiettivo è enfatizzare l'effetto profondità della pietra naturale senza esporre la meccanica dell’installazione.
- I professionisti utilizzano i bordi rifiniti per passare in modo naturale dalle robuste texture 3D della pietra alle superfici piane del muro a secco.
- L'eliminazione del supporto esposto o dell'adesivo grezzo garantisce il il backsplash in pietra sembra integrato nel design architettonico.
- Le terminazioni adeguatamente rifinite evidenziano le texture uniche dell'ardesia naturale o della quarzite senza distrarre le lacune visive.
Barriere antiumidità e protezione strutturale
Al di là dell’attrattiva visiva, la finitura dei bordi è una necessità funzionale nell’ambiente cucina del 2026. La sigillatura del perimetro impedisce all'acqua, al vapore e al grasso di cucina di infiltrarsi nello spazio dietro pannelli in pietra. Questa protezione è vitale per mantenere l'integrità del substrato e prevenire la crescita di muffe nelle zone ricche di umidità vicino a lavelli e fornelli. L'utilizzo di sigillanti in tinta o di profili in pietra specializzati crea un confine non poroso che resiste ai rigori di una cucina ad alto traffico.
- La sigillatura dei perimetri esposti protegge il substrato dalle infiltrazioni di umidità e dalla potenziale crescita di muffe secondo gli standard della cucina 2026.
- Gli installatori applicano sigillanti in tinta o profili specifici per la pietra per creare un confine non poroso alla fine di una corsa.
- La protezione dei bordi riduce il rischio che singole pietre si scheggino o si allentino lungo le parti più vulnerabili del muro.
Precisione di installazione e valore a lungo termine
Le finiture di alta qualità sono un investimento nel valore della proprietà. Competenze tecniche come il livellamento di precisione e l'allineamento a piombo garantiscono che l'installazione rimanga sicura nel tempo. L'utilizzo di componenti realizzati in fabbrica, come gli angoli a L corrispondenti provenienti da una cava diretta, garantisce la coerenza del colore e la sincronizzazione delle texture che le mitre tagliate in cantiere spesso faticano a replicare. Questo approccio sistematico alla terminazione previene l'aspetto incompiuto comune nei prodotti di qualità inferiore pietra del registro applicazioni, garantendo che l'alzatina rimanga una risorsa durevole e che richiede poca manutenzione.
- Il livellamento di precisione ai bordi dimostra abilità tecnica e garantisce che l'intero percorso della pietra rimanga a piombo e sicuro.
- Usando Pietra naturale il bullnose o il rivestimento specializzato prevengono l'aspetto incompiuto comune nelle applicazioni di pietre contabili di qualità inferiore.
- Terminato sapientemente le superfici in pietra assicurano l'alzatina rimane un bene durevole e a bassa manutenzione che resiste all'attività quotidiana in cucina.
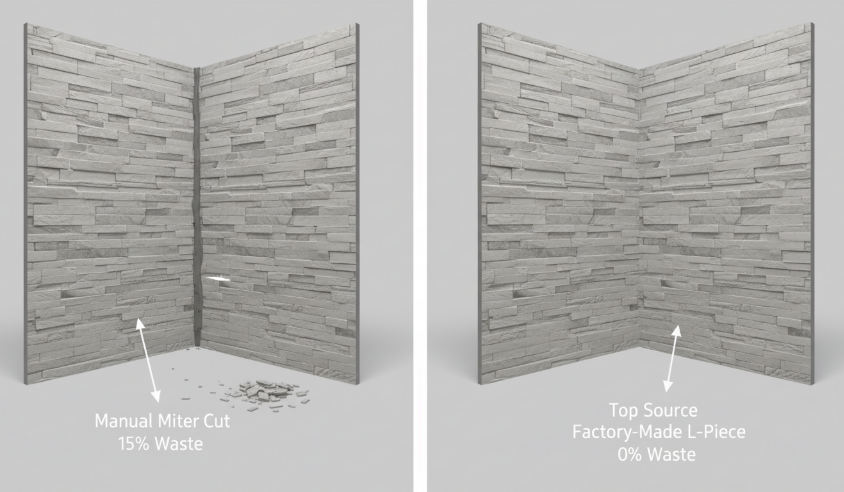
Angoli a L in fabbrica e tagli obliqui in cantiere: quale è meglio per le cucine?
Fabbrica progettata con precisione Gli angoli a L superano le prestazioni della mitratura manuale in cantiere riduce eliminando la necessità di manodopera specializzata e fornendo un legame strutturalmente superiore che resiste all'ambiente ad alta umidità delle cucine moderne.
Efficienza di installazione e risparmio di manodopera
Gli angoli a L prodotti in fabbrica accelerano i tempi del progetto eliminando la necessità di una smerigliatura di precisione sul campo, ad alta intensità di manodopera. Nel mercato delle ristrutturazioni del 2026, ad alta richiesta, gli appaltatori mantengono tempi stretti utilizzando unità preassemblate che si incastrano in posizione. Queste unità eliminano il rischio di rottura del materiale comunemente associato al taglio manuale della pietra, garantendo che ogni metro quadrato di superficie la pietra naturale acquistata arriva fino al muro piuttosto che nel cestino dei rifiuti.
| Metrica delle prestazioni | Angoli a L di fabbrica (fonte principale) | Tagli obliqui in loco |
|---|---|---|
| Velocità di installazione | Alto; sistema di interblocco modulare | Basso; richiede rettifica/adattamento manuale |
| Norma di precisione | Disco diamantato CNC (90 gradi) | Manuale (soggetto a jitter dello strumento) |
| Legame adesivo | Polimerizzazione controllata della resina epossidica | Adesivo per campo ambientale |
| Rifiuti materiali | 0% (Prefabbricato per progetto) | 10-15% (Rottura del taglio) |
Ingegneria di precisione e qualità dell'allineamento
Gli ambienti di produzione controllati producono angoli costanti di 90 gradi che gli utensili manuali non possono replicare in un cantiere. L'avanzata attrezzatura per il taglio a infrarossi garantisce che ogni angolo a L soddisfi le specifiche dimensionali esatte, creando una transizione senza soluzione di continuità da un piano della parete a quello successivo. Questo livello di precisione impedisce lacune visibili e “gradini” comune nel lavoro di taglio obliquo in loco, mantenendo l'intento architettonico del paraschizzi o dell'isola della cucina.
Integrità strutturale e prestazioni adesive
La forza di adesione degli angoli assemblati in fabbrica supera gli adesivi applicati sul campo. I produttori utilizzano resina epossidica ad alta resistenza formulata appositamente per Pietra naturale, applicato in condizioni di temperatura e pressione controllate. Ciò impedisce la delaminazione della pietra, un problema frequente nelle cucine dove il calore dei fornelli e l'umidità dei lavelli possono indebolire le mitraglie standard. Il design a forma di Z ad incastro aggiunge stabilità meccanica, garantendo che gli angoli resistano all'usura quotidiana per decenni.
Continuità visiva e versatilità progettuale
Gli angoli a L di fabbrica forniscono una struttura di pietra robusta e autentica che avvolge i bordi senza la cucitura affilata e dall'aspetto artificiale caratteristica di un taglio obliquo. Perché Pietra di alto livello acquistando materiali dalla stessa cava per lotto, le unità angolari mantengono un'uniformità di tonalità del 95% rispetto ai pannelli piatti. Questa armonia è vitale per progetti di cucine moderne dove le linee pulite della serie Flat o i dettagli intricati della serie Pencil richiedono un aspetto unificato e professionale in tutte le transizioni.
Pietra impilata premium per l'eccellenza architettonica

Come passare senza problemi dalla pietra robusta al muro a secco liscio
Colmare il divario di spessore tra 1,75 pollici pannelli in pietra naturale e il muro a secco standard richiede perline di transizione rigide specializzate e sfumatura graduata per evitare crepe sui bordi e striature visive.
Selezione dei cordoni angolari di transizione rigidi
Nel 2026, gli appaltatori professionisti si sono allontanati dagli angoli standard del muro a secco a favore di perline rigide in vinile o rivestite in carta appositamente progettate per le transizioni dei materiali. Queste perline forniscono un ponte stabile attraverso il giunto, accogliendo lo spessore significativo di Top I pannelli contabili di Source Stone, che vanno da 1 cm a 3,5 cm. Selezionare una perla che corrisponda a quella della pietra Il profilo garantisce che il composto del giunto abbia una base solida che resiste alla flessione o alla delaminazione nel tempo.
| Caratteristica | Perlina angolare standard | Perlina di transizione (da pietra a muro) |
|---|---|---|
| Supporto per la profondità del profilo | Minimo (fino a 1/8″) | Alto (0,75″ a 1,75″) |
| Requisito adesivo | Solo composto unito | Composto + PVA/Colla da costruzione |
| Resistenza alle crepe | Basso alle giunzioni dei materiali | Alto (ponte rinforzato) |
- Utilizzare perline specializzate progettate per le transizioni dei materiali anziché gli angoli standard del muro a secco.
- Assicurarsi che il cordone colmi completamente la giunzione per fornire una base stabile per il composto del giunto.
- Selezionare perle che accolgano lo spessore tipico da 0,75" a 1,75". pannelli di pietra impilati.
Applicazione dell'adesivo e posizionamento del cordone
Garantire il punto di transizione richiede un approccio a doppio legame per prevenirlo “fantasma” o lo spostamento comune nelle aree cucina ad alto traffico. Applichiamo uno strato di base sottile di composto per giunti sulla superficie del muro a secco, quindi rinforziamo la parte posteriore del cordone con colla PVA ad alta resistenza. Questa combinazione fissa la perlina contro il bordo a fessura naturale della pietra mantenendo il muro a secco lato perfettamente a filo per le fasi di finitura.
- Applicare uno strato sottile di composto per giunti sulla superficie del muro a secco prima di posizionare il cordone.
- Aggiungi colla PVA o un adesivo simile ad alta resistenza sul retro della perlina per la massima adesione.
- Premere saldamente il cordone contro il bordo della pietra per eliminare gli spazi vuoti mantenendo il lato del muro a secco a filo.
Tecniche di sfumatura per la fusione visiva
La creazione di un aspetto senza soluzione di continuità prevede strati graduali di composto per nascondere la differenza di altezza fisica tra pietra e muro a secco. Applichiamo più strati sottili di composto per giunti, estendendo ulteriormente ogni strato successivo sulla superficie del muro a secco per creare un'illusione ottica di planarità. Per il tocco finale, eventuali spazi sottili rimanenti tra il bordo ruvido della pietra e il tallone vengono riempiti con malta o sigillante per pietra in tinta.
- Applicare più strati sottili di composto per giunti, estendendo ulteriormente ciascuno strato sul muro a secco.
- Sfuma i bordi del composto per creare una pendenza che appaia piatta ad occhio nudo.
- Riempi eventuali spazi sottili rimanenti tra la pietra e il cordone utilizzando malta o sigillante per pietra dello stesso colore.
Posizionamento strategico per una durabilità a lungo termine
L'integrità a lungo termine dipende dal posizionamento e dal substrato sottostante. Posizioniamo le transizioni dalla pietra al muro a secco in zone a basso impatto per proteggere il fragile composto del giunto da danni meccanici. Utilizzando un substrato di pannello di cemento dietro la parte superiore Pannelli in pietra sorgente fornisce la rigidità necessaria per resistere al movimento. Ogni installazione deve essere in linea con le normative edilizie attuali per le applicazioni di materiali non combustibili per garantire sicurezza e conformità.
- Posizionare le transizioni dalla pietra al muro a secco in aree a basso impatto per evitare che il composto del giunto si scheggi.
- Installa un pannello di cemento dietro i pannelli in pietra per un substrato rigido che resiste al movimento.
- Verificare che il punto di transizione sia in linea con le norme edilizie del 2026 per le applicazioni interne di materiali non combustibili.
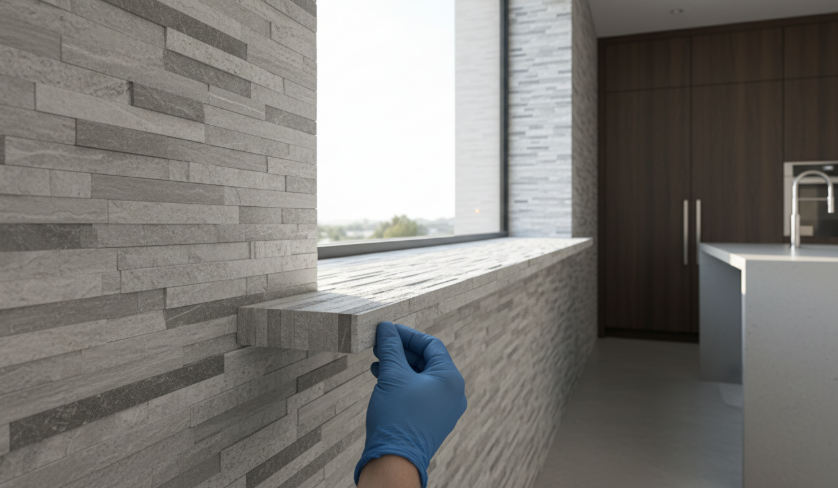
Risolvere il “Involucro della finestra” La sfida: gestire i rendimenti dei davanzali profondi
Per ottenere un rivestimento professionale delle finestre è necessario passare dall'involucro tradizionale all'allineamento del substrato strutturale e all'uso di angoli a L fresati in fabbrica per garantire stabilità termica e continuità visiva.
Preparazione del substrato pre-costruzione per involucri Trimless
Le attuali tendenze architettoniche nel 2026 favoriscono aperture delle finestre minimaliste e senza finiture. Questo design richiede un substrato perfettamente a filo prima del primo pannello in pietra è sempre impostato. Si consiglia di installare pannelli di supporto in cemento a filo con il ritorno della finestra per fornire una base stabile e non combustibile. Gli appaltatori devono verificare che l'apertura della finestra sia quadrata e spessorare il supporto dove necessario. Anche una deviazione di 1/8 di pollice nell'apertura approssimativa crea rivelazioni irregolari con cui diventa impossibile nascondersi Pietra naturale.
L'impermeabilizzazione è la fase più critica nei ritorni dei davanzali profondi. Assicurarsi che la barriera contro l'umidità si estenda completamente nel ritorno per proteggere l'involucro dell'edificio da potenziali ingressi. Ciò protegge la struttura della parete dalla condensa che si forma naturalmente all'interfaccia finestra-pietra in climi variabili.
| Metodo di finitura | Lavoro & Precisione | Integrità strutturale |
|---|---|---|
| Tagli obliqui in loco | Manodopera altamente qualificata; incline alla scheggiatura dei bordi. | Vulnerabile alla dilatazione termica; le articolazioni potrebbero aprirsi. |
| Angoli a L di fabbrica | Installazione immediata; Precisione della lama diamantata CNC. | Angolo monolitico; resiste alla fessurazione e alla delaminazione. |
Utilizzo degli angoli a L di fabbrica per semplificare l'installazione della restituzione
Gli angoli a L realizzati in fabbrica eliminano la necessità di difficili tagli obliqui in loco. I nostri angoli a L abbinati forniscono un continuo struttura in pietra naturale dalla parete principale nel ritorno. Ciò mantiene il “pietra piena” estetica senza cuciture visibili e frastagliate. Installa prima i pezzi angolari sul bordo della finestra per stabilire la disposizione, quindi procedi verso l'esterno fino al resto del muro. Il design a forma di Z ad incastro di Top Source I pannelli in pietra garantiscono il passaggio dall'angolo il pezzo sul pannello piatto rimane nascosto.
Gestione delle variazioni di spessore nei ritorni di davanzali profondi
Pannelli in pietra naturale variare di spessore. I nostri pannelli della serie Rough vanno da 1 a 1,75 pollici, il che richiede un'attenta pianificazione nel punto in cui la pietra incontra il telaio della finestra. Controllare la distanza tra il telaio e la pietra per garantire che la pietra non ostruisca il funzionamento della finestra o l'hardware. Si consiglia di utilizzare un adesivo epossidico ad alta resistenza specificatamente formulato per pietra naturale da proteggere pannelli nel ritorno. Ciò impedisce ai pezzi di pietra di allentarsi nel tempo a causa delle vibrazioni della finestra o dei cicli termici.
Lascia un piccolo spazio tra il bordo in pietra e il telaio della finestra per un cordone di sigillante flessibile in tinta. Questo spazio favorisce l'espansione termica e impedisce alla pietra di esercitare pressione sull'unità finestra al variare della temperatura.
Finitura e sigillatura dei bordi di ritorno esposti
La corretta finitura del ritorno della finestra protegge la pietra dagli urti e semplifica la manutenzione nelle aree ad alto contatto. Applicare un sigillante penetrante di alta qualità a pH neutro sulla pietra nella pellicola per finestre. Ciò impedisce la formazione di macchie dovute a condensa o accumulo di polvere. La durabilità naturale dell'ardesia e della quarzite garantisce che gli angoli esposti della finestra resistano meglio alle scheggiature rispetto alle alternative prodotte. La pulizia regolare con una spazzola morbida e acqua mantiene l'aspetto della pietra senza la necessità di prodotti chimici aggressivi.
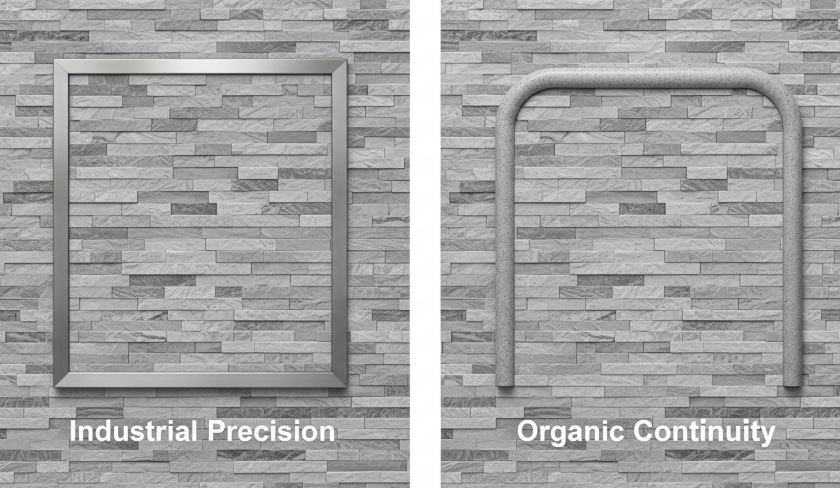
Utilizzo di finiture in metallo e toro in pietra naturale: un confronto estetico
IL scelta tra profili metallici e pietra naturale il bullnose non è più solo una questione di costi; si tratta di una decisione progettuale fondamentale tra la moderna precisione industriale e la classica continuità architettonica.
Bordi definiti ed eleganti con profili metallici
Le finiture metalliche come l'acciaio inossidabile e l'alluminio forniscono un netto contrasto industriale con la struttura robusta del pannelli in pietra naturale impilati. Questi profili creano una struttura sottile e visibile che si adatta al cambiamento del 2026 verso un design architettonico minimalista e contemporaneo. Quando utilizziamo bordi metallici, stabiliamo un confine netto che enfatizza la precisione geometrica dell'installazione, rendendolo particolarmente efficace per la nostra Serie Flat pannelli contabili.
- I bordi metallici forniscono un cappuccio protettivo adatto alle zone commerciali ad alto traffico dove la resistenza agli urti è una priorità.
- I profili in alluminio e PVC offrono un'alternativa economica per progetti su larga scala che richiedono una copertura dei bordi coerente.
- La natura lineare di questi rivestimenti mette in risalto il “maschio-femmina” sistema di interblocco di Pannelli a forma di Z fornendo un punto di arresto definitivo.
Continuità organica con toro in pietra naturale
Pietra naturale i pezzi a toro utilizzano la stessa materia prima dei pannelli principali per creare una transizione morbida e arrotondata. Questo approccio rende il backsplash o muro d'accento appare come se fosse costruito con solidi blocchi di pietra anziché con sottili impiallacciature. Perché Pietra di alto livello garantisce la consistenza della cava dello stesso lotto, questi bordi a toro mantengono lo stesso colore e venature minerali in tutto il progetto, impedendo il “irregolare” sembrano comuni con i fornitori di livello inferiore.
- Le finiture toro offrono un'estetica tradizionale o di transizione che funziona meglio per caminetti residenziali e ritorni di cucine premium.
- L'abbinamento con le specifiche specie di pietra, come Alaska Grey o Midnight Slate, preserva l'aspetto autentico e di alto valore della pietra.
- Il profilo arrotondato elimina gli spigoli vivi, garantendo un ambiente più sicuro nelle cucine familiari affollate.
Selezione funzionale per ambienti ad alta umidità
Condizioni del sito spesso dettare la scelta finale tra metallo e pietra. Le finiture metalliche eccellono negli ambienti commerciali umidi o nelle facciate esterne perché resistono alla corrosione e ai detergenti pesanti meglio della maggior parte dei materiali porosi. I progettisti che lavorano in spazi ristretti, come i rivestimenti dei bagni o gli stretti paraschizzi delle cucine, spesso preferiscono il metallo per la sua impronta a basso profilo rispetto alle dimensioni più spesse di un toro in pietra.
- Il toro in pietra naturale richiede una sigillatura costante programma per abbinare i pannelli primari e mantenere la resistenza all'umidità.
- I profili metallici come la serie Schluter Jolly accolgono vari spessori di pietra, consentendo una finitura a filo anche con irregolarità “Ruvido” pannelli di serie.
- Le installazioni esterne in regioni ad alta salinità beneficiano dei raggi UV stabilità della pietra naturale combinato con la durata delle finiture in acciaio inossidabile di tipo marino.
Conclusione
La raffinata lavorazione dei bordi e le precise transizioni degli angoli definiscono il calibro professionale di un progetto di cucina in muratura. L'utilizzo di angoli a L realizzati in fabbrica e pannelli di precisione con lama diamantata CNC garantisce un'estetica coesa che elimina gli spazi visibili e protegge il substrato sottostante. Questi dettagli tecnici forniscono l'integrità strutturale e la finitura senza soluzione di continuità necessarie per le applicazioni architettoniche di fascia alta.
Rivedi le specifiche del tuo progetto attuale per determinare quali profili in pietra ad incastro e componenti angolari coordinati si adattano meglio al tuo progetto. Contatta il nostro team per richiedere un catalogo tecnico o per assicurarti campioni dal nostro inventario Big 10 pronto per la spedizione.
Domande frequenti
Come rifinire il bordo in pietra alla fine del percorso del mobile?
Per rifinire un bordo in pietra alla fine di un mobile, puoi utilizzare un pezzo di finitura a toro abbinato, un elegante profilo in metallo o eseguire un ritorno smussato in cui un piccolo pezzo di pietra viene tagliato con un angolo di 45 gradi per avvolgere il bordo al muro. Per un look minimalista, assicurati che la pietra abbia un bordo lucidato in fabbrica e rifinisci la transizione con una sottile perla di mastice di alta qualità in tinta.
Ho bisogno di pezzi angolari speciali per la copertura della finestra della cucina?
Sebbene non sia strettamente obbligatorio, l'utilizzo di elementi angolari a L prefabbricati è altamente raccomandato per i rivestimenti delle finestre della cucina per ottenere un'estetica professionale e senza soluzione di continuità. Se non sono disponibili pezzi angolari specifici per il tuo tipo di pietra, lo standard del settore è quello di smussare i bordi dei pannelli piatti con un angolo di 45 gradi, consentendo ai pezzi di incontrarsi esattamente all'angolo per un aspetto continuo.
Come nascondere il bordo tagliato di un pannello in pietra su un angolo esterno?
Il modo più efficace per nascondere a bordo tagliato su un angolo esterno consiste nell'utilizzare un taglio obliquo, unendo due pannelli ad angoli di 45 gradi per nascondere l'interno grezzo della pietra. In alternativa, è possibile installare un profilo angolare in metallo (come una striscia Schluter) per coprire i bordi, proteggendoli pietra da scheggiatura e fornisce una finitura decorativa pulita e moderna.
Posso utilizzare finiture metalliche Schluter con pietre impilate?
Sì, è possibile utilizzare le finiture metalliche Schluter pietra accatastata. Per garantire una vestibilità adeguata, è necessario selezionare un profilo con una profondità maggiore “gamba” o altezza (come la serie Quadec o Rondec) che corrisponde al punto più spesso del Pietra naturale. Il rivestimento deve essere inserito nel letto di malta a spessore sottile prima dell'applicazione della pietra per garantire una transizione sicura e a filo.
Il modo migliore per levigare i bordi affilati della pietra vicino al piano di lavoro?
Il modo migliore per levigare i bordi affilati della pietra è utilizzare tamponi diamantati per levigatura manuale. Inizia con una grana più bassa (circa 60 o 100) per eliminare le bave affilate e passa gradualmente a grane più alte (da 200 a 400) per creare una grana morbida e “facilitato” bordo. Per una lucidatura simile a quella di fabbrica che si abbina al piano di lavoro, continua a levigare fino a grana 800 e rifinisci con un sigillante per pietra per ripristinare il colore.
