DIY プロジェクトを開始して、途中で 1 つの手順を間違えると、単純なアップグレードが大きな頭痛の種に変わる可能性があることに気づいたことがありますか?インストール中 Zパネル 経験豊富なDIY愛好家でも苦労することがよくあります。凹凸のある表面、難しい位置合わせ、または乱雑な仕上げは、全体の外観を台無しにする可能性があります。壁の準備が不十分であったり、接着剤の選択が間違っていたりすると、住宅改修の成果がすぐに悪化してしまいます。 “やり直し” 状況。
機能壁を単に優れているだけでなく、プロ仕様に見せたい場合は、ただ熱意以上のものを必要とします。明確な計画、適切なツール、そしてシームレスな取り付けに Z クリップを使用するなどの賢いテクニックがすべて違いを生みます。このガイドでは、各ステップを説明し、安全で正確な設置のためのヒントを共有し、高品質のパネルと実用的な配送オプション (大手サプライヤーの事前サイズキットなど) が次の DIY Z パネルの設置をどのように可能にするかについて説明します。 “簡単です”。あなたのビジョンを現実にすることから始めましょう。
Z パネルで空間をグレードアップ
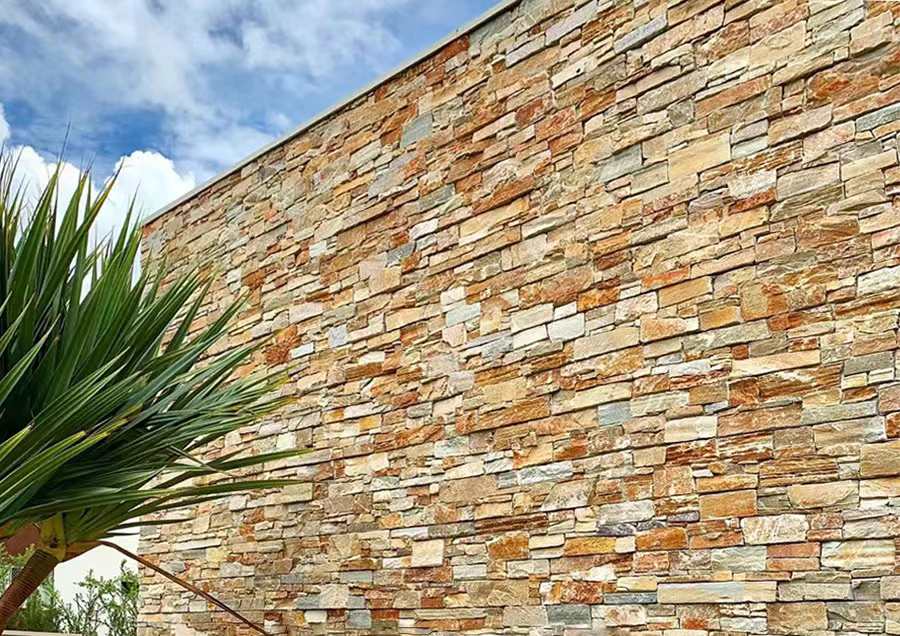
空間にスタイルと実用的な価値の両方を加える方法をお探しなら、Z パネルが頼りになるソリューションとなるでしょう。これらの多用途の石パネルは、簡単な取り付けプロセスと驚くほど自然な外観により、DIY 住宅改修で人気を集めています。リビングルームの壁をポップにしたい場合、暖炉を目玉にしたい場合、または家の外観をアップグレードしたい場合でも、Z パネルは、ほぼすべての設計ビジョンに適合する柔軟で耐久性のあるアプローチを提供します。
“Z パネルは、天然石の美しさと手間のかからない取り付けを融合しており、専門家に依頼せずにワンランク上の住宅改修をしたい人に最適です。”
Zパネルとは何ですか?
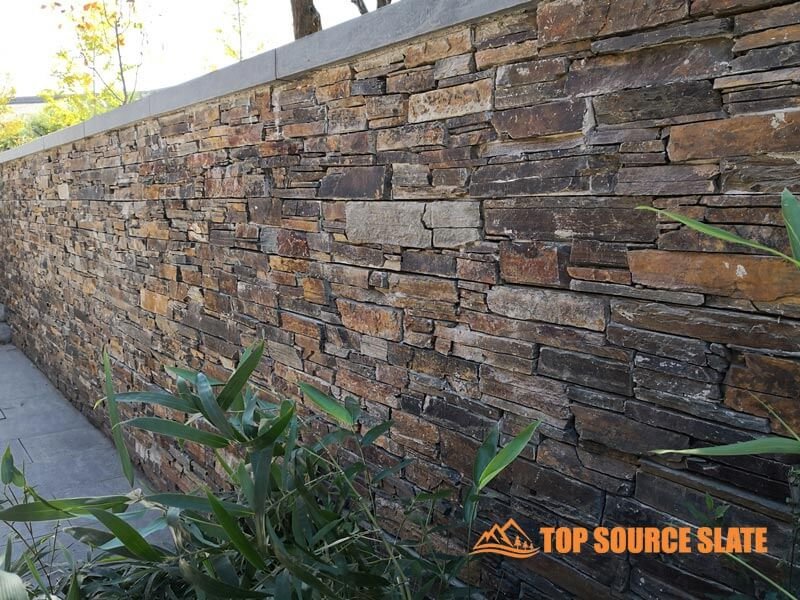
Zパネルは、パズルピースのように合うように設計されたインターロックストーンタイルです。通常、a “z”形状のエッジにより、位置合わせが簡単になり、継ぎ目がほとんど見えなくなります。ほとんどの Z パネルはスレート、珪岩、砂岩などの本物の石で作られており、どの壁にも本物の頑丈な感触を与えます。一部の製品には背面に金属クリップが組み込まれているため、基本的なツールを使用して迅速かつ安全に取り付けることができます。豪華な設備は必要ありません。
-
 卸売価格の外装天然石クラッド
 -
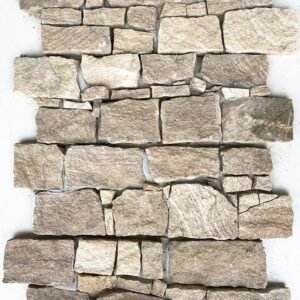
 オイスタークォーツZストーンパネル 550×200
 -
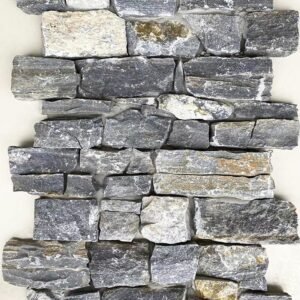
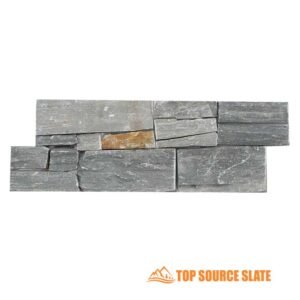
 曇った灰色の Z 形石英天然石クラッド パネル
 -
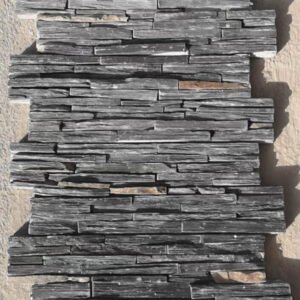
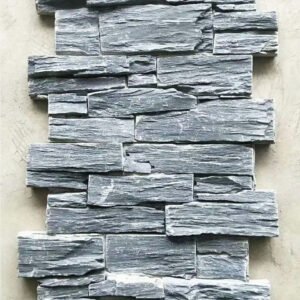 ブラックスレートZパネルクラッド
 -
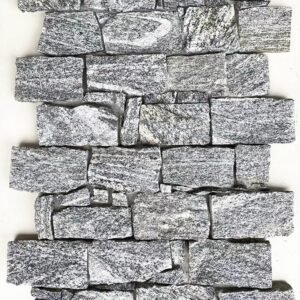
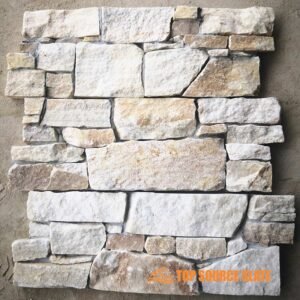 自然な白い石英石のクラッディング
 -
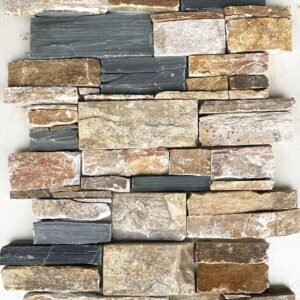
 外壁装飾用ブルーダイヤモンド石英石クラッド
 -
 グリーンクォーツ天然石クラッドパネル
 -
 中国工場の天然Zストーンパネル
 -
 売れ筋のレッジストーン機能の壁被覆パネル
 -
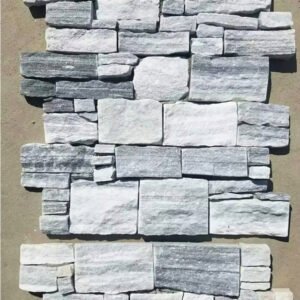
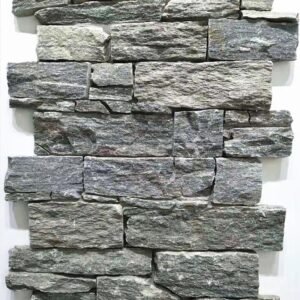
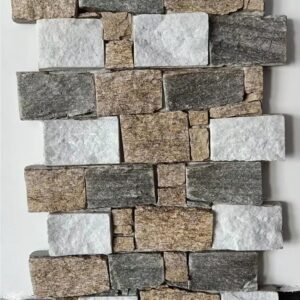
 Z型パネル積み石クラッディング
 -
 セメント裏打ち天然棚石スタックストーン壁タイル
 -
 マルチカラースレートセメントは、天然のインターロッキングレッジストーンを裏打ちしました
 -
 黒いスレートセメントで裏打ちされた棚石ベニヤパネル
 -
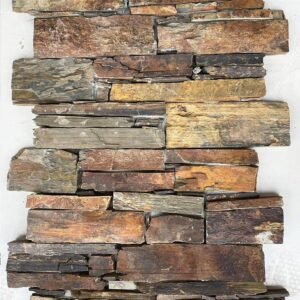
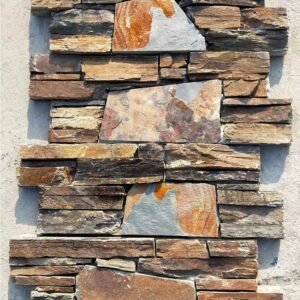 素朴なスレート乾積み石突き板の外装
 -
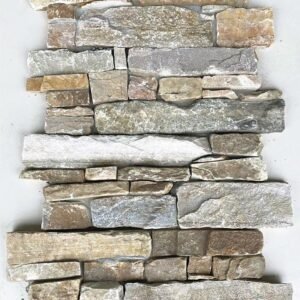
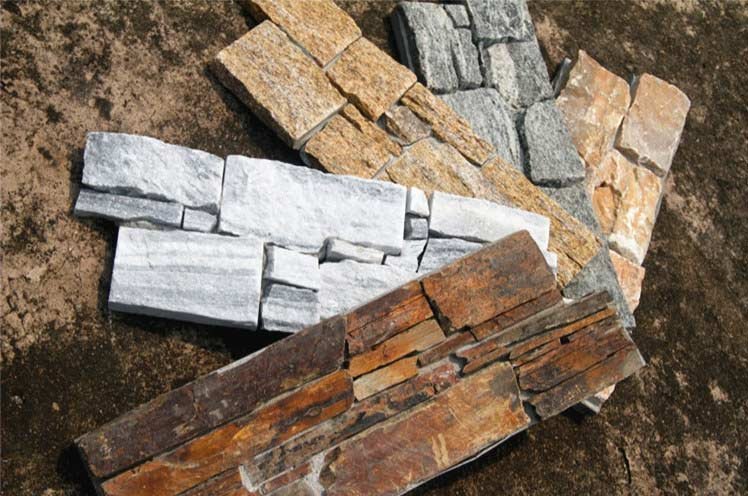
 中国人気のあるインターロックストーンクラッディングZパネル
Zパネルを使用するメリット:見た目の美しさ、設置の容易さ、耐久性
人々が Z パネルを選ぶ理由の 1 つは、その真剣な抑制の魅力です。時代を超越した高級な外観を目指している場合、これらのパネルはテクスチャーの深みと素朴な特徴をもたらします。連動するデザインは、プロである必要がないことも意味します。DIY Zパネルの取り付け シンプルで、混乱や間違いのリスクが最小限に抑えられます。さらに、耐久性のある石材は屋内外での使用に耐え、欠けや色あせに強いため、投資が何年も持続します。
Z パネルはどこで使用できますか?
- 内壁
- アクセントウォール
- 暖炉
- 屋外被覆材
不思議に思う 家の中で Z パネルを使用する場所?リビングルームやベッドルームのアクセントの壁に最適ですが、暖炉、キッチンのバックスプラッシュ、パティオの壁にも素晴らしい効果を発揮します。熱心な方のために Zパネルを使ったリフォーム、可能性は 1 つの部屋だけではなく、玄関、浴室の周囲、または屋外のキッチンなどにも及びます。堅牢な耐候性を備えた Z パネルは、内側と外側の両方で自己主張するための賢い選択です。
さまざまなタイプの Z パネルを理解する: マテリアル、テクスチャ、スタイル
万能の Z パネルはありません。クールなグレーからリッチなゴールドまで、あらゆる種類の石で作られたオプションが見つかります。仕上げも、分割面の凹凸のあるものから滑らかなスタイルまでさまざまです。これは、素朴なキャビンからモダンなロフトまで、どんなデザインのテイストにもマッチすることを意味します。 Zパネルが何でできているのか疑問に思っている人のために説明すると、ほとんどの最高品質の製品には、強度と色の一貫性のために慎重に選択された天然石が使用されています。
インストールに関する洞察: 内蔵クリップによる時間の節約
現在の Z パネルの多くには、壁に固定する金属クリップが組み込まれているため、測定したり、穴を開けたり、追加のブラケットをいじったりする時間を短縮できます。この機能により、 Zパネルの取り付け 初めての方にも、熟練したリノベーターにとっても同様に簡単で、ツールに汗を流すよりも、自分の作品を鑑賞することに多くの時間を費やすことができます。

トップソーススレート: 高品質 Z パネルのパートナー
Top Source Slate は、信頼性が高くカスタマイズ可能な Z パネル ソリューションを提供する 15 年以上の経験をもたらします。工場から直接のアプローチにより、コストを抑えながら、顧客が期待する本物の石の品質を提供します。住宅所有者、建築業者、設計者は、標準色からユニークなカスタムオーダーまで、豊富なカタログを利用して、あらゆる段階でサポートと誠実なガイダンスが得られることを知っています。
Z パネルの概要: スタイル、マテリアル & アプリケーション
| パネル材質 | 人気の仕上げ | 一般的なアプリケーション | 一般的なサイズ範囲 | 業界ベンチマーク (耐久性) |
|---|---|---|---|---|
| スレート | 分割面 | 暖炉、アクセントウォール | 6″×24″ | 高(水) & 耐凍結性) |
| 珪岩 | 粗い & スムーズ | 屋外被覆材 | 6″×24″;カスタム利用可能 | 非常に高い (傷つきにくい) |
| 砂岩 | 自然な裂け目 | 内壁 | 6″×24″ | 中 (屋内に最適) |
| 大理石 | 研ぎ澄まされた | 豪華な機能 | 4″×18″ 6まで″×24″ | 中 (定期的なシールが必要) |
| 花崗岩 | フレーム加工/ファインピッキング | 交通量の多い外装 | 6″×24″ | 非常に高い (UV & 耐衝撃性) |
注記:
この表では、主要な Z パネルの材質、一般的な仕上げ、適用分野、および業界の耐久性ベンチマークでの各材質のパフォーマンスを強調しています。測定値は一般的なメーカー標準を反映しています。カスタマイズオプションは幅広く利用可能です。
設置の準備: ツール、材料、表面の準備
Z パネルを使用して住宅アップグレード プロジェクトを開始するということは、洗練された結果を得るためにプロのように準備することを意味します。飛び込む前に Zパネルの取り付け、道路での問題を避けるために、適切なギアを揃え、高品質の素材を選択し、路面を準備する必要があります。時間をかけて慎重に計画することで、各石がぴったりとフィットし、フィーチャーウォールが何年も長持ちするようになります。
“ツールの準備、表面のチェック、レイアウトの計画など、しっかりした準備ルーチンにより、 Zパネルの取り付け より簡単になり、無駄やコストのかかるやり直しを避けることができます。”
ツールの収集: 包括的なチェックリスト
Z パネルのセットアップを成功させるには、まず、 Zパネルの取り付けに必要な工具。参考リストは次のとおりです。
- レベル – 完全な直線用
- メジャーテープ - スペースのサイズを調整する
- 石材鋸またはアングルグラインダー - カスタムカット用
- 石材用接着剤 – 適切なタイプが重要 (次に詳しく説明します)
- ノッチ付きコテ – 接着剤を均一に広げるための
- 安全メガネと手袋 - 常に安全を確保してください
- Z クリップまたは金属製取り付けブラケット – パネルに追加のサポートが必要な場合
多くの Z パネルには金属クリップが組み込まれているため、トップ ソース スレート キットを入手すれば、取り付けがさらに早くなることがわかります。
適切な接着剤の選択: 種類、用途、互換性
これらの石を確保する場合は、 Zパネルの取り付けに最適な接着剤 重要です。内壁の場合は、高品質のポリマーベースの建築用接着剤が効果的ですが、屋外または湿った場所では、屋外用の特殊な石材用接着剤が必要になる場合があります。互換性を常に確認してください。一部の接着剤は特定の壁面用に作られていません。接着剤をノッチ付きのこてで広げて均等にグリップし、硬化が始まる前に各パネルを所定の位置に固定します。
表面処理: 洗浄、レベリング、および構造の健全性の確保
次は脚の作業です。基礎壁を掃除して、ほこり、油、または接着を妨げる可能性のあるものを取り除きます。表面が水平であることを再確認してください。凹みや穴を埋めるにはパッチングコンパウンドを使用してください。古いレンガ、コンクリート、または乾式壁の場合は、石の重量を支えるのに十分な強度があることを確認してください。これをスキップしないでください。ベースに欠陥があると、後でパネルがぐらついたり緩んだりする原因になります。のために Z パネル取付、安定していてきれいな壁は、迅速かつ簡単な設置と実際の頭痛の種を分けます。
レイアウトの測定と計画: 正確な配置と無駄を最小限に抑えるテクニック
プロ級の外観を実現するには、計画が重要です “ライドオアディー” 動く。巻尺と水準器を使用して、Z パネルが着地する位置を計画します。中心または主要な焦点から開始し、何かを貼り付ける前に最初の列をドライフィットします。端に小さくて奇妙な部分が残らないように、事前にカットにマークを付けてください。これは慎重です Zパネルのセットアップ 材料を節約し、縫い目がほとんど見えないようにします。
トップソーススレート: 簡単な Z パネルキットとサポート
時間厳守ですか? Top Source Slate は、あらゆる種類のスペース向けのクリップと詳細な設置ガイドを備えた、事前にサイズ設定された Z パネル キットを提供しています。これらのバンドルは時間を節約し、DIY ユーザーの推測作業を減らします。彼らのをチェックしてください 商品ページ パネルのスタイルを調べたり、スペースに適したキットの選択についてサポートとチャットしたりできます。
必須ツール & Z パネルを取り付けるための準備手順
| 工具・材料 | なぜ必要なのか | 推奨スペック・ブランド | 測定・使用方法 | 業界のベストプラクティス |
|---|---|---|---|---|
| レベル | 均一でまっすぐな列を保証します | ボックスレベル、24~48インチ | 行ごとに水平方向の配置をチェックする | 3~4 パネルごとに再確認してください |
| 石材用接着剤 | 石壁への強力な接着 | マペイ ウルトラライト(内装・外装用) | 1/4インチのノッチ付きこてで広げます | 完全に使用する前にスクラップパネルでテストしてください |
| 鋸/グラインダー | コーナー、エッジのカスタムカット | 湿式タイルソー (DeWalt、QEP) | エッジから少なくとも 1 パネル幅に切り込みを入れてトリミングします | 安全メガネを着用し、可能であれば屋外でカットしてください |
| 表面クリーナー | パネルの密着性を向上 | マイルドな脱脂剤または石鹸水 | 壁を拭き、完全に乾燥させます | 開始する前にカビや水による損傷がないか評価してください |
| Zクリップ / 内蔵クリップ | より迅速なパネル取り付け | ステンレス鋼または亜鉛メッキ | 各パネルの端から 4 ~ 6 インチの位置に取り付けます | トップソーススレートキットの標準 |
注記:
この表は、Z パネル プロジェクトを確実に良い方向から始めるための実際のツール、材料、専門的なヒントをまとめたものです。これらの詳細を、インストールの各段階の前のチェックリストとして使用してください。

ステップバイステップ ガイド: プロのように Z パネルをインストールする
天然石で空間を盛り上げてみませんか?このフレンドリーなステップバイステップの Z パネル取り付けガイドに従って、プロが細部まで処理したようなきれいな仕上げを実現します。少しの計画と確実なテクニックがあれば、Z パネルのインストールは頭を悩ませる必要はありません。誰でも管理できる簡単なプロジェクトです。
“慎重なドライフィッティング、Z クリップの賢明な使用、および忍耐強い接着作業が、安全で高品質の天然石パネル設置の根幹を形成します。”
ドライフィット: 接着剤を塗布する前に配置を計画する
まず、壁の前の床に Z パネルを配置します。これは、最終的な外観をプレビューし、色やテクスチャを調整するのに役立ちます。ドライフィットでは、エッジがしっかりとフィットし、角が揃うようにパネルをトリムする必要がある場所も示されます。難しい箇所に小さな隙間が残らないように、このステップには時間をかけてください。
接着剤の塗布: 一貫して確実に取り付けるためのテクニック
次に、前に説明したように壁を準備し、プレミアムストーン用接着剤を入手します。ギザギザのこてを使って、一度に数列ずつ塗布していきます。各パネルを粘着ベッドにしっかりと押し込んでしっかりと固定し、軽く左右に動かして石を掴みやすくします。 Z パネルの取り付けでは、接着剤の均一な層が長期安定性の鍵であることを覚えておいてください。この手順をうやむやにしないでください。
Z クリップの使用: シームレスな位置合わせと簡単な取り付けを実現
パネルまたは壁システムでパネル用の Z クリップを使用している場合は、クリップ ベースを 12 ~ 16 インチごとに壁に取り付け、パネルに取り付けられたクリップをその上に取り付けます。特に Top Source Slate の多くの高品質 Z パネルには金属クリップが組み込まれているため、DIY ユーザーにとってすべてが簡単になります。このシステムは、すべてをまっすぐに保ちながら石を頑丈に保持し、Z パネルをどのようにして壁に一度に取り付けるのかというよくある質問に答えます。限りなく近いです “設定したら忘れる” できる限り
パネルのカッティング: エッジとコーナーの正確なトリミング
すべての壁が標準パネル サイズに完全に適合するわけではありません。滑らかな切断には、ダイヤモンドブレードを備えた湿式鋸またはアングルグラインダーを使用してください。慎重に測定し、パネルに印を付けてから、欠けないようにゆっくりとカットします。常に保護眼鏡を着用してください。きちんとカットされたパネルはレイアウトにぴったりと収まり、コーナーやエッジがほぼシームレスに仕上がり、プロジェクトがだらしなくなくシャープに見えるようになります。
ヒントとして: パネルを所定の位置に配置したら、接着剤が完全に硬化する前に、ラインのレベルと真直度を検査するために戻ります。ここで簡単に調整を行うと、その日の手間を省き、壁の斜めの列を避けることができます。忍耐強く取り組むことで、Z パネルのインストールは、初心者にとっても満足のいく週末プロジェクトになります。
手間のかからないオプションをお探しですか? Top Source Slate のパネルは、正確なサイズ設定とすぐに取り付けられる Z クリップを備えているため、追加のハードウェアと格闘する時間を減らし、新しいアクセント ウォールを鑑賞することに多くの時間を費やすことができます。
Zパネルの設置方法 & 結果の比較
| 設置方法 | 必要なツール | 平均設置時間 (10 平方フィートあたり) | 仕上げ品質(業界ベンチマーク) | ベストユースケース |
|---|---|---|---|---|
| 接着剤のみ | こて、接着剤、水準器 | 2時間 | 良好 (正確なレベリングが必要) | 屋内アクセントウォール |
| Z クリップのみ | ドリル、ドライバー、クリップ、水準器 | 1.5時間 | 非常に良い(調整が簡単) | 暖炉、仮設設備 |
| 接着剤+Zクリップ | 接着剤、コテ、クリップ、ドリル | 1.2時間 | 優れた (業界標準) | 屋外被覆材、交通量の多い壁 |
| 伝統的なモルタル | モルタル、フロート、レベル | 2.5時間 | 良い(スキルによる) | 外観ファサード |
| ねじ込み式 | スクリューガン、ブラケット、水準器 | 1.8時間 | 非常に良い (アップグレード可能/削除可能) | 商業・レンタルスペース |
注記:
このグラフは、Z パネルのさまざまな設置システムが、必要な労力、仕上げ品質、最適な用途の観点からどのように積み重なるかを示しており、プロジェクトの目標に適した技術を選択するのに役立ちます。

シームレスな外観の実現: 完璧な設置のためのヒントとコツ
Z パネルの取り付け時に完璧でプロフェッショナルな仕上がりを求めるのであれば、適切なテクニックを知っていれば大きな違いが生まれます。天然石パネルの設置は、単にパネルを壁に貼り付けるだけではありません。継ぎ目を隠したり、角をぴったりと合わせたり、最終的に最高級に見えるようにするための小さな工夫が重要です。このガイドでは、扱いにくいコーナーの作業から耐候性の最適なシーラントの選択まで、Z パネルのシームレスな取り付けに関するヒントを紹介します。
“コーナー、シームレスな位置合わせ、慎重なシーリングをマスターすることで、Z パネルのセットアップが手間をかけずに長持ちする、絵に描いたような完璧な外観を実現します。”
コーナーとエッジの操作: ぴったりとシームレスなフィット感を実現
コーナーやエッジは職人技が光る部分です。接着剤を塗布する前に、必ず 2 回測定し、すべてのエッジ部分をドライフィットしてください。内側のコーナーでは、パネル接合部を交互に配置して自然に重なり合うようにすることで、ラインが重ならないようにします。外側のコーナーには、カスタムカットした L 字型パネルを使用するか、既製のコーナーピースを使用することができます。迷った場合は、Top Source Slate を使用すると、余分な手間をかけずにカスタムの外観を実現できる、精密に留められたコーナーが提供されます。
縫い目を隠す: 継続的で自然な外観を実現するテクニック
継ぎ目を隠すには、適切なレイアウト計画が重要です。パネルを固定する前に、色の濃淡と質感を混ぜ合わせていくつかをレイアウトし、ランダムな配置を作成します。可能な限りジョイントをずらしてください。さらに良い結果を得るには、接着剤が濡れているときに隣接するパネルを軽くたたいて、目に見える線を最小限に抑えます。このステップにより、Z パネルのセットアップが大幅に向上し、石材に本物の中断のない流れが与えられます。
グラウトとシーリング: 湿気から保護し、寿命を延ばす
パネルを設置したら、推奨される場所にのみグラウトを注入します。Z デザインは通常、ほとんどの接合部を隠すため、グラウトは最小限で済みます。狭い隙間には研磨されていないグラウトを使用し、余分なグラウトはすぐに拭き取ってください。石を新品同様の耐水性を保つために、通気性のある石用シーラントを選択してください。 Top Source Slate は、Mapei Ultracare Stone、Tile などの製品を推奨しています & グラウトシーラーなど。色を良くし、汚れを防ぎます。最良の結果を得るには、パネルが乾いたら塗布し、数年ごとに再度塗布してください。
一般的な設置の問題のトラブルシューティング: 凹凸のある表面、緩んだパネル、接着剤の問題
すべての作業がスムーズに進むわけではありません。Z パネルの取り付けの不均一やその他の問題を解決する方法は次のとおりです。
- 凹凸のある表面? ロングレベルで確認してください。高い箇所の場合は、軽くやすりをかけるか研磨してください。低い箇所の場合は、パネルを再度取り付ける前に石積みのフィラーを使用してください。
- パネルが緩んでいませんか? ピースを取り外し、新しい接着剤を追加し、しっかりと押して元の位置に戻します。乾燥時間を軽視しないでください。
- 接着剤が接着していないのでしょうか? 接着剤の選択を再考し、壁にほこりがなく、乾燥していることを確認してください。扱いにくい箇所には、機械式 Z クリップ (多くの Top Source Slate 製品に付属) を使用して保持力を高めます。
シームレスな仕上がりは忍耐と正しい方法から生まれることを忘れないでください。耐久性があり、全天候型の取り付けができるようにするには、高品質のシーラントやグラウトに投資し、内蔵クリップを最大限に活用して簡単で丈夫な取り付けを実現します。問題が発生した場合は、Top Source Slate のサポートが成功へと導きます。
Z パネルの一般的な課題 & プロのソリューション
| チャレンジ | よくある原因 | 専門家のヒント | 測定・試験 | 業界ベンチマーク/リファレンス |
|---|---|---|---|---|
| 目に見える縫い目 | 不適切なレイアウト、一貫性のない配置 | 互い違いのジョイント、ブレンドパネルの色/仕上げ | 接着剤硬化前の目視確認 | 目に見える線が 2mm 未満 (業界目標) |
| 緩んだパネル | 接着力不足、壁の凹凸 | 高品質の接着剤を再塗布し、パネルには Z クリップを使用してください | 空洞音のタップテスト | 硬化後、パネルの 99% が触れてもしっかりしています |
| コーナーギャップ | 不適切な切断・測定 | 留め継ぎするか、事前にカットされたコーナーを使用し、フィット感を再確認します | 取り付け前に試し履き | 隙間が 1mm 未満の標準 |
| 水染み | 石やグラウトにシーラーがないか、シーラーが不十分です | 推奨のストーンシーラーを塗布します | シーラント硬化後の滴下試験 | 水をはじく <吸収率2% |
| 接着不良 | 間違った接着剤、汚れた表面 | 承認済みの製品に切り替え、壁をきれいにします | 24 時間待って、手動で接着をテストします | パネルを取り外すには力が必要です |
注記:
この表には、現実世界の問題と業界標準で認められているトップソリューションが共有されているため、DIY ユーザーは問題を迅速に解決し、自信を持って完了できます。
Z パネルのメンテナンス: 寿命と美しさを確保する
Z パネルの取り付けに取り組んだら、見た目をシャープに保つことは、通常の家庭の日課の一部となるはずです。いくつかの良い習慣と適切なメンテナンス製品を使用すれば、屋内でも屋外でも、石の特徴を何年も美しく保ち、構造的に健全なままにすることができます。 Z パネルのクリーニング、保護、そして投資を最大限に活用するための重要事項を詳しく見てみましょう。
“定期的な清掃とスマートな保護ルーチンにより、パネルが屋内にあるか風雨にさらされているかにかかわらず、DIY Z パネルの設置は自然の美しさを永続的に披露することができます。”
定期的な清掃:ほこり、汚れ、汚れを取り除く
Z パネルの掃除方法を知ることは、寿命を延ばすための鍵です。まずは柔らかい毛のブラシやマイクロファイバーの布で埃を払います。軽い汚れの場合は、きれいな水で洗い流してください。汚れが見つかった場合は、中性洗剤を使用してください。石の表面を損傷する可能性があるため、酸性または研磨剤を含む製品は避けてください。屋外で使用する場合は、数週間ごとにホースを優しくすすぐと、汚れや花粉が定着するのを防ぎます。高圧洗浄機は使用しないでください。それはやりすぎで、個々の石を緩める可能性があります。
湿気から守る: シーラントと防水
湿気の問題を防ぐことは、屋外の Z パネルを使用した住宅改修、バスルーム、またはキッチンの跳ね返りでは特に重要です。高品質で通気性のあるストーンシーラー (Top Source Slate が推奨する Mapei や Laticrete のものなど) を選択し、2 ~ 3 年ごとに塗り直してください。パネルがきれいで乾燥した後、スポンジまたはブラシを使用して均一にカバーするように塗布します。防水は色と構造の完全性を維持するために不可欠です。適切に密閉されたパネルは、濡れたゾーンと乾燥したゾーンの両方で凍結融解サイクルや汚れに耐えます。
損傷の検査: 潜在的な問題の特定と対処
たとえ硬い石であっても、時間が経つと問題が発生する可能性があります。屋内または屋外で Z パネルを年に 1 回検査し、緩んだ部品、モルタルの欠落、ひび割れ、または水の汚れを見つけます。屋外でのセットアップの場合は、冬の厳しい天候の後に必ず確認してください。問題を発見した場合は、湿気が下に入る前に、緩んだ石を建築用接着剤で貼り直すか、ひび割れた石を交換してください。設置状況を監視する簡単な習慣により、コストを節約し、パネルの外観を鮮明に保つことができます。
長期的なケア: Z パネルの設置の美しさを維持するためのヒント
継続的な魅力を維持するには、強力な化学スプレーを避け、つる性の植物や蔓が屋外の石の間に根を張らないようにしてください。水の流出や汚れを防ぐために、屋外設置物の上の側溝をきれいに保ってください。 Z パネルは屋外でも使用できるのでしょうか?もちろん、定期的なシーラントサイクルを守り、接合部の締まり具合をチェックしてください。年次または季節メンテナンスを計画すると、屋内と屋外のパネルの両方が最高の状態に保たれ、後の修理の必要性が最小限に抑えられます。
プロジェクトの寿命を最大限に延ばすために、Top Source Slate はビデオ ガイド、専門家のヒント、天然石パネルの設置に適したシーラーを提供します。 メンテナンスリソースページ。彼らのサポート チームは、あなたが家族の一員であるかのように、プロジェクト固有のケアに関する質問に電子メールまたは電話で喜んで答えます。
Zパネルメンテナンスチェックリスト & 業界標準
| メンテナンスタスク | 推奨周波数 | ツール/製品 | ベストプラクティス/方法 | 業界標準/目標 |
|---|---|---|---|---|
| ホコリ取り・拭き掃除 | 毎月 | 柔らかいブラシ、マイクロファイバークロス | 表面を優しくブラッシングし、強くこすらないでください | 塵や破片を100%除去 |
| 徹底的なクリーニング | 年2回 | マイルドストーンクリーナー、水 | 濡らして、拭いて、すすいで、すぐに乾かしてください | 縞や残留物がない |
| シール・防水 | 2〜3年ごとに | 石材シーラント(通気性) | ドライパネルに均一に塗布します。 | 表面に水玉ができ、 <2%吸収 |
| 損傷の検査 | 毎年(嵐の後も) | 目視チェック、軽打テスト | 亀裂、接合部の緩み、汚れを探す | すべてのパネルが所定の位置にしっかりと固定されている |
| 修理・再取り付け | 必要に応じて | 建築用接着剤、交換パネル | 取り外してエリアを清掃し、新しいパネルを再度取り付けます | 修理はオリジナルの仕上げと一致します |
注記:
このガイドでは、業界の専門家からの推奨事項と Top Source Slate のベスト プラクティスに基づいて、メンテナンスのタイミング、ツール、および適切に維持された Z パネルに期待できる標準をまとめています。
結論
数え切れないほどのクライアントを指導した後、 Zパネル プロジェクトでは、適切な計画、適切なツール、そして詳細に正面から取り組む意欲によって、良い結果が得られることを私は身をもって知っています。測定、準備、賢明なテクニックを使用して慎重に設置に取り組むと、あなたのスペースは洗練されたプロフェッショナルな仕上がりになり、すべての努力の価値が生まれます。
初めてのDIYでも、経験豊富なプロでも、Z パネルを使えば誰でも部屋を変えることができると思います。天然石の美しさと簡単な取り付けの組み合わせにより、誰でも手の届くカスタムの外観が得られます。壁をアップグレードする準備ができている場合は、忍耐と少しのノウハウがこのプロジェクトを本物に変えるということを覚えておいてください。 “勝つ”。
よくある質問
Q1: Zパネルは何に使用されますか?
A1: Z パネルは主に、壁や天井にシームレスな外観を作成するために使用され、装飾や音響の目的で使用されることがよくあります。これらは、簡単な設置プロセスを提供するインターロック パネルで構成されており、屋内と屋外の両方の設定で一般的に使用されます。
Q2: Z パネルはどのように取り付けますか?
A2: Z パネルを取り付けるには、まず壁に取り付けポイントをマークします。適切な接着剤またはネジを使用して、Z クリップまたは Z バーをパネルと壁の両方に取り付けます。パネルの位置を合わせて、所定の位置にスライドさせます。水平でしっかりと固定されていることを確認してください。
Q3: Zパネルの取り付けにはどのような接着剤を使用する必要がありますか?
A3: Z パネルの取り付けに推奨される接着剤は、石材や金属の表面に強力に接着する PL プレミアム建設用接着剤です。貼り付ける前に、壁とパネルの表面がきれいであることを確認してください。
Q4: Zパネルは浴室などの水気の多い場所でも使用できますか?
A4: はい、Z パネルは天然石や処理木材などの耐水性素材で作られている場合、濡れた場所でも使用できます。湿気による損傷を防ぐために、設置中に適切な密閉および防水技術が使用されていることを確認してください。
Q5: Z パネルは DIY 可能ですか?
A5: はい、Z パネルは DIY しやすいように設計されています。通常、わかりやすい取り付けガイドが付属しており、ドリルや水準器などの基本的なツールが必要です。ただし、安全性と耐久性を確保するには、取り付け手順に注意深く従うことが重要です。
Q6: Zパネルの設置費用はいくらですか?
A6: Zパネルの設置費用は素材やサイズによって異なります。平均して、材料費は 1 平方フィートあたり 8 ドルから 15 ドルの範囲になります (専門の設置業者を利用した場合の労力は含まれません)。 DIY で設置すると全体的なコストを削減できます。
Q7: Zパネルはメンテナンスが必要ですか?
A7: Z パネルは通常、最小限のメンテナンスを必要とします。定期的にほこりを払い、湿らせた布で時々掃除するだけで十分です。外装パネルの場合、外観を維持し、環境による磨耗に耐えるために、定期的なシーリングが必要になる場合があります。
Q8: Zパネルを使用するメリットは何ですか?
A8: Z パネルは、簡単な設置と最小限のメンテナンスという利便性を備えた、クリーンでモダンな美学を提供します。また、吸音パネルとして使用すると遮音性が向上し、屋内外の用途に耐久性のある表面を提供します。
外部リンク
- Z パネルのインストール ガイド |マクモニーグル・ストーン
- 石材パネルの Z クリップ取り付け – ストーンプライ
- PDF: Z パネル設置ガイド
- Zバーの取り付けガイド – 認めた
- 壁取り付けシステム Z クリップ – 天井調整業者
- 大型内装石材パネルの取り付け
- ゲージ Z バーの取り付けガイドライン
- Zストーンウォールクラッディングの取り付け方法
