なぜフラッグストーンパティオを選ぶのですか?
屋外スペースを強化することになると、いくつかのオプションがフラッグストーンパティオの時代を超越した魅力と耐久性を提供します。 フラッグストーンパティオ 天然石のテクスチャーと素朴な色で視覚的に印象的であるだけでなく、時の試練にも耐えているため、ヤードで美しさと機能の両方を望んでいる住宅所有者に人気のある選択肢になります。
フラッグストーンパティオの概要:時代を超越した耐久性のある屋外オプション
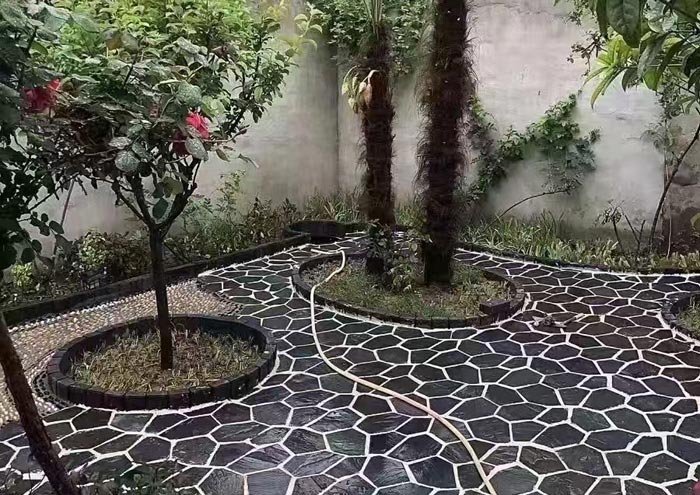
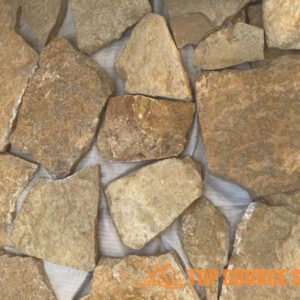
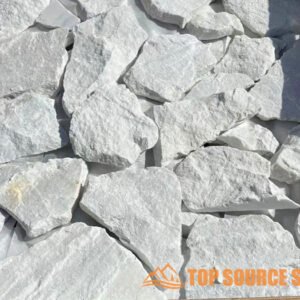
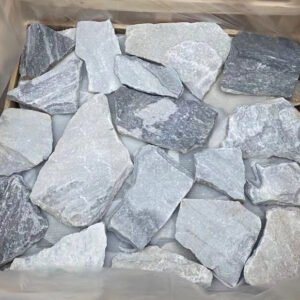
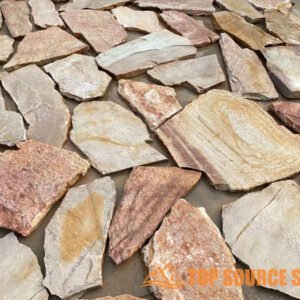
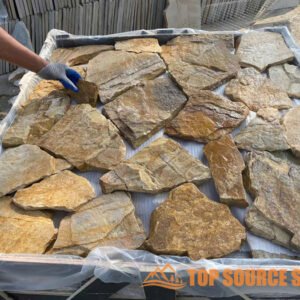
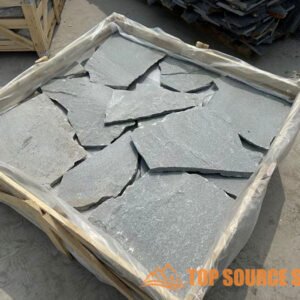
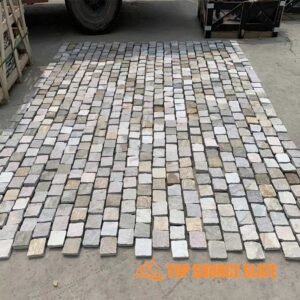
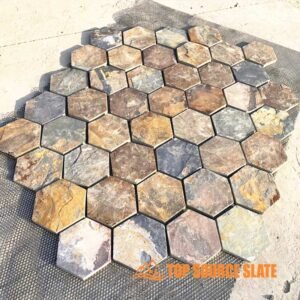
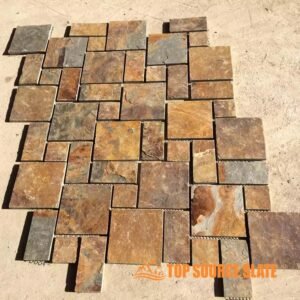
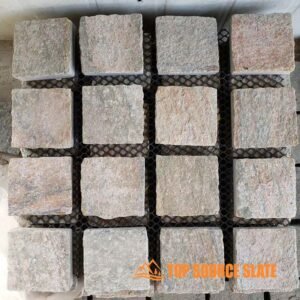
フラッグストーン 通常、層に分割された堆積岩であり、自然に平らな形を与え、経路とパティオを作成するのに理想的です。テクスチャー、色、厚さなど、各石のユニークな特性は、合成材料で複製できないユニークな外観を作成します。素朴で自然な外観であろうと、より洗練された、エレガントなデザインを目指している場合でも、フラッグストーンパティオは、特定のスタイルとニーズに合わせて調整できます。
フラッグストーンの利点:
- 耐久性: フラッグストーンは、その長期にわたる性質で知られています。夏の焦げ目から凍る冬まで、ひび割れや衰退することなく、厳しい気象条件に耐えることができます。
- 自然の美しさ: 敷石の素朴な色調と有機的な形状は、屋外スペースに自然な魅力を加え、庭園、芝生、その他の景観要素とシームレスに調和します。
- 汎用性: 敷石は、シンプルで落ち着いた配置から、より複雑な幾何学模様まで、さまざまなデザインに使用できます。砂利、小石、舗装などの他の素材と組み合わせて、ユニークな外観を作成することもできます。
- メンテナンスが低い: 木材やコンクリートとは異なり、敷石は最小限のメンテナンスしか必要としません。腐ったり、反ったり、虫害を受けたりすることがないため、忙しい住宅所有者にとって実用的な選択肢となります。
石畳と他のパティオ材: 正しい選択をする
パティオの素材を検討するとき、コンクリート、レンガ、舗装などの選択肢に出会うこともあります。それぞれの素材に利点がありますが、 敷石 いくつかの理由で際立っています。
| 材料 | 利点 | 短所 |
|---|---|---|
| フラッグストーン | 自然の美しさ、耐久性、滑り止め、メンテナンスの手間がかからない | 初期費用が高く、設置に時間がかかる |
| コンクリート | 手頃な価格、多用途、迅速な設置 | 時間の経過とともに亀裂が入る可能性があり、定期的なシーリングが必要で、自然な外観が損なわれます |
| レンガ | クラシックな外観、耐久性、修理が簡単 | コケやカビが発生しやすい、色の選択肢が限られている |
| 舗装業者 | 色も形も豊富で取り付けも簡単 | 時間の経過とともに変化する可能性があり、定期的なメンテナンスが必要です |
敷石はコンクリートや舗装などの材料に比べて初期コストが高いかもしれませんが、特に耐久性や美的魅力の点で長期的なメリットがあるため、長期的には費用対効果の高い選択肢となることがよくあります。
始める前に知っておくべきこと: 時間、予算、ツール
をインストールする 石畳のパティオ やりがいのあるプロジェクトですが、慎重な計画と準備が必要です。設置プロセスに入る前に、必要な時間、予算、ツールを明確に理解することが重要です。
時間: パティオのデザインのサイズと複雑さに応じて、設置には数日から数週間かかる場合があります。特に特定の期間内で作業している場合や、特定の日付までにプロジェクトを完了する必要がある場合は、現実的な期待値を設定し、それに応じて計画を立てることが重要です。
予算: 敷石のパティオを設置する費用は、パティオのサイズ、使用する敷石の種類、自分で作業を行うか専門家に依頼するかなどの要因によって大きく異なります。平均して、材料と人件費には 1 平方フィートあたり 15 ドルから 30 ドルかかることが予想されます。ただし、自分でプロジェクトに取り組むことを選択した場合は、この負担を減らすことができます。
ツール: インストールに必要な必須ツールのリストは次のとおりです。
- 掘削用のシャベルとつるはし
- レイアウト用の巻尺とマーキングペイント
- 資材運搬用手押し車
- 石留め用ゴムハンマー
- 均一な表面を確保するためのレベル
- ベースを締め固めるためのタンピングツール
- 石を切断するための石材用のこぎり(必要な場合)
- 安全装備(手袋、ゴーグル、膝パッド)
プロジェクト中の遅延を避けるために、インストールを開始する前に、必要なツールがすべて手元にあることを確認してください。さらに、石材のこぎりなどの専用機器をまだ所有していない場合は、レンタルすることを検討してください。これらの工具は、そのまま購入すると高価になる可能性があります。


計画と設計: 成功の基礎を築く
適切な場所を選択する
最適な場所を選択する 石畳のパティオ が鍵です。日当たり、家からの近さ、排水、眺望、パティオが既存の景観とどのように適合するかを考慮してください。適切に選択された場所により、使いやすさが向上し、メンテナンスが最小限に抑えられます。
パティオのレイアウトをデザインする
自分のスタイルに合ったパターンを決めてください。一般的な選択肢は次のとおりです。
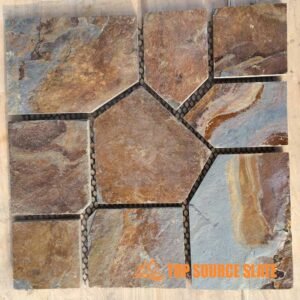
- ランダム/不規則: さまざまな形の石を使用したナチュラルでオーガニックな外観。
- ランニングボンド: レンガのような千鳥状のパターンで構築的な外観を実現。
- バスケット織り: 石を垂直にペアリングしたクラシカルでエレガントなデザイン。
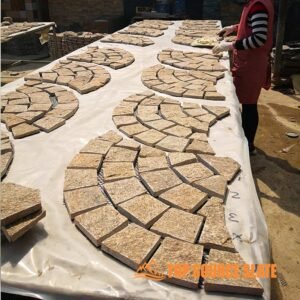
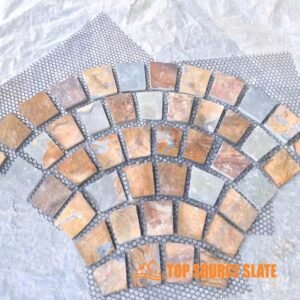
- 円形/ファン: 円形または曲線のパティオに最適で、ダイナミックな焦点を追加します。
サイズ、流れ、色を家や景観と調和させてデザインするようにしてください。
コストの見積もり
予算編成は不可欠です。費用は、パティオのサイズ、敷石の種類、専門家を雇うかDIYで雇うかなどの要因に応じて、平方フィートあたり15ドルから30ドルの範囲になります。人件費、追加機能、砂利、砂、シーラントなどの材料の費用が含まれます。
道具と材料を集める
開始する前に、次のツールと材料を準備します。
- ツール: シャベル、つるはし、巻尺、マーキングペイント、手押し車、ゴム槌、水準器、タンピングツール、石工用のこぎり、安全装置。
- 材料: 敷石、砂利、砂、グラウト・目地材、シーリング材。
すべてを手元に用意しておくと、スムーズな設置プロセスが保証されます。
地面を準備する: 強固な基礎を築く
成功した 石畳のパティオ 設置は適切な地面の準備から始まります。パティオの安定性と寿命は、作成する基礎に大きく依存します。このセクションでは、将来の問題を防ぐために、用地準備、基礎の敷設、適切な排水の確保という重要な手順について説明します。
敷地の準備: エリアを片付けて平らにする方法
最初の石を置く前に、そのエリアを片付けて平らにすることで、サイトを準備する必要があります。この手順は、パティオを安定して平らにし、石の移動や水たまりなどの問題を防ぐために非常に重要です。
サイトを準備する手順:
- エリアをマークします: マーキングペイントや杭と紐を使って、パティオの周囲の輪郭を描きます。これは発掘のガイドとして機能し、パティオの最終的なサイズと形状を視覚化するのに役立ちます。
- 植生を削除します。 草、植物、その他の植生をすべて取り除いてください。シャベルや芝生カッターを使用すると、このプロセスが簡単になります。パティオの下で将来成長するのを防ぐために、根も必ず取り除いてください。
- 土を掘る: エリアを6〜8インチの深さまで掘ります。この深さにより、砂利のベース、砂の層、敷石を置くスペースが確保されます。土壌が特に軟かったり、ずれやすい場合は、より深く掘って、より厚い基礎層を追加する必要がある場合があります。
- 地面を平らにする: 長い水準器や平らな台を使って、掘削面が均一であることを確認します。地面が傾斜している場合は、水が流れやすいように緩やかな勾配を作り、家や他の構造物から水を遠ざけます。
適切な排水の確立:水の蓄積を防ぐ
適切な排水は製品を長持ちさせるために不可欠です 石畳のパティオ。これがないと石の下に水がたまり、家の基礎がずれたり、ひび割れたり、さらには損傷を引き起こす可能性があります。
排水のヒント:
- ベースを傾斜させる: 地面を平らにするときは、建物から離れたところにわずかな傾斜 (1 フィートあたり約 1/4 インチ) があることを確認してください。こうすることで、雨水がパティオから排出され、雨水が溜まるのを防ぐことができます。
- 排水パイプを取り付けます (必要な場合): 雨が多い地域や自然排水が悪い地域では、パティオの下に排水管やフレンチ排水管を設置する必要がある場合があります。このシステムは余分な水をパティオから運び出し、パティオの完全性を保護します。
- 浸透性のジョイントを考慮してください。 砂や砂利などの浸透性の目地材を使用すると、石の隙間から水が浸透し、表面の流出を減らし、自然排水を促進します。
基礎の敷設: 砂利と砂の層の重要性
あなたのベース 石畳のパティオ はその基礎であり、安定性を提供し、時間の経過とともに石が移動するのを防ぎます。しっかりと準備された基礎は適切な排水も保証し、さまざまな気象条件でもパティオの完全性を維持するのに役立ちます。
ベースを設置する手順:
- 砂利を広げる: まず、掘削エリア全体に砕いた砂利の層(深さ約 3 ~ 4 インチ)を敷きます。砂利は排水に不可欠であり、移動を防ぐ強固な基盤を提供します。レーキを使用して砂利を均等に分配します。
- 砂利を圧縮します。 タンパーまたはプレートコンパクターを使用して、砂利層をしっかりと圧縮します。パティオの設置後にベースが沈んだり移動したりしないようにするには、適切な圧縮が重要です。砂利が均一に圧縮されるまでこのプロセスを繰り返します。
- 砂層を追加します。 砂利の上に、砂の層を1〜2インチ広げます。砂は敷石を置くための滑らかで均一な表面を提供し、設置中に石を水平にするのが簡単になります。直定規またはボードを使用して砂の層を平らにします。
ベースをコンパクトにする: 長期的な安定性を確保する
砂利と砂の基層を圧縮することは、車の耐久性に直接影響を与える重要なステップです。 石畳のパティオ。ベースがしっかりと圧縮されていると、時間の経過とともに石がずれたり、沈んだり、不均一になるのを防ぎます。
圧縮のヒント:
- 適切なツールを使用してください。 手動タンパーは小さなパティオに適していますが、より広いエリアの場合は、より強力で効率的なプレートコンパクターのレンタルを検討してください。
- レイヤーでコンパクトに: 基礎が特に深い(4 インチ以上)場合は、一度に砂利を詰めるのではなく、何層かに分けて圧縮してください。これにより、材料を追加する前に各層が安定し、十分に圧縮されることが保証されます。
- レベリングを確認します。 ベースを圧縮するときは、定期的に直定規またはレベルツールを使用してレベルをチェックしてください。このステップにより、表面が均一に保たれます。これは敷石の安定性に非常に重要です。
基礎が完全に締め固められると、しっかりとした水はけのよい基礎が完成し、敷石を敷くという設置の次の段階に進むことができます。適切な下地処理は、石の重量を支えるだけでなく、パティオが今後何年にもわたって風雨に耐えられるようにするのにも役立ちます。
Flagstone のインストール: ステップバイステップ ガイド
敷地を準備し、基礎層を所定の位置にしっかりと設置したら、いよいよ床の敷設を開始します。 敷石。プロジェクトのこの段階では、パティオが実際に形を作り始めます。この段階で慎重に配置し、細部にまで注意を払うことで、敷石のパティオが美しく耐久性のあるものになります。
乾式敷設とモルタル設置: どちらの方法が最適ですか?
をインストールするときに最初に行う必要がある決定の 1 つは、 石畳のパティオ 乾式敷設工法を採用するか、モルタルセッティング工法を採用するかです。それぞれのアプローチには独自の利点があり、選択はあなたの好み、あなたの地域の気候、そして達成したい特定の外観によって異なります。
乾式敷設方法:
- 説明: この方法では、モルタルを使用せずに、砂と砂利の床に直接敷石を置きます。石は可能な限りぴったりとくっつけられ、接合部には砂、砂利、または小石が詰められます。
- 利点:
- 柔軟性: 地盤の沈下に伴って石が自然に動くようになり、ひび割れのリスクが軽減されます。
- 透過性: 水が継ぎ目から浸透し、流出を減らし、排水を促進します。
- 修理のしやすさ: 必要に応じて、個々の石を簡単に持ち上げて交換できます。
- 短所:
- シフトの可能性: 特に凍結融解が繰り返される地域では、時間の経過とともに石がわずかに移動する場合があります。
- 雑草の成長: ジョイントが開いていると雑草が生える可能性があるため、定期的なメンテナンスが必要になります。
モルタルの設置方法:
- 説明: この方法には、コンクリート スラブまたは圧縮された基礎の上に敷かれたモルタルの床の上に敷石を置くことが含まれます。石と石の継ぎ目部分もモルタルで埋めていきます。
- 利点:
- 安定性: 石が移動するリスクが少なく、より強固で恒久的な設置が可能になります。
- よりすっきりとした外観: モルタル接合により、より滑らかで完成度の高い外観が得られます。
- 雑草に対する耐性: モルタルで満たされた目地は雑草の成長を防ぎ、メンテナンスを軽減します。
- 短所:
- 労働集約的: 正しく取り付けるには、より多くのスキルと時間が必要です。
- 料金: 追加の材料と労働力が必要なため、一般的により高価になります。
- 排水に関する懸念: モルタルで設置されたパティオでは、表面に水が溜まるのを防ぐために適切な排水ソリューションが必要な場合があります。
一貫したパターンを作成する: プロのように石畳を配置するためのヒント
アレンジの仕方は、 敷石 パティオに設置すると、全体的な美観に大きな影響を与えます。自然で不規則なパターンを好む場合でも、より構造化されたデザインを好む場合でも、慎重な計画と配置が重要です。
石畳を配置する手順:
- エッジから始めます。 まず、パティオの端に沿って大きな石を置きます。これは周囲を定義し、内部の石のしっかりした境界線を作成するのに役立ちます。
- 内側に向かって働く: 端が決まったら、内側に向かってパズルのように石を合わせていきます。石の間の隙間を最小限に抑えて、しっかりとしたまとまりのあるパターンを作成するようにしてください。
- 形状を変化させます: 均一性を避けるために、さまざまな形やサイズの石を混ぜ合わせてください。これにより視覚的な面白さが加わり、パティオがより自然な外観になります。
- テストフィット: 各石を設置する前に、所定の位置にテストして、周囲の石とうまくフィットすることを確認します。必要に応じて位置を調整して、ぴったりとフィットさせます。
- 一貫したギャップを維持する: きれいでプロフェッショナルな仕上がりにするには、石の間の隙間を一定に保つようにしてください。石のサイズと形状に応じて、通常、隙間は約 1/4 ~ 1/2 インチである必要があります。
デザインのヒント:
- ランダムなレイアウトを使用します。 自然で有機的な外観を実現するには、直線やパターンの繰り返しを作成しないようにします。代わりに、自然の不規則性を模倣したランダムなレイアウトを使用します。
- カラーバリエーションを考慮してください: 敷石の色が異なる場合は、パティオ全体に均等に配置して、バランスの取れた外観を作成します。
- 焦点を組み込む: 大きくてユニークな形の石を焦点として使用して、パティオの特定のエリアに注目を集めることができます。
敷石を平らにする: 滑らかで均一な表面を実現する
平らな表面を実現することは、石畳のパティオの美しさと機能性にとって非常に重要です。凹凸のある表面はプロフェッショナルらしくなく、つまずく危険や排水の問題を引き起こす可能性があります。
敷石を平らにする手順:
- ベースを確認してください: 各石を置く前に、その下の砂の層が水平であることを確認してください。直定規と水準器を使用して、くぼみや高い箇所がないか確認します。
- 石を据える: 敷石を砂のベースの上に置き、しっかりと固定されていることを確認します。石がぐらつく場合は、石が平らになるまで下の砂を調整してください。
- 場所をタップしてください: ゴムハンマーを使って石を砂に優しく叩き、しっかりと固定されていることを確認します。石が割れる可能性があるため、強く叩きすぎないように注意してください。
- レベルを確認してください: 各石を設置した後、水準器を使用して周囲の石と均一であることを確認します。必要に応じて、下から砂を追加または削除して調整します。
- プロセスを繰り返します。 パティオ全体で計画的に作業しながら、それぞれの石を置き、平らにならし続けます。
プロのヒント: 適切な排水を確保するために、パティオ全体にわずかな傾斜 (1 フィートあたり約 1/4 インチ) を維持します。これにより、表面に水が溜まるのを防ぎ、時間の経過とともにパティオが損傷するのを防ぎます。
隙間を埋める: シームレスな外観を実現する適切なジョイント素材の選択
すべての敷石を所定の位置に配置したら、次のステップは石の間の隙間を埋めることです。接合部に選択する素材は、パティオの外観、機能、メンテナンスの必要性に影響します。
一般的な接合材料:
- 砂: 乾式パティオに人気の選択肢で、作業が簡単で、接合部から水を排出できます。ただし、時間が経つと洗い流されてしまう可能性があるため、補充が必要になる場合があります。
- 砂利または小石: より素朴な外観にするには、継ぎ目を小さな砂利や小石で埋めることができます。このオプションは排水も促進し、メンテナンスの負担が比較的少なくなります。
- モルタル: モルタルを敷いたパティオで使用されるモルタルは、雑草の成長を防ぎ、きれいな仕上がりの外観を提供する、しっかりとした永久的な接合部を作成します。ただし、貼り付けるにはより高度な技術が必要であり、ひび割れを防ぐために密閉する必要がある場合があります。
ジョイントを充填する手順:
- 素材を広げます: 選択した目地材をパティオの上に注ぎ、石の間のすべての隙間を確実に埋めます。
- 隙間に一掃: ほうきを使って材料を接合部に掃き込み、接合部を完全に埋めます。動いたりずれたりしないように、深い隙間や広い隙間は必ず埋めてください。
- マテリアルを圧縮します。 砂や砂利の場合は、タンパーを使用するか、単にパティオの上を歩いて、材料を接合部に圧縮します。これにより石が安定し、ジョイント材が不均一に沈むのを防ぎます。
- 表面を洗い流します。 目地を埋めた後、パティオを水で優しく洗い流し、石の表面から余分な物質を取り除きます。モルタル目地の場合は、モルタルを硬化させてから洗い流してください。
表面を密閉する: パティオを風雨から守る
あなたを封印する 石畳のパティオ これは、風雨から保護し、寿命を延ばすための重要なステップです。シーラントは水の浸透を防ぎ、コケや藻の成長を減らし、石の自然な色を高めるのに役立ちます。
シーラントの種類:
- 浸透シーラー: これらのシーラーは石に吸収され、表面の外観を変えることなく内部から保護します。敷石の自然な外観を維持するのに最適です。
- フィルム形成シーラー: これらは石の表面に保護層を作り、わずかな光沢を加えて色を高めます。保護力は高まりますが、石の外観が変わってしまう可能性があります。
石畳を封印する手順:
- 表面をきれいにします: 密閉する前に、パティオが清潔で、汚れ、ほこり、破片がないことを確認してください。表面に汚れが付着すると封じ込められ、外観に影響を与える可能性があります。
- シーラントを塗布します。 ブラシ、ローラー、またはスプレーを使用して、石畳の表面全体にシーラントを均等に塗布します。塗布時間と乾燥時間については、必ずメーカーの指示に従ってください。
- 乾燥させます: パティオを使用する前に、シーラントを完全に乾かしてください。シーラントの種類や気象条件によっては、これに数時間から丸 1 日かかる場合があります。
- 必要に応じて再適用します: シーラントは、風雨への暴露レベルに応じて、通常 2 ~ 3 年ごとに再塗布する必要があります。定期的なメンテナンスは、パティオの見栄えを保ち、寿命を延ばすのに役立ちます。
石畳のパティオを密閉すると、その美しさが増すだけでなく、風雨からの重要な保護も提供され、屋外スペースが今後何年にもわたって美しく機能し続けることが保証されます。
最後の仕上げ: 石畳のパティオに命を吹き込む
敷石が敷かれ、パティオの構造が完成したら、新しい屋外スペースを居心地の良い、機能的で美しいエリアに変える仕上げに集中します。これらの最終ステップは、 石畳のパティオ 見た目が素晴らしいだけでなく、今後何年にもわたってお客様のニーズを満たします。
縁取りと境界線: 石畳を安全に保つ方法
エッジングは、骨の構造と安定性を維持する上で重要な役割を果たします。 石畳のパティオ。適切に取り付けられたエッジは、石のずれを防ぎ、接合材を所定の位置に保ち、天候の変化や人の往来によってもパティオを無傷に保ちます。
一般的なエッジング オプション:
- 金属またはプラスチックのエッジ: これらの素材は柔軟性があるため、湾曲したパティオや不規則な形状のパティオに最適です。それらは表面のすぐ下に設置され、ほとんど目に見えませんが、石と接合材を所定の位置に効果的に保持します。
- 石またはレンガの縁取り: 石やレンガをエッジとして使用すると、より統一感のある外観になります。このオプションは、敷石を補完する装飾的な境界線を追加すると同時に、強力な横方向のサポートも提供します。
- コンクリート縁石: コンクリート縁石は、最大限の耐久性を実現する強固で恒久的なソリューションを提供します。交通量の多い場所や、パティオと芝生や庭の花壇が接する場所で特に便利です。
エッジングの取り付け手順:
- 溝を掘る: パティオの周囲に、縁取り材を入れるのに十分な深さの浅い溝を掘ります。溝は水平で、パティオの輪郭に沿っている必要があります。
- エッジングを取り付けます。 エッジ材をトレンチに配置し、水平で敷石の上部と揃っていることを確認します。柔軟な素材を使用する場合は、地面に打ち込んだ杭で固定します。
- 埋め戻しと圧縮: トレンチを土または砂利で埋め戻し、締め固めてエッジを所定の位置にしっかりと保持します。このステップは動きを防ぎ、時間が経ってもエッジングを安定させるのに役立ちます。
- エッジを仕上げます。 洗練された外観を実現するには、パティオの外側の端に沿って土、マルチ、または装飾石の層を追加し、周囲の風景にシームレスに溶け込ませます。
パティオ周りの造園: 補完的な植栽のアイデア
周囲の景観づくり 石畳のパティオ 美しさを高め、パティオと庭の他の部分との間に調和のとれた変化を生み出すことができます。植物、低木、その他の景観要素を適切に組み合わせると、パティオの端が柔らかくなるだけでなく、色、質感、プライバシーも追加されます。
パティオの端に植えるアイデア:
- 低成長のグランドカバー: 忍び寄るタイム、セダム、アイリッシュモスなどの植物は、敷石の間や端に沿った隙間を埋めるのに最適です。メンテナンスの手間がかからず、干ばつに強く、緑豊かな境界線を追加します。
- 開花多年草: ラベンダー、サルビア、カンゾウなどの多年草は、成長期を通して鮮やかな色彩をもたらします。パティオの端に沿って植えると、活気に満ちた魅力的な空間が生まれます。
- 観賞用の草: ファウンテングラスやブルーフェスクなどの背の高い草は、特にパティオの端近くに群生して植えられると、動きと質感を加えます。
- 低木と小さな木: プライバシーと構造を強化するには、パティオの周囲に低木や小さな観賞用の木を植えることを検討してください。ツゲ、アジサイ、イタヤカエデなどの樹種は、囲いの感覚を高める自然なスクリーンを作り出します。
景観設計のヒント:
- 植物を階層化する: 背の低い植物を手前に、背の高い植物を後ろに配置して、さまざまな高さの植物を重ねて奥行きを作ります。このアプローチにより、視覚的な面白さと充実感が加わります。
- 季節ごとの興味: 一年のさまざまな時期に咲く植物を組み合わせて選択すると、パティオが季節を通して色と生命に囲まれるようになります。
- 点灯: 景観照明を組み込んで、植物、小道、パティオそのものなどの主要な特徴を強調します。太陽光発電または低電圧ライトは、安全性と雰囲気の両方を高めるエネルギー効率の高いオプションです。
屋外用の家具や装飾品を追加する: 居心地の良い魅力的な空間を作る
を満喫するには 石畳のパティオ、快適な座席とあなたの個人的なスタイルを反映する装飾的な要素を備えています。パティオを食事、くつろぎ、娯楽のためのスペースとして想定しているかどうかに関係なく、適切な家具と装飾がパティオを機能的で居心地の良い屋外リビングエリアにします。
パティオ用の家具のアイデア:
- ダイニングセット: 丈夫なテーブルと椅子が屋外での食事や集まりに最適です。金属、木材、樹脂など、風雨に耐えられる素材を選択してください。
- ラウンジ家具: よりリラックスした雰囲気をお求めの場合は、屋外用のソファ、アームチェア、ハンモックをご検討ください。耐候性生地のクッションと枕が快適さと色彩を加えます。
- ファイヤーピットとヒーター: ファイヤーピット、屋外暖炉、またはポータブルヒーターを使用して、涼しい季節にもパティオの使用を延長してください。これらの機能は暖かさを提供し、居心地の良い雰囲気を作り出します。
装飾とアクセサリー:
- 屋外用ラグ: 屋外用ラグでパティオのさまざまなエリアを定義します。足元に質感と暖かさを加え、家具の配置を固定します。
- プランターとポット: 季節の花や常緑の低木を詰めた大きなプランターは、パティオに色と緑を豊かに加えます。さまざまなサイズのポットをグループ化してダイナミックに表示します。
- ストリングライトとランタン: 照明はパティオの雰囲気を決める鍵です。ストリングライト、ランタン、さらにはLEDキャンドルが、夜に柔らかく魅力的な光を作り出します。
- 水の特徴: 小さな噴水やバードバスがパティオに癒しの要素を加えます。水の流れる音はリラックス効果を高め、野生動物を引き寄せます。
照明に関する考慮事項: 夜間にパティオを照らす方法
適切な照明により、機器の使いやすさが向上します。 石畳のパティオ 夕方までご利用いただけるので、日が沈んでからも長くお楽しみいただけます。考え抜かれた照明は安全性を高めるだけでなく、雰囲気を作り出し、屋外空間の美しさを際立たせます。
パティオ照明の種類:
- 通路ライト: これらの低レベルのライトは、地面を照らし、つまずく危険を防ぐために、歩道に沿って、またはパティオの周囲に設置されます。
- オーバーヘッドストリングライト: ストリングライトが頭上に垂れ下がり、星空のようなお祭り気分を演出します。カジュアルな集まりやロマンチックな夜に最適です。
- スポットライト: スポットライトを使用して、座席エリア、水回り、特に美しい植物などの特定の場所を強調表示します。調整可能なスポットライトは、目的の効果を生み出すように狙いを定めることができます。
- ランタンとキャンドル: ポータブルランタンとLEDキャンドルが、パティオに温かみのある明滅する光を加えます。居心地の良い親密な雰囲気を作り出すのに最適です。
照明のヒント:
- 照明を重ねます: さまざまなタイプのライト (アンビエント、タスク、アクセント) を組み合わせて、バランスの取れた柔軟な照明スキームを作成します。
- タイマーとセンサーを使用します。 照明を自動化するには、タイマーやモーションセンサーの設置を検討してください。これにより、エネルギーを節約できるだけでなく、必要なときにパティオが明るく照らされるようになります。
- 耐候性の器具を選択してください: 屋外の照明器具は耐久性があり、風雨に耐えられるように設計されている必要があります。屋外での使用に適していることを確認するには、高い IP 定格 (侵入保護) を備えた器具を探してください。
適切な仕上げを行うことで、 石畳のパティオ ご自宅を美しく飾るだけでなく、一年中楽しめる機能的で魅力的な屋外のリビングスペースにもなります。
メンテナンスとケア: 石畳のパティオを最高の状態に保つ
時間と労力を費やして美しい肌を作り上げた後、 石畳のパティオ、寿命を確保し、外観を維持するには、適切にメンテナンスすることが不可欠です。定期的なメンテナンスは、雑草の成長、汚れ、石の移動などの問題を防ぎ、パティオを何年も新品同様の魅力的な状態に保ちます。
定期的な掃除: 汚れやシミを取り除く方法
定期的な清掃はメンテナンスの第一歩です 石畳のパティオ。時間の経過とともに、汚れ、破片、有機物が表面に蓄積し、対処しないと変色や損傷の原因となる可能性があります。
定期的なクリーニングの手順:
- 掃除: 定期的にパティオを毛の硬いほうきで掃いて、浮いた土、落ち葉、その他のゴミを取り除きます。この簡単な作業で汚れの蓄積を防ぎ、汚れのリスクを軽減します。
- すすぎ: 庭のホースを使ってパティオの表面を洗い流します。これにより、摩耗の原因となる塵や小さな粒子を取り除くことができます。高圧洗浄機を利用できる場合は、石の損傷を避けるために低設定で使用してください。
- スポットクリーニングの汚れ: 食べ物、飲み物、有機物による汚れの場合は、温水に食器用洗剤を数滴混ぜて穏やかな洗浄液を作ります。溶液を汚れの部分に塗布し、柔らかいブラシで優しくこすり、徹底的に洗い流します。石を損傷する可能性があるため、刺激の強い化学薬品や酸性洗剤の使用は避けてください。
頑固な汚れの対処法:
- グリースと油の汚れ: 重曹またはコーンスターチを汚れに振りかけて油を吸収させます。数時間放置した後、ブラッシングして中性洗剤溶液で洗います。
- コケと藻類: 同量の水とホワイトビネガーを混ぜて患部に塗布し、ブラシでこすります。その後よく洗い流してください。
- 錆びの汚れ: 錆びの場合は、石材を傷めずに錆び汚れを除去できる専用の石材クリーナーをご使用ください。メーカーの指示に注意深く従ってください。
雑草とコケの予防: きれいな外観を維持するためのヒント
雑草やコケは景観を損ねる可能性があります。 石畳のパティオ そして時間の経過とともに損傷を引き起こす可能性さえあります。これらの問題に定期的に対処することで、パティオの清潔で魅力的な外観を維持することができます。
雑草予防のヒント:
- ギャップを適切に埋める: 石と石の間の継ぎ目はポリマー砂などの適切な材料で満たされていることを確認してください。ポリマー砂は濡れると硬化し、雑草の成長を防ぎます。
- 発芽前の除草剤を散布します。 雑草が生えてくる前に、石と石の継ぎ目に発芽前除草剤を散布します。こうすることで雑草の種子の発芽を防ぎます。
- 手で引っ張る: 雑草が発生した場合は、根が深くなる前に手で取り除きます。再成長を防ぐために、根全体を引き抜くように注意してください。
コケの成長を制御する:
- 日光への曝露量を増やす: コケは湿った日陰の場所で生育します。可能であれば、近くの木や茂みを伐採して、パティオに日光が当たる量を増やしてください。
- 排水を改善する: 水が溜まるとコケの成長が促進されるため、パティオの表面から水が適切に排出されるようにしてください。必要に応じて目地材を再塗布するか、パティオの傾斜を調整します。
- モスキラーを使用します。 頑固なコケの場合は、石材表面専用のコケキラーを塗布してください。製品の使用説明書をよく読み、治療後はよく洗い流してください。
石畳の再シール: シーラントをいつどのように塗布するか
あなたを封印する 石畳のパティオ 石を風雨から保護し、汚れを軽減し、石の自然な色を引き立てます。時間が経つとシーラントが摩耗する可能性があり、パティオの保護と外観を維持するために再塗布が必要になります。
再シールする場合:
- 頻度: 通常、敷石のパティオは、日光、雨、人の往来の程度に応じて、2 ~ 3 年ごとに再密閉する必要があります。ただし、石の吸収性が高まっていることに気付いた場合(たとえば、表面で水が玉状にならなくなった場合)、それは再封が必要な兆候です。
- 徹底的なクリーニング後: こすり洗いや高圧洗浄を伴う大掃除を行った場合は、パティオを再度密閉して保護層を復元することをお勧めします。
再封する方法:
- パティオを掃除する: 新しいシーラントを塗布する前に、パティオが清潔で、汚れ、汚れ、破片がないことを確認してください。作業を進める前に、表面を完全に乾燥させてください。
- 適切なシーラントを選択してください: 敷石の種類と地域の気候に適したシーラントを選択してください。浸透性シーラーは自然な外観を維持するのに最適ですが、フィルム形成シーラーはわずかな光沢と発色を高めます。
- シーラントを塗布します。 ブラシ、ローラー、またはスプレーを使用して、パティオの表面全体にシーラントを均等に塗布します。小さなセクションに分けて作業して、完全にカバーできるようにし、溜まりを避けます。
- 乾燥させます: メーカーの指示に従ってシーラントを乾燥させます。製品や気象条件によっては、これには数時間から丸 1 日かかる場合があります。
- 渋滞を避ける: シーラントが完全に硬化するまでは、パティオに人が立ち入らないようにしてください。これにより、耐久性があり、長持ちする仕上がりが保証されます。
一般的な問題への対処: 亀裂とヘタリのトラブルシューティング
最善の準備と設置を行ったとしても、 石畳のパティオ 最終的には、亀裂、石の沈下、表面の凹凸などの問題が発生する可能性があります。これらの問題に迅速に対処することは、パティオの完全性と外観を維持するのに役立ちます。
一般的な問題と解決策:
- 石の亀裂: 小さな亀裂はエポキシまたは屋外用に設計された石材フィラーで埋めることができます。大きな亀裂の場合は、さらなる損傷を防ぐために、影響を受けた石を完全に交換することを検討してください。
- 沈降石: 時間の経過とともに石が不均一になったり沈んだ場合は、慎重に石を持ち上げ、その下に砂や砂利を追加してレベルを戻します。砥石をリセットする前に母材を圧縮します。
- ルースストーン: 石材が緩んだり、足元がぐらついたりする場合は、石材を取り除き、その下に目地材やモルタルを塗り直してください。安定性を確保するために、石をリセットする前に材料を十分に圧縮してください。
プロアクティブなメンテナンスのヒント:
- 定期的に検査してください: パティオに摩耗、ずれ、損傷の兆候がないか定期的に確認してください。早期発見により、修理が容易になり、費用も安くなります。
- きれいな接合部: 石の間の接合部を清潔に保ち、破片がない状態に保ち、水の滞留や雑草の成長につながる可能性のある詰まりを防ぎます。
- ジョイント材の補充: 時間が経つと、ジョイント素材が洗い流されたり、沈殿したりする場合があります。必要に応じて砂、砂利、またはモルタルを再塗布して、接合部を充填して安定させます。
結論: 新しい石畳のパティオを楽しむ
時間、労力、リソースを投資してインストールした後、 石畳のパティオ、あなたの労働の成果を楽しむ時が来ました。適切に構築された敷石のパティオは、屋外スペースの美的魅力を高めるだけでなく、リラクゼーション、エンターテイメント、家族の集まりのための機能的なエリアも提供します。適切なお手入れとメンテナンスを行えば、パティオは何年にもわたって美しく耐久性のある家の特徴を保ちます。
アウトドアリビングのアイデア: 新しい空間を最大限に活用する
今あなたの 石畳のパティオ が完成したら、この新しい屋外スペースをどのように活用するかを考える時が来ました。静かな隠れ家として想像する場合でも、活気のあるエンターテイメントエリアとして想像する場合でも、パティオを最大限に活用する方法は無数にあります。
アウトドアリビングのアイデア:
- 屋外ダイニング: 頑丈なテーブルと快適な椅子を備えた屋外ダイニングエリアを設置します。グリルまたは屋外キッチンを追加して、究極の屋外ダイニング体験をお楽しみください。
- ラウンジとリラクゼーションエリア: クッション付きのソファ、アームチェア、コーヒーテーブルを備えた居心地の良いラウンジスペースを作りましょう。快適さとスタイリッシュさをさらに高めるために、屋外用ラグを追加することを検討してください。
- エンターテイメントスペース: 集まりの中心としてファイヤーピットまたは屋外暖炉を設置します。椅子で囲み、ストリングライトやランタンを追加すると、温かみのある居心地の良い雰囲気が生まれます。
- ガーデンオアシス: プランター、ガーデンベッド、または水回りの設備を追加して、パティオを周囲の風景に統合します。これにより、パティオと庭の自然要素の間にシームレスな移行を生み出すことができます。
- 屋外オフィス: 在宅勤務を楽しみたい人は、屋外のオフィス スペースに小さなテーブルと椅子を設置することを検討してください。新鮮な空気と自然環境は、生産性と創造性を向上させます。
長期的なメリット: 石畳のパティオが時の試練に耐えられる理由
選択する 敷石 パティオは家の美しさと機能性への長期的な投資だからです。他の多くの素材とは異なり、敷石は非常に耐久性があり、自然の魅力を維持しながら風雨に耐えることができます。適切な設置とメンテナンスを行えば、石畳のパティオは何十年にもわたって頑丈で魅力的な表面を提供し続けます。
トップソーススレート これらすべての領域で優れているため、家の外で覆われているか屋内の特徴的な壁に取り組んでいるかどうかにかかわらず、私たちはあなたの石のクラッディングの願いの中で最高の共犯者になります。今日お問い合わせください 次の課題をどのように支援するかについて詳しく知るため。
