
商業施設の石材の外装が緩んでいると、即時の安全上のリスクが生じ、施設管理者に重大な法的責任が生じます。石が剥がれる場合、多くの場合、単純な経年変化ではなく、水分の深部への浸入や構造的なたわみが原因であることがわかります。これらの兆候を無視すると、重大な違反ごとに 12,471 ドルの OSHA 罰金が科せられ、最終的には全面的なファサードの破損に発展する可能性があります。
この記事では、基材の水分計の読み取り値が 15% ~ 20% を超えているかどうかを確認したり、NYC Code 基準に対するたわみ制限を測定したりするなど、根本原因を特定するための技術的なフレームワークを提供します。プロが解説します 破損したパネルを取り外す工程 without affecting surrounding masonry, preparing the substrate for re-adhesion, and matching grout colors to maintain aesthetic consistency and structural durability across the building exterior.
Identifying the Root Cause of Loose Stone (Moisture vs. Bond)
Moisture infiltration serves as the most frequent catalyst for loose stone in masonry cladding. While bond failure typically originates from initial application errors, water ingress facilitates long-term structural degradation through freeze-thaw expansion and salt crystallization that aggressively weakens the stone-to-substrate interface.
| Diagnostic Factor | Moisture Infiltration | Adhesive Bond Failure |
|---|---|---|
| Visual Indicators | Efflorescence, damp backing, or mold presence. | Clean failure surface with minimal residue. |
| Substrate Metrics | Moisture meter readings above 15%–20%. | Baseline moisture with localized detachment. |
| Failure Catalyst | Freeze-thaw cycles and chemical hydrolysis. | Incompatible materials or poor curing. |
Differentiating Moisture Infiltration from Adhesive Bond Failure
現場データによると、特に季節の変わり目に、石が浮き出る主な原因は水の浸入であることが判明しています。凍結融解サイクルでは水が基材内で膨張するため、大きな内部圧力がかかり、塩の結晶化により石とその裏材の間の化学界面が弱められます。白い白華や裏地の湿り気などの視覚的兆候は、外部シーラントが機能不全に陥り、湿気が一次バリアを迂回していることを示しています。逆に、一次接着不良は通常、環境への曝露ではなく、互換性のない材料の使用や初期設置段階でのエラーに関連しています。
診断プロトコルと基質検査
効果的な診断は、石が視覚的に所定の位置に残っている場合でも、局所的な剥離を示す中空音を特定するタップテストから始まります。基板メーターの測定値が 15% ~ 20% を超えると湿気の侵入が確認され、故障の根本原因が水であることが特定されます。残留物が多い、またはチョーク状の表面は、時間の経過とともに基材が柔らかくなった長期的な浸透を示唆しています。これらの指標のないきれいな破損点は、多くの場合、機械的接着の問題を示しています。通常は、モルタルの強度が不十分であるか、構築中の表面の汚染が原因です。
安全第一: 構造のたわみの検査
構造たわみ検査は、荷重を受けた梁、スラブ、または支持システムの変形を測定することで安全性を確保します。 BS 8110 やユーロコード 2 を含むほとんどの規格では、総たわみをスパン/250 に制限していますが、ニューヨーク市条例のようなより厳格な要件では、構造上の破損やボンド損失を防ぐために、特定のサスペンション システムに対してスパンの 3/360 の制限を義務付けています。 石のクラッディング。
確立されたたわみ制限と安全基準
BS 8110 およびユーロコード 2 に準拠すると、総たわみをスパン/250 しきい値内に維持することで構造の不安定性を防止します。仕上げや石材のパーティションの場合、エンジニアは建設後の移動をスパン/500 または 20 mm に制限します。この精度により、石とその基材の間の接着不良が防止されます。音響および石製サスペンション システムに対する NYC Code の要件では、長期の耐用性を確保するために、これらのパラメータがスパン長の 3/360 までさらに厳格化されています。
基質の安定性の診断方法
メンテナンス チームは、0.001 インチの分解能を備えたダイヤル インジケータを使用した静荷重テストを使用して、ミッドスパンおよび 1/4 スパン間隔で動きを捕捉します。大規模な設置の場合、落下重量偏向計 (FWD) は衝撃荷重を通じて均一性と非線形性を評価します。また、技術者は ASTM E2835 に準拠した衝撃プレート荷重試験を実施して、衝撃力を受けたプレートの特定のたわみを測定し、交通量の多いゾーンでの安定性評価のための経験的データを提供します。
保守チームの検査ワークフロー
構造リスクの特定は、最初の現場調査中に視覚的な亀裂やスパン/360 を超える垂れ下がりを確認することから始まります。測定結果が 10 フィートのスパンにわたって 1/4 インチを超えるたわみを示した場合、プロトコルでは構造エンジニアとの即時相談が必要です。荷重たわみ曲線を文書化し、弾性率を逆算することで、専門的なメンテナンス記録が確立され、専門家による責任を制限するのに役立ちます。 石の修理と外装 メンテナンス。
周囲の石に当たらずに破損したパネルを撤去
隣接する石材への影響を防ぐために、損傷した石の中心から始めて外側に向かって作業し、除去エリアを隔離します。手作業での抽出にはノミを、精度には湿式鋸を組み合わせて使用します。 カットによりきれいな仕上がりが保証されます 周囲のベニヤの構造的完全性を維持しながら、基板を保護します。
センターアウト方式による手動抽出
損傷した部分の中心にノミを置きます。 パネル ハンマーで軽く叩いて石を小さな破片に砕きます。この技術は、他の方法では隣接するユニットに力が伝わる可能性があるエッジから力を遠ざけるようにします。除去プロセスを中心から端に向かって拡大することで、周囲のベニヤにかかる応力と振動を最小限に抑え、衝撃ゾーンを効果的に隔離します。
ワイヤーブラシを使用して浮遊した破片を取り除き、交換用接着剤のきれいな下地を確保します。古いモルタルやほこりの痕跡をすべて除去することで、再設置段階での接着不良を防ぎます。抽出中に清潔な作業エリアを維持すると、接合部がより鮮明に見えるようになり、健康な石に偶発的に当たる可能性が減ります。
精密ソーイングと構造抽出
大きなものを正確に切断するには、湿式鋸または手鋸を使用してください。 隣接する石の偶発的な亀裂を防ぐパネル。パネルの周囲にモルタルラインを刻み込むと、機械的引き抜き時の振動を吸収する逃げギャップが形成されます。重量を支える石の場合は、プロセス全体を通じて構造の完全性を維持するために、エポキシ注入またはステンレス鋼の棒を適用します。
埋め込む “オランダ人” 自然な美しさを維持するための部分交換用のパッチ。 フルパネルを必要としない壁 抽出。これには、 損傷部分のみを除去し、適合する石を取り付ける 虚空にピースを入れる。この方法は特に遺産に効果的です 完全な交換用パネルが見つかる石または複雑なパターン は難しいです。
必要なツールと基板の準備
安全メガネ、彫刻刀セット、中性 pH クリーナーなどの必須装備を集めてください。 石を守る 表面のエッチングや変色。露出した基材の表面を徹底的にこすって古いモルタルを除去し、新しいポリマー改質シンセットを確実に接着させます。このタイプの接着剤は、熱膨張や建物の動きに対応するために必要な柔軟性を備えています。
2026 年の検査スケジュールを確立すると、緩んだパネルを早期に特定できるようになり、壁の寿命が最大 20 年延びる可能性があります。白華や軽度の亀裂を定期的にチェックすることで、大規模なパネル取り外しの必要性を回避できる小規模な修理が可能になります。これらのメンテナンス手順を文書化することで、長期的な安全性が確保され、建物所有者の責任が管理されます。
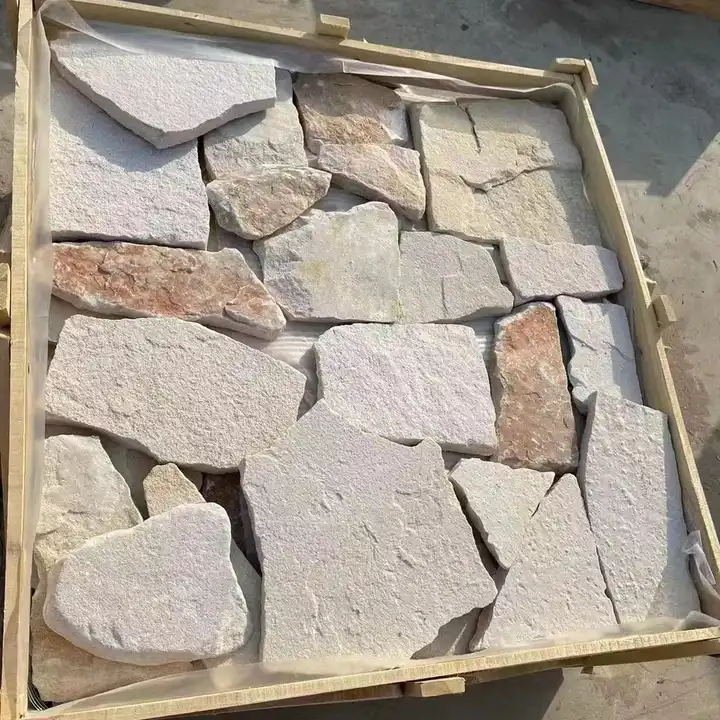
プレミアムな工場直送のスタックストーンでプロジェクトをレベルアップ

再接着のための基材の洗浄
基板の洗浄により、接着破壊剤として機能する汚れ、グリース、有機残留物が除去されます。清潔で乾燥した表面を確保することで、接着剤が最大限の接触を実現し、湿気の侵入や初期の接着不良によって引き起こされる将来の石の剥離を防ぎます。
表面汚染物質を除去するための標準プロトコル
浮遊粒子や微細な塵を除去するには、液体溶剤を塗布する前にドライクリーニング方法が必要です。技術者はタッククロスまたはマイクロファイバータオルを使用して、基板に傷を付けずに破片を持ち上げます。テクスチャーのある表面の場合は、柔らかいブラシを取り付けた掃除機を使用すると、ほこりが素材の細孔の奥深くに沈着するのを防ぎます。
表面に指紋や油性の残留物がある場合は、70% イソプロピル アルコール (IPA) 溶液を塗布します。この濃度により、効果的な洗浄と制御された蒸発速度のバランスが取れます。重度のグリースや頑固な有機汚染物質の場合は、アセトンに続いてイソプロパノールを使用する順序で溶剤を使用すると、より強力な洗浄作用が得られます。糸くずの出ない素材で表面を一方向に拭き、汚染物質が接着領域全体に再分布するのではなく、確実に除去されます。
材料の準備と機械的結合の要件
石や木のような多孔質の基材は、構造の奥深くに汚れを閉じ込めることがよくあります。すすぎ水が透明になるまで、これらの領域を石鹸溶液でこする必要があります。こすった後は、これらの材料を完全に自然乾燥させる必要があります。ヒートガンは、接着剤の化学的硬化を妨げる可能性のある残留水分を除去するのに役立ちます。
滑らかなまたは非多孔質の表面を提供するには、機械的な粗面化が必要です。 “歯” 絆のために。 180 ~ 220 グリットのサンドペーパーを使用すると、パネルの構造的完全性を損なうことなく、接着剤がグリップするのに十分な表面積が得られます。金属または石のような表面上で高度な接合を行うには、ピラニア エッチング シーケンスを使用して残留酸化物を除去します。この準備の後に特殊なプライマーを塗布すると、熱膨張や湿気サイクルが起こりやすい環境での長期安定性が保証されます。
接着力の検証とメンテナンスに関する文書
洗浄プロセスの検証には、洗浄した基板の小さな部分に対する 24 時間のテープ引き剥がしテストが含まれます。このテストでは、完全な再取り付けを開始する前に、表面に接着破壊剤がないことが確認されます。数時間の露出でも結果が損なわれる可能性があるため、準備した表面に新たな塵が蓄積するのを防ぐために、乾燥サイクルが終了したらすぐに選択した接着剤を塗布します。
建物の更新 特定のクリーニングを含むメンテナンスログ 使用された薬剤と方法は、将来の検査のための明確な記録を提供します。よくある接着不良を避けるため、技術者はパネルを再設置する前に残留溶剤や湿気の兆候がないか確認します。適切な文書化と乾燥時間の厳守により責任が管理され、長期にわたる環境ストレス要因に修理が確実に耐えることが保証されます。
グラウトとモルタルの色を合わせて修理する
石積みの修復を成功させるには、次の事項を遵守するかどうかが重要です。 ASTM C270 および C979 規格 美的一貫性と構造的耐久性を確保するため。事前にブレンドされた混合物または特定の顔料キャニスター システムを利用することで、技術者は必要なせん断接着強度を維持し、白華などの問題を防止しながら、既存の接合部に適合させることができます。
モルタル選択に関する ASTM 規格
2026 年の修理に適したモルタルを選択するには、既存の下地との互換性を確保するために、タイプ M、S、または N 混合物に関する ASTM C270 規格を厳密に遵守する必要があります。技術者は ASTM C979 に準拠した顔料を使用し、顔料の総濃度をセメント重量の 10% に制限する必要があります。この制限を超えると、セメント結合の完全性が損なわれることがよくあります。の ミックスデザイン ASTM C144 の砂と清潔な飲料水を組み込む必要があります。接着不良や塩の結晶化を防ぐために、混合物に空気混入混合物や塩化物を加えることは避けてください。
ブレンドテクニックと事前に色付けされたオプション
Daubois や Glen-Gery などのメーカーが工場で製造した製品には、数十の標準的な色合いが用意されており、大規模な石積みの接合部全体で均一な結果が得られます。特殊な現場に合わせて、SPEC MIX キャニスター システムを使用すると、作業者はグレーの N 型または S モルタルの 80 ポンド袋に単色のユニットを追加できます。高強度修復プロジェクトでは、ソロモン SGS A/H/X シリーズ顔料がよく使用されます。これは ASTM C979 の要件を超え、さまざまな石材環境に弾力性のある着色を提供します。これらの事前計算されたシステムにより、混合プロセス中の人為的エラーや色合いのドリフトが軽減されます。
色の検証と現場での応用
最終的な色合いの検証には、モルタルリボンの作成と同一のサンプルでのテストが含まれます。 完全なアプリケーションを開始する前にパネルを確認する。 ACI 530 規格で指定されている 330 ~ 428 psi のせん断接着強度を維持することで、補修材が建物のファサードに永久に接着します。技術者は、最初の硬化が始まった後は、着色モルタルの再焼き戻しを避けなければなりません。一次混合後に水を加えると、色のばらつきが大きくなり、材料が弱くなります。一貫したバッチ処理と水分制御は、古い石積みと新しい石積みの間のシームレスな移行を達成するための最も効果的な方法です。
白華への対処: 白い粉の解決策
Efflorescence occurs when water-soluble salts migrate through porous stone and crystallize on the surface during moisture evaporation. While primarily an aesthetic issue, these white powdery deposits signal underlying moisture problems that require preventative measures like vapor barriers, specialized mortar selection, and breathable sealants to ensure long-term stone stability.
Root Causes of Salt Surface Crystallization
Water-soluble salts move through porous 石のパネル 毛細管現象を介して。石の内部の水分が表面で蒸発すると、特徴的な白い粉を形成する鉱物の堆積物が残ります。一次白華は通常、設置後 72 時間以内に発生し、多くの場合、最初のモルタルまたはグラウト混合物に使用される水によって促進されます。二次堆積物は、雨や地下水の浸透などの継続的な環境暴露により、長期間にわたって発達します。
いくつかの要因がこれらの塩の蓄積に寄与します。標準セメントや特定の基材などの高アルカリ性の建築材料は、すぐに使えるミネラル源となります。さらに、湿った土壌に直接接触したり、サイトのメンテナンス中にミネラル分を多く含む硬水を使用すると、外部の塩が内部に侵入します。 石系。これらの発生源が残留水分と結合すると、結晶化サイクルが無限に続きます。
石材インスタレーションの予防戦略
湿気の経路を排除することが、塩分の移動を防ぐ最も効果的な方法です。水の浸入を防ぐために防湿層と適切な防湿コースを設置してください。 石 基板を通して。適切な敷地の勾配と排水傾斜により、基部付近に水が溜まるのを防ぎます。 石造りのファサード と壁を保護し、材料に侵入できる水分の量を減らします。これらの構造的な安全装置により、内部の安全性が保たれます。 石の環境が乾燥している。
材料の選択は、利用可能な可溶性塩を最小限に抑える上で重要な役割を果たします。高アルカリ性の代替材の代わりに、ポリマー強化薄セット材とアルミン酸カルシウムセメントベースのグラウト材を選択してください。これらの特殊な結合剤には、浸出しやすいミネラルがほとんど含まれていません。保管 石材ユニットは保管および設置中に乾燥します また、プロジェクト終了直後に一次白華を引き起こす早期の湿気の吸収も防ぎます。
安全な除去と表面修復技術
白華の洗浄には、塩が石の奥深くまで押し込まれるのを防ぐため、ドライスタートアプローチが必要です。まず硬い非金属ブラシを使用して、患部から浮いた粉末を取り除きます。液体クリーナーは、表面の蓄積物を機械的に除去した後にのみ使用してください。頑固な白い粉の場合は、専用の石材クリーナーまたは薄めた白酢などの弱酸性溶液を塗布してください。必ず最初に小さな領域をテストして、溶液が表面をエッチングしないことを確認してください。 石を石化するか、その自然を改変する 色。
一度 石はきれいで完全です dry, seal the surface with a high-quality, breathable natural stone sealer. These sealers allow water vapor to escape while preventing liquid moisture from being absorbed into the pores. This barrier minimizes future moisture absorption and breaks the cycle of salt migration. Periodic inspections and maintaining proper drainage around the installation will help keep the stone surface clear of future mineral deposits.
Annual Inspection Checklist for High-Traffic Areas
施設管理者は、歩道、照明システム、構造ベニヤの厳格な年次検査を実施することで、安全を維持し、責任を軽減します。主要な技術基準には、縁石の高さを少なくとも 6 インチに維持すること、ドア敷居の差異を 0.75 インチに制限すること、GFCI が水源から 36 インチ以内に設置されていることを確認することが含まれます。
歩道の安全性と路面危険の軽減
通行量の多いゾーンでのスリップやつまずきの事故を防ぐための第一歩は、通路をきれいに保つことです。メンテナンスチームは、すべての通路と歩行面に破片、液体の流出、予期せぬ障害物がないことを確認する必要があります。湿気に頻繁にさらされる表面には高摩擦素材が必要であり、検査官は歩行者用通路に緩んだ敷物や床の凹凸が存在しないことを確認する必要があります。視認性と安全性を確保するために、縁石は最低 6 インチの高さを維持し、コントラストのあるペイントでマークする必要があります。タイヤストップは最大高さ 6.5 インチを超えていないことを確認する必要があり、スピードバンプには接近する交通に対する明確に見える警告標識が必要です。
出入り口と照明基準
安全に出入りするには、適切な照明と機能的なドアのハードウェアが重要です。検査プロトコルには、進入ポイント付近のモーション作動センサーのテストと、2026 年の安全スケジュールを反映するための照明タイマーの更新が含まれます。非常照明システムは定期的なテストが必要であり、駐車場の設備は損傷を防ぐためにプラスチックレンズまたは金属スクリーンで保護する必要があります。ドアはスムーズに動作する必要があり、技術者はドアの敷居を測定して、差異が 0.75 インチを超えないことを確認する必要があります。すべての出口ルートは完全に遮るものがなく、出口標識が常に視認可能で適切に照明されていることをテストして確認する必要があります。
構造的完全性と責任管理
湿気は石材の破壊の主な原因となり、多くの場合、初期の接着破壊よりも頻繁に凍結融解サイクルを通じて石の接着を弱めます。屋根の年次点検、 石のパネルおよび屋根板は、コンポーネントの緩みや湿気による損傷を、落下の危険が生じる前に特定します。専門家はタップテストを使用して中空の音がする石を特定し、水分計を使用して基質レベルが15〜20%未満にとどまっていることを確認します。電気の安全性は、水深 36 インチ以内のコンセントで GFCI を毎月テストし、可燃物を配電パネルから 36 インチ離すことによって管理されます。これらの調査結果と年間平均日交通量 (AADT) を文書化することは、OSHA が指摘する危険に関連するリスクを軽減するのに役立ちます。重大な違反ごとに 12,471 ドルの罰金が科せられる可能性があります。
よくある質問
積み上げた石が落ちてしまうのはなぜですか?
積み重ねられた石のベニヤ 通常、湿気の侵入、構造の動き、または不適切な取り付けによって引き起こされる接着不良が原因で剥がれます。よくある問題としては、バックバタリング工程を省略したり、2026 年の気象サイクルに耐えられない劣化したモルタルを使用したりすることが挙げられます。通常 検査は結石が発生する前に弱い結合を特定するのに役立ちます 秋。
暖炉の中に落ちた石をどうやって直すのですか?
掃除してください 石と壁 空洞を徹底的に除去して古い破片を取り除きます。色を合わせた二液性エポキシを塗布するか、 石材の裏側にN型モルタルを塗布 しっかりと押し込みます。必要に応じて石をテープで固定し、接合部を仕上げる前に少なくとも 24 時間硬化させます。
石突板をパッチしてもらえますか?
石についた白い粉はどうやって取り除くのですか?
この白い粉は白華と呼ばれ、湿気によって表面に浮き出た塩の堆積物で構成されています。軽い付着物は、乾いた非金属ブラシで取り除くか、水で洗い流してください。頑固な場合には、希釈した酢溶液、またはムリア酸と水を 1:12 で混ぜたものを塗布し、重曹で中和してすすいでください。
石材ベニヤにひび割れが発生する原因は何ですか?
亀裂は多くの場合、壁タイの腐食、基材の移動、または熱膨張によって発生します。裏材と石の膨張率が異なると、結合を破壊する応力が発生します。凍結融解サイクルや塩の結晶化などの環境要因も、時間の経過とともに微小亀裂の原因となります。
一枚の石パネルを交換するにはどうすればよいですか?
壁面をきれいにし、新しいパネルの裏面を軽く湿らせて接着力を高めます。ポリマー強化タイプ S モルタルを 1/2 インチの層でパネルに塗布し、こてでうねを作り、下から押し込みます。継ぎ目をグラウトバッグで満たし、継ぎ目のない外観を得るために滑らかにします。
最終的な考え
ゆるい 石の修理 表面の外観と根底にある構造の健全性の両方に対処する正確なアプローチが必要です。商業用不動産の管理者は、湿気の管理が修繕の寿命を左右することに気づくことがよくあります。水による劣化であれ、機械的結合の問題であれ、特定の故障を特定することで、チームは正しいモルタルと洗浄プロトコルを適用して再発を防ぐことができます。これらの詳細に早期に対処することで、小規模な切り離しが高価な本格的な置き換えに変わることを防ぎます。
一貫した年次検査により、より安全な環境が生み出され、石材の落下に伴う法的リスクが制限されます。 ASTM C270 などの規格に従い、たわみ制限を監視することで、 石のクラッディング 環境ストレス下でも安全を保ちます。これらのメンテナンス ワークフローは、建物のファサードを保護し、耐用年数を延ばし、長期的な施設管理の信頼できるベースラインを提供します。
