Gestapelde steen is de meest natuurlijke en een van de oudste bouwmaterialen. Het wordt al eeuwen in verschillende projecten gebruikt, zowel binnen als buiten uw huis. Stapelsteenpanelen kunnen om vele redenen een geweldige keuze zijn: het duurt eeuwig, het biedt een breed scala aan kleuren om uit te kiezen en het kan schoonheid toevoegen aan elke ruimte waarin je ze plaatst.
Wat is gestapelde steen
Gestapelde steen zo bekend als ledgesteen, grootboekpaneel, stenen fineerkladden, gekweekte steen, gestapelde stenen panelen, gestapelde stenen grootmateriaalpanelen, fineer in de natuursteen, ledbertone wandpanelen, veer van het grootbeen, latpeneer, slate veener, slate veener, slate veener, slate veener, slate veener, slate veener, slate veener, slo
Een natuurlijke en tijdloze look voor uw huis is de beste manier om gestapelde stenen muurbekleding te beschrijven. Dit type landschapsarchitectuur biedt een uniek, ander uiterlijk dat u niet kunt vinden met een ander materiaal of stijl. Het goede van dit soort ontwerp is dat het veelzijdig is en op veel verschillende manieren kan worden toegepast. Laten we eens nader bekijken wat het precies inhoudt, evenals enkele ideeën over hoe het toe te passen!
-
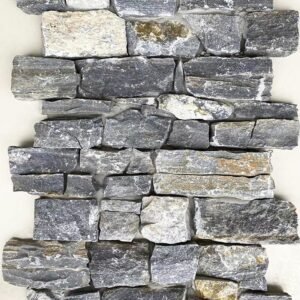
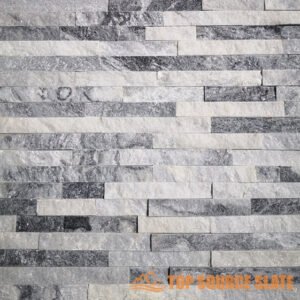
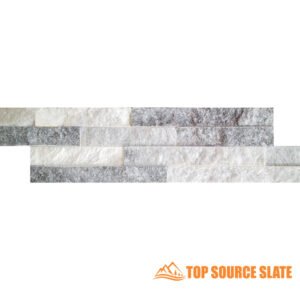 Glinsterende ijsgrijze mozaïektegels met gespleten oppervlak
 -
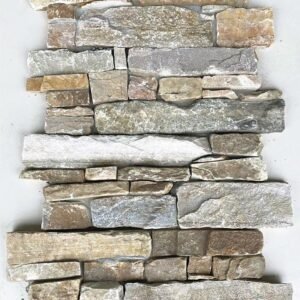
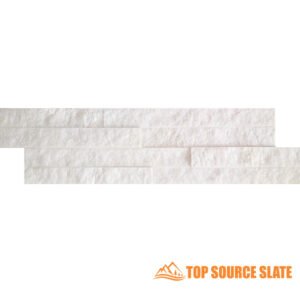 Glinsterende ijswitte mozaïektegels met gespleten gezicht
 -
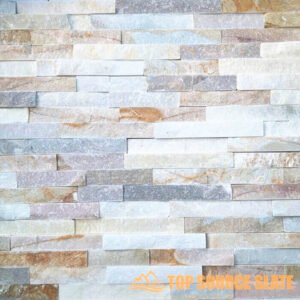
 Oesterkwarts mozaïektegels met gespleten oppervlak 360x100 mm
 -
 Blauwe diamantkwartssteenbekleding voor buitenmuurdecoratie
 -
 Oyster Quartz Z Stone-panelen 550 x 200
 -
 Groothandelsprijs natuurstenen buitenbekleding
 -
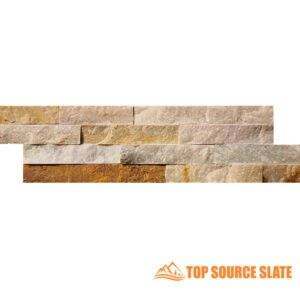
 China gouden honing kwartsiet gestapelde steen
 -
 Alaska grijze moderne stenen muurbekleding aan de buitenkant
 -
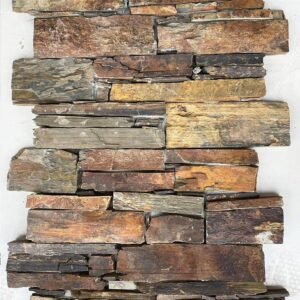
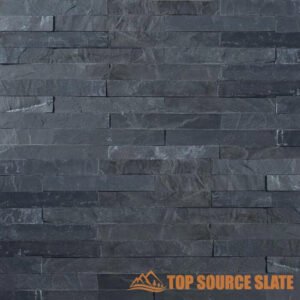 Exterieur moderne zwarte leisteen gestapelde stenen fineer open haard
Waar u gestapelde stenen kunt gebruiken
Een van de beste manieren om textuur aan uw thuisontwerp toe te voegen, is om gestapelde stenen te gebruiken. Dit zijn natuurlijke stenen die zijn geïnstalleerd in de manier waarop u een tegel zou installeren. Het beste deel is dat u een gestapelde steen kunt gebruiken voor elke ontwerpstijl.
U kunt de stapelpanelen van de gestapelde stenen buitenshuis en binnenshuis gebruiken omdat het het ideale materiaal is om een functiemuur te creëren. U kunt bijvoorbeeld een functiemuur maken rond uw open haard, in de foyer, badkamer, of deze gebruiken als backsplash in uw keuken.
Aan de andere kant kunt u het ook gebruiken om de buitenkant van uw huizen te markeren, zoals de kolommen, schoorsteen, voordeur en nog veel meer. Dus als u dit materiaal in uw huis wilt installeren, bent u aan het juiste punt gekomen.
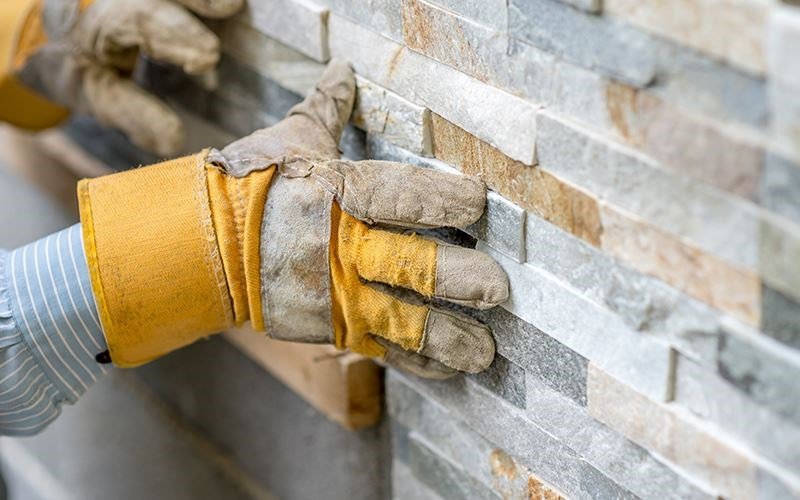
Installatie van gestapelde steen
Of u nu een professional bent of een huiseigenaar die een doe -het -zelf -project heeft overgenomen, u kunt de onderstaande stappen volgen om gestapelde stenen fineer te installeren in uw huis buiten of interieur.
Krijg al uw tools
Zodra uw substraatbord is opgezet, moet u al uw gereedschappen bij elkaar krijgen. Dit is zodat u onmiddellijk met het proces kunt beginnen en het in minder tijd kunt voltooien. Hier zijn alle gereedschappen die u nodig hebt om een gestapelde stenen muur in uw huis op te zetten:
- Haakse slijper
- Meng emmer
- Potlood
- Troffel
- Rechte rand
- Meetlint
- Gestapelde stenen
- Lijmpoeder
- Water
Naast deze essentiële materialen moet u alle veiligheidsuitrusting in gedachten houden. Het is bijvoorbeeld goed om oorbanden en veiligheidsbril te dragen bij het snijden van een richelsteen.
Houd de Substraatgebied Ckarig
Bij het neerleggen van gestapelde stenen fineerpanelen, is het eerste wat je moet doen om het substraatgebied schoon te maken. Daarna moet u een outdoor siliciumsubstantie aanbrengen op de randen van het bord. Dit sluit eventuele openingen tussen de muur en het daaraan bevestigde substraat.
Houd er rekening mee om het overtollige product af te schrapen door een ijsstick te gebruiken. Het is de beste manier om de vloeistof te verwijderen zonder deze te verspreiden.
Meng de primer
Een belangrijk ding om te onthouden bij het leggen van gestapelde stenen fineer is dat je een primer op de substraatwand moet aanbrengen. Merk echter op dat u het product eerst moet verdunnen met water.
Meestal worden de pakketten primer geleverd met handleidingen. U moet degene met uw product controleren om de juiste verhoudingen te krijgen. Zodra je ze kent, moet je het water in een emmer gieten en de primer toevoegen.
Pas de primer toe
Nu u het mengsel hebt gemaakt, moet u het op het substraatbord toepassen. Het gebruik van een brede penseel is de beste manier om dit te doen, omdat u hiermee een groter oppervlak kunt bedekken. Een rol is een ander hulpmiddel dat u kan helpen de primer gemakkelijk toe te passen.
Houd er rekening mee dat u de primer in één keer op het hele substraat op het hele substraat aanbrengt. Meestal duurt het vijftien minuten voordat het oppervlak drogen. Je moet niet beginnen met het opleggen van de gestapelde stenen grootboekpanelen tenzij het bord volledig droog is.
Leg de Gestapeld Stenen Panelen
Gestapelde stenen grootboekpanelen zijn gemaakt van natuursteen, zodat ze verschillen in textuur, dikte en grootte. Daarom moet je een rij gestapelde stenen tegen het substraat opleggen. Houd er rekening mee dat ze geen lijm op hen toepassen.
Het doel van het opleggen van droge stenen is om de beste look voor je muur te krijgen. U kunt proberen de stukken in verschillende hoeken te plaatsen om het juiste uiterlijk te selecteren. Zodra u weet welke look u wilt, kunt u beginnen met de permanente applicatie.
Snijd de gestapelde steen Fineer
Wanneer u gestapelde stenen tegel op de muur legt, zult u merken dat het laatste stuk langer zal zijn dan het substraat. Daarom moet u het in de juiste maat snijden. U kunt dit doen door de richelsteen op de muur te plaatsen en meetband te gebruiken om het juiste snijpunt te markeren. Vervolgens kunt u de snede maken met de hoekmolen.
Meng de lijm
Nu al je materiaal klaar is, moet je de lijm mengen door het poeder in de emmer te leggen waarmee het wordt geleverd en water toe te voegen. U moet ervoor zorgen dat het resulterende mengsel de consistentie van tandpasta heeft. Dit maakt een soepele toepassing mogelijk.
Nogmaals, merk op dat het lijmpakket een handleiding heeft. Dat moet u gebruiken voor de mengverhoudingen. Als je aan de juiste metingen vasthoudt, kun je de juiste consistentie krijgen.
Breng de lijm aan
Pak de troffel op en plaats deze in de lijmemmer om de pasta te krijgen. Breng dit vervolgens aan op de onderkant van het substraat. Houd er rekening mee om alleen voldoende lijm te doen voor de eerste rij van de gestapelde stenen muren.
Misschien wilt u de lijm op de achterkant van het gestapelde stenen fineer aanbrengen. Hoewel er geen kwaad is, raden we u aan dat niet te doen. Dit komt omdat het proces schoner zal zijn en het plaatsen gemakkelijker zal zijn door de lijm op de muur aan te brengen.
Bevestig de gestapelde stenen aan de muur
Nu je de lijm hebt geplaatst, moet je beginnen met het bevestigen van de gestapelde stenen panelen. Als je klaar bent met de eerste rij, werk je je een weg omhoog en leg je meer lijm als je gaat.
Een gestapelde stenen tegel komt in verschillende variaties, dus maak je geen zorgen over een off-gecentreerde look bij het maken van overlappingen. Leg gewoon de stenen zoals ze zijn om een natuurlijk resultaat te krijgen.
Leg de bovenste rij
Wanneer u de bovenste rij bereikt, vindt u ongelijke ruimte op het substraat. Daarom moet u de gestapelde stenen panelen naar de juiste maat snijden. Zodra u dat doet, brengt u lijm aan op de achterkant van de steen. Hierdoor wordt het bevestigsproces voor de top eenvoudiger gemaakt.
Nadat u alle gestapelde stenen hebt bevestigd, moet u een doek gebruiken om eventuele rommel aan de randen te vegen. Vervolgens moet je de muur laten drogen en je zult klaar zijn.
gerelateerd aan:
Stacked Stone: een complete kopersgids【update】
Installatierichtlijnen voor gestapelde stenen tegels
Hoe gestapelde stenen panelenhoeken te installeren
Laatste woorden
Dit is uw volledige gids voor gestapelde steen en de toepassing ervan. Ze komen in verschillende variaties. U kunt bijvoorbeeld een gekweekte steen of een richelsteen voor uw huis krijgen. Zodra u de gestapelde stenen hebt, kunt u het eerdere aanvraagproces gebruiken om eenvoudig een nieuwe muur te maken.
Opmerking: inspecteer alle gestapelde stenen panelen voor de installatie. Natuursteenproducten missen inherent uniformiteit en zijn onderhevig aan variatie in kleur, schaduw, afwerking, enz. Het wordt aanbevolen om gestapelde stenen tegels uit verschillende dozen te mengen bij het installeren.
Als een Chinese fabrikant, exporteur en fabriek van cultuursteen, richelsteen, gestapelde stenen fineer, welkom om je vrij te voelen Neem contact met ons op op elk moment.
