Noen gang startet et DIY -prosjekt og realisert halvveis i det ene savnet trinnet kan gjøre en enkel oppgradering til en stor hodepine? Installere Z -paneler Ofte opplevde stubber til og med DIYERS - uendelige overflater, vanskelige justeringer eller rotete finish kan avspore hele utseendet. En dårlig prepped vegg eller feil limvalg forvandler raskt en hjemmforbedringsgevinst til en “gjør-over” situasjon.
If you want your feature wall to look pro—not just good enough—you need more than just enthusiasm. Clear planning, the right tools, and smart techniques like using Z clips for seamless mounting all make the difference. I denne guiden vil vi lede deg gjennom hvert trinn, dele tips for sikker, nøyaktig installasjon og dekke hvordan kvalitetspaneler og praktiske fraktalternativer (som pre-size-sett fra ledende leverandører) kan gjøre din neste DIY Z-panelinstallasjon a “No-Brainer”. Let’s get started on turning your vision into reality.
Elevate Your Space with Z Panels
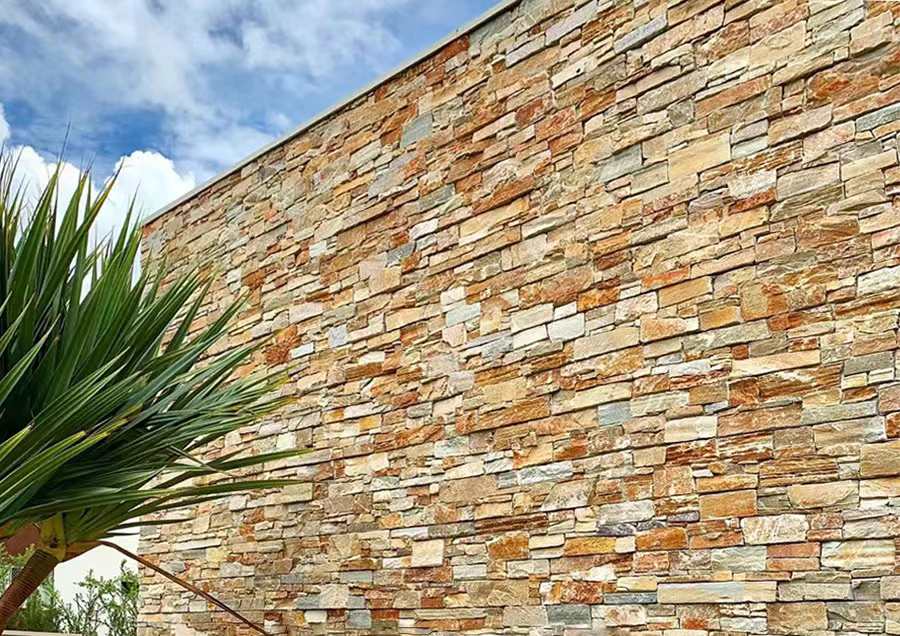
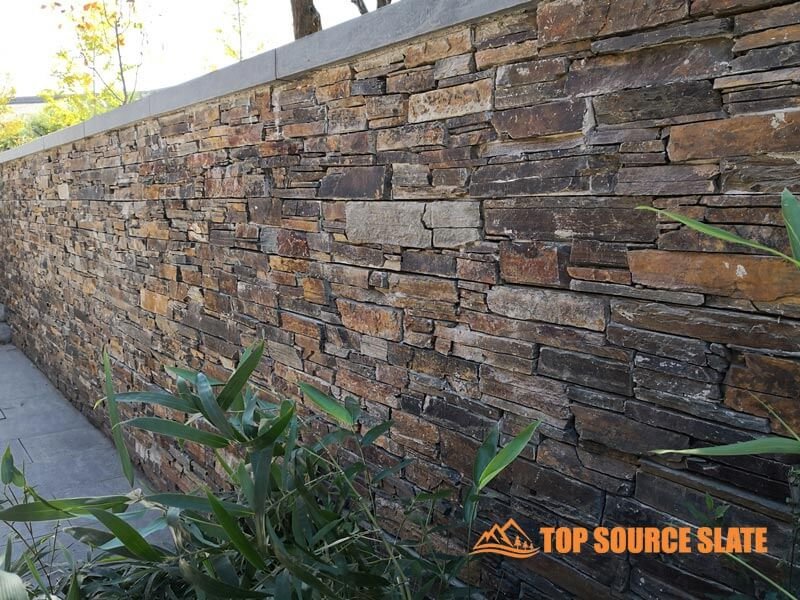
If you’re looking for a way to add both style and practical value to your space, Z Panels could be your go-to solution. These versatile stone panels are gaining popularity in DIY home improvement for their easy installation process and jaw-dropping natural look. Enten du vil lage en vegg med stue, gjøre peisen din til et midtpunkt, eller oppgradere hjemmets utvendige, tilbyr Z -paneler en fleksibel og holdbar tilnærming som passer til nesten alle designvisjoner.
“Z-paneler blander natursteinskjønnhet med problemfri installasjon, noe som gjør dem perfekte for alle som ønsker å ta hjemmeforbedring opp et hakk uten å ringe inn proffene.”
What are Z Panels?
Z -paneler er sammenlåsende steinfliser, designet for å passe sammen som puslespillstykker. De har vanligvis en “Z”-formet kant, som gjør at de justerer dem enkle og holder sømmer nesten usynlige. De fleste Z -paneler er laget av ekte stein - for eksempel skifer, kvartsitt eller sandstein - og gir hver vegg en ekte, robust følelse. Noen kommer til og med med innebygde metallklipp på baksiden, slik at du kan montere dem raskt og sikkert med grunnleggende verktøy; Ingen fancy utstyr er nødvendig.
-
 Engrospris utvendig natursteinsbekledning
 -
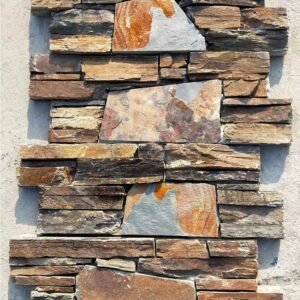
 Oyster Quartz Z steinpaneler 550 x 200
 -
 Skyet grå Z-form kvarts naturstein kledningspaneler
 -
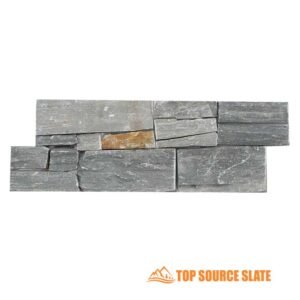
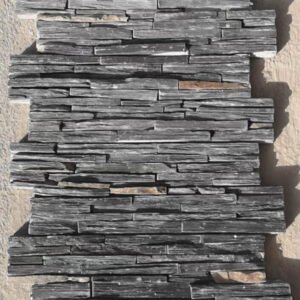
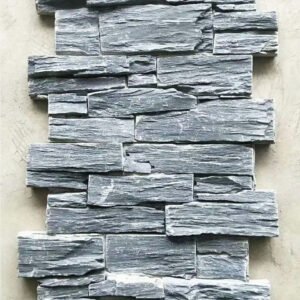 Sort skifer Z-panelkledning
 -
 Naturlig hvit kvartssteinkledning
 -
 Blå diamant kvartssteinkledning for ytterveggdekorasjon
 -
 Grønn kvarts naturstein kledningspaneler
 -
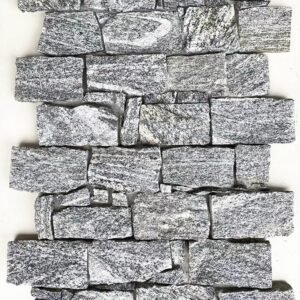
 Kinesisk fabrikk naturlig Z steinpaneler
 -
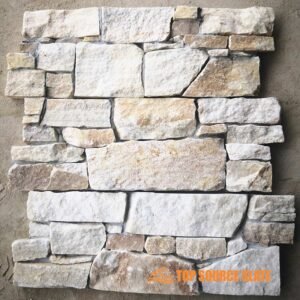
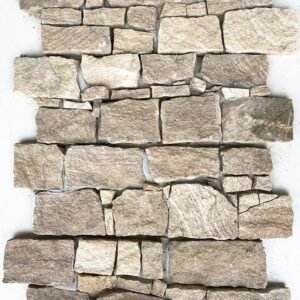
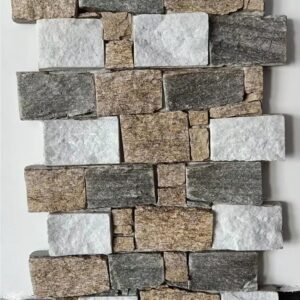
 Hotselgende hyllestein har veggkledningspaneler
 -
 Z-formet panel stablet steinkledning
 -
 Sementstøttet naturlig Ledgestone Stackstone veggflis
 -
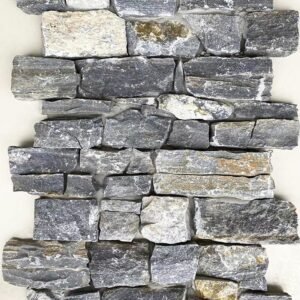
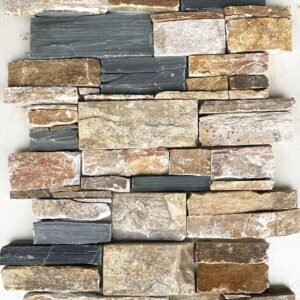
 Flerfarget skifersementstøttet naturlig sammenlåst avsatsstein
 -
 Svart skifersementstøttede kantsteinfinerpaneler
 -
 Rustikk skifertørrstabel steinfinér utvendig
 -
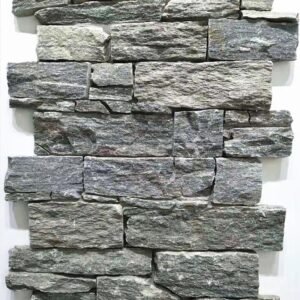
 Kina populære sammenlåsende steinkledning Z-paneler
Fordelene med å bruke Z -paneler: estetisk appell, enkel installasjon og holdbarhet
En grunn til at folk velger Z -paneler er deres alvorlige fortauskant. Hvis du sikter mot et tidløst, eksklusivt utseende, leverer disse panelene strukturert dybde og jordnær karakter. Deres sammenkoblingsdesign betyr også at du ikke trenger å være proff -DIY Z -panelinstallasjon is simple, with minimal risk of mess or mistakes. Plus, the durable stone material holds up well indoors and outdoors, resisting chips and fading so your investment lasts for years.
Where Can You Use Z Panels?
- Innvendige vegger
- Accent Walls
- Peiser
- Outdoor Cladding
Wondering where to use Z Panels in your home? They’re great for accent walls in living rooms or bedrooms, but also work wonders on fireplaces, kitchen backsplashes, or even patio walls. For those keen on home improvement with z panels, the possibilities go way beyond just one room—think entryways, bath surrounds, or outdoor kitchens. With their robust weather resistance, Z Panels are a smart choice for making a statement both inside and out.
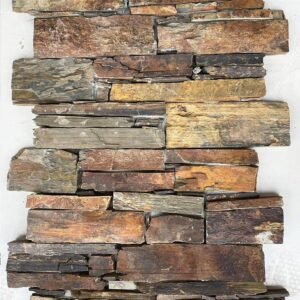
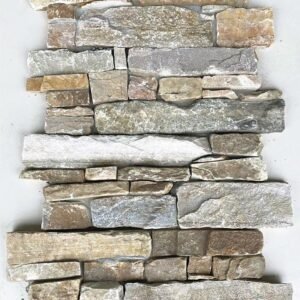
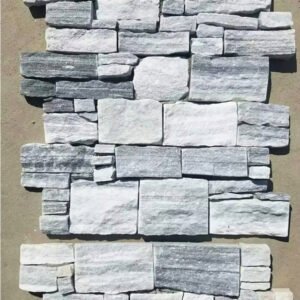
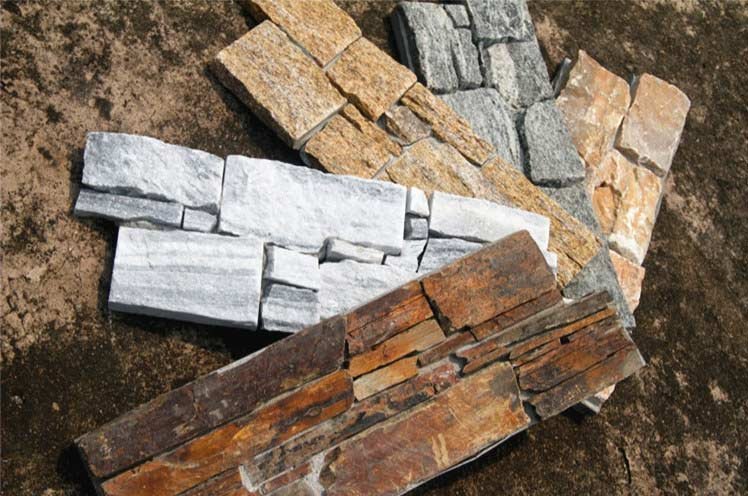
Forstå forskjellige typer Z -paneler: Materialer, teksturer og stiler
Det er ingen størrelser som passer alle Z-panelene. Du finner alternativer laget av alle slags steiner, i farger som spenner fra kule grå til rike gull. Finishene varierer også, fra splittet ansikt robusthet til jevnere stiler; Dette betyr at du kan matche hvilken som helst designsmak, fra rustikk hytte til moderne loft. For alle som lurer på hva som er Z-paneler laget av, bruker de fleste produkter av topp kvalitet natursteinsstykker nøye valgt for styrke og fargekonsistens.
Installasjonsinnsikt: sparer tid med innebygde klipp
Mange Z-paneler har i dag innebygde metallklipp som griper veggen, slik at du bruker mindre tid på å måle, bore eller maser med ekstra parentes. Denne funksjonen lager Installere Z -paneler en lek for nybegynnere og erfarne renovatører, som lar deg bruke mer tid på å beundre arbeidet ditt enn å svette over verktøy.

Top Source Slate: Din partner for kvalitets Z-paneler
Top Source Slate bringer over 15 års erfaring med å levere pålitelige, tilpassbare Z Panel-løsninger. Med en direkte fra fabrikk-tilnærming holder de kostnadene i sjakk mens de leverer den ekte steinkvaliteten kundene forventer. Huseiere, utbyggere og designere kan benytte seg av den dype katalogen deres, fra standardfarger til unike tilpassede bestillinger, vel vitende om at de vil få både hjelp og ærlig veiledning hvert trinn på veien.
Oversikt over Z-paneler: stiler, materialer & Applikasjoner
| Panelmateriale | Populære finisher | Vanlige applikasjoner | Typisk størrelsesområde | Bransjereferanse (holdbarhet) |
|---|---|---|---|---|
| Skifer | Delt ansikt | Peis, Accent Wall | 6″x24″ | Høy (vann & Frostbestandig) |
| Kvartsitt | Ujevn & Glatt | Outdoor Cladding | 6″x24″; tilpasset tilgjengelig | Veldig høy (ripebestandig) |
| Sandstein | Naturlig spalte | Innvendige vegger | 6″x24″ | Middels (best for innendørs) |
| Marmor | Finslipt | Luksuriøse funksjoner | 4″x18″ til 6″x24″ | Middels (vanlig forsegling nødvendig) |
| Granitt | Flammet/Fint plukket | Eksteriør med høy trafikk | 6″x24″ | Svært høy (UV & Slagfast) |
Note:
Tabellen fremhever viktige Z Panel-materialer, deres vanlige overflatebehandlinger, bruksområder og hvordan hver av dem presterer under industristandarder for holdbarhet. Målinger gjenspeiler typiske produsentens standarder; tilpasningsalternativer er allment tilgjengelige.
Forberedelse for installasjon: Verktøy, materialer og overflateforberedelse
Å starte et hjemmeoppgraderingsprosjekt med Z Panels betyr å forberede seg som en proff for å få det polerte resultatet. Før du dykker inn Installere Z -paneler, bør du stille opp riktig utstyr, velge materialer av høy kvalitet og forberede overflaten for å unngå hikke på veien. Hvis du tar deg tid til nøye planlegging, sikrer du at hver stein passer akkurat, og at den spesielle veggen din varer i årevis.
“En solid forberedelsesrutine – verktøy klare, overflatesjekket, planlagt layout – gir Installere Z -paneler enklere og bidrar til å unngå sløsing eller kostbare overgrep.”
Samle verktøyene dine: En omfattende sjekkliste
Hvert vellykket Z Panel-oppsett begynner med å samle inn nødvendig verktøy for z-panelinstallasjon. Her er en go-to-liste:
- Nivå – for helt rette linjer
- Målebånd – for å dimensjonere plassen din
- Mursag eller vinkelsliper – for tilpassede kutt
- Steinlim – riktig type betyr noe (vi deler det ned neste gang)
- Tannsparkel – for å spre limet jevnt
- Vernebriller og hansker – spill alltid trygt
- Z-klemmer eller metallmonteringsbraketter – hvis panelene dine trenger ekstra støtte
Mange Z-paneler kommer nå med innebygde metallklemmer, så hvis du får tak i et Top Source Slate-sett, vil du finne at installasjonen går enda raskere.
Velge riktig lim: typer, bruk og kompatibilitet
Når det gjelder å sikre disse steinene, bruker du beste lim for z-panelinstallasjon er kritisk. For innvendige vegger fungerer et polymerbasert konstruksjonslim av høy kvalitet godt, mens utendørs eller våte områder kan trenge et spesialisert utvendig steinlim. Sjekk alltid kompatibiliteten – noen lim er ikke laget for visse veggoverflater. Spred limet med en tannsparkel for et jevnt grep og lås hvert panel på plass før det begynner å herde.
Overflateforberedelse: Rengjøring, utjevning og sikring av strukturell soliditet
Nå kommer benarbeidet. Rengjør bunnveggen for å fjerne støv, oljer eller annet som kan rote med vedheft. Dobbeltsjekk at overflaten er jevn; bruk lappemasse for å fylle fordypninger eller hull. For gammel murstein, betong eller gips, sørg for at den er sterk nok til å bære steinvekt. Ikke hopp over dette: en defekt base fører til vaklende eller løse paneler senere. Til Z Panelmontering, stabile og rene vegger utgjør forskjellen mellom en rask, enkel installasjon og en ekte hodepine.
Måling og planlegging av layout: Teknikker for nøyaktig plassering og minimalt med avfall
For et pro-grade-utseende er planlegging din “ride-or-die” flytte. Bruk et målebånd og vater for å kartlegge hvor Z-panelene dine vil lande. Start fra midten eller et hovedfokuspunkt og tørrpass den første raden før du stikker noe ned. Merk snittene på forhånd for å unngå små, rare biter i kantene. Dette forsiktig Z Paneloppsett vil spare materiale og sikre at sømmene forblir nesten usynlige.
Toppkildeskifer: Easy Z-panelsett og støtte
Trangt i tide? Top Source Slate tilbyr forhåndsdimensjonerte Z Panel-sett, komplett med klips og detaljerte installasjonsveiledninger for alle slags rom. Disse pakkene sparer tid og reduserer gjettingen for gjør-det-selv-makere. Sjekk ut deres produktside for å utforske panelstiler eller chatte med brukerstøtte om å velge riktig sett for rommet ditt.
Viktige verktøy & Forberedende trinn for installasjon av Z-paneler
| Verktøy/materiale | Hvorfor det trengs | Anbefalte spesifikasjoner/merke | Måling/bruksmetode | Bransje beste praksis |
|---|---|---|---|---|
| Nivå | Sikrer jevne, rette rader | Boksnivå, 24-48 tommer | Sjekk horisontal justering hver rad | Kontroller på nytt etter hver 3-4 paneler |
| Stone lim | Sterk binding for stein-på-vegg | Mapei Ultralite (for innendørs/utvendig bruk) | Spred med 1/4 tomme tannsparkel | Test på skrappanel før full bruk |
| Sag/kvern | Egendefinerte kutt for hjørner, kanter | Våt flissag (DeWalt, QEP) | Skjær og trim minst 1 panelbredde fra kantene | Bruk vernebriller og klipp utendørs hvis mulig |
| Overflaterens | Forbedrer panelvedheft | Mild avfettingsmiddel eller såpevann | Tørk av veggen og la den tørke helt | Vurder for mugg- eller vannskader før du starter |
| Z Clips / Innebygde Clips | Raskere panelfeste | Rustfritt stål eller galvanisert | Fest 4-6 tommer fra hver panelende | Standard i Top Source Slate-sett |
Note:
Denne tabellen oppsummerer virkelige verktøy, materialer og profesjonelle tips for å sikre at ditt Z Panel-prosjekt starter på høyre fot. Bruk disse detaljene som sjekkliste før hvert trinn av installasjonen.

Trinn-for-trinn-guide: Installere Z-paneler som en proff
Klar til å øke plassen din med naturstein? Følg denne vennlige trinnvise installasjonsveiledningen for z-paneler for en ren finish som ser ut som en profesjonell håndtert hver eneste detalj. Med litt planlegging og solid teknikk, trenger ikke installere Z Panels å være en hodepine – bare et enkelt prosjekt som alle kan administrere.
“Forsiktig tørrmontering, smart bruk av z-klemmer og tålmodig limarbeid utgjør ryggraden i sikker installasjon av natursteinspaneler av høy kvalitet.”
Tørrmontering: Planlegg arrangementet ditt før du påfører lim
Start med å legge ut dine Z-paneler på gulvet foran veggen din. Dette hjelper deg med å forhåndsvise det endelige utseendet og justere farger eller teksturer. Tørrmontering viser også hvor du må trimme paneler slik at kantene sitter tett og hjørnene på linje. Ta deg god tid under dette trinnet slik at du ikke ender opp med små rester på vanskelige steder
Påføring av lim: Teknikker for jevn og sikker montering
Forbered deretter veggen som skissert tidligere og ta tak i premium steinlimet. Spre det med en tannsparkel, og påfør akkurat nok for noen få rader om gangen. Trykk hvert panel godt inn i den klebrige sengen for å sikre det godt, og bruk lett side-til-side-bevegelse for å hjelpe steinen å gripe tak. Husk at med installasjon av Z-paneler er et jevnt lag med lim nøkkelen for langvarig stabilitet – ikke glen over dette trinnet
Bruk av Z-klemmer: Sikrer sømløs justering og enkel feste
Hvis panelene eller veggsystemet ditt bruker z-klemmer for paneler, fester du klipsbasen til veggen hver 12.–16. tomme og setter de panelmonterte klipsene over dem. Mange kvalitets Z-paneler, spesielt fra Top Source Slate, kommer med innebygde metallklemmer – noe som gjør alt enklere for gjør-det-selv-folk. Dette systemet holder steinen solid samtidig som det holder alt rett, og svarer på det populære spørsmålet om hvordan z-paneler festes til veggen i et enkelt trekk. Det er like nærme “sett-det-og-glem-det” som du kan få
Skjærepaneler: Nøyaktig trimming for kanter og hjørner
Ikke alle vegger passer perfekt med standard panelstørrelser. Bruk en våtsag eller vinkelsliper med diamantblad for jevne kutt. Mål nøye, merk panelet ditt, og kutt deretter sakte for å unngå flis. Bruk alltid øyevern. Pent kuttede paneler bør legge seg rett inn i oppsettet ditt, skape en nesten sømløs finish i hjørner og kanter – og holde prosjektet ditt skarpt, ikke slurvete
For et tips: Når panelene dine er på plass, går du tilbake for å inspisere linjene for jevnhet og retthet før limet herder helt. Å gjøre raske justeringer her kan redde dagen og hjelpe deg å unngå skjeve rader nedover veggen. Med tålmodighet blir installasjon av Z-paneler virkelig et tilfredsstillende helgeprosjekt – selv for nybegynnere.
Leter du etter problemfrie alternativer? Top Source Slates paneler har presisjonsstørrelser og klar-til-montering Z-klemmer, slik at du vil bruke mer tid på å beundre den nye aksentveggen din og mindre tid på å bryte med ekstra maskinvare.
Z-panelinstallasjonsmetoder & Sammenligning av resultater
| Installasjonsmetode | Nødvendig verktøy | Gjennomsnittlig installasjonstid (per 10 sq ft) | Finish Quality (Industry Benchmark) | Beste brukstilfelle |
|---|---|---|---|---|
| Kun lim | Sparkel, lim, vater | 2 timer | Bra (krever nøyaktig utjevning) | Innendørs aksentvegger |
| Kun Z-klipp | Drill, skrutrekker, klips, nivå | 1,5 timer | Veldig bra (enkle justeringer) | Peiser, midlertidige installasjoner |
| Lim + Z-klemmer | Lim, sparkel, klips, drill | 1,2 timer | Utmerket (industristandard) | Utendørs kledning, høytrafikerte vegger |
| Tradisjonell mørtel | Mørtel, flyte, vater | 2,5 timer | God (avhengig av ferdigheter) | Utvendig fasade |
| Skruemontert | Skruepistol, braketter, vater | 1,8 timer | Veldig bra (oppgraderbar/avtakbar) | Kommersielle, utleieplasser |
Note:
Dette diagrammet viser hvordan ulike installasjonssystemer for Z-paneler henger sammen når det gjelder nødvendig innsats, finishkvalitet og beste applikasjoner – og hjelper deg å velge riktig teknikk for prosjektmålene dine.

Oppnå et sømløst utseende: tips og triks for å perfeksjonere installasjonen din
Hvis du er ute etter den feilfrie, profesjonelle finishen når du installerer Z-paneler, kan det å kjenne de riktige teknikkene utgjøre hele forskjellen. Installasjon av natursteinspaneler handler ikke bare om å feste paneler på en vegg – det handler om de små detaljene som holder sømmer skjult, hjørnene tettsittende og det endelige resultatet ser topplag ut. Denne veiledningen deler tips for sømløs montering av z-paneler, fra å jobbe vanskelige hjørner til å velge de beste tetningsmidlene for værbeskyttelse.
“Mestring av hjørner, sømløs justering og forsiktig forsegling vil gi ditt Z Panel-oppsett et langvarig, bildeperfekt utseende uten problemer.”
Arbeide med hjørner og kanter: Oppnå en tettsittende, sømløs passform
Hjørner og kanter er der håndverket ditt skinner. Mål alltid to ganger og tørrpass alle kantstykker før du påfører lim. For innvendige hjørner, alternative panelskjøter for en naturlig overlapping, slik at linjer aldri stables. Utvendige hjørner ser best ut med spesialkuttede L-formede paneler, eller du kan bruke ferdiglagde hjørnestykker. Når du er i tvil, tilbyr Top Source Slate presisjonsgjærede hjørner for det tilpassede utseendet uten ekstra innsats.
Skjul sømmer: Teknikker for et kontinuerlig, naturlig utseende
God planlegging er nøkkelen til å skjule sømmer. Før du fester paneler, legg ut flere for å blande fargenyanser og teksturer, og skape et tilfeldig arrangement. Forskyv leddene når det er mulig. For enda bedre resultater, bank nabopaneler forsiktig sammen mens limet er vått for å minimere synlige linjer. Dette trinnet forbedrer virkelig Z Panel-oppsettet ditt og gir murverket ditt en autentisk, uavbrutt flyt.
Fuging og forsegling: Beskytter mot fuktighet og forbedrer levetiden
Når panelene er installert, fuges kun der det er anbefalt - Z-designet skjuler vanligvis de fleste skjøter, så minimalt med fugemasse er nødvendig. Bruk en ikke-slipt fugemasse for tette hull og tørk bort overflødig omgående. For å holde steinen uberørt og vannavstøtende, velg en pustende steinforsegling. Top Source Slate anbefaler produkter som Mapei Ultracare Stone, Tile & Grout Sealer eller lignende, som fremhever farge og beskytter mot flekker. Påfør når panelene er tørre og påfør på nytt med noen års mellomrom for best resultat.
Feilsøking vanlige installasjonsproblemer: ujevne overflater, løse paneler og limproblemer
Ikke alle jobber går problemfritt, så her er hvordan du fikser ujevn z-panelinstallasjon eller andre hikke:
- Ujevn overflate? Sjekk med et langt nivå; for høye flekker, slip eller slip lett ned, og for lave områder, bruk mursparkel før du fester paneler igjen.
- Løse paneler? Fjern stykket, legg til nytt lim og trykk godt på plass igjen - ikke spar på tørketiden.
- Limet fester seg ikke? Tenk på limvalget ditt på nytt og sørg for at veggen er støvfri og tørr. For vanskelige steder, bruk mekaniske Z-klemmer (inkludert med mange Top Source Slate-produkter) for ekstra hold.
Husk at en sømløs finish er resultatet av tålmodighet og de riktige metodene. For varige, værklare installasjoner, invester i tetningsmidler av høy kvalitet, fugemasser, og få mest mulig ut av de innebygde klipsene for enkel, solid montering. Hvis du treffer en ulempe, kan Top Source Slates støtte styre deg til suksess.
Vanlige Z-panelutfordringer & Pro løsninger
| Utfordring | Vanlig årsak | Eksperttips | Måling/Test | Bransjebenchmark/referanse |
|---|---|---|---|---|
| Synlige sømmer | Dårlig layout, inkonsekvent justering | Forskyv skjøter, bland panelfarger/finisher | Visuell kontroll før limet herder | Mindre enn 2 mm synlig linje (bransjemål) |
| Løse paneler | Utilstrekkelig lim, ujevn vegg | Påfør kvalitetslim på nytt, bruk z-klemmer for paneler | Tap-test for hul lyd | 99 % av panelene er solide å ta på etter setting |
| Hjørnespalter | Feil skjæring/måling | Gjærer eller bruk ferdigkuttede hjørner, dobbeltsjekk passform | Prøvepass før installasjon | Mellomrom mindre enn 1 mm standard |
| Vannfarging | Ingen/dårlig forsegler på stein eller fugemasse | Påfør anbefalt steinforsegler | Drypptest etter tetningsmiddelherding | Frastøt vann med <2 % absorpsjonshastighet |
| Feil ved lim | Feil lim, skitten overflate | Bytt til godkjent produkt, rengjør vegg | Vent 24 timer, test lim for hånd | Paneler bør kreve kraft for å fjerne |
Note:
Denne tabellen deler virkelige problemer og toppløsninger anerkjent i industristandarder, slik at gjør-det-selv-arbeidere kan fikse problemer raskt og fullføre med stolthet.
Vedlikehold av Z-panelene dine: Sikre lang levetid og skjønnhet
Når du har satt i gang arbeidet med å installere Z-paneler, bør det være en del av din vanlige hjemmerutine å holde dem skarpe. Med noen få gode vaner og de riktige vedlikeholdsproduktene, kan steinelementet ditt forbli fantastisk og strukturelt solid i mange år framover – innendørs eller utendørs. La oss bryte ned det viktigste for å rengjøre, beskytte og få mest mulig ut av investeringen i Z Panel.
“Regelmessig rengjøring og smarte beskyttelsesrutiner gjør DIY Z Panelinstallasjon til et varig utstillingsvindu for naturlig skjønnhet, enten panelene er inne eller utsatt for elementene.”
Regelmessig rengjøring: Fjerner støv, smuss og flekker
Å vite hvordan du rengjør Z-paneler er nøkkelen for lang levetid. Start med å tørke av med en myk børste eller mikrofiberklut. For lett smuss, skyll med rent vann. Hvis du oppdager flekker, bruk et mildt rengjøringsmiddel for stein – unngå sure eller slipende produkter, da de kan skade steinoverflaten. For utendørs bruk, en skånsom slangeskylling med noen ukers mellomrom hindrer at skitt og pollen setter seg inn. Hopp over høytrykkspyleren; det er overkill og kan løsne individuelle steiner.
Beskyttelse mot fuktighet: tetningsmidler og vanntetting
Forebygging av fuktproblemer er spesielt viktig for forbedring av hjemmet med Z-paneler utendørs, på badet eller på kjøkkenet. Velg en kvalitetspustende steinforsegler (som de fra Mapei eller Laticrete, anbefalt av Top Source Slate) og påfør på nytt hvert 2.-3. år. Påfør etter at panelene er rene og tørre, med en svamp eller børste for jevn dekning. Vanntetting er avgjørende for å bevare farge og strukturell integritet: riktig forseglede paneler motstår fryse-tine-sykluser og flekker i både våte og tørre soner.
Inspisere for skade: Identifisering og adressering av potensielle problemer
Selv tøff stein kan få problemer over tid. Planlegg en årlig inspeksjon av Z-panelene dine – innendørs eller utendørs – for å oppdage løse deler, manglende mørtel, sprekker eller vannflekker. For utendørs oppsett, sørg for å sjekke etter hardt vintervær. Når du oppdager et problem, må du feste løse steiner med konstruksjonslim eller bytte ut sprukne steiner før fuktighet kommer under. Å overvåke installasjonen er en enkel vane som sparer penger og holder panelene skarpe.
Langtidspleie: Tips for å opprettholde skjønnheten til Z-panelinstallasjonen
For vedvarende sjarm, unngå sterke kjemiske sprayer og ikke la klatreplanter eller vinranker rote mellom steiner utendørs. Hold takrenner klare over utendørs installasjoner for å unngå vannavrenning og flekker. Hvis du lurer på, kan Z-paneler brukes utendørs? Absolutt - bare hold deg til vanlige tetningssykluser og sjekk skjøter for tetthet. Planlegging av årlig eller sesongmessig vedlikehold holder både innendørs og utendørs paneler i toppform, og minimerer reparasjonsbehov senere.
For å maksimere levetiden til prosjektet ditt, tilbyr Top Source Slate videoguider, eksperttips og de riktige tetningsmassene for installasjonen av natursteinpaneler på deres side for vedlikeholdsressurser. Supportteamet deres svarer gjerne på prosjektspesifikke omsorgsspørsmål via e-post eller telefon, akkurat som du er en del av familien.
Z Vedlikeholdssjekkliste for panel & Bransjestandarder
| Vedlikeholdsoppgave | Anbefalt frekvens | Verktøy/produkt | Beste praksis/metode | Bransjestandard/Mål |
|---|---|---|---|---|
| Støvtørking/tørking | Månedlig | Myk børste, mikrofiberklut | Børst overflaten forsiktig, ingen hard skrubbing | 100 % fjerning av støv og rusk |
| Dyp rengjøring | To ganger årlig | Mild steinrens, vann | Våt, tørk, skyll, tørk umiddelbart | Ingen striper eller rester |
| Forsegling/vanntetting | Hvert 2-3 år | Steinforsegling (pustende) | Påfør på tørre paneler, jevn dekning | Vannperler på overflaten, <2 % absorpsjon |
| Inspiser for skade | Årlig (og etter stormer) | Visuell sjekk, lett trykktest | Se etter sprekker, løse skjøter, flekker | Alle paneler sitter godt på plass |
| Reparasjon/gjenfesting | Etter behov | Byggelim, erstatningspanel | Fjern, rengjør området, sett på nytt panel | Reparasjon matcher original finish |
Note:
Denne veiledningen oppsummerer vedlikeholdstid, verktøy og standarder du kan forvente fra velholdte Z-paneler, basert på anbefalinger fra bransjeeksperter og Top Source Slates beste praksis.
Konklusjon
Etter å ha guidet utallige kunder gjennom deres Z -panel prosjekter, vet jeg på egen hånd at et godt resultat kommer ned til riktig planlegging, de riktige verktøyene og en vilje til å takle detaljene direkte. Når du nærmer deg installasjonen med omhu – måler, forbereder og bruker smarte teknikker – får plassen din den polerte, profesjonelle finishen som gjør all innsatsen verdt det.
Jeg tror alle kan forvandle et rom med Z Panels, enten du er en førstegangs gjør-det-selv-er eller en erfaren proff. Blandingen av natursteinsskjønnhet og enkel installasjon setter et tilpasset utseende innen rekkevidde for alle. Hvis du er klar til å gi veggen en oppgradering, husk: tålmodighet og litt kunnskap gjør dette prosjektet til et ekte “vinne”.
FAQ
Q1: Hva brukes Z-paneler til?
A1: Z-paneler brukes først og fremst for å skape et sømløst utseende på vegger eller tak, ofte for dekorative eller akustiske formål. De består av sammenlåsende paneler som tilbyr en enkel installasjonsprosess, ofte brukt i både interiør og eksteriør.
Q2: Hvordan installerer du Z Panels?
A2: For å installere Z-paneler begynner du med å merke installasjonspunktene på veggen. Bruk passende lim eller skruer for å feste Z-klips eller Z-stenger til både panelene og veggen. Juster panelene og skyv dem på plass. Sørg for at de er jevne og sikkert festet.
Spørsmål 3: Hvilket lim skal brukes for installasjon av Z Panel?
A3: Et anbefalt lim for installasjon av Z Panel er PL Premium Construction Adhesive, som gir sterk liming for stein- og metalloverflater. Sørg for at vegg- og paneloverflatene er rene før påføring.
Q4: Kan Z-paneler brukes i våte områder som bad?
A4: Ja, Z-paneler kan brukes i våte områder hvis de er laget av vannbestandige materialer som naturstein eller behandlet tre. Sørg for at riktig forseglings- og vanntettingsteknikker brukes under installasjonen for å forhindre fuktskader.
Q5: Er Z-paneler DIY-vennlige?
A5: Ja, Z-paneler er designet for å være DIY-vennlige. De kommer vanligvis med en enkel installasjonsveiledning og krever grunnleggende verktøy som bor og vater. Det er imidlertid avgjørende å følge installasjonsinstruksjonene nøye for å sikre sikkerhet og holdbarhet.
Q6: Hva koster det å installere Z-paneler?
A6: Kostnaden for å installere Z Panels varierer avhengig av materiale og størrelse. I gjennomsnitt kan materialer variere fra $ 8 til $ 15 per kvadratfot, ikke inkludert arbeidskraft hvis en profesjonell installatør brukes. DIY-installasjon kan redusere de totale kostnadene.
Q7: Krever Z-paneler vedlikehold?
A7: Z Paneler krever generelt minimalt vedlikehold. Regelmessig støvtørking og sporadisk rengjøring med en fuktig klut er tilstrekkelig. For utvendige paneler kan periodisk forsegling være nødvendig for å bevare utseendet og motstå miljøslitasje.
Q8: Hva er fordelene med å bruke Z-paneler?
A8: Z-paneler tilbyr en ren, moderne estetikk med bekvemmeligheten av enkel installasjon og minimalt vedlikehold. De forbedrer også lydisolasjonen når de brukes som akustiske paneler, og gir en slitesterk overflate for både innendørs og utendørs bruk.
Eksterne lenker
- Installasjonsveiledning for Z-paneler | McMonagle Stone
- Z-Clip Installasjon av steinpaneler – StonePly
- PDF: Installasjonsveiledning for Z Panel
- Installere Z-Bars Guide – Conwed
- Veggmonteringssystem Z-clips – Takoutfitters
- Feste store innvendige steinpaneler
- Installasjonsretningslinjer for Gage Z-bar
- Hvordan passe Z Stone Wall Cladding
