
Vil du gi et snev av tidløs skjønnhet i landskapet ditt? Mange diyers og entreprenører synes å installere uregelmessig naturlig tilfeldig løs stein -skremmende på grunn av den opplevde kompleksiteten. Å få det galt fører til ustabile veier, ujevne overflater og et utseende som er alt annet enn naturlig.
Men frykt ikke! Denne guiden bryter ned prosessen i enkle å følge trinn, og sikrer at prosjektet ditt ser profesjonelt ut. Fra å velge riktig stein til å mestre mørtelen, lærer du hvordan du lager fantastiske terrasser, gangveier og mer. Å velge uregelmessig naturlig tilfeldig løs stein av høy kvalitet fra en pålitelig kilde som topp kildestein sikrer dimensjonal presisjon, materiell integritet og estetisk dyktighet.
-
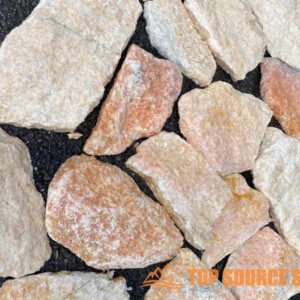
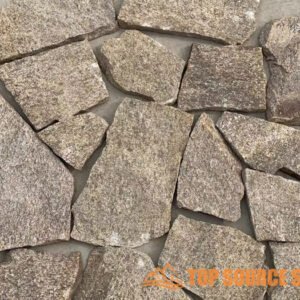
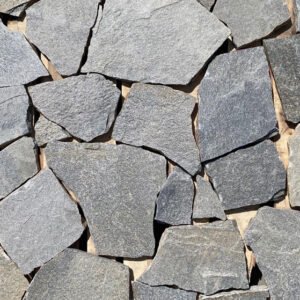 Naturlig delt ansikt grå kvartsitt tilfeldig løs veggkledning i stein
 -
 Naturlig kvartsitt Tilfeldig uregelmessig steinpanelfliser for veggkledning
 -
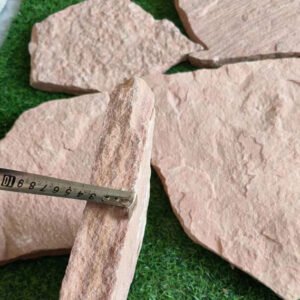 Engros Rosa Sandstein Tilfeldig Løs Stone Kledning
 -
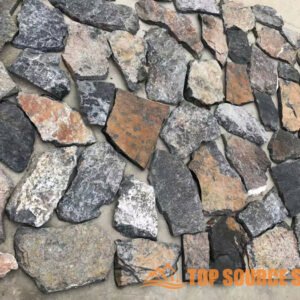
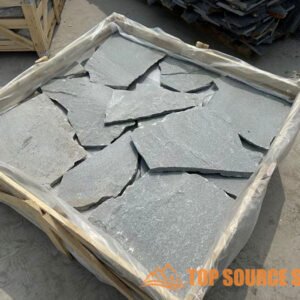
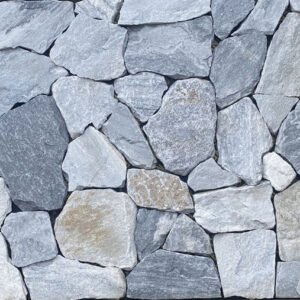 Engros Blå Kvartsitt Tilfeldig Løs Stein Flis for veggkledning
 -
 Naturlig tilfeldig løsstein for innvendig og utvendig veggkledning
 -
 Tilfeldig eksteriør Naturstein Løs Steinfiner Veggbekledning Dekor
 -
 Naturlig uregelmessig tilfeldig løs steinbekledningsfiner
 -
 Kina Factory Supply Utendørs Naturlig Tilfeldig Løs steinveggbekledningsfliser
 -
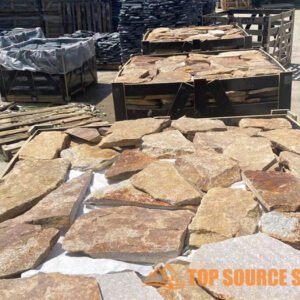
 Fabrikkpris Naturlig Eksteriør Tilfeldig Løs Steinveggbekledning
 -
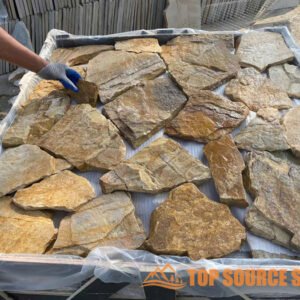
 Utvendig Gul Grov Tilfeldig Løs Steinveggbekledning
 -
 Naturlig tilfeldig løs steinveggbekledningspanel for innendørs og utendørs
 -
 Naturlig løs steinveggbekledning for veggdekorasjon
Planlegging av ditt tilfeldige løse steinprosjekt: utvalg og design
Planlegging av et uregelmessig naturlig tilfeldig løs steinprosjekt innebærer flere nøkkeltrinn for å sikre et vakkert og varig resultat. Fra å vurdere landskapet ditt til å estimere materialer, er nøye planlegging avgjørende for et vellykket resultat. Dette kapittelet vil veilede deg gjennom de innledende stadiene, med fokus på steinvalg, designhensyn og definisjon av prosjektomfang. Riktig planlegging bidrar til å unngå kostbare feil og sikrer at visjonen din blir en realitet.
“Ved å bruke uregelmessig naturlig tilfeldig løs stein i landskapsdesignet ditt kan du legge til et unikt, naturlig preg som forbedrer den generelle estetikken og utfyller det omgivende miljøet.”
Vurdering av landskapet ditt: Evaluering av jord, drenering og rom
Før du velger steinene dine, må du evaluere landskapet ditt. Sjekk jordtypen; Er det leire, sand eller loam? God drenering er avgjørende for å forhindre at vann skader din steininstallasjon. Observer hvordan vann flyter under regn for å identifisere potensielle problemområder. Mål også den tilgjengelige plassen for å bestemme området du dekker med stein. Å vite disse detaljene hjelper deg å velge passende steiner og forberede bakken effektivt. Dette trinnet er “Super viktig”, ikke gå glipp av det!
Vurder de eksisterende funksjonene i landskapet ditt. Har du trær, busker eller andre planter som vil påvirke designet ditt? Legg merke til soleksponeringen i forskjellige områder, da dette kan påvirke fargen og teksturen på steinene over tid. Når du forstår landskapets unike egenskaper, kan du lage et design som harmonerer med dets naturlige omgivelser.
Velge riktig stein: Farge, tekstur og materialalternativer
Å velge riktig stein er et kritisk trinn i planleggingen av prosjektet. Vurder farge-, tekstur- og materialalternativene som er tilgjengelige. Fargene varierer fra jordnære brune og grå til livlige røde og gule. Tekstur kan variere fra glatt og polert til grov og robust. Materialalternativer inkluderer granitt, kalkstein, sandstein og skifer. Hver type tilbyr en unik estetikk og nivå av holdbarhet. Top Source Stone tilbyr et bredt spekter av alternativer som passer til ethvert prosjekt.
Tenk på den generelle stilen du ønsker å oppnå. En rustikk design kan ha nytte av ru teksturerte, jordfargede steiner, mens en moderne design kan inkludere glatte, grå steiner. Besøk Top Source Stone for å utforske ulike prøver og finne den perfekte matchen for din visjon. Tilpasningstjenestene deres sikrer at du får akkurat det du trenger.
Designoppsett: mønstre og plassering for visuell appell
Utformingen av steinene dine kan påvirke den visuelle appellen til prosjektet ditt betydelig. Vurder ulike mønstre og plasseringsalternativer. Et tilfeldig mønster kan skape et naturlig, organisk utseende, mens et mer strukturert mønster kan legge til et snev av formalitet. Eksperimenter med forskjellige arrangementer for å se hva som fungerer best for rommet ditt. Ta bilder av favorittoppsettene dine for å hjelpe deg med å visualisere det endelige resultatet. Riktig planlegging er nøkkelen.
Tenk på avstanden mellom steinene. En stram planløsning kan skape en solid overflate, mens en større avstand kan gi rom for bunndekke eller dekorativ grus mellom steinene. Vurder funksjonen til området du designer. En sti kan kreve en mer stabil, jevn overflate, mens et dekorativt område kan gi mer kreativ frihet. Bruk Irregular Natural Random Loose Stone for å gi prosjektet ditt et unikt preg.
Beregning av materialer: Beregning av stein- og mørtelbehov
Nøyaktig estimering av materielle behov er avgjørende for å unngå å gå tom for stein eller overforbruk. Mål området du planlegger å dekke og beregn kvadratmeterne. Bruk denne målingen for å finne ut hvor mye stein du trenger. Legg til en buffer på 10-15 % for å ta hensyn til kutt og avfall. Anslå også mengden mørtel eller grus som kreves for å sette steinene. Top Source Stone kan gi ekspertråd om materialberegning.
Vurder tykkelsen på steinene når du estimerer materialer. Tykkere steiner vil kreve mer mørtel og kan påvirke den totale høyden på den ferdige overflaten. Rådfør deg med en profesjonell på Top Source Stone for å sikre at du har nøyaktige målinger og materialanslag. Deres ekspertise kan spare deg for tid og penger i det lange løp. Dette sikrer at du ikke kommer til kort halvveis i prosjektet.

Viktige verktøy og materialer for steininstallasjon
Forberedelse til et steininstallasjonsprosjekt krever å samle de riktige verktøyene og materialene. Å ha alt for hånden sikrer en jevn og effektiv prosess. Dette kapittelet skisserer nødvendige verktøy, mørtel, grunnmaterialer og fugemasser som trengs for en vellykket installasjon. Å være godt forberedt er halve kampen!
“Bruk av riktig verktøy og materialer av høy kvalitet er avgjørende for en holdbar og estetisk tiltalende installasjon av Irregular Natural Random Loose Stone.”
Samleverktøy: Gummihammer, sparkel, vater og sikkerhetsutstyr
En gummihammer er avgjørende for å banke steiner forsiktig på plass uten å skade dem. En sparkel brukes for å påføre mørtel jevnt. Et nivå sikrer at steinene dine er riktig på linje. Sikkerhetsutstyr, inkludert hansker og øyebeskyttelse, er avgjørende for å beskytte deg selv under installasjonsprosessen. Å ha disse verktøyene lett tilgjengelig vil gjøre jobben mye enklere. Ikke glem å beskytte knærne!
Ytterligere nyttige verktøy inkluderer en meisel for å forme steiner, et målebånd for nøyaktig plassering og en trillebår for transport av materialer. Vurder å leie spesialverktøy hvis du skal takle et stort prosjekt. Prioriter alltid sikkerhet ved å bruke passende personlig verneutstyr (PPE). Disse enkle trinnene gjør en stor forskjell.
Mørtelutvalg: Velge riktig blanding for steinvedheft
Å velge riktig mørtel er avgjørende for å sikre riktig steinvedheft. Vurder hvilken type stein du bruker og miljøforholdene. En polymermodifisert mørtel anbefales ofte for sin overlegne bindestyrke og fleksibilitet. Ferdigblandet mørtel er praktisk, men å blande dine egne gir større kontroll over konsistensen. Top Source Stone anbefaler kvalitetsmørtel for lang levetid resultater.
Faktorer å vurdere når du velger mørtel inkluderer trykkstyrke, vannmotstand og herdetid. Sørg for at mørtelen er kompatibel med den spesifikke typen stein du bruker. Les produsentens instruksjoner nøye og følg dem nøyaktig. Bruk av feil mørtel kan føre til sprekker og ustabilitet. Dette er ingen spøk!
Basematerialer: Grus, pukk og sand
Grunnmaterialene gir et stabilt fundament for din steininstallasjon. Grus brukes vanligvis som underlag for drenering. Pukk gir en jevn overflate for steinene å hvile på. Sand brukes til å fylle ut små hull og skape en jevn overflate. Top Source Stone tilbyr en rekke aggregater for å passe dine prosjektbehov. En solid base er nøkkelen til en langvarig installasjon.
Riktig grunnpreparering er avgjørende for å forhindre at steinene setter seg og forskyves. Komprimer grunnmaterialene grundig med en platekomprimator eller håndtamper. Sørg for at basen er jevn og godt drenert. En dårlig forberedt base kan føre til betydelige problemer nedover veien. Ta deg god tid og gjør det riktig.
Fugemasser: Alternativer for å fylle hull og forbedre stabiliteten
Fellesforbindelser fyller hullene mellom steinene, forbedrer stabiliteten og forhindrer ugrasvekst. Alternativene inkluderer polymersand, mørtel og epoksybaserte leddforbindelser. Polymersand er enkel å installere og gir fleksibilitet. Mørtel gir et mer tradisjonelt utseende og større holdbarhet. Epoksybaserte forbindelser gir overlegen styrke og vannmotstand. Velg det beste alternativet for dine spesifikke behov.
Når du velger en fugemasse, bør du vurdere dens farge, tekstur og påføringsvennlighet. Sørg for at blandingen er kompatibel med typen stein du bruker. Følg produsentens instruksjoner nøye for å sikre riktig installasjon. Fugemasser forbedrer ikke bare stabiliteten, men forbedrer også den generelle estetikken til prosjektet ditt. God skjøting gjør en stor forskjell!
Anbefalte verktøy og materialer for steininstallasjon
| Verktøy/materiale | Beskrivelse | Hensikt | Gjennomsnittlig kostnad | Toppkilde Steinekvivalent |
|---|---|---|---|---|
| Gummi klubbe | En hammer med gummihode. | Banke steiner på plass. | $ 15 – $ 30 | N/a |
| Murskje | Et flatt, spiss verktøy for å spre mørtel. | Påføring av mørtel jevnt. | $ 10 – $ 20 | N/a |
| Nivå | Et verktøy for å sikre at overflater er horisontale eller vertikale. | Sørg for at steinene er på linje. | $ 20 – $ 50 | N/a |
| Polymermodifisert mørtel | En mørtelblanding med polymerer for forbedret binding. | Fester steiner sammen. | $ 15 – $25 per pose | Toppkilde Stone Premium Morter |
| Knust stein | Gradert tilslag for grunnpreparering. | Skaper en jevn og stabil base. | $ 30 – $50 per kubikkmeter | Toppkilde Stone Base Aggregate |
| Polymer sand | Sand blandet med polymerer for fugefylling. | Fylle hull og hindre ugrasvekst. | $ 20 – $30 per pose | Toppkilde Steinskjøtsand |

Forberedelse av stedet: Bygge et solid fundament
Riktig forberedelse av stedet er avgjørende for en stabil og langvarig Irregular Natural Random Loose Stone-installasjon. Et solid fundament forhindrer fremtidige endringer og sikrer lang levetid på prosjektet ditt. Dette kapittelet gir en detaljert veiledning om klargjøring av stedet, inkludert utgraving, installasjon av grunnlag, utjevning og dreneringsløsninger. Å få dette riktig er helt avgjørende!
“Et godt forberedt sted er hjørnesteinen i en vellykket uregelmessig naturlig tilfeldig løs steininstallasjon, som forhindrer fremtidige problemer og sikrer et vakkert, holdbart resultat.”
Graving: Fjerning av matjord og rusk
Det første trinnet i forberedelse av stedet er utgraving. Fjern all matjord, gress, røtter og rusk fra området. Grav til en dybde som tillater grunnlaget og tykkelsen på steinene, vanligvis 6-8 tommer. Dette sikrer at den ferdige overflaten blir på ønsket nivå. Bruk en spade og trillebår for å fjerne det utgravde materialet. Dette er et arbeidskrevende, men nødvendig skritt.
Sørg for å fjerne eventuelle underjordiske verktøy eller hindringer før du graver. Kontakt dine lokale forsyningsselskaper for å merke nedgravde linjer. Vurder skråningen til området rundt for å sikre riktig drenering. Fjerning av alt organisk materiale forhindrer nedbrytning og setninger, noe som kan kompromittere stabiliteten til steininstallasjonen.
Grunnlag: Legge og komprimere grus eller pukk
Etter utgraving legges et underlag med grus eller pukk. Dette laget gir drenering og et stabilt fundament. Bruk minimum 4 tommer grus eller pukk, avhengig av jordforholdene og tiltenkt bruk av området. Fordel materialet jevnt og komprimer det grundig med en platekomprimator eller håndtamper. Kvalitetsbasematerialer fra pålitelige leverandører, som Top Source Stone, er avgjørende for stabilitet.
Komprimering av grunnlaget er avgjørende for å forhindre setninger. Overlapp hver passasje med komprimatoren med minst 6 tommer for å sikre jevn komprimering. Tilsett vann under komprimering for å hjelpe materialet med å binde seg sammen. Et riktig komprimert grunnlag vil gi et solid fundament som vil støtte vekten av steinene og forhindre forskyvning.
Utjevning: Oppnå en jevn og jevn overflate
Å oppnå en jevn og jevn overflate er avgjørende for en profesjonelt utseende steininstallasjon. Bruk et lag med sand eller fin grus for å jevne ut underlaget. Spre materialet jevnt og bruk et vater for å se etter høye eller lave flekker. Legg til eller fjern materiale etter behov for å lage en perfekt jevn overflate. En jevn overflate gjør setting av steinene mye enklere.
Bruk et langt, rett brett eller et vater for å avrette overflaten. Dette vil hjelpe deg å oppnå et konsistent og jevnt plan. Sjekk nivået i flere retninger for å sikre nøyaktighet. En perfekt jevn overflate vil forhindre ujevn setning og sikre at steinene er stabile og på linje. Dette krever tålmodighet, men det er verdt innsatsen!
Drenering: Sikre riktig vannavrenning
Riktig drenering er avgjørende for å forhindre at vann skader steininstallasjonen din. Sørg for at stedet har tilstrekkelig drenering for å håndtere regnvann og avrenning. Vurder å installere avløpsrør eller franske avløp for å lede vannet bort fra området. Skrå grunnlaget litt for å fremme vannavrenning. Et godt drenert område forhindrer vannskader og forlenger levetiden til installasjonen.
Observer hvordan vannet renner under regn for å identifisere potensielle problemområder. Installer dreneringsløsninger i områder der vann har en tendens til å samle seg. Sørg for at dreneringssystemet er riktig koblet til et egnet uttak. Å ignorere drenering kan føre til kostbare reparasjoner nedover veien. Ikke vær øreklok og dum!
Materialkostnader for byggeplass
| Materiale | Beskrivelse | Enhetskostnad | Estimert mengde | Total kostnad |
|---|---|---|---|---|
| Grus | 3/4″ knust grus til underlagssjikt. | $35/kubikkmeter | 5 kubikkmeter | $175 |
| Knust stein | 1/2″ pukk for planering. | $40/kubikkmeter | 2 kubikkmeter | $ 80 |
| Sand | Fin sand for utjevning av overflate. | $25/kubikk | 1 kubikktun | $ 25 |
| Dreneringsrør | 4″ perforert avløpsrør. | $5/fot | 50 fot | $250 |
| Filterstoff | Geotekstilduk for drenering. | $1/kvadratfot | 100 kvadratmeter | $100 |

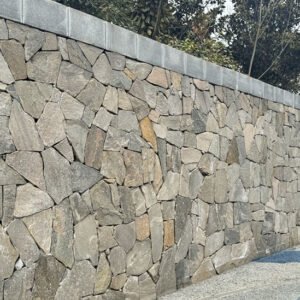
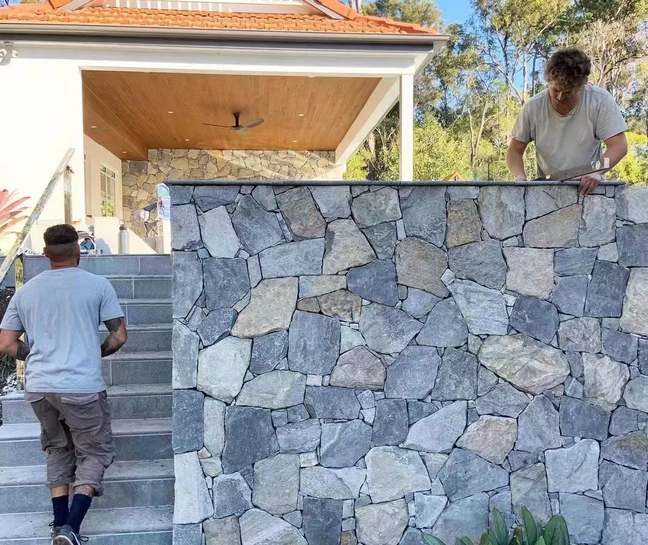
Trinn-for-trinn installasjon: Legge uregelmessig stein for et naturlig utseende
Installasjon av uregelmessig naturlig tilfeldig løs stein krever nøye oppmerksomhet på detaljer for å oppnå et naturlig og profesjonelt utseende. Dette kapittelet tilbyr en trinnvis veiledning som dekker påføring av mørtel, plassering av stein og fugeteknikker. Med den riktige tilnærmingen kan du lage en fantastisk landskapsfunksjon. Det er her gummien møter veien!
“Riktige installasjonsteknikker er nøkkelen til å vise frem den naturlige skjønnheten til uregelmessig naturlig, tilfeldig løs stein, for å sikre en holdbar og visuelt tiltalende finish.”
Blanding av mørtel: Oppnå riktig konsistens
Det første trinnet er å blande mørtelen til riktig konsistens. Følg produsentens instruksjoner nøye. Tilsett vann gradvis til den tørre mørtelblandingen, rør kontinuerlig til du oppnår en jevn, smidig konsistens som ligner på peanøttsmør. Unngå å tilsette for mye vann, da dette kan svekke mørtelen. Bruk en blandebor med padlefeste for best resultat. Å få riktig blanding er avgjørende.
La mørtelen slakke i 10-15 minutter etter blanding. Dette gjør at kjemikaliene kan aktiveres fullt ut og forbedrer bearbeidbarheten. Remix mørtelen kort før du bruker den. Kast all mørtel som begynner å stivne eller tørke ut. Riktig mørtelkonsistens sikrer sterk vedheft og hindrer sprekker.
Påføring av mørtel: Sikre full kontakt med underlaget
Påfør et sjenerøst lag med mørtel på det forberedte underlaget med en sparkel. Mørtelbedet skal være tykt nok til å romme den uregelmessige formen på steinene, vanligvis 1-2 tommer. Sørg for full kontakt mellom mørtelen og baksiden av steinen. Trykk hver stein godt inn i mørtelen, vri den litt for å sikre en god binding. Top Source Stones overlegne produksjon sikrer dimensjonal presisjon, noe som gjør dette trinnet jevnere.
Unngå å få mørtel på de synlige overflatene av steinene. Hvis mørtel kommer på overflaten, tørk den av umiddelbart med en fuktig svamp. Arbeid i små seksjoner for å unngå at mørtelen tørker ut før du setter steinene. En sterk binding mellom steinen og underlaget er avgjørende for en holdbar installasjon.
Steinplassering: Arrangere steiner i et visuelt tiltalende mønster
Å arrangere steinene i et visuelt tiltalende mønster er en kunst. Eksperimenter med forskjellige layouter før du setter steinene permanent. Sikt etter et naturlig, tilfeldig utseende, men unngå å lage store hull eller gjentatte mønstre. Bruk steiner i forskjellige størrelser og former for å skape visuell interesse. Gå tilbake ofte for å vurdere det generelle utseendet. Dette krever et godt øye!
Sett steinene sammen så tett som mulig, og etterlater jevne hull for fuging. Bruk en gummiklubbe til å banke steinene forsiktig på plass. Sjekk nivået på hver stein og juster etter behov. Bruk shims for å støtte steiner som ikke er helt støttet av mørtelen. Riktig plassering av stein er nøkkelen til en vakker og naturlig installasjon. Husk at du jobber med Irregular Natural Random Loose Stone.
Skjøting: Fylle hull og forbedre stabiliteten
Når mørtelen har herdet i 24-48 timer, er det på tide å fylle fugene. Bruk en pekesparkel til å pakke mørtel inn i hullene mellom steinene. Sørg for at skjøtene er helt fylt og ikke etterlater tomrom. Glatt mørtelfugene med en fuktig svamp for å skape en jevn og profesjonell finish. Fuging øker stabiliteten og hindrer ugrasvekst.
Unngå overfylling av fugene, da dette kan forringe det naturlige utseendet til steinene. Vurder å bruke en farget mørtel for å komplementere steinene. Fjern overflødig mørtel fra steinoverflatene umiddelbart. Riktig skjøting er avgjørende for en holdbar og estetisk tiltalende installasjon.
Trinn-for-trinn installasjonstidsberegninger
| Skritt | Beskrivelse | Beregnet tid | Verktøy som kreves |
|---|---|---|---|
| Blanding av mørtel | Forbereder mørtel til riktig konsistens. | 30 minutter | Blandebor, padlefeste, bøtte |
| Påføring av mørtel | Spredning av mørtel på underlaget. | 1 time | Murskje, bøtte |
| Steinplassering | Ordne og sette stein i mørtel. | 2-4 timer | Gummihammer, vater, shims |
| Sammenføyning | Fylle hull mellom steinene med mørtel. | 1-2 timer | Pekesparkel, fuktig svamp |
Finpuss og vedlikehold: Sikre langvarig skjønnhet
Riktig etterbehandling og vedlikehold er avgjørende for å bevare skjønnheten og integriteten til din Uregelmessig Naturlig Tilfeldig løs steininstallasjon i årene som kommer. Dette kapittelet gir viktige tips om rengjøring, forsegling og løpende vedlikehold for å holde steinoverflaten på best mulig måte. Litt omsorg kommer langt!
Regelmessig vedlikehold og riktige forseglingsteknikker vil forlenge levetiden og skjønnheten til din betraktelig installasjon av naturstein.”
Rengjøring: Fjerning av overflødig mørtel og rusk
Etter at mørtelen er fullstendig herdet, fjern overflødig mørtel og rusk fra steinoverflaten. Bruk en stiv børste og et mildt vaskemiddel for å skrubbe steinene forsiktig. Unngå å bruke sterke kjemikalier eller skurende rengjøringsmidler, da disse kan skade steinen. Skyll overflaten grundig med rent vann. En ren overflate er det første trinnet til langvarig skjønnhet.
For gjenstridige mørtelflekker, prøv å bruke en spesialisert mørtelfjerner. Følg produsentens instruksjoner nøye. Test fjerneren på et lite, usynlig område først for å sikre at det ikke skader steinen. Høytrykksspyling kan også være effektivt, men bruk en lavtrykksinnstilling for å unngå å skade overflaten.
Forsegling: Beskytter stein mot flekker og vær
Forsegling av steinoverflaten beskytter den mot flekker og værskader. Velg en høy kvalitet naturstein sealer som passer for den typen stein du har. Påfør forsegleren i henhold til produsentens instruksjoner. Vanligvis innebærer dette å påføre et tynt, jevnt strøk med en pensel eller rull. Top Source Stone gir råd om valg av riktige tetningsprodukter.
La forsegleren tørke helt før overflaten utsettes for vann eller trafikk. Påfør forsegleren på nytt hvert 1-3 år, avhengig av eksponeringsnivået. Forsegling er et avgjørende skritt for å bevare skjønnheten og levetiden til steininstallasjonen din. Dette vil virkelig gjøre en forskjell.
Løpende vedlikehold: Regelmessig rengjøring og inspeksjon
Regelmessig rengjøring og inspeksjon er avgjørende for løpende vedlikehold. Fei eller støvsug steinoverflaten regelmessig for å fjerne skitt og rusk. Rens søl umiddelbart for å unngå flekker. Inspiser overflaten med jevne mellomrom for sprekker eller skader. Å løse små problemer raskt kan forhindre at de blir større problemer.
Unngå å bruke avisingssalter på steinoverflater, da disse kan skade steinen. Bruk i stedet sand eller grus for trekkraft. Trim all vegetasjon som vokser nær steinoverflaten for å forhindre flekker og fuktighetsbevaring. Enkelt vedlikehold kommer langt.
Reparere sprekker og skader: Løsning av vanlige problemer
Sprekker og skader kan oppstå over tid på grunn av forvitring eller stor trafikk. Reparer små sprekker med en steinreparasjonsmasse som matcher fargen på steinen. Følg produsentens instruksjoner nøye. For større sprekker eller skadede steiner bør du vurdere å erstatte det berørte området. Top Source Stones slitesterke stein av høy kvalitet krever minimalt med vedlikehold.
Fjern alt løst rusk fra det skadede området før du påfører reparasjonsmassen. La reparasjonsmassen herde helt før overflaten utsettes for trafikk. Vurder å ansette en profesjonell for mer omfattende reparasjoner. Å løse problemer raskt bevarer prosjektet ditt.
Vedlikeholdsplan for uregelmessig stein
| Oppgave | Hyppighet | Materialer som trengs | Beregnet tid |
|---|---|---|---|
| Feiing/Støvsuging | Ukentlig | Kost eller støvsuger | 15 minutter |
| Rengjøring | Månedlig | Mildt vaskemiddel, stiv børste, vann | 30 minutter |
| Forsegling | Hvert 1-3 år | Steinforsegler, børste eller rull | 1-2 timer |
| Undersøkelse | Kvartalsvis | Ingen | 10 minutter |
| Reparasjon av sprekker | Etter behov | Steinreparasjonsmasse, sparkel | Varierer |
Konklusjon
Etter 15 år i steinindustrien har jeg lært at installasjon av uregelmessig naturlig tilfeldig løs stein ikke bare handler om å legge bergarter; Det handler om å skape et tidløst landskap. Det handler om å bringe et stykke av naturens kunst inn i hagen din med selvtillit.
Fra min erfaring hos Top Source Stone ligger nøkkelen til suksess i detaljene: riktig planlegging, kvalitetsmaterialer og litt tålmodighet. Stol på meg; å få grunnlaget riktig er “hvor den er,” og sikrer at prosjektet ditt tåler tidens tann.
Husk at hver stein forteller en historie, og med den rette tilnærmingen kan du skape noe helt unikt. Hvis du sikter på varig skjønnhet og et snev av natur, er det alltid verdt det å ta deg tid til å gjøre det riktig.
FAQ
Q1: Hva er fordelene med å bruke uregelmessig naturlig tilfeldig løs stein til landskapsarbeid?
A1: Uregelmessige naturlige tilfeldige løse steiner er utmerket for landskapsarbeid på grunn av deres unike former som tilbyr estetisk appell og visuell interesse. De er også holdbare, miljøvennlige og gir et naturlig utseende til landskapsprosjektene dine.
Q2: Hvordan installerer du uregelmessig naturlig tilfeldig løs stein?
A2: For å installere uregelmessig naturlig tilfeldig løs stein, må du først klargjøre en stabil og jevn base med komprimert grus. Plasser steinene i ønsket mønster, og pass dem godt. Fyll hull med mindre steiner eller grus, og sørg for at overflaten er jevn.
Q3: Hvilke verktøy trengs for å legge løs stein?
A3: Du trenger grunnleggende landskapsarbeidsverktøy som spader, raker og en komprimator. I tillegg kan en gummihammer hjelpe med å justere steinene, og et nivå sikrer at de legges jevnt.
Q4: Hvordan vedlikeholder du løse steinstier eller terrasser?
A4: Regelmessig vedlikehold innebærer å fjerne rusk, justere steiner som kan ha forskjøvet seg, og av og til legge til fersk grus for å fylle ut hull. Regelmessig komprimering kan også være nødvendig for å opprettholde deres stabilitet.
Q5: Er uregelmessig naturlig tilfeldig løs stein egnet for områder med mye trafikk?
A5: Ja, med riktig installasjon kan uregelmessige naturlige tilfeldige løse steiner håndtere områder med høy trafikk. Sørg for at de er godt komprimert, og at eventuelle hull er fylt med grus for stabilitet.
Q6: Hva er de miljømessige fordelene ved å bruke naturstein?
A6: Natursteiner er miljøgunstige ettersom de krever minimal prosessering og kan hentes lokalt, noe som reduserer karbonavtrykket. De slipper heller ikke ut VOC, noe som gjør dem til et miljøvennlig valg for konstruksjon.
Q7: Kan uregelmessig naturlig tilfeldig løs stein brukes innendørs?
A7: Ja, disse steinene kan brukes innendørs, ofte som veggkledning eller gulv i områder som kjøkken og bad, og gir en rustikk, naturlig estetikk.
Q8: Hvordan velger du riktig stein for prosjektet ditt?
A8: Vurder faktorer som tiltenkt bruk, ønsket estetikk, lokal tilgjengelighet og steinens naturlige holdbarhet og værbestandighet. Rådgivning med en steinleverandør kan også gi innsikt i de beste alternativene for dine behov.
Eksterne lenker
- Tilfeldig løs stein: det naturlige valget for bærekraftig design
- Naturlig uregelmessig tilfeldig løs steinbekledningsfiner
- Alt om naturlige steinsteinsbeleggere – Toppkildeskifer
- Hage Stepping Stones | Landskap & Utendørs stepping Stones
- Høstbrun uregelmessig stepping Stones – SUI stein
- Uregelmessig steinflagg – Stonewood-produkter
- Naturstein Crazy Paving Ideer for ditt uterom
- Flaggstein til salgs i Ohio — Stone Center
