Innkjøp av innvendige aksentvegger påvirker prosjektmarginene direkte når billige materialer forårsaker installasjonsfeil og synlige sømmer, noe som fører til kostbart omarbeid og misnøye hos kunden. Underordnede steinpaneler klarer ofte ikke å levere den sømløse presisjonen som kreves av avansert interiør, noe som svekker forhandlerens rykte og lønnsomhet.
Denne analysen måler Top Source Stone opp mot konsistensstandarden for samme batch-steinbrudd, og legger vekt på presisjonsskjæring av CNC-diamantblad og minimum 300 kvadratmeter MOQ for å sikre skalerbar forsyning med overlegen ensartethet, sømløse sammenlåsende paneler og matchende L-hjørner for feilfri finish.
Hvorfor innvendige aksentvegger krever mer “Fullfør” Enn utvendig sidekledning?
Innvendige aksentvegger krever mer detaljert etterbehandling på grunn av deres fokus på estetisk presisjon, sømløs visuell integrering og fint håndverk, mens utvendig sidekledning prioriterer beskyttelse og holdbarhet.
Estetiske og funksjonelle forskjeller mellom innvendige aksentvegger og utvendig sidekledning
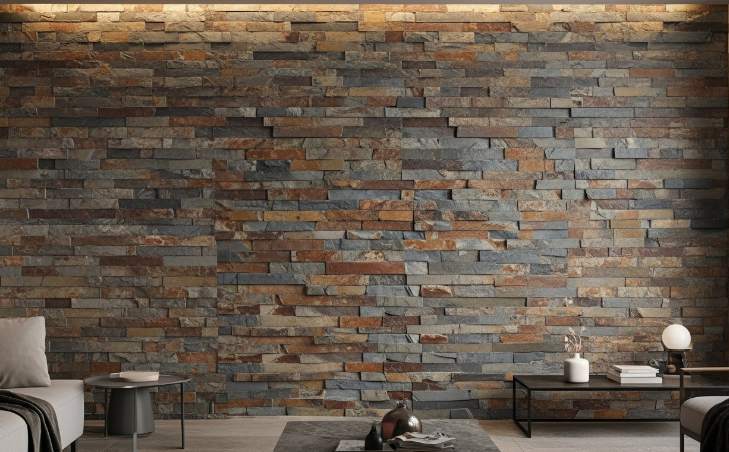
Innvendige aksentvegger fremhever visuelle detaljer som rent kanter, tekstur og designsammenheng. De krever sømløse paneler med nøye oppmerksomhet på lyseffekter og fargeharmoni, minimerer synlige ledd.
Utvendig sidekledning prioriterer holdbarhet og motstand mot vær. Den må tåle soleksponering, fuktighet og temperaturendringer. Finishene er mer funksjonelle, aksepterer strukturelle bevegelser og fuktighetsdrenering, noe som resulterer i grovere, mindre raffinerte utseende.
Top Source Stones sømløse sammenlåsende panelsystem for innvendige aksentvegger
Toppkilde Stone bruker Z-Shape og S-Shape sammenlåsende paneler med CNC diamantblad presisjonsskårne kanter. Dette mann-kvinne-tilkoblingssystemet passer tett sammen paneler, skjuler vertikale skjøter og underlaget under for å skape et sømløst utseende som er avgjørende for interiør.
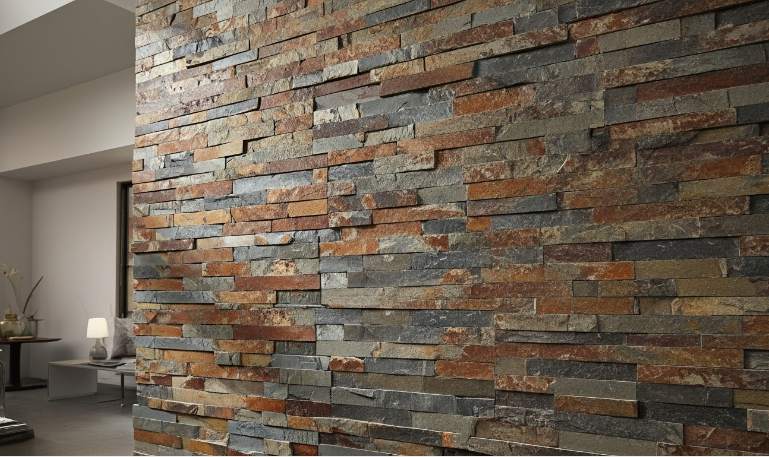
- Steinbruddskonsistens: Paneler kommer fra samme parti og bruddåre, og sikrer ensartet fargetone og tekstur som er avgjørende for innendørs estetikk.
- Matchende L-hjørner: Prefabrikkerte hjørner gir profesjonelle omslagsfinisher uten komplisert skjæring på stedet.
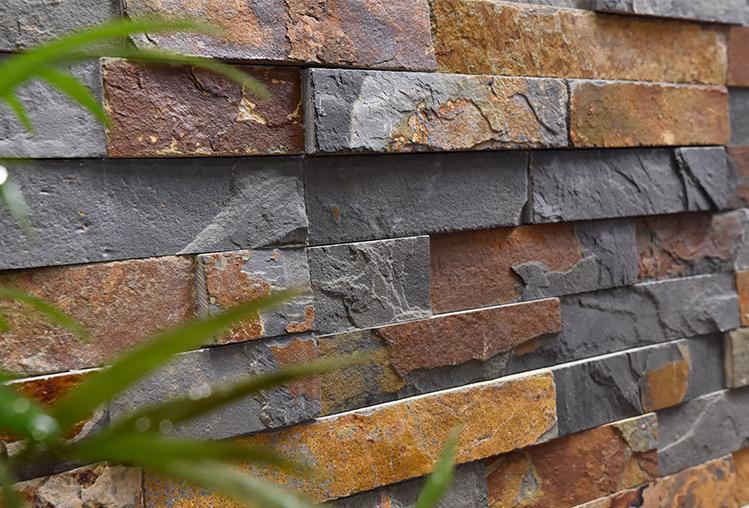
- Naturlig spalte & Sømløs finish: Forbedrer taktil dybde og visuell interesse, egnet for eksklusive interiørapplikasjoner.
Dette systemet lar forhandlere og forhandlere tilby sine kunder høy presisjon stein aksent vegger som oppfyller de strengere estetiske kravene til interiørmiljøer, kontra de mer robuste behovene til utvendig sidekledning.
Hvordan planlegge oppsettet ditt for å unngå “Sliver” Kutt i tak og gulv?
Sentrér og balanser kutt på motsatte sider, unngå kutt mindre enn en halv flis, og plasser kuttede fliser der støping eller fugemasse skjuler dem.
Kjerneprinsipper for balansert planlegging
Start med å sentrere og balansere flisoppsettet slik at størrelsen på den kuttede flisen til venstre matcher kuttet til høyre, og de øverste kuttene speiler de nederst. Denne symmetrien gir en profesjonell og visuelt balansert finish.
Unngå å lage kutt mindre enn halvparten av flisstørrelsen. Disse tynne “skjærekutt” skille seg ut og forringe det generelle utseendet, noe som indikerer dårlig utførelse.
Plasser kuttet fliser i ytterkanter av veggen hvor trimmer, lister eller fugemasser kan skjule disse mindre perfekte kuttene. Å skjule dem her holder hovedflatene rene og estetisk tiltalende.
Ta også hensyn til arkitektoniske funksjoner som vinduer, dører, nisjer og fokuspunkter når du velger startposisjon. Plassering av en hel flis eller hovedfunksjon på disse stedene bidrar til å unngå vanskelige kutt i områder med høy synlighet.
Bruk av kvarteringsoppsett og steinpanelalternativer for å minimere skjæresnitt
Når du arbeider med offsetmønstre som t-banefliser eller 12×24 paneler, standard sentrering kan gi uønskede kutt. Kvarteringslayoutteknikken flytter midten til 1/4 eller 3/4 flismerket. Dette fordeler kutt over vekslende rader, og opprettholder balansen uten at tynne kanter er samlet i én rad.
Toppkilde Stone tilbyr matchende L-formede hjørnepaneler som passer nøyaktig til de rektangulære panelene. Disse prefabrikerte hjørnene gir rene, sømløse overganger ved veggkanter, og reduserer eller eliminerer behovet for tilpassede skjæresnitt.
Deres sammenlåsende Z-form og S-form paneler bruker presis “mann-kvinne” koblinger konstruert med CNC diamantbladskjæring. Denne teknologien sikrer tett passform uten synlige hull, noe som hjelper til med å skjule mindre skjæreavvik og forhindrer at fliser vises.
Høypresisjon CNC diamantbladskjæring holder hver dels kanter rene og konsistente. Dette håndverket hjelper installatører med å oppnå jevne kutt som ser skarpe og profesjonelle ut, forbedrer den generelle finishen og reduserer sjansen for stygge kutt.
Premium stablet stein for entreprenører

Effekten av raking Light: Hvordan skjuler eller fremhever det installasjonssømmer?
Rakende lys treffer overflater i lave vinkler, og understreker selv små sømfeil. Håndtering av fugeorientering, belysning og finish reduserer sømmens synlighet effektivt.
Hvordan Raking Light påvirker installasjonens synlighet
Rakende lys treffer overflater i spisse vinkler, og gir langstrakte skygger som forstørrer mindre uregelmessigheter som sømmer og ujevne overflater. Solvinkler på tidlig morgen og kveld øker synligheten dramatisk. Veggmonterte uplights og sterk hvit belysning forsterker disse skyggene, slik at installasjonsfeil skiller seg tydelig ut for observatører.
Design- og installasjonsstrategier for å minimalisere sømsynlighet
For å redusere sømmens synlighet under rakende lys, orienter lange gipsplater parallelt med lysretningen. Dette minimerer skyggekontrasten på sømmer. Bruk Top Source Stones sammenlåsende Z-Shape- eller S-Shape-paneler for å skjule vertikale skjøter og skape jevne overflateoverganger. Velg diffuse lysarmaturer og matte, lyse overflater for å myke opp skygger og skjule ufullkommenheter. I tillegg hjelper skimming av overflater etter skjøtebearbeiding med å minimere sømlinjer som blir uttalt under et blikk i lys.
Hvordan fullføre steinkanter når veggen plutselig ender uten et hjørne?
Når steinvegger avslutt brått uten hjørner, bruk avskallede kanter, kantstein, naturlige endepaneler eller matchende fugemasse for å avslutte rent.
Vanlige teknikker for etterbehandling av steinkanter uten hjørner
Når en steinmur stopper uten hjørne, bruker installatører flere effektive etterbehandlingsmetoder for å opprettholde et profesjonelt utseende og beskytte kanten.
- Naturlige flisete kanter er laget av forsiktig meisling av stein ender for å bryte den rette linjen, og skaper en organisk finish som integreres med steinens karakter.
- Kant eller kant steiner dannes en ramme rundt omkretsen og gir en jevn visuell overgang, vanligvis laget av samme eller komplementære stein.
- Naturlige endepaneler kommer med ferdige vertikale kanter designet for midtveggstopper der det ikke finnes et hjørne, noe som muliggjør en ren kantavslutning.
- Fargetilpasset fugemasse eller fugemasse påført langs kanten blander den med omkringliggende overflater og tetter gapet, spesielt effektivt der stein møter gips.
Valget mellom disse metodene avhenger av prosjektets stil og krav, men alle har som mål å levere et sømløst, polert utseende ved brå veggavslutninger.
Toppkildesteinspesifikasjoner som støtter kantfinisher
Toppkilde Stone tilbyr konstruerte produkter som forenkler etterbehandling av kanter når vegger slutter uten hjørner, med fokus på presisjon og naturlig estetikk.
- Matchende L-hjørner utfyller alle serier, og gir tekstur og fargekonsistens for jevne overganger ved veggreturer og kanter.
- Paneler er kuttet med CNC diamantbladpresisjon, noe som sikrer rene, konsistente kanter som letter en profesjonell finish og enklere installasjon.
- Naturlig spalte og delt ansikt finish på paneler fremhever steinens organisk tekstur, spesielt effektiv når kantene slutter synlig.
- Naturlig slutt Paneler er spesialbygget for avslutninger mellom vegger uten hjørner, med ferdige vertikale kanter for å eliminere rått utseende.
Disse funksjonene gjør Top Source Stone paneler et pålitelig valg for forhandlere og entreprenører som trenger konsekvente, høykvalitets steinfinerer som håndterer kantfinisher profesjonelt.
Kan du trygt installere stein over store speil eller glassfunksjoner?
Montering av naturlig stablet stein direkte over store speil eller glass er generelt usikkert uten riktig underlag og strukturell støtte.
Utfordringer og hensyn ved montering av stein over glass eller speil
Naturstein veier mellom 8 til 13 pounds per kvadratfot, som glassoverflater vanligvis ikke kan støtte direkte. Denne vektfeilen skaper en reell risiko for glassbrudd under og etter installasjon. Forskjeller i termisk ekspansjon mellom stein og glass forårsaker adhesjonsproblemer og potensielle skader. Høystyrke fleksible lim er nødvendig, men garanterer fortsatt ikke langsiktig liming på glass. Byggeforskrifter begrenser ofte montering av tunge overflater på ikke-strukturelt glass, noe som gjenspeiler sikkerhetshensyn i disse miljøene.
Anbefalte fremgangsmåter og passende alternativer for steinlignende overflatebehandlinger i nærheten av glass
I stedet for å påføre stein direkte på glass eller speil, installere naturlig stablet stein på stabile, egnede underlagsvegger i tilknytning til disse overflatene. Lett Stone finérpaneler eller konstruerte steinalternativer reduserer vekt og risiko. Sammenlåsende panelsystemer, som Z-Shape eller S-Shape paneler med CNC-presisjon, bør monteres på strukturelle vegger – ikke på glass. Bruk innrammede installasjoner med stål- eller trebakside for å støtte trygt stein nær reflekterende elementer. Påfør tetningsmidler og fleksible steinlim kun på kompatible underlag, aldri direkte på glass. Rådfør deg alltid med bygningsingeniører og følg lokale forskrifter for sikker og varig installasjon.
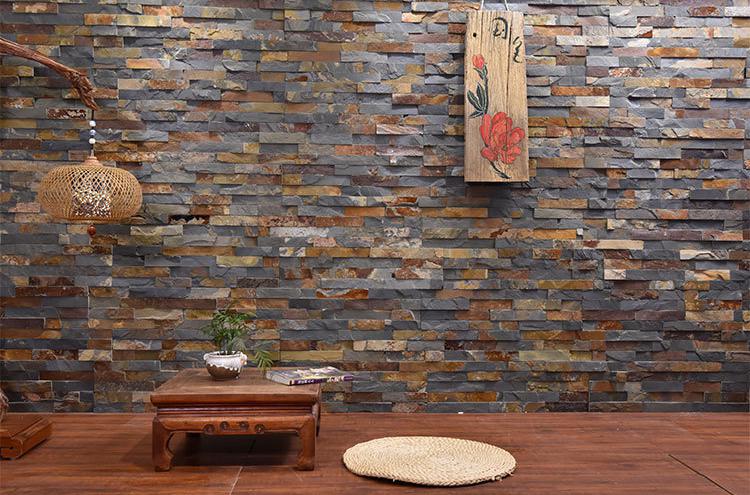
Å oppnå “Nullledd” Se i eksklusive boligstuer
Null-ledd-utseendet krever nøyaktig materialvalg og installasjonsmetoder for å skape sømløs, kontinuerlig natursteinsmur avsluttes.
| Nøkkelfaktor | Detaljer |
|---|---|
| Materialkonsistens | Bruk natursteinspaneler hentet fra samme bruddåre for å sikre farge og åreensartethet |
| Paneldesign | Bruk sammenlåsende Z-Shape- eller S-Shape-paneler med presisjonskanter med CNC-diamantblad for å skjule vertikale skjøter |
| Installasjonsteknikk | Installer paneler med tette hann-hunforbindelser for å skjule sømmer og unngå synlige hull |
| Kantbehandling | Bruk matchende L-formede hjørner for å opprettholde tekstur og fargeflyt på veggoverganger |
| Panelstørrelse & Tykkelse | Standard paneler kommer i 6″ x 24″ (150x600 mm) eller 6″ x 22″ (150x550mm) størrelser, med tykkelse fra 1cm til 2,5cm |
Materialvalg og konsistens
Å oppnå et nullledd utseende avhenger først av naturstein kvalitet og konsistens. Topp Kildestein gir paneler hentet utelukkende fra det samme bruddlaget, noe som sikrer en jevn fargetone på over 95 % innenfor hver bestilling. Denne tilnærmingen reduserer merkbare fargeforskjeller som ellers ville fremhevet sømmer på store vegger.
Interlocking Panel Design
Nullleddeffekten er sterkt avhengig av panelformer konstruert for å låse tett sammen. Top Source Stones Z-Shape- og S-Shape-paneler bruk a “mann-kvinne” koblingssystem presisjonskåret med CNC diamantblader. Denne utformingen skjuler installasjonssubstrat og kamuflerer vertikale skjøter, og skaper kontinuerlige veggflater uten trinnvise hull.
Installasjonsteknikker for å skjule sømmer
Presisjon under installasjonen er avgjørende. Installatører må skjøte paneler godt uten mellomrom. Bruk de sammenlåsende kantene og sørg for full kontakt mellom panelene. Bruk matchende prefabrikkerte L-formede hjørner til ytre hjørner for å opprettholde sømløs tekstur og fargeflyt. Dette reduserer etterbehandlingstiden og opprettholder justeringen.
Panelstørrelse og tykkelse
Standard rektangler måler vanligvis 6″ x 24″ (150x600 mm) eller 6″ x 22″ (150x550mm). Tykkelsen varierer fra 1 til 2,5 cm, med noen premiummodeller opp til 3,5 cm. Tyngre paneler krever riktig forberedelse av underlaget men forbedrer dybden, forsterker nullleddets arkitektoniske integritet.
Sammendrag
Bruk steinbruddskonsistent, sammenlåsende natursteinspaneler, kombinert med omhyggelig installasjon, for å oppnå sømløs high-end veggfinish med null synlige skjøter.
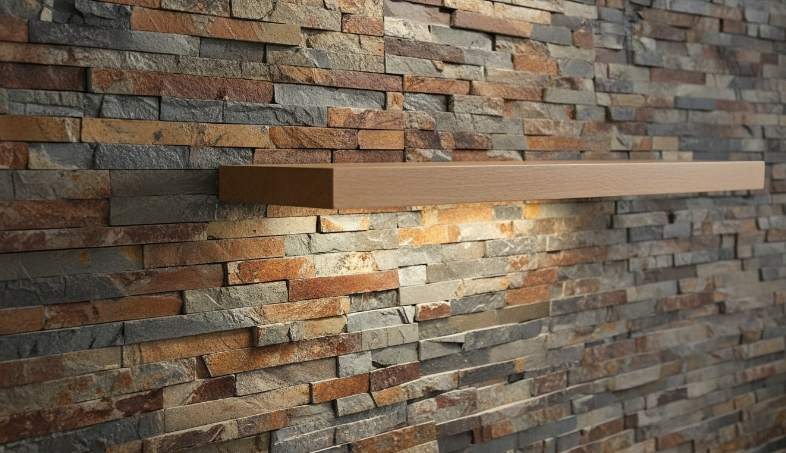
Hvordan integrere flytende hyller og belysning direkte i steinmønsteret?
Sikker montering av hyller og forhåndsplanlegging av elektriske ledninger bak steinpaneler sikrer stabil integrering samtidig som det bevarer det naturlige steinestetikk.
Montering av flytende hyller på naturlige stablede steinvegger
Montering av flytende hyller på naturlig stablet stein krever spesiell forsiktighet på grunn av veggens tekstur og uregelmessigheter. Bruk murankre eller betongskruer som ekspanderer eller tres direkte inn i stein- eller mørtelfugene. Mørtelfuger er å foretrekke borepunkter siden de er mykere enn massiv stein, noe som reduserer sjansen for sprekkdannelse.
Fordi naturlig stablet stein overflater er ujevne, plasser shims bak brakettene for å sikre at hyllen sitter plant. For vegger med svært uregelmessige steinprofiler kan det være nødvendig å hakk i stein eller første installasjon et støttebrett for å skape en flat overflate for montering. Unngå å feste hyller direkte til gips bak steinfineren; sørg for at steinen er godt festet til en solid bakside som sementplate for riktig laststøtte.
Inkorporerer LED-belysning i steinaksentvegger
Integrer LED-belysning ved å føre elektriske ledninger bak steinplater under montering. Denne tilnærmingen gir et rent, hardwired utseende uten overflaterot. Velg flytende hyller laget spesielt for murvegger, som ofte inkluderer integrerte LED-lister som en del av hyllestrukturen.
Velg LED-fargetemperaturer mellom 3000 og 4500 Kelvin for å forbedre steinens tekstur og skape en varm, men likevel naturlig omgivelseslys. Bruk lyskontroller som fjernkontroller eller veggbrytere inkludert i LED-sett for å justere belysningen etter behov. Planlegg hylleplassering slik at den er på linje med hovedbokstein mønster for å opprettholde visuell rytme og unngå å forstyrre natursteinstrukturen.
Opprettholde visuell flyt: Matchende steinårer på tvers av store vegger
Matchende steinårer krever samme-batch-platevalg kombinert med presise layoutteknikker som bookmatching og kontinuerlig årejustering for enhetlig visuelle bilder av store vegger.
Teknikker for å justere steinårer på store overflater
Ulike tilnærminger hjelper opprettholde visuell flyt over flere steinpaneler på store vegger. Hver av dem har distinkte effekter på mønsterkontinuitet og generell påvirkning.
- Bookmatch-teknikk skaper speilplater, og produserer slående symmetri og dristige, sammenhengende åremønstre som er ideelle for funksjonsvegger.
- Venestrømningsmetode orienterer alle plater i samme veneretning, og gir kontinuerlig bevegelse og harmoni selv uten nøyaktig mønsterreplikasjon.
- Kontinuerlig venetilpasning kobler sammen paneler sømløst slik at venemønstre flyter som ett ubrutt design over hele overflaten.
- Tilfeldig kamp plasserer plater uten tvungen justering, og opprettholder et organisk utseende som fremhever naturlig variasjon.
Bruker Same-Batch Quarry Consistency og CNC Presisjon i Vein Matching
Materialkonsistens og kuttepresisjon spiller nøkkelroller for å oppnå høykvalitets venetilpasning på store installasjoner.
- Å velge plater hentet fra samme åre i bruddet begrenser fargeskift og åreinkonsistens, noe som sikrer ensartet utseende gjennom hele veggen.
- Topp kildestein bruker CNC diamantblad presisjonskanter på Z-Shape og S-Shape paneler, noe som muliggjør tette sammenlåsende skjøter som skjuler sømmer og underlag.
- Matchende prefabrikkerte L-hjørner gir jevn veneforlengelse rundt 90-graders veggoverganger, og eliminerer visuelle brudd.
- Visuell verifisering før forsendelse med bilder og videoer bekrefter venekonsistens før levering, og beskytter prosjektmarginen og installasjonssikkerheten.
Ofte stilte spørsmål
Hva er den anbefalte retningen for å begynne å installere innvendige naturlig stablede steinpaneler?
Begynn å installere fra bunnen og jobb deg opp mot taket. Dette sikrer fundamentstabilitet, bruker tyngdekraften til å holde steiner på plass som mørtelsett, gir bedre ergonomisk tilgang og sikrer presisjon i justeringen fra en jevn første rad.
Hvordan kan kuttede eller rå steinkanter effektivt skjules på en innvendig aksentvegg?
Bruk fuging for å fylle hull og jevne ut steinoverflaten, påfør malertape før fuging for å beskytte tilstøtende overflater, og bruk strategiske kutteteknikker som vinklet kutt eller kutting av individuelle steiner for å unngå synlige sømmer og skape et naturlig utseende.
Hvilke belysningsteknikker fremhever best teksturen til natursteinsvegger?
Graze-belysning er mest effektivt for å fremheve tekstur ved å plassere lys rett over steinen slik at skygger og dimensjoner forsterkes. Opplysing og skrå belysning gir også dramatiske effekter, mens bakgrunnsbelysning fungerer godt med gjennomskinnelige steinvarianter.
Hvordan skal gapet mellom steinplater og himling avsluttes?
Forbered skjøten ved å rengjøre og utvide gapet, og påfør deretter en malbar polymerbasert fugemasse eller tetningsmasse med maskeringstape for rene kanter. Bruk en skumstøttestang for større hull, glatt ut tetningsmassen før den tørker, og la den herde fullstendig før maling.
Kan steinplater monteres rundt veggmonterte TV-er?
Ja, ved enten å installere TV-festet før steinlegging eller ettermontere festet i eksisterende stein. Pre-installasjon innebærer montering på sementplate med stein kuttet rundt. Ettermontering krever forsiktig skjæring eller mellomlegg for å feste festet sikkert til veggstendere uten å bore i mørtelfuger.
Endelige tanker
Mens generisk steinpaneler kan virke kostnadseffektivt på forhånd, bare Top Source Stones direkte bruddkilde og CNC diamantbladpresisjon garanterer konsistent fargetone, sømløs sammenlåsing og holdbare finisher som beskytter merkevarens rykte mot ujevne installasjoner og synlige sømmer. Investering i ekte samme-batch steinbruddskonsistens og konstruert paneldesign reduserer tilbakeringinger og øker kundetilfredsheten, og gir forhandlere et sterkt forsprang i premium innvendige aksentveggprosjekter.
Ikke stol på gjetting – start med et prøvesett for å oppleve produktets perfekte passform og naturlige tekstur på egen hånd. Ta kontakt med teamet vårt for å utforske private label-alternativer eller be om detaljerte kataloger skreddersydd for din prosjektskala og markedsbehov.
SEO
Tittel: Den designdrevne installasjonen: Lage feilfrie interiørvegger
Beskrivelse: Innvendige aksentvegger fra direkte bruddkilde med CNC-presisjon og MOQ 300 kvm. Kun fabrikkengros, ingen detaljhandel.
URL: interiør-aksent-vegger-leverandør
Nøkkelord: innvendige aksentvegger
