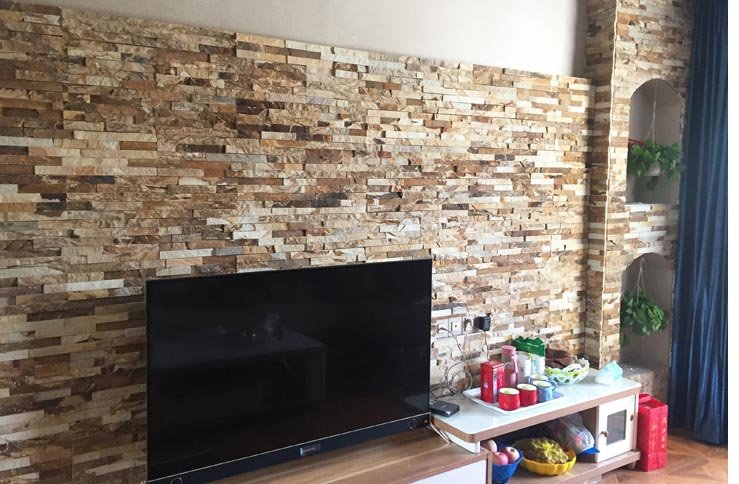
Urok ułożony kamień tkwi w surowej elegancji i ponadczasowym uroku. Ten wszechstronny materiał może przekształcić zwykłe ściany w efektowne elementy architektoniczne. Jednak opanowanie sztuki montażu narożników ułożonych w stosy kamiennych paneli ma kluczowe znaczenie dla uzyskania profesjonalnego i dopracowanego wyglądu. Prawidłowy montaż narożnika zapewnia nie tylko estetykę, ale także integralność konstrukcji.
Wymagane materiały i narzędzia
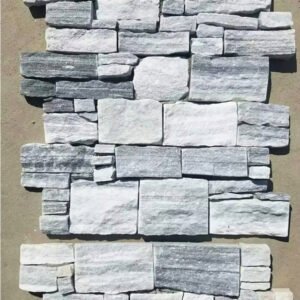
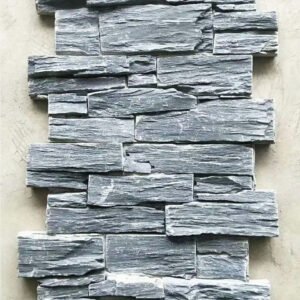
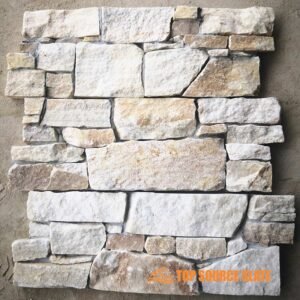
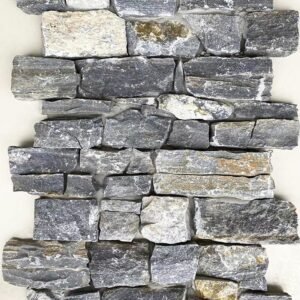
Wybór odpowiednich materiałów to pierwszy krok w kierunku udanego projektu. Różne rodzaje ułożonych kamiennych narożnikówtakie jak kamień naturalny czy fornir sztuczny, charakteryzują się różnorodną fakturą i kolorystyką. Niezbędne narzędzia to piła murarska, kielnia i poziomica. Nie zapomnij o sprzęcie ochronnym – rękawice, okulary ochronne i maska przeciwpyłowa są niezbędne.

Preparing the Surface
For best bonding results, the surface should be clean, dry, and have open pores for adhesion. Smooth, non-porous, or polished surfaces should be avoided to adhere to. Interior installations of interlocking stacked stone panels could be installed on gypsum drywall or exterior grade plywood for up to 10’ in height. A cement board is recommended for interior walls exceeding 10’ in height. For exterior applications, interlocking stacked stone panel corners can be installed directly onto brick, masonry blocks, cured concrete, or cement boards.
Begin by thoroughly cleaning the wall to remove dust and debris. Apply a moisture barrier to protect the underlying structure from water damage. Next, install a metal lath, which provides a strong base for the mortar and stone to adhere to. This step is critical for ensuring the stacked stone panels stay securely in place.
Planning Your Layout
Measure and mark the wall to plan your layout precisely. Dry laying the stacked stones helps visualize the final look and allows for adjustments before permanent installation. Choose a pattern that complements your space, whether it’s a uniform grid or a more random arrangement for a natural effect.
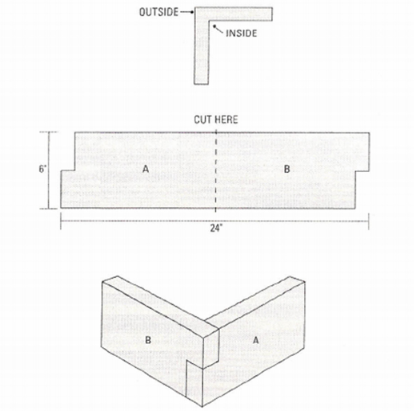
Mitering an Outside Corner
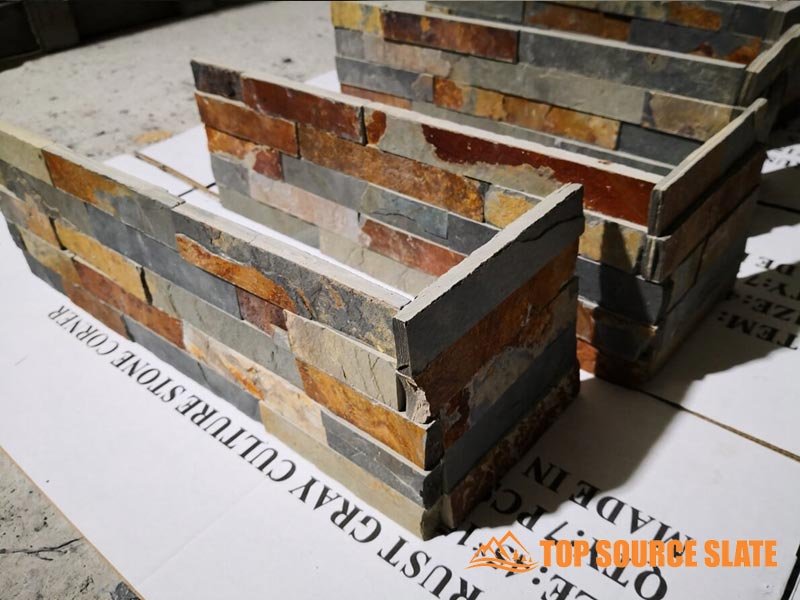
1. Set the saw to a 45-degree angle. With the textured face of exterior stacked stone panels facing up and the lip away from you, make a 45-degree cut.
2. Set Side B aside. Flip Side A over so that the textured front of exterior stacked stone panels faces down and the edge from the previous cut is towards the saw blade. Adjust the saw to 90 degrees and make a second 45-degree cut as close to the end of the panel as possible. Discard the material that was cut away.
3. Mount the second section by adding adhesive to the back of the stacked stone panel and a small bead to the edge where the panels will meet.
4. Push the cut sides of the panels together and secure with screws.
Mitering an Inside Corner
1. Dostosuj piłę do kąta 45 stopni z teksturowaną stroną skierowaną do góry i wargą od ciebie. Wytnij pod kątem 45 stopni i ustaw stronę A na bok.
2. Odwróć stronę B panelu, z teksturowanym z przodu skierowanego w dół i poprzednią krawędzią cięcia w kierunku ostrza piły. Wytnij koniec wewnętrznych kamiennych paneli kamiennych jako blisko kąt 45 stopni, a następnie odrzuć usuniętą sekcję.
3. Zamontuj drugą część panelu cięć i ukryj szew narożny farbą z zestawu dotykowego.
-
 Najwyższej jakości płytki łupane 3D z piaskowca do wnętrz i na zewnątrz
 -
 Cena hurtowa rustykalna mozaika kwarcowo-miedziana z dzieloną powierzchnią
 -
 Wysokiej jakości chińska mozaika z dzieloną powierzchnią, typu ostryga
 -
 Chiny produkują mozaikę kwarcytową z dzieloną powierzchnią ostryg
 -
 Profesjonalna produkcja mozaiki z szarej cegły rotia z dzieloną powierzchnią 10 * 36 cm
 -
 Fabryka w Chinach, panel księgi głównej z dzieloną twarzą w kolorze królewskiej bieli
-
 Cena hurtowa okładzin zewnętrznych z kamienia naturalnego
 -
 Panele kamienne Oyster Quartz Z 550 x 200
 -
 Mętne szare panele okładzinowe z kwarcu w kształcie litery Z
 -
 Okładzina panelowa Z z czarnego łupka
 -
 Okładzina z naturalnego białego kamienia kwarcowego
 -
 Okładzina z kamienia kwarcowego w kolorze niebieskiego diamentu do dekoracji ścian zewnętrznych
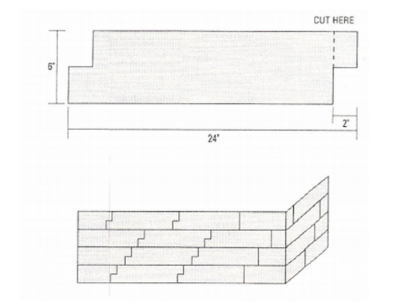
Cutting the Stacked Stones Panels.
Please follow the below steps to achieve a natural hand-stacked appearance:
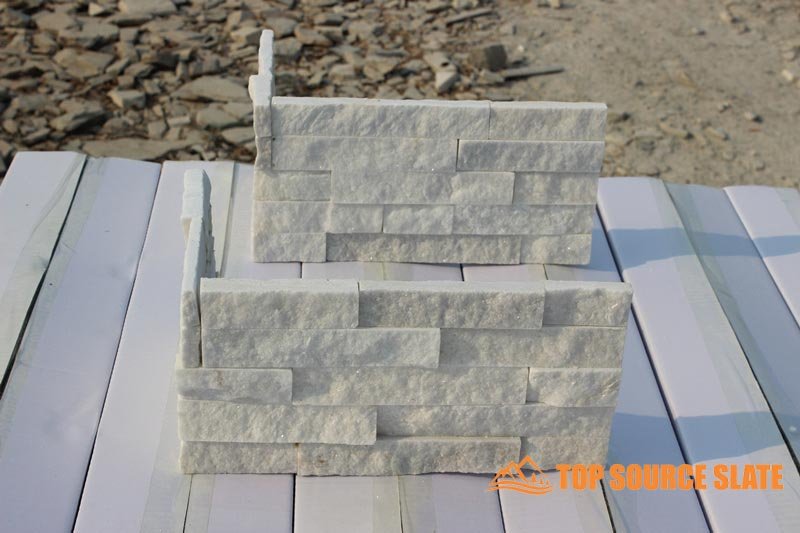
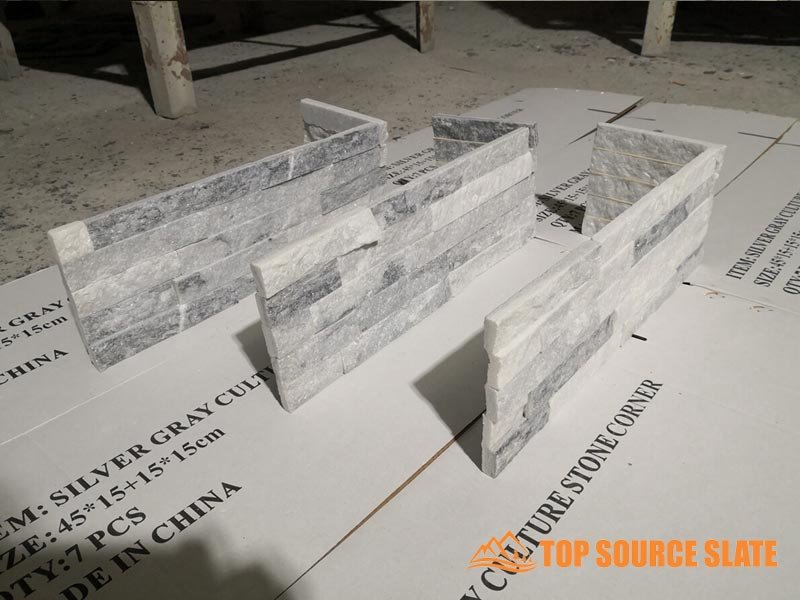
- Stacked stone panel corners are used to finish outside corners with natural edges. Inside corners should be mitered from plain panels. Orient the outside corner so that the flat lips are up.
- Stacked corner panels have natural rock-faced ends on both sides and are shaped as shown. They are 24” long and 6” high with approximately one square foot coverage.
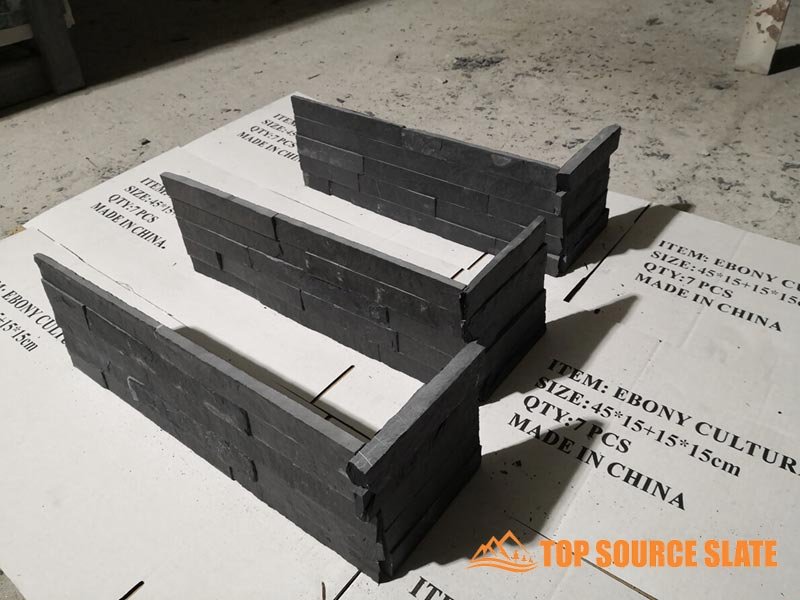
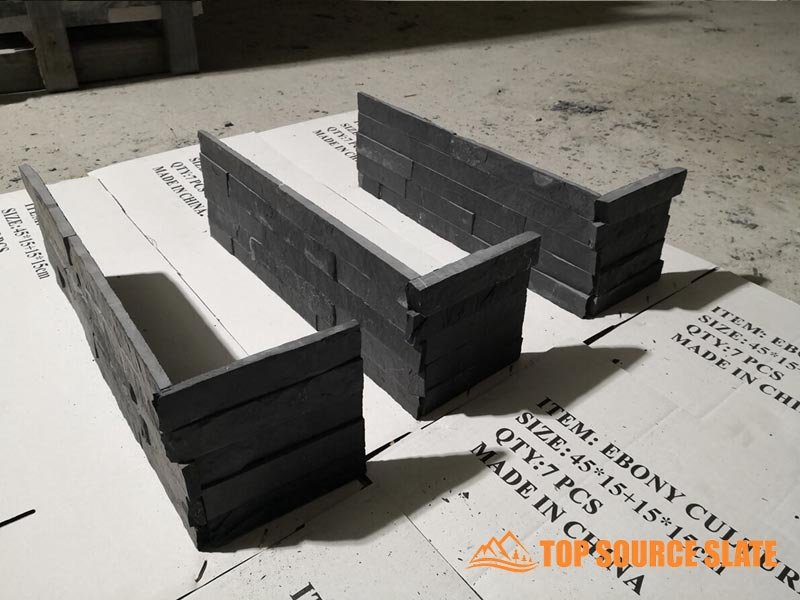
- Dry fit 6 x 24 stacked stone panels leading into the interlocking tabs of the outside corner. Trim the first panel to align the last panel’s slots with the interlocking tabs of the outer corner. Corner panels should be cut into two pieces at the desired length and finger-joined around the outside corner as shown. One corner panel is needed to complete the linear foot of the outside corner.
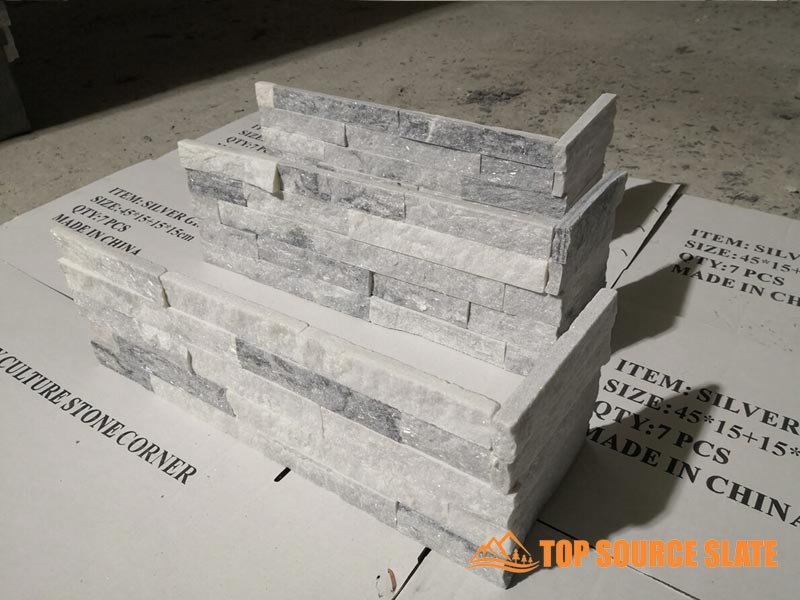
- Continue the installation by removing one staggered end of the plain stacked stone piece and place adjacent to the installed corner piece to continue the same row. Use construction adhesive and screws to install the row of panels leading away from the corner
- Alternate the size of the corner pieces to help stagger the joints. Do not stagger in a brick fashion, but randomly alter the size to conceal the joint patterns.
Use tools like a wet saw or angle grinder to cut the rackmount interlocking stacked stone panels to the required size. Safety is paramount—always wear protective gear when cutting. Achieving precise cuts is essential for a seamless fit, especially around corners where accuracy matters most.
Mieszanie i nakładanie zaprawy
For all installations, a polymer-modified mortar is recommended. For commercial installations, as well as
exterior installations over 10’ in height, a polymer mortar with a latex additive is strongly recommended.
Selecting the right mortar is crucial for a strong bond. Follow mixing instructions carefully to achieve the right consistency—not too dry, not too wet. Apply a scratch coat of mortar to the wall to enhance adhesion. This initial layer will hold natural stacked stone panels firmly in place.
Installing the Corner Pieces
Stacked stone corner pieces are the keystones of your project. They provide the framework and set the tone for the entire installation. Place the first stone with meticulous care, ensuring it is perfectly aligned and level. This step is foundational for a flawless finish.
Jak zainstalować ułożony kamień lub kamień półkowy
Jak zainstalować kamienny kominek
Plusy i minusy nowoczesnych kamiennych okładzin zewnętrznych
Laying the Stacked Stones
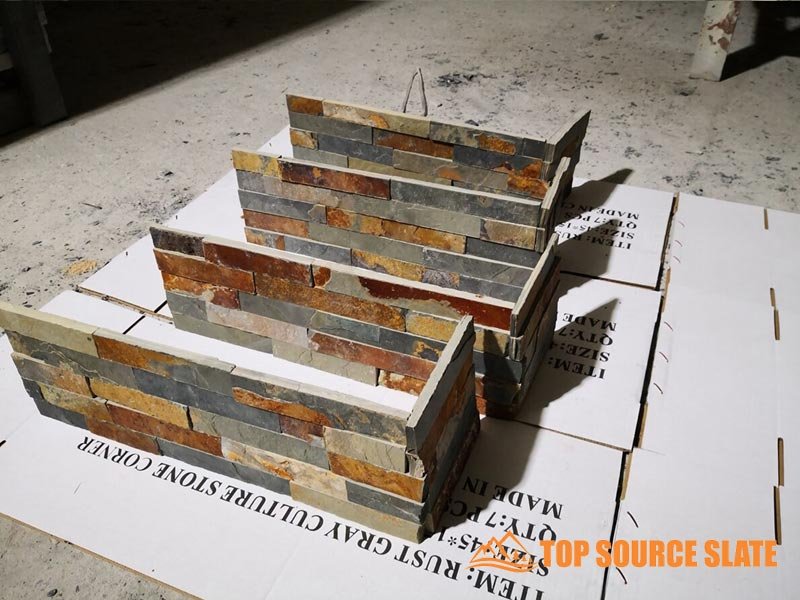
Start laying stones from the bottom up. This method helps maintain the structure’s stability. Ensure each stone is level and maintain consistent joints between quality stone stacked stone panel corners. Regularly check for level and plumb to keep the installation straight and even.
Finishing the Stacked Stone Corners
Inspect the corners for any gaps or voids. Fill small gaps with additional mortar and smooth the joints for a clean, professional look. Attention to detail in this step can make a significant difference in the overall appearance.
Cleaning and Sealing
Nadmiar zaprawy z kamieni usunąć za pomocą miękkiej szczotki lub gąbki. Dokładne oczyszczenie kamieni pozwala odkryć ich naturalne piękno. Na koniec nałóż uszczelniacz, aby zabezpieczyć kamień przed wilgocią i plamami. Uszczelniacz wzmacnia również kolor kamienia, nadając mu żywe wykończenie.
Opanowanie montażu ułożonych w stosy narożników kamiennych paneli księgi przekształca prosty projekt w dzieło sztuki. Dzięki starannemu planowaniu, precyzyjnemu wykonaniu i dbałości o szczegóły można uzyskać oszałamiające, trwałe wykończenie, które upiększy każdą przestrzeń.
Często zadawane pytania
Jak wykonać narożniki wewnętrzne kamieniem hodowlanym?
Narożniki wewnętrzne z kamieniem hodowlanym można uzyskać, docinając krawędzie kamieni pod kątem 45 stopni w miejscu ich styku. Tworzy to czysty, jednolity narożnik. Upewnij się, że używasz mocnego kleju lub zaprawy, aby zabezpieczyć kamienie na miejscu.
Jaki jest najlepszy sposób cięcia ułożonych kamieni?
Kamień ułożony w stosy można ciąć kilkoma różnymi narzędziami, w zależności od rodzaju kamienia:
- Do kamienia naturalnego: Do precyzyjnych cięć idealnie sprawdzi się piła mokra wyposażona w tarczę diamentową.
- Dla produkowanego kamienia: Można użyć szlifierki kątowej z tarczą diamentową lub piły do cięcia na mokro płytek w przypadku cieńszych kawałków.
- Podczas cięcia kamienia zawsze noś odpowiedni sprzęt ochronny, w tym okulary i rękawice.
Co można zrobić z ułożonym kamieniem?
Kamień piętrowy jest wszechstronny i można go stosować na różne sposoby:
- Twórz akcentujące ściany wewnątrz lub na zewnątrz.
- Osłona obudowy kominka, aby uzyskać rustykalny lub nowoczesny wygląd.
- Popraw wygląd kolumn lub filarów.
- Używaj jako osłon tylnych w kuchniach lub łazienkach.
- Udekoruj ściany ogrodu lub elementy krajobrazu.
Jak zainstalować narożnik z kamienia księgi głównej?
Montaż narożników kamiennych księgi głównej obejmuje:
- Przygotuj powierzchnię, czyszcząc ją i upewniając się, że jest płaska i sucha.
- Nałóż zaprawę lub klej zarówno na kamień, jak i na ścianę.
- Wciśnij mocno narożniki na miejsce, upewniając się, że są wypoziomowane i wyrównane.
- Wypełnij szczeliny zaprawą lub fugą i usuń nadmiar materiału.
- Pozostawić instalację do wyschnięcia i utwardzenia zgodnie z instrukcją produktu.
Jak wykonać narożniki z ułożonych płytek kamiennych?
Narożniki z ułożonymi w stos płytkami kamiennymi zazwyczaj obejmują:
- Cutting the tiles to fit neatly around the corner.
- Using corner pieces specifically designed for stacked stone to ensure a seamless look.
- Applying adhesive or mortar to both the tiles and the wall.
- Pressing the tiles firmly into place, ensuring they are level and aligned correctly.
- Grouting between the tiles once the adhesive has cured, and cleaning off any excess grout.
Uzbrojeni w wiedzę zdobytą w tym obszernym przewodniku dla kupujących, jesteście teraz przygotowani do pewnego wyboru, montażu i konserwacji ułożonego kamienia. Obejmij czarujący urok iwszechstronność ułożonego kamienia, pozwalając mu przekształcić Twoje otoczenie w zapierające dech w piersiach i ponadczasowe arcydzieło.
Jeśli szukaszproducenci i dostawcy kamienia ułożonego, polecamy sprawdzić nasze produkty.
Mamy ponad 15-letnie doświadczenie w eksporcie i oferujemy próbki przed złożeniem zamówienia. Aby otrzymać indywidualną wycenę,Skontaktuj się z nami teraz!
