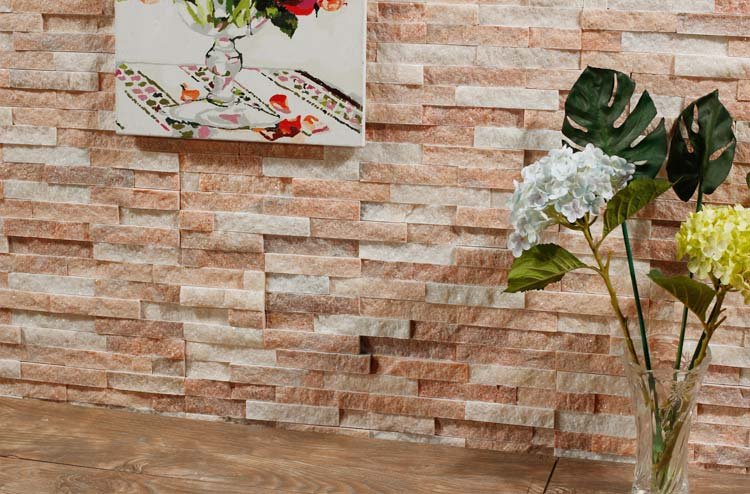
Zewnętrzny kamień ułożony jest oszałamiającym wyborem do poprawy architektonicznej atrakcyjności domów, zapewniającego rustykalny, ale elegancki wygląd. Ten wszechstronny materiał jest szeroko stosowany w różnych zastosowaniach, od ścian akcentu po pełne fasadę. Jednak z czasem naturalne piękno kamienia z zewnątrz może zniknąć z powodu czynników środowiskowych, wymagając od właścicieli domów rozważenia odmalowania lub barwienia w celu utrzymania jego estetycznych i ochronnych właściwości. W tym przewodniku zbadamy, jak malować zewnętrzny kamień, zagłębiając się w przyczyny malowania, kroków przygotowawczych, wyboru farby, technik i wskazówek dotyczących konserwacji.
Malowanie zewnętrznego kamienia ułożonego w stos może przekształcić wygląd domu, oferując świeżą perspektywę bez potrzeby pełnego remontu. Idąc naprzód, omówimy wszystko, co musisz wiedzieć, aby osiągnąć profesjonalne wykończenie, zapewniając jednocześnie długowieczność twoich zewnętrznych paneli forniru.
1. Powody do malowania kamienia ułożonego
1.1 Zwiększenie estetycznego uroku
Jednym z głównych motywacji do malowania zewnętrznego kamienia jest zwiększenie jego estetycznego uroku. Naturalny kolor kamienia może czasem kolidować z nowoczesnymi preferencjami projektowymi lub otaczającym krajobrazem. Wybierając nowy kolor, właściciele domów mogą oddychać nowe życie w swoje zewnętrzne elementy. Opcje kolorów Obejmuje się od neutralnych tonów do odważnych, żywych odcieni, pozwalając na kreatywną ekspresję.
Na przykład jaśniejsze odcienie mogą stworzyć jasny, przestronny charakter, a ciemniejsze kolory mogą dodać dramatu i wyrafinowania. Ponadto malarstwo umożliwia koordynację z ogólną kolorystyką domu, w tym wykończeniem, drzwiami i oknami, prowadząc do spójnej konstrukcji.
1.2 Ochrona zewnętrznego kamienia ułożonego
Oprócz ulepszenia wizualnego malarstwo jest warstwą ochronną dla kamiennych paneli z zewnątrz. Elementy mogą odbijać się na powierzchniach kamienia naturalnego, prowadząc do erozji, przebarwienia, a nawet szkód strukturalnych. Farba wysokiej jakości stanowi barierę przed wilgocią, promieniami UV i fluktuacji temperatury, przedłużając życie kamienia.
Według badań z Narodowe Centrum Technologii i Szkolenia Ochrony, pomalowane powierzchnie mogą zmniejszyć wchłanianie wilgoci nawet o 75%, co znacząco ograniczając ryzyko pleśni i pleśni. W ten sposób malarstwo nie tylko upiększcza, ale także wzmacnia kamień przed stresorami środowiskowymi.
1.3 Aktualizacja wyglądu
Malarstwo może dramatycznie zaktualizować wygląd twojego domu bez intensywnych remontu. Jeśli niedawno zmieniłeś krajobraz lub dodałeś nowe funkcje architektoniczne, odmalowanie zewnętrznego kamienia ułożonego może pomóc w stworzeniu harmonii w ramach ogólnego projektu. Ponadto pozwala właścicielom domów nadążać za trendami projektowymi, co ułatwia odświeżenie wyglądu domu na przestrzeni lat.
Zasadniczo malowanie swojego zewnętrznego kamienia jest prostym, ale skutecznym sposobem na modernizację i ulepszenie uroku w domu, zapewniając, że pozostaje wyróżniającą się funkcją w Twojej okolicy.
-
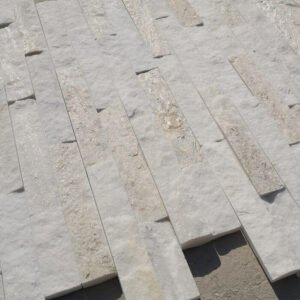 Chiny nowe kolory kwarcytowych paneli kamiennych
 -
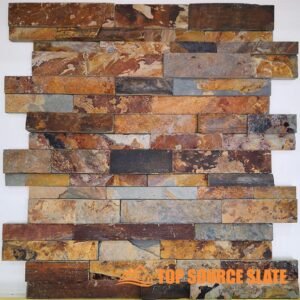 Panel księgi kamiennej z szorstkiego, zardzewiałego łupka o wymiarach 6 cali x 24 cale.
 -
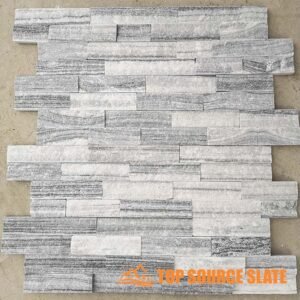 Szorstki, szary, ułożony w stos kamienny panel księgi głównej o wymiarach 6 cali x 24 cale.
 -
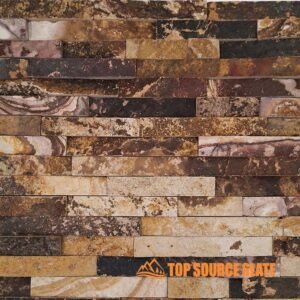 Panel kamienny z szorstkiego piaskowca o wymiarach 6 cali x 24 cale.
 -
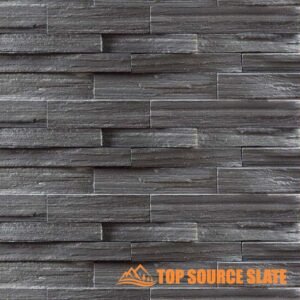 Panel księgi z naturalnego, czarnego łupka, szorstki, 6 cali x 24 cale.
 -
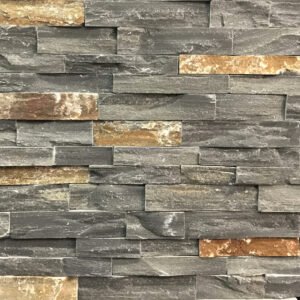 Panel księgi Sierra Blue 6 cali x 24 cale. Kamień naturalny Kwarcyt
 -
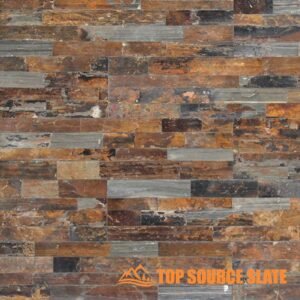 Panele z naturalnego kamienia z łupka kalifornijskiego - 6 x 24
 -
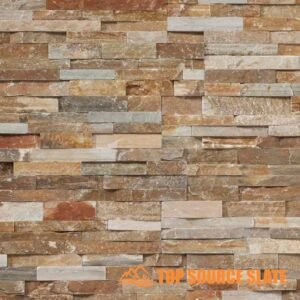 Księga panelowa z łupków złotych zbiorów – 6x24
-
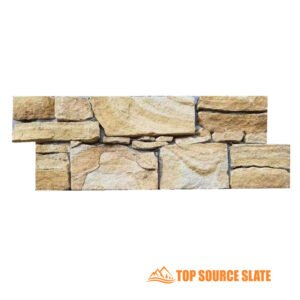 Zewnętrzna okładzina ścienna z naturalnego kamienia w nowym stylu
 -
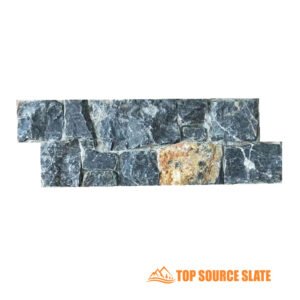 Zewnętrzna okładzina z naturalnego kamienia w nowym stylu
 -
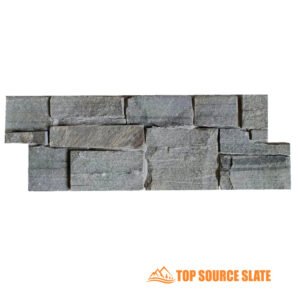 Ceny hurtowe zewnętrzne panele z kamienia naturalnego
 -
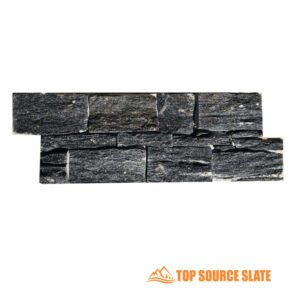 Kamienny kominek z czarnego kwarcu
 -
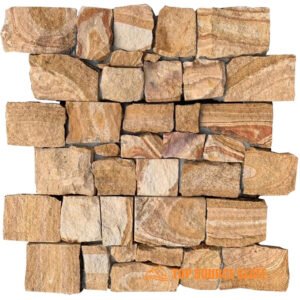 Cena fabryczna z piaskowca z okładziną kamienną z panelem
 -
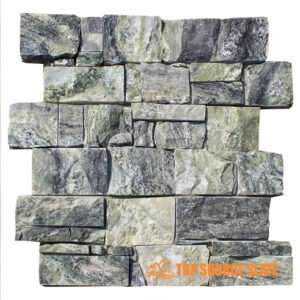 Cena fabryczna blokujących kamienne panele elewacyjne Z
 -
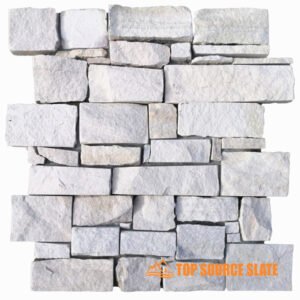 Kamienny kominek z białego piaskowca
 -
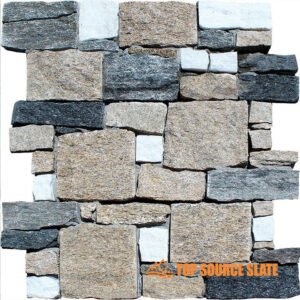 Dekoracja zewnętrzna półka z kamienia hodowlanego
-
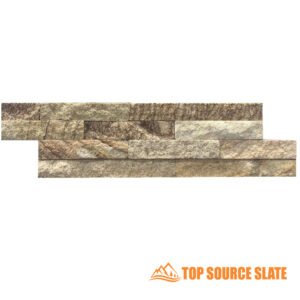 Najwyższej jakości płytki łupane 3D z piaskowca do wnętrz i na zewnątrz
 -
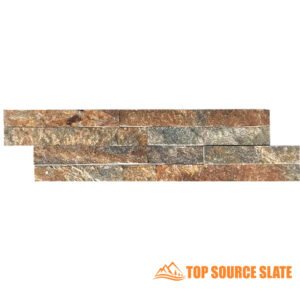 Cena hurtowa rustykalna mozaika kwarcowo-miedziana z dzieloną powierzchnią
 -
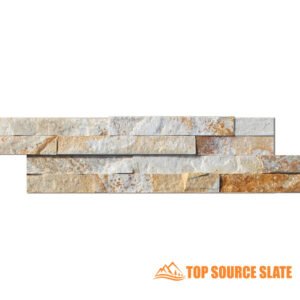 Wysokiej jakości chińska mozaika z dzieloną powierzchnią, typu ostryga
 -
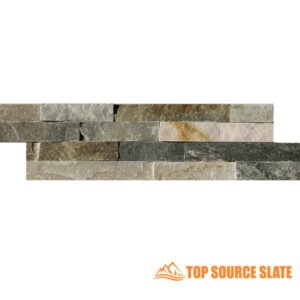 Chiny produkują mozaikę kwarcytową z dzieloną powierzchnią ostryg
 -
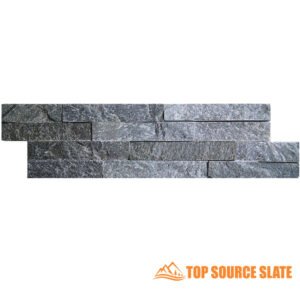 Profesjonalna produkcja mozaiki z szarej cegły rotia z dzieloną powierzchnią 10 * 36 cm
 -
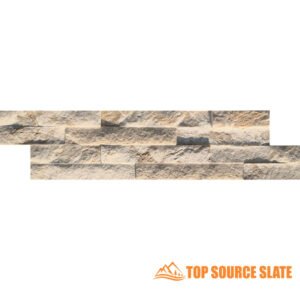 Fabryka w Chinach, panel księgi głównej z dzieloną twarzą w kolorze królewskiej bieli
 -
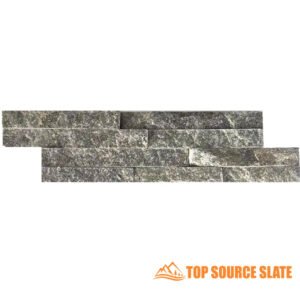 Fabryczne płytki ścienne z mozaiką z zielonego kwarcytu w Chinach
 -
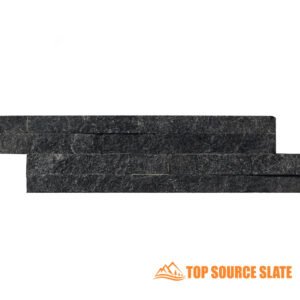 Producent chińskiej płytki z czarnego kwarcytu mini z dzieloną powierzchnią
Ułożony kamień: kompletny przewodnik dla kupujących 【aktualizacja】
Jak zainstalować ułożony kamień lub kamień półkowy
Jak zainstalować kamienny kominek
Okładziny z kamienia naturalnego: kompletny przewodnik
2. Przygotowanie do projektu
2.1 Ocena stanu zewnętrznego kamienia ułożonego
Przed zanurzeniem się w proces malarski kamień ułożony na zewnątrz jest niezbędne. Spójrz blisko jakichkolwiek oznak uszkodzeń, takich jak pęknięcia, żetony lub rozpadająca się zaprawa. Wcześniejsze rozwiązanie tych problemów zwiększy wygląd projektu i zapewni dłuższą pracę malarską.
Jeśli znajdziesz znaczne szkody, rozważ skonsultowanie się z profesjonalistą w celu naprawy. Ten krok jest kluczowy; Zaniedbanie rozwiązania problemów może prowadzić do złej przyczepności farby i jeszcze bardziej rozległych szkód w przyszłości.
2.2 Czyszczenie zewnętrznej powierzchni kamiennej oklearki
Dokładne czyszczenie powierzchni kamiennej jest nie do negocjacyjnym krokiem w przygotowaniu. Brud, brud i pleśń mogą hamować przyczepność farby i prowadzić do nierównych wykończeń. Oto kilka skutecznych metod czyszczenia:
- Mycie ciśnienia: Korzystanie z podkładki ciśnieniowej może skutecznie usunąć uparty brud i zanieczyszczenia. Upewnij się, że ciśnienie jest odpowiednio wyznaczone, aby uniknąć uszkodzenia zewnętrznych paneli forniru z zewnątrz.
- Szorowanie: W przypadku mniejszych obszarów lub delikatnego kamienia szczotka zarośla z mieszaniną wody i łagodnego detergentu może działać cuda. Zwróć uwagę na szczeliny, w których brud ma tendencję do gromadzenia się.
Po oczyszczeniu pozwól, aby kamień całkowicie wyschnął, ponieważ malowanie nad wilgotnymi powierzchniami może powodować bulgotanie i obieranie.
2.3 Naprawianie szkód
Jeśli podczas oceny zidentyfikowałeś jakieś pęknięcia lub żetony, ważne jest ich naprawę przed malowaniem. Oto kilka typowych metod napraw:
- Naprawa moździerza: Użyj związku łatania do pęknięć w stawach zapraw. Wyczyść staw, nałóż związek i wygładzaj go piel.
- Kamienne wypełniacz: Kamienne wypełniacz można nakładać na drobne wióry w kamieniu. Postępuj zgodnie z instrukcjami producenta dotyczących czasów aplikacji i suszenia.
Poświęcając czas na prawidłowe przygotowanie kafelki kamiennej w stos zewnętrznych, przygotujesz scenę do udanego projektu malarskiego, który będzie wyglądał dobrze i trwa dłużej.
3. Wybór odpowiedniej farby
3.1 Rodzaje farby odpowiednie do kamienia z zewnątrz
Wybór odpowiedniej farby ma kluczowe znaczenie dla osiągnięcia trwałego i estetycznego wykończenia na zewnętrznym kamieniu. Dwa główne rodzaje farby są zazwyczaj zalecane dla kamiennych powierzchni:
- Farba akrylowa: Znana z elastyczności i trwałości farba akrylowa jest doskonałym wyborem do zastosowań zewnętrznych. Dobrze przylega do zewnętrznych paneli okleinowych w stos zewnętrznych, opiera się blaknięciem i zapewnia doskonałe pokrycie. Dodatkowo pozwala kamieniu oddychać, zmniejszając ryzyko gromadzenia się wilgoci pod farbą.
- Farba lateksowa: Kolejna realna opcja, lateksowa farba jest oparta na wodzie i łatwa w obsłudze. Szybko wysycha, ma niskie emisje LZO i jest łatwiejsze do czyszczenia niż farby na bazie oleju. Poszukaj wysokiej jakości farb lateksowych specjalnie sformułowanych do użytku na zewnątrz.
Wybierając farbę, upewnij się, że jest on oznaczony przez kamień murowany lub zewnętrzny, aby upewnić się, że może skutecznie wytrzymać elementy zewnętrzne.
3.2 Wybór kolorów
Wybór odpowiedniego koloru dla swojego zewnętrznego kamienia ułożonego może znacząco wpłynąć na ogólny wygląd domu. Oto kilka wskazówek, aby poprowadzić Twoją decyzję:
- Rozważ otoczenie: Weź pod uwagę kolory bocznicy, dachu i krajobrazu Twojego domu. Spójna paleta kolorów stworzy harmonię w projekcie zewnętrznym.
- Próbki testowe: Zawsze wypróbuj kilka kolorów na kamiennej powierzchni przed zaangażowaniem. Farba może wyglądać inaczej po nałożeniu, pod wpływem warunków oświetlenia i naturalny kolor zewnętrznej kamiennej ściany.
- Trendy kontra ponadczasowość: Chociaż kuszące jest wybór modnych kolorów, rozważ wybór bardziej ponadczasowych odcieni, jeśli planujesz pozostać w domu w długim okresie. Neutralne odcienie, takie jak szarości, beiges i białe, często zapewniają klasyczny wygląd.
Ostatecznie odpowiedni kolor farby nie tylko poprawia urok w domu, ale także przyczynia się do jego wartości i długowieczności.
4. Potrzebne narzędzia i materiały
4.1 Niezbędne narzędzia
Posiadanie odpowiednich narzędzi ma kluczowe znaczenie dla udanego projektu malowania. Oto lista niezbędnych narzędzi, których będziesz potrzebować podczas malowania zewnętrznego kamienia w stosie:
- Pędzle: Niezbędne są różnorodne pędzle (zarówno syntetyczne, jak i naturalne włosy). Użyj szczotek sztywnego baru do teksturowanych powierzchni i drobniejszych szczotek do szczegółowych obszarów.
- Rolki: Wałek z grubą drzemką jest idealny do szybkiego pokrycia większych obszarów. Do szczegółowych prac można użyć mniejszego wałka.
- Sprzęt natryskowy (opcjonalnie): Aby uzyskać gładkie i równomierne wykończenie, rozważ użycie opryskiwacza, szczególnie w przypadku większych powierzchni. Upewnij się, że masz odpowiednie koło ochronne podczas korzystania z opryskiwacza.
- Upuść tkaniny i taśmę: Chroń sąsiednie powierzchnie, kładąc tkaniny z kropli i używając taśmy malarza do maskowania obszarów, których nie chcesz malować.
4.2 Sprzęt bezpieczeństwa
Bezpieczeństwo powinno być zawsze priorytetem podczas podejmowania projektu malarskiego. Oto kilka zalecanych urządzeń bezpieczeństwa:
- Rękawice: Użyj rękawiczek jednorazowych lub wielokrotnego użytku, aby chronić ręce przed farbą i chemikaliami.
- Maski: Maska jest niezbędna, szczególnie podczas pracy z farbą w sprayu lub w słabo wentylowanych obszarach. Wybierz maskę ocenianą na opary farby.
- Gogle bezpieczeństwa: Chroń oczy przed rozpryskami i zanieczyszczeniami, szczególnie podczas mycia ciśnienia lub za pomocą narzędzi.
- Podkładki kolan: Jeśli będziesz pracować na poziomie gruntu przez dłuższy czas, podkładki kolan mogą pomóc w zmniejszeniu dyskomfortu.
Zapewniając, że masz wszystkie niezbędne narzędzia i sprzęt bezpieczeństwa, przygotujesz się do gładszego i bezpieczniejszego malarstwa.
Wytyczne dotyczące montażu ułożonych płytek kamiennych
Jak zmierzyć ułożone panele z forniru kamiennego
Jak wybrać ułożone płytki kamienne do swojego projektu
5. Techniki malarskie
Podczas malowania kamień ułożony na zewnątrz, stosowana technika może dramatycznie wpłynąć na ogólne wykończenie i trwałość twojego projektu. Ta sekcja zawiera dogłębny przewodnik, aby zapewnić profesjonalne wyniki z długotrwałymi efektami.
5.1 Zastosowanie podkładu
Używanie wysokiej jakości podkładu jest niezbędnym pierwszym krokiem w zapewnieniu prawidłowego przylegania farby i trwa na okładzinie kamiennej. Piming tworzy jednolitą podstawę, uszczelnia porowate powierzchnie i zapobiega wchłanianiu kamienia zbyt dużej ilości farby, co może prowadzić do nierównomiernego pokrycia.
- Wybierz odpowiedni podkład: W przypadku zewnętrznego kamienia ułożonego wybierz akrylowy podkład murowy. Startery akrylowe są bardzo trwałe i elastyczne, co pozwala im dostosować się do tekstury kamienia, jednocześnie zapobiegając pękaniu lub obieraniu z czasem. Jeśli twój kamień jest szczególnie porowaty lub nigdy nie został namalowany, rozważ podkład o wysokiej wiązaniu dla dodatkowego przestrzegania.
- Zastosuj podkład równomiernie:
- Zacznij od użycia pędzla do nakładania podkładu na krawędzie i szczegółowe obszary. W przypadku powierzchni szorstkich kamiennych zaleca się szczotkę z sztywnego barwa, aby dostać się do szczelin.
- Po pokryciu szczegółowych obszarów użyj wałka lub opryskiwacza do większych sekcji. A Gruby wałek do drzemki Działa najlepiej na teksturowanych powierzchniach, takich jak kamień ułożony.
- Upewnij się, że zakryjesz każdy zakątek, ponieważ nierównomierne gruntowanie może prowadzić do zastosowania farby plamistej. Pojedynczy, równomierny płaszcz jest zazwyczaj wystarczający.
- Pozwól wystarczającej ilości czasu suszenia: Pozwól, aby podkład całkowicie wyschł przed przejściem do malowania. Zwykle zajmuje to około 24 godzin, w zależności od warunków pogodowych. Pośpieszanie tego kroku może spowodować, że farba będzie bańki lub obieraj.
- Opcjonalny krok – Sanding: Aby uzyskać gładsze wykończenie, lekko szlifuj powierzchnię Papier ścierny drobnoziarnisty Po wyschnięciu podkładu. To usunie wszelkie gromadzenie się podkładu w podniesionych obszarach i zapewni bardziej równą powierzchnię farby.
5.2 Proces malowania
Po wyschnięciu podkładu nadszedł czas, aby przejść do faktycznego procesu malowania. Metoda, którą zdecydujesz się nakładać farbę - czy to szczotem, wałkiem lub sprayem - zależy od rozmiaru i tekstury zewnętrznego kamienia. Oto szczegółowy podział:
Dokładnie wymieszaj farbę:
- Zanim zaczniesz, upewnij się, że farba jest równomiernie mieszana. Wymieszaj farbę Dokładnie, aby zapewnić spójność koloru i tekstury.
Zacznij od krawędzi i szczegółów:
- Użyj pędzla do pomalowania krawędzi zewnętrznej kamiennej forniru, skupiając się na zakrętach, szczelinach i skomplikowanych detalach. Szczotka oferuje lepszą kontrolę dla tych obszarów w porównaniu do wałka lub opryskiwacza.
Wałek dużych powierzchni:
- W przypadku większych obszarów użyj Grube wałek Aby skutecznie zakryć powierzchnię. Drzemka (grubość pokrywy wałkowej) powinna być przynajmniej ¾ cala lub więcej, w zależności od głębokości tekstury kamiennej. Zapewnia to, że farba wnika w szczeliny zewnętrznego kamienia.
- Rzuć w małych sekcjach, używając długich, nawet uderzeń, aby uniknąć znaków okrążenia. Pieprzyć krawędzie Przejeżdżając lekko po wcześniej pomalowanych obszarach, aby stworzyć bezszwową mieszankę.
Malarstwo natryskowe (opcjonalnie):
- Jeśli pokryjesz duży obszar, używając opryskiwacz farby Może zaoszczędzić czas i zapewnić równomierne, profesjonalne wykończenie. Opryskiwacze są szczególnie skuteczne w przypadku wysoce teksturowanych kamiennych paneli z zewnątrz, ponieważ mogą penetrować małe pęknięcia i szczeliny.
- Jednak opryskiwanie wymaga większego przygotowania, ponieważ musisz zamaskować okoliczne obszary za pomocą Upuść ubrania i taśmę malarza Aby zapobiec nadmiernemu rozpraniu.
Bezpieczeństwo jest kluczem:
- Używając opryskiwacza, zawsze noś maskę i gogle, aby chronić się przed oparami na farbach i nadmiernej rozpryskiwania.
Wiele cienkich płaszczy:
- Aby uzyskać najlepsze wyniki, zastosuj wiele cienkich warstw, a nie jedną grubą warstwę. Ta technika zapewnia lepsze pokrycie, minimalizuje kroplówki i zapewnia odpowiednio przestrzeganie kamiennej powierzchni na zewnątrz. Pozostaw każdą warstwę do dokładnego wyschnięcia przed nałożeniem następnego.
- Wskazówka: Podczas nakładania drugiego płaszcza użyj Technika krzyżowania, Malowanie w jednym kierunku dla pierwszego płaszcza i przeciwnego kierunku dla drugiego. Zapewnia to nawet zasięg i pomaga uniknąć serii lub nierównomiernej konsystencji.
Sprawdź i retusz:
- Po wyschnięciu ostatniego warstwy sprawdź pomalowaną powierzchnię pod kątem wszelkich pominiętych miejsc, ociekających lub nierównych obszarów. Użyj małego pędzla, aby poruszyć te obszary, aby uzyskać nieskazitelne wykończenie.
5.3 Techniki profesjonalnego wykończenia
Osiągnięcie profesjonalnego wykończenia obejmuje stosowanie zaawansowanych technik, które zapewniają równomierne pokrycie i wypolerowany wynik. Oto kilka metod, które mogą przenieść Twój projekt na wyższy poziom:
Użyj odpowiedniego wałka drzemki:
- Aby uzyskać szorstkie lub wysoce teksturowane kamienne powierzchnie, wybierz Gruby wałek do drzemki (1-1,25 cali). Grubsza drzemka pozwoli wałkowi sięgnąć głęboko w szczeliny zewnętrznego kamienia.
- Jeśli powierzchnia jest gładsza, do osiągnięcia eleganckiego wykończenia można użyć krótszego wałka do drzemki (½ cala).
Pijanie krawędzi:
- Piórka to technika, w której mieszasz krawędzie każdej sekcji podczas malowania. Zapewnia to, że nie ma ostrych linii ani okrążeń, w których jeden pomalowany obszar spotyka inny. Na przykład, jeśli przewracasz farbę na jednej sekcji, lekko zwiń krawędzie w sąsiednim obszarze, aby utworzyć bezproblemową przejście.
Nie przepracuj farby:
- Nadmierne rozdzieranie lub nadmierne przemieszczanie farby może prowadzić do smug, śladów szczotek i nierównej konsystencji. Nałóż farbę w gładkich, a nawet pociągnięciach, I unikaj wielu razy w tym samym obszarze, gdy farba zacznie wysychać. Jest to szczególnie ważne w przypadku teksturowanych powierzchni, takich jak kamień z zewnątrz, w których przetwarzanie farby może powodować nierównomiernie w szczelinach.
Czas suszenia między płaszczami:
- Przynajmniej zezwalaj 4-6 godzin czasu suszenia między warstwami na farby na bazie wody. W przypadku farb na bazie oleju najlepiej poczekać 24 godziny. Zapobiega to podnoszeniu podkładu i zapewnia poprawnie przyleganie każdej warstwy.
- W chłodniejszych lub bardziej wilgotnych klimatach czasy suszenia mogą zostać przedłużone. Bądź cierpliwy, ponieważ właściwe suszenie zapewnia długowieczność farby.
Rolling (dla opryskiwaczy):
- Jeśli używasz opryskiwacza, rozważmy Rolling. Jest to technika, w której po rozpyleniu sekcji używasz wałka do przejścia przez mokrą farbę. Ta metoda pomaga wepchnąć farbę do zewnętrznych szczelinowych szczelinek i zapewnia równe pokrycie.
Za pomocą uszczelniacza (opcjonalnie):
- Aby uzyskać dodatkową ochronę i długowieczność, rozważ zastosowanie Wyczyść uszczelniacz murowy Po wyschnięciu farby. To nie tylko poprawia kolor malowanego kamienia, ale także chroni go przed elementami, takimi jak deszcz, ekspozycja na słońce i akumulacja brudu.
- Wybierz Oddychający, oddychający uszczelniacz Zaprojektowany do murowania zewnętrznego. Zastosuj go pędzlem lub wałkiem zgodnie z tymi samymi technikami stosowanymi do malowania.
5.4 Specjalne rozważania dotyczące kamiennej oklery z zewnątrz
Kamienna płytka z zewnątrz często zawiera wyjątkowe wyzwania ze względu na nierówną powierzchnię i porowatą naturę. Oto kilka dodatkowych rozważań specyficznych dla tego materiału:
- Porowatość kamienia: Bardzo porowate kamienie, takie jak wapień lub piaskowca, mogą wymagać dodatkowych warstw podkładu lub farby, aby zapobiec wchłanianiu kamienia zbyt dużej ilości produktu. Zawsze najpierw testuj mały obszar, aby ocenić, jak reaguje kamień.
- Naturalna tekstura i rowki: Ze względu na swoją nierówną konsystencję, układane kamienne płytki mają zwykle rowki i nierówne obszary, które można przegapić podczas malowania. Aby to walczyć, upewnij się, że zmienisz kąt widzenia podczas malowania, zapewniając, że żadne obszary nie zostaną odkryte.
Postępując zgodnie z tymi kompleksowymi technikami malowania, zapewnisz kamień ułożony na zewnątrz Wygląda profesjonalnie i jest dobrze chroniony w stosunku do żywiołów przez wiele lat.
Jak czyścić kamień ułożony we wnętrzu?
Jak ciąć kamienne panele księgi głównej?
Jak usunąć zewnętrzną okładzinę kamienną
6. Konserwacja po malowaniu
6.1 Sprawdzanie farby
Po pomalowaniu zewnętrznego kamienia ułożonego regularne konserwacja jest niezbędna do zachowania jego wyglądu i trwałości. Zacznij od okresowego sprawdzania malowanej powierzchni, szczególnie po trudnych warunkach pogodowych. Poszukaj jakichkolwiek oznak zużycia, takich jak:
- Obieranie lub pękanie: Problemy te mogą wskazywać na słabą przyczepność lub uszkodzenie podstawowego kamienia.
- Odbarwienie: Failing Fading Faint może wynikać z przedłużonej ekspozycji na słońce.
- Wzrost pleśni lub pleśni: Sprawdź wszystkie ciemne plamy, szczególnie w wilgotnych obszarach.
Niezwłoczne rozwiązanie tych problemów może zapobiec większej liczbie szkód i przedłużyć żywotność twojego malowania.
6.2 Wskazówki dotyczące dotykania
Aby pomalowany zewnętrzny kamień z ułożonym kamieniem wyglądał świeżo, konieczne mogą być retusz. Oto jak skutecznie zarządzać drobnymi naprawami:
- Zidentyfikuj obszary problemowe: Po kontroli zaznacz wszelkie miejsca, które wymagają uwagi.
- Oczyść obszar: Przed retuszem wyczyść dotknięte obszary łagodnym detergentem i wodą, aby usunąć brud lub pleśń.
- Użyj tej samej farby: W przypadku retuszu zawsze używaj tej samej farby i koloru, które początkowo zastosowałeś. Jeśli farba była narażona na światło słoneczne przez dłuższy czas, rozważ przyniesienie próbki do sklepu, aby dokładnie dopasować kolor.
- Metoda aplikacji: Użyj małego pędzla do precyzji, łącząc nową farbę w istniejącą powierzchnię, aby uzyskać płynny wygląd.
Utrzymanie kamiennych paneli z zewnątrz nie tylko sprawia, że wyglądają świetnie, ale także pomaga chronić inwestycję z czasem.
7. Powszechne błędy, których należy unikać
7.1 Pomijanie przygotowania
Jednym z najważniejszych błędów popełnianych przez właścicieli domów jest pominięcie niezbędnych kroków przygotowawczych. Właściwe przygotowanie, w tym czyszczenie i naprawa zewnętrznego kamienia, ma kluczowe znaczenie dla osiągnięcia trwałego i atrakcyjnego wykończenia. Bez niego farba może łupić się, obierać lub chip, prowadząc do kosztownych napraw i potrzeby pełnego odmalowania wcześniej niż się spodziewano.
7.2 Korzystanie z niekompatybilnych produktów
Innym powszechnym błędem jest użycie niewłaściwego rodzaju farby lub podkładu. Nie wszystkie farby są odpowiednie do murowania lub kamienia, a stosowanie niekompatybilnych produktów może powodować złą adhezję i przedwczesną awarię. Zawsze wybieraj farby specjalnie zaprojektowane do zewnętrznego kamienia w stosy i unikaj farb na bazie oleju, chyba że są one wyraźnie zalecane na kamienne powierzchnie.
7.3 Ignorowanie warunków pogodowych
Pogoda odgrywa kluczową rolę w sukcesie twojego projektu malarskiego. Malowanie w ekstremalnych temperaturach lub wilgotności może negatywnie wpłynąć na procesy zastosowania i suszenia. Idealnie wybierz suchy, łagodny dzień do malowania, unikanie warunków, takich jak deszcz lub bezpośrednie światło słoneczne, które mogą powodować zbyt szybko wyschnięcie farby i powodować nierówne wykończenie.
7.4 Pośpieszanie procesu
Wreszcie, pośpiech przez proces malowania może prowadzić do błędów i słabego wykończenia. Nie spiesz się z każdym krokiem, od przygotowania do aplikacji. Pozwól, aby odpowiedni czas suszenia między płaszczami i nie pomijaj żadnych niezbędnych kroków, takich jak gruntowanie. Pośpieszona praca często powoduje potrzebę przeróbki, co może być zarówno czasochłonne, jak i frustrujące.
Uświadamiając sobie te powszechne pułapki i podejmując niezbędne środki ostrożności, możesz zapewnić udany projekt malowania, który poprawia piękno i długowieczność twojego zewnętrznego kamienia.
Kluczowe wyniki
- Przygotowanie jest kluczowe: Nigdy nie lekceważ znaczenia czyszczenia i naprawy kamienia przed malowaniem. Dobrze przygotowana powierzchnia zapewnia lepszą przyczepność i dłuższe wykończenie.
- Wybierz odpowiednie produkty: Wybierz wysokiej jakości, specyficzne dla murarstwa podkłady i farby, aby chronić i upiększyć swój zewnętrzny kamień.
- Regularna konserwacja: Regularnie sprawdź malowane powierzchnie i wykonaj w razie potrzeby retuszu, aby dom wyglądał świeżo.
- Unikaj typowych błędów: Pamiętaj o przygotowaniu, kompatybilności z produktu, warunkach pogodowych i nie spiesz się przez cały proces, aby uniknąć pułapek.
Z tymi wskazówkami możesz z pewnością podjąć swój zewnętrzny projekt malowania kamiennego. Nie tylko poprawicie estetyczny urok swojego domu, ale także ochronisz swoją inwestycję przez wiele lat. Niezależnie od tego, czy szukasz świeżego wyglądu, czy warstwy ochronnej, malowanie zewnętrznego kamienia ułożonego jest wartościowe.
8. Wniosek
Malarstwo kamień ułożony na zewnątrz Może być satysfakcjonującym projektem, który poprawia piękno i długowieczność twojego domu. Rozumiejąc powody malowania, dokładnego przygotowywania powierzchni, wybierania odpowiednich materiałów i starannie stosując farbę, możesz osiągnąć oszałamiające wyniki, które podnoszą urok w domu.
Najlepsza tablica źródłowa Poniżej wyróżnia się we wszystkich tych obszarach, czyniąc nas najlepszym wspólnikiem w twoich kamiennych życzeniach okładzin, niezależnie od tego, czy pracujesz nad okładziną kamienia zewnętrznego, czy ścianą charakterystyczną.Skontaktuj się z nami już dziś Aby dowiedzieć się więcej o tym, jak pomożemy w kolejnym zadaniu.

