Zewnętrzna okładzina kamienna może podnieść estetykę każdej przestrzeni, ale są chwile, kiedy możesz chcieć lub potrzebować go usunąć. Niezależnie od tego, czy jest to spowodowane uszkodzeniem, przestarzałym projektem czy projektem renowacji, usunięcie okładziny kamiennej może być trudnym zadaniem, które wymaga starannego przygotowania i odpowiednich narzędzi. Oto szczegółowy przewodnik krok po kroku, który pomoże Ci skutecznie usunąć okładzinę z kamienia naturalnego, nie powodując niepotrzebnych uszkodzeń znajdującej się pod nią ściany.
-
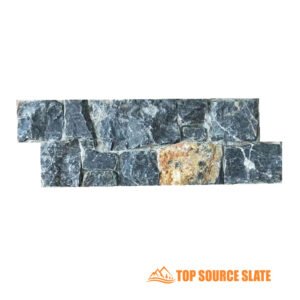
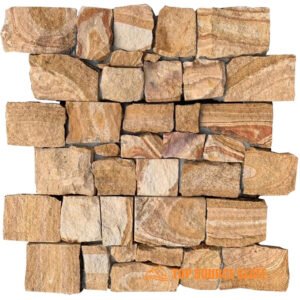
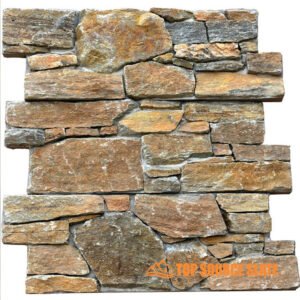
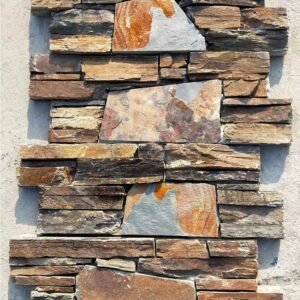
 Zewnętrzna okładzina ścienna z naturalnego kamienia w nowym stylu
 -
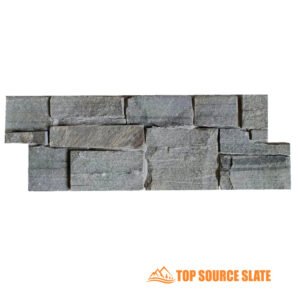
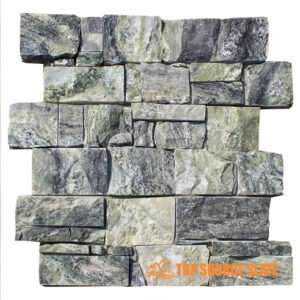
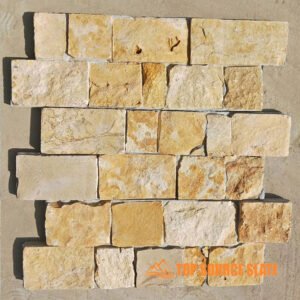
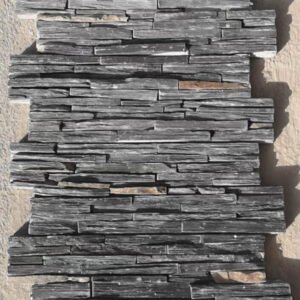
 Zewnętrzna okładzina z naturalnego kamienia w nowym stylu
 -
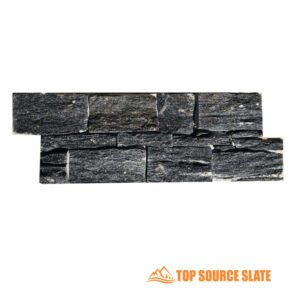
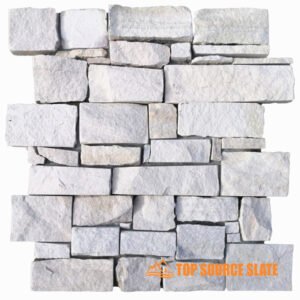
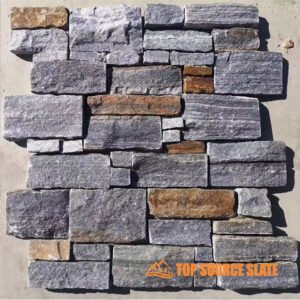
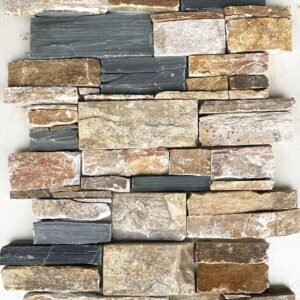
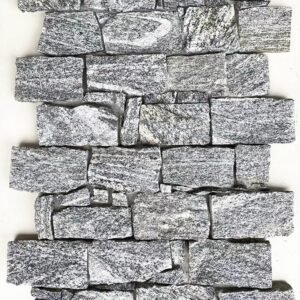
 Ceny hurtowe zewnętrzne panele z kamienia naturalnego
 -
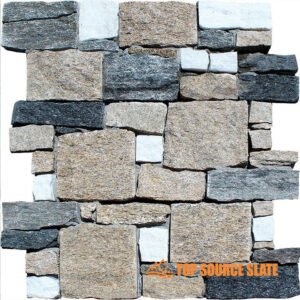
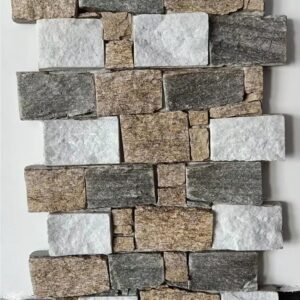
 Kamienny kominek z czarnego kwarcu
 -
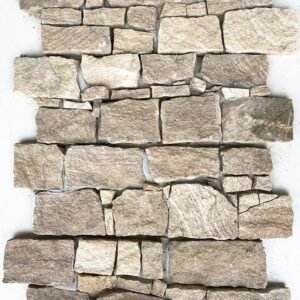
 Cena fabryczna z piaskowca z okładziną kamienną z panelem
 -
 Cena fabryczna blokujących kamienne panele elewacyjne Z
 -
 Kamienny kominek z białego piaskowca
 -
 Dekoracja zewnętrzna półka z kamienia hodowlanego
 -
 Rustykalna okładzina ścienna z półkami kwarcowymi Z płytek ceramicznych
 -
 Produkty z kamienia hodowlanego z panelami łupkowymi Splitface
 -
 Okładzina ścienna z kamienia Granit Z
 -
 Dostawca z Chin łączący ze sobą okładziny kamienne w różnych kolorach
 -
 Chiny hurtowa półka z kamienia hodowlanego w kształcie litery Z
 -
 Popularne w Chinach blokujące panele kamienne w kształcie litery Z
 -
 Rustykalna, sucha, łupkowa okleina kamienna na zewnątrz
 -
 Panele z forniru kamiennego na podłożu z czarnego łupka cementowego
 -
 Naturalny, blokujący kamień półkowy na podłożu z wielobarwnego cementu łupkowego
 -
 Naturalna płytka ścienna Stackstone na podłożu cementowym
 -
 Panel w kształcie litery Z, ułożony w okładzinę kamienną
 -
 Gorący sprzedawanie półek wyposażony jest w panele okładzin ściennych
1. Ocena rodzaju instalacji
Przed rozpoczęciem procesu usuwania ważne jest ustalenie, w jaki sposób została zainstalowana zewnętrzna okładzina kamienna. Ocena ta określi narzędzia, czas i metody wymagane do wykonania zadania.
Naturalny, związany zaprawą Okładzina kamienna
Większość zewnętrznych okładzin kamiennych montuje się za pomocą zaprawy, która działa jako spoiwo pomiędzy kamieniem a powierzchnią ściany. Okładziny kamienne mocowane na zaprawie można znaleźć zarówno na ścianach zewnętrznych, jak i wewnętrznych. W przypadku bezpośredniego klejenia zaprawą proces usuwania może być pracochłonny, ponieważ każdy kamień należy odłupać osobno. Dłutowanie wokół spoin kamienia, w którym znajduje się zaprawa, jest najskuteczniejszym sposobem usunięcia każdego kawałka. Wiązanie zaprawy jest zwykle mocne, dlatego należy spodziewać się użycia znacznej siły.
Okładzina kamienna z mocowaniami mechanicznymi (montaż w ramie)
W niektórych przypadkach okładzina kamienna jest instalowany na ramie drewnianej lub metalowej. Ten rodzaj okładziny jest zwykle mocowany za pomocą śrub lub gwoździ i można go usunąć w dużych fragmentach. Delikatnie uderzając w okładzinę i słuchając głuchych dźwięków, można określić, czy okładzina jest zamontowana na ramie nośnej. Oprawiona okładzina z kamienia naturalnego jest na ogół łatwiejsza do usunięcia, ponieważ często cały panel można oderwać od ściany w większych kawałkach, co zmniejsza nakład pracy. Należy jednak zachować szczególną ostrożność, aby nie uszkodzić ściany pod spodem.
Okładzina z kamienia fornirowanego
Cienkie okładziny z forniru kamiennego są lżejsze i łatwiejsze do usunięcia w porównaniu do pełnowymiarowych elementów kamiennych. Forniry przykleja się zazwyczaj podobnie jak płytki cienką warstwą zaprawy lub kleju. Proces usuwania forniru jest podobny do procesu usuwania płytek ceramicznych i wymaga użycia dłuta lub skrobaka, aby przerwać wiązanie i podnieść kamienie. Usuwanie forniru jest mniej pracochłonne, ale nadal wymaga ostrożności, aby uniknąć żłobienia ściany.
2. Przygotowanie do pracy
Aby skutecznie usunąć zewnętrzną okładzinę kamienną, konieczne jest odpowiednie przygotowanie. Odpowiednie narzędzia i środki ostrożności nie tylko ułatwią pracę, ale także zagwarantują, że nie spowodujesz nadmiernych uszkodzeń ściany znajdującej się pod spodem.
Sprzęt ochronny
Podczas usuwania okładzin kamiennych bezpieczeństwo powinno być Twoim najwyższym priorytetem. Podczas tego procesu częstymi zagrożeniami są latające odłamki, ostre narzędzia i kurz. Noś następujące rzeczy:
- Okulary ochronne: Chroń oczy przed latającymi odłamkami zaprawy i kamienia.
- Rękawice: Wytrzymałe rękawice robocze zapobiegają skaleczeniu ostrymi kamieniami i narzędziami.
- Maska przeciwpyłowa: Usunięcie zaprawy lub kleju powoduje powstawanie dużej ilości pyłu, który może podrażniać płuca.
- Długie rękawy i buty robocze: Chronią Twoją skórę przed skaleczeniami, otarciami i ciężkimi odłamkami kamieni.
Narzędzia, których będziesz potrzebować
Aby usuwanie było jak najskuteczniejsze, niezbędne jest posiadanie odpowiednich narzędzi. Niektóre z podstawowych narzędzi, które będą potrzebne, obejmują:
- Młotek i zimne dłuto: Są niezbędne do ręcznego usuwania kamienia i zaprawy.
- Podważ Bar: Do odrywania dużych paneli kamiennych od ściany, szczególnie podczas pracy z instalacjami ramowymi.
- Wiertarka elektryczna z wiertłem murarskim: Jeśli zaprawa jest szczególnie uparta, wywiercenie otworów w zaprawie może ułatwić jej wybijanie.
- Szlifierka kątowa: To elektronarzędzie pomaga przecinać grube spoiny zaprawy lub betonu w pełnowymiarowych zewnętrznych okładzinach kamiennych.
- Szczotka druciana: Użyj tego do oczyszczenia resztek zaprawy i kleju po usunięciu kamienia.
3. Proces usuwania
Po ocenieniu rodzaju instalacji i zebraniu odpowiednich narzędzi i sprzętu ochronnego możesz rozpocząć proces usuwania.
Krok 1: Zacznij od krawędzi
Proces usuwania okładziny kamiennej należy rozpocząć od skupienia się na krawędziach lub narożnikach instalacji. Obszary te są zazwyczaj najłatwiej dostępne i stanowią naturalny punkt wyjścia dla dźwigni finansowej. Rozpoczęcie od krawędzi zmniejsza ryzyko uszkodzenia dużych fragmentów ściany i zapewnia bardziej kontrolowany proces usuwania.
1.1. Wkładanie narzędzi
Użyj zimnego dłuta lub podważacza, aby wcisnąć klin między okładzinę z kamienia naturalnego a ścianę. Zacznij od małych, lekkich uderzeń młotkiem, aby uniknąć uszkodzenia konstrukcji ściany pod spodem. Celem jest utworzenie wystarczającej przestrzeni pomiędzy kamieniem a zaprawą, aby można było rozpocząć stosowanie dźwigni w celu usunięcia kamieni. Jeśli okładzina jest klejona bezpośrednio zaprawą, ostrożnie odłupuj krawędzie, aż będziesz mieć dostęp do spoin zaprawy.
1.2. Zdobywanie dźwigni
Po poluzowaniu kamieni krawędziowych delikatnie je podważ, wywierając stały nacisk za pomocą podważacza. Zachowaj ostrożność, zwłaszcza jeśli kamienie są duże i ciężkie. Nagłe szarpnięcia mogą spowodować pęknięcia lub odpryski na powierzchni, zwłaszcza jeśli jest to cegła lub płyta gipsowo-kartonowa. Jeśli zauważysz, że kamień nie odchodzi łatwo, nie używaj siły – przejdź do następnej sekcji i wróć, gdy ponownie zostanie poluzowany.
1.3. Unikanie uszkodzeń
Pracuj powoli, aby uniknąć znacznego uszkodzenia ściany. Rozpoczynając od krawędzi, unikasz również osłabienia większych sekcji’ integralność strukturalną, która może się zawalić lub złamać, jeśli nie będzie się z nią ostrożnie obchodzić.
Krok 2: Poluzuj zaprawę
Po usunięciu krawędzi zewnętrznej okładziny kamiennej kolejnym wyzwaniem jest poluzowanie zaprawy. Zaprawa pełni funkcję podstawowego kleju do okładzin kamiennych, a jej usuwanie wymaga cierpliwego, systematycznego podejścia.
2.1. Odłupywanie zaprawy
Za pomocą młotka i dłuta ostrożnie usuń zaprawę otaczającą okładzinę z kamienia naturalnego. Najlepiej jest ustawić dłuto w spoinach zaprawy pomiędzy kamieniami, a nie bezpośrednio pod nimi. Zmniejsza to ryzyko uszkodzenia ściany, jednocześnie skutecznie rozbijając zaprawę. Zaprawa może być niezwykle mocna, dlatego ważne jest stosowanie stałego nacisku. Powtarzające się lekkie uderzenia są skuteczniejsze i bezpieczniejsze niż mocne uderzenia, które mogą spowodować pęknięcie lub uszkodzenie ściany za okładziną z forniru kamiennego.
2.2. Wiercenie w przypadku upartej zaprawy
W przypadku twardszych i grubszych warstw zaprawy może być konieczne użycie wiertarki elektrycznej z wiertłem do kamienia. Wiercenie otworów w zaprawie osłabia jej wiązanie, przez co łatwiej jest ją wykuć. Jest to szczególnie przydatne w przypadku starszych zapraw, które miały czas na znaczne stwardnienie. Zaleca się jednak ostrożność podczas używania elektronarzędzi w pobliżu delikatnych powierzchni lub powierzchni z płyt kartonowo-gipsowych, ponieważ nadmierne wiercenie może spowodować uszkodzenie.
2.3. Sprawdzanie postępu
W trakcie pracy z zaprawą należy okresowo sprawdzać, jak łatwo kamień się rozluźnia. Jeśli okładzina z forniru kamiennego nie przesuwa się po usunięciu otaczającej ją zaprawy, może nadal być związana w innych obszarach. Systematycznie przechodź od kamienia do kamienia, uważając, aby nie spieszyć się i usunąć całą zaprawę, ponieważ może to spowodować przyklejenie się części okładziny.
Okładziny z kamienia naturalnego: kompletny przewodnik
Plusy i minusy nowoczesnych kamiennych okładzin zewnętrznych
10 najlepszych hurtowników okładzin z kamienia naturalnego w Wielkiej Brytanii
8 czynników do wyboru hurtownika ściennego kamienia naturalnego
Krok 3: Użyj szlifierki kątowej do twardej zaprawy
W przypadkach, gdy zaprawa jest szczególnie uparta lub gęsta, ręczne dłuto może nie wystarczyć. Szlifierka kątowa wyposażona w tarczę diamentową może być nieocenionym narzędziem do przecięcia zaprawy bez uszkodzenia ściany.
3.1. Wybór odpowiedniego narzędzia
Szlifierka kątowa z tarczą diamentową lub do kamienia jest przeznaczona do przecinania twardych materiałów klejących, takich jak zaprawa murarska. Przed użyciem upewnij się, że masz odpowiedni sprzęt ochronny: okulary, rękawiczki i maskę przeciwpyłową. Szlifierki kątowe wytwarzają pył i drobne zanieczyszczenia, dlatego niezbędna jest praca w dobrze wentylowanym pomieszczeniu.
3.2. Cięcie spoin zaprawowych
Przeprowadź szlifierkę kątową wzdłuż spoin zaprawowych pomiędzy zewnętrznymi okładzinami kamiennych ścian. Celem jest wcięcie się w zaprawę na tyle głęboko, aby osłabić jej przyczepność do kamienia bez wcinania się w ścianę pod spodem. Zacznij od niskiej prędkości i stopniowo zwiększaj ciśnienie, jeśli to konieczne. Działanie tnące szlifierki kątowej spowoduje czyste przerwanie między kamieniami a ścianą, dzięki czemu łatwiej będzie je usunąć za pomocą podważacza lub młotka.
3.3. Postępowanie z grubą lub stałą zaprawą
Jeśli zaprawa jest szczególnie gruba, rozważ przecięcie kamienia i zaprawy w “X” wzór. Pomaga to podzielić kamień na mniejsze, łatwiejsze do zarządzania sekcje. Po przecięciu zaprawy można użyć dłuta lub podważacza, aby dokończyć usuwanie kamienia okładzinowego w kawałkach. Pamiętaj, że szlifierka kątowa ma dużą moc, więc unikaj używania zbyt dużej siły, ponieważ może to spowodować uszkodzenie ściany.
Krok 4: Usuń duże panele w sekcjach (w przypadku okładzin z ramami)
W przypadku instalacji ramowych, gdzie zewnętrzne okładziny kamienne są mocowane do drewnianej lub metalowej ramy, proces może być znacznie szybszy, ponieważ duże sekcje można usunąć za jednym razem.
4.1. Identyfikacja instalacji ramowych
Instalacje okładzin kamiennych w ramach są montowane na konstrukcji nośnej, zazwyczaj drewnianej lub metalowej, która utrzymuje panele elewacyjne na miejscu. Pukanie w ścianę może pomóc w rozpoznaniu sekcji obramowanych, ponieważ będą wydawać pusty dźwięk w porównaniu z okładzinami klejonymi zaprawą. Po zlokalizowaniu skup się na usunięciu paneli z ramy, a nie pojedynczych kamieni.
4.2. Podważanie dużych paneli
Włóż podważacz lub duże dłuto pomiędzy panel a ramę. Zastosuj stały, stały nacisk, aby oddzielić panel od podłoża. W niektórych przypadkach przed podważeniem panelu należy usunąć śruby lub gwoździe. Zachowaj ostrożność podczas ściągania dużych sekcji, ponieważ mogą one być ciężkie i mogą nagle się przesunąć po zwolnieniu z ramy.
4.3. Zarządzanie cięższymi sekcjami
Jeśli okładzina jest szczególnie ciężka, poproś o pomoc w opuszczeniu paneli po ich odłączeniu od ramy. Upuszczenie lub nieprawidłowe obchodzenie się z dużymi sekcjami może spowodować uszkodzenie otaczających obszarów lub stanowić zagrożenie dla bezpieczeństwa.
4.4. Sprzątanie
Po usunięciu paneli prawdopodobnie pozostaną resztki śrub, gwoździ lub kleju, które utrzymywały ramę na miejscu. Należy je usunąć za pomocą szczotki drucianej lub podobnego narzędzia, pozostawiając czystą powierzchnię do przyszłej pracy.
4. Postępowanie w przypadku uszkodzeń ścian
Po usunięciu okładziny kamiennej ważne jest sprawdzenie ściany pod kątem uszkodzeń. Zewnętrzne okładziny kamienne, zwłaszcza te, które są mocowane zaprawą, mogą pozostawiać powierzchnię nierówną lub podziurawioną.
Naprawa uszkodzeń ścian
- Łatanie dziur i pęknięć: Użyj wysokiej jakości masy do łatania, aby wypełnić wszelkie ubytki pozostawione przez zaprawę. Większe pęknięcia lub wyżłobienia mogą wymagać mocniejszego wypełniacza. Nałożyć masę równomiernie pacą, a po wyschnięciu przeszlifować, aby uzyskać gładkie wykończenie.
- Wzmocnienie powierzchni ściany: Jeśli ściana pod spodem uległa znacznym uszkodzeniom, przed nałożeniem nowego wykończenia powierzchni należy rozważyć wzmocnienie jej środkiem wiążącym lub dodatkowym tynkiem.
Czyszczenie resztek zaprawy i kleju
Po usunięciu kamiennych paneli elewacyjnych na ścianie prawdopodobnie przykleją się resztki zaprawy lub kleju. Do usunięcia pozostałości można użyć sztywnej szczotki drucianej lub myjki wysokociśnieniowej, pozostawiając czystą powierzchnię gotową do naprawy lub nowej instalacji.
5. Szczególne uwagi
Fornir kontra kamienie pełnowymiarowe
Istnieje różnica pomiędzy cienkimi fornirami kamiennymi a pełnowymiarowymi okładzinami kamiennymi ścian zewnętrznych. Forniry są lżejsze i łatwiejsze do usunięcia, ponieważ zazwyczaj przylegają jak płytki. Kamień pełnowymiarowy wymaga jednak większej siły i ostrożności, ponieważ jest cięższy i często stanowi integralną część konstrukcji ściany.
Kiedy wezwać profesjonalistów
Jeśli nie masz pewności co do procesu usuwania lub zajmowania się dużym obszarem, najlepiej będzie zwrócić się o profesjonalną pomoc. Wyspecjalizowani wykonawcy mogą szybko i skutecznie usunąć okładzinę, minimalizując potencjalne uszkodzenia mienia.
6. Często zadawane pytania
1. Jakiego narzędzia używa się do usuwania okładzin kamiennych?
Aby usunąć okładzinę kamienną, zazwyczaj będziesz potrzebować dłuto, młotek, oraz podważnik murarski. W przypadku większych obszarów możesz użyć a wiertarka elektryczna z przystawką do dłuta lub młot pneumatyczny aby pomóc rozluźnić materiał. Sprzęt ochronnytakie jak rękawiczki i okulary ochronne, są niezbędne podczas tego procesu.
2. Jak najłatwiej usunąć fornir kamienny?
Najprostszym sposobem usunięcia forniru kamiennego jest wykonanie następujących kroków:
- Narysuj linie fug wokół forniru kamiennego za pomocą szlifierki lub noża.
- Użyj dłuto i młotek aby poluzować fornir na jego krawędziach.
- Podważ ostrożnie fornir za pomocą podważarki murarskiej.
- W przypadku dużych sekcji lub upartych obszarów użyj a dłuto elektryczne aby przyspieszyć proces.
3. Jaka jest różnica między okładziną kamienną a fornirem kamiennym?
- Okładzina kamienna: odnosi się do cienkich kawałków kamienia naturalnego lub sztucznego nakładanych na powierzchnię zewnętrzną lub wewnętrzną budynku w celach dekoracyjnych. Pełni funkcję ochronną i estetyczną.
- Fornir kamienny: odnosi się do cieńszych kawałków kamienia, często sztucznych, imitujących wygląd kamienia naturalnego. Stosuje się go w podobny sposób jak okładziny kamienne, ale zazwyczaj jest lżejszy i łatwiejszy w montażu.
4. Jak mocowana jest okładzina kamienna?
Okładzina kamienna jest mocowana za pomocą klej na bazie cementu Lub moździerz. Można go nakładać bezpośrednio na przygotowaną powierzchnię, taką jak beton, lub na metalowa listwa Lub płyta cementowa na konstrukcjach ramowych. W niektórych przypadkach w celu dodatkowego wsparcia, szczególnie na powierzchniach zewnętrznych, stosuje się kotwy mechaniczne lub zaciski.
7. Wniosek
Usuwanie okładzina zewnętrzna z kamienia to pracochłonny proces, który wymaga starannego planowania i odpowiednich narzędzi. Niezależnie od tego, czy okładzina jest klejona zaprawą, czy montowana na ramie, kluczem do sukcesu jest cierpliwość i precyzja. O ile małe projekty typu „zrób to sam” są wykonalne, większe lub bardziej złożone prace mogą wymagać profesjonalnej pomocy. Wykonując poniższe kroki, skutecznie usuniesz okładzinę kamienną i przygotujesz ściany do kolejnego etapu renowacji.
Jeśli szukasz producenci i dostawcy kamienia ułożonego, polecamy sprawdzić nasze produkty.
- Medaliony mozaikowe 10 produktów
- Szalony Brukowy Fliz 14 produktów
- Losowy luźny kamień 18 produktów
- Kamień z suchego stosu 24 produkty
- Wodospad Ułożony Kamień 17 produktów
- Marmur Ułożony Kamień 10 produktów
- Płytki ścienne dzielone 15 produktów
- Okładzina ścienna Ledgestone 28 produktów
- Ułożony Kamień 37 produktów
Mamy ponad 18-letnie doświadczenie w eksporcie i oferujemy próbki przed złożeniem zamówienia.
Jeśli potrzebujesz dodatkowej pomocy lub chcesz omówić coś spersonalizowanego, prosimyskontaktuj się z nami kiedykolwiek.
Chętnie podzielimy się naszą wiedzą, aby pomóc także Tobie!
