Uszczelnianie kamienia naturalnego jest niezbędna do ochrony powierzchni przed plamami, wilgocią i erozją, szczególnie w obszarach zewnętrznych lub o dużym natężeniu ruchu. Oto obszerny przewodnik na temat skutecznego uszczelniania kamienia i utrzymywania jego trwałości.
-
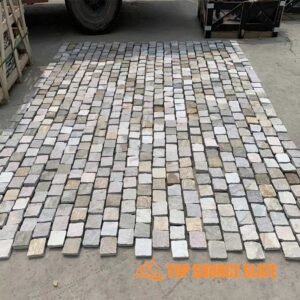 Beżowa, kwarcytowa płyta chodnikowa z szalonym wzorem z Chin
 -
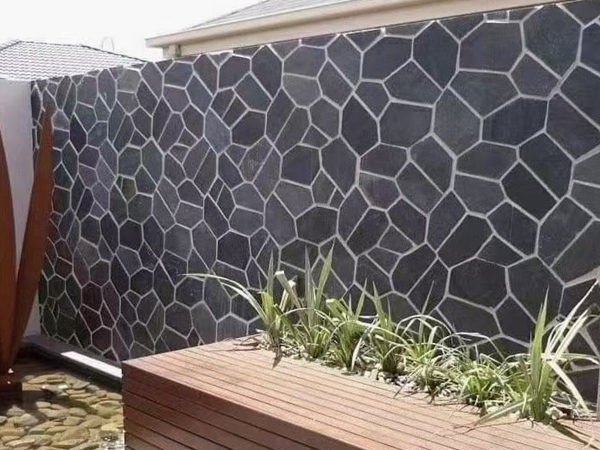
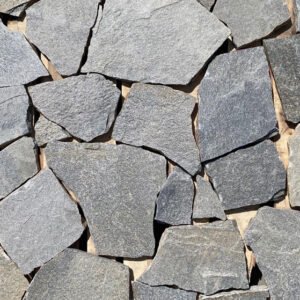
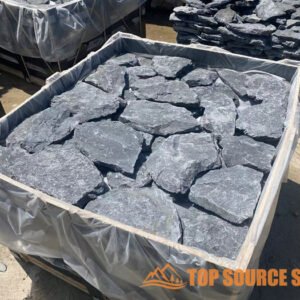
 Czarny łupek, nieregularny, przypadkowy, szalony kamień chodnikowy
 -
 Kamień naturalny, szalony, nieregularny kamień łupkowy do krajobrazu
 -
 Chińska wielokolorowa mata podłogowa z łupka kamiennego z siatki kamiennej
 -
 Łupkowa, szalona, nieregularna płyta chodnikowa z siatki chodnikowej
 -
 Nieregularna kostka brukowa z łupkiem siatkowym
 -
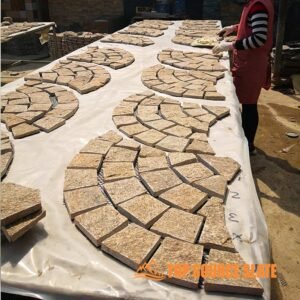
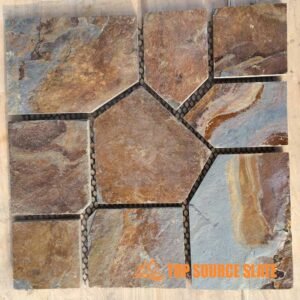
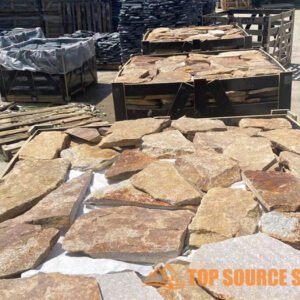
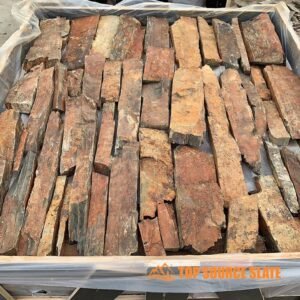
 Naturalny zardzewiały kamień chodnikowy z oczkami flagowymi
 -
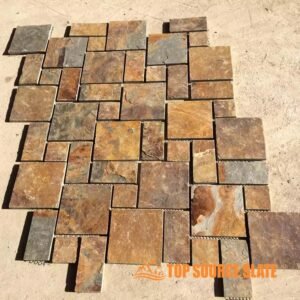
 Kwadratowe kamienne płytki podłogowe podjazd z kostki brukowej
 -
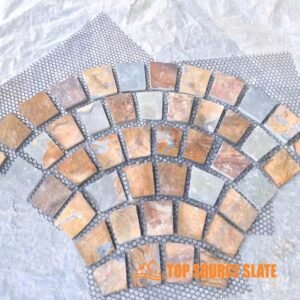
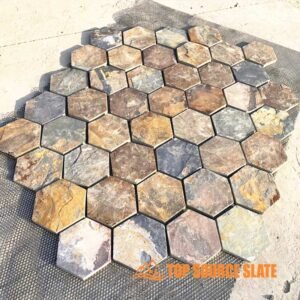
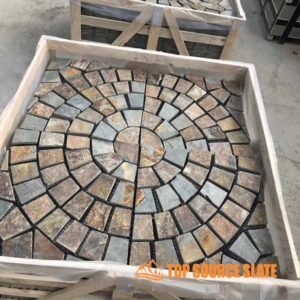
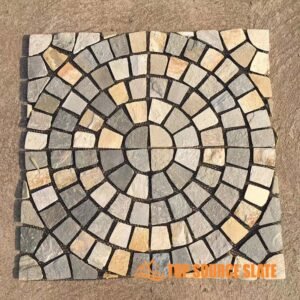 Płytka z siatki kamiennej o okrągłym kształcie, kostka brukowa na siatce
 -
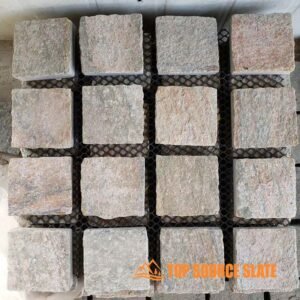
 Naturalne zardzewiałe oczka z kostki brukowej Kawałki flag
-
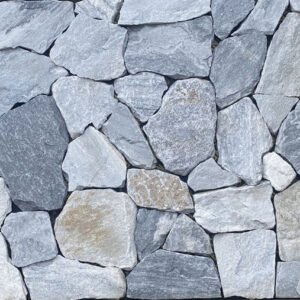
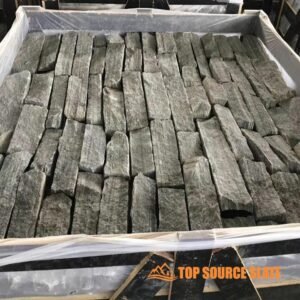
 Naturalna, szara, kwarcytowa okładzina ścienna z dzieloną powierzchnią, luźna, kamienna okładzina ścienna
 -
 Naturalny kwarcyt, losowe, nieregularne kamienne płytki panelowe do okładzin ściennych
 -
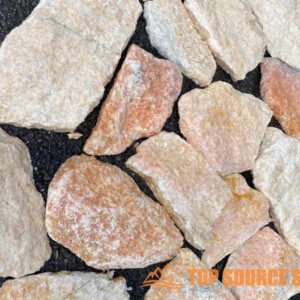
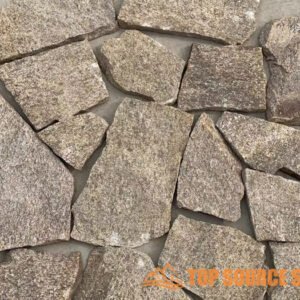
 Hurtownia różowego piaskowca losowo luźna okładzina kamienna
 -
 Hurtownia niebieskiego kwarcytu losowo luźna kamienna płytka do okładzin ściennych
 -
 Naturalny, luźny kamień do okładzin ściennych wewnętrznych i zewnętrznych
 -
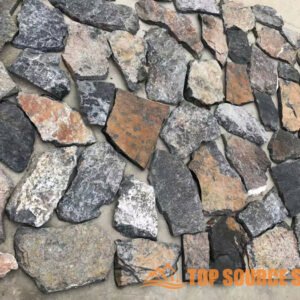 Losowy zewnętrzny kamień naturalny Luźny kamienny fornir Dekoracja okładzin ściennych
 -
 Naturalny, nieregularny, losowy, luźny fornir kamienny
 -
 Dostawa fabryczna w Chinach Zewnętrzne naturalne, losowe, luźne kamienne płytki elewacyjne
 -
 Cena fabryczna Naturalna zewnętrzna, losowa, luźna okładzina ścienna z kamienia
 -
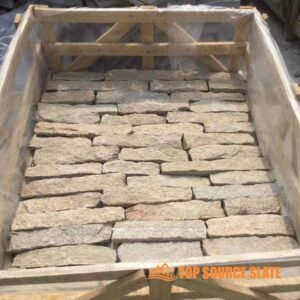
 Zewnętrzna żółta, szorstka, losowa, luźna okładzina ścienna z kamienia
-
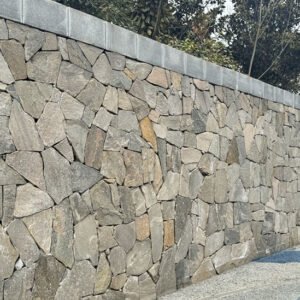
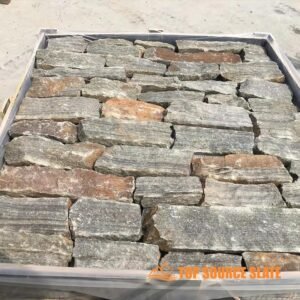
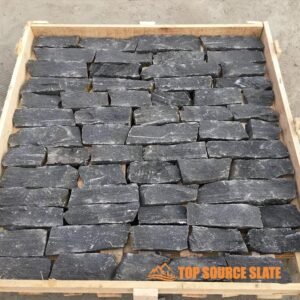 Hurtownia losowych okładzin z suchego stosu czarnego kwarcytu
 -
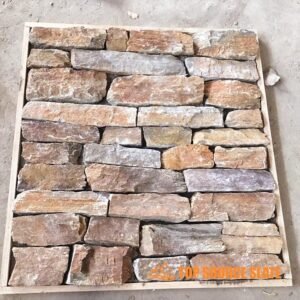
 Najwyższej jakości okładzina ścienna z suchego kamienia
 -
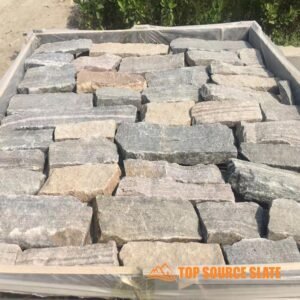
 Fabryczna sprzedaż bezpośrednia tania luźna okładzina ścienna z kamienia
 -
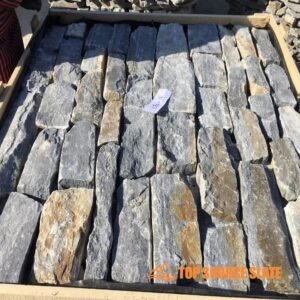
 Fabryczna, losowa okładzina ścienna z kamienia naturalnego
 -
 Zewnętrzna dekoracyjna, luźna okładzina kamienna z suchym stosem
 -
 Dostawca z Chin nieregularne okładziny ścienne z forniru kamiennego
 -
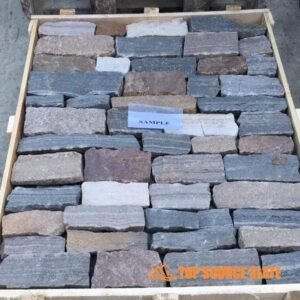
 Producent z Chin zewnętrzne okładziny ścienne z naturalnego luźnego kamienia
 -
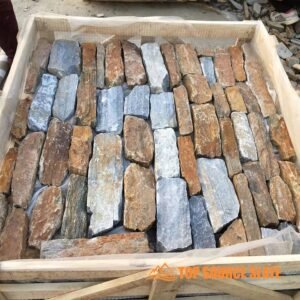
 Producent z Chin, luźny kamień półkowy, fornir z kamienia naturalnego
 -
 Zewnętrzny kamienny kominek z suchym kominkiem od dostawcy z Chin
 -
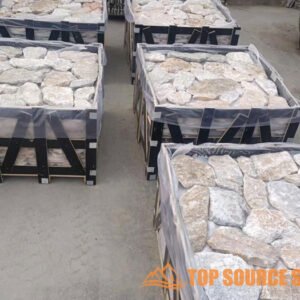
 Eksporter z Chin, luźna, sucha kamienna ściana oporowa
1. Dlaczego uszczelnianie kamienia naturalnego jest niezbędne
Kamień naturalny, choć trwały, jest porowaty i podatny na wchłanianie wody, plamy i uszkodzenia spowodowane warunkami atmosferycznymi. Uszczelnienie pomaga zablokować przenikanie wilgoci, olejów i innych zanieczyszczeń do powierzchni kamienia, zachowując jego wygląd i integralność strukturalną. Bez uszczelnienia kamień używany na zewnątrz, np. na tarasach lub w kuchniach, może szybko ulec degradacji w wyniku narażenia na działanie czynników atmosferycznych lub rozlania.
2. Wybór odpowiedniego uszczelniacza do kamienia
Podczas uszczelniania kamienia naturalnego kluczowy jest wybór odpowiedniego rodzaju uszczelniacza. Różne rodzaje kamienia mają wyjątkową porowatość i właściwości, dzięki czemu niektóre uszczelniacze są bardziej skuteczne niż inne. Oto bardziej szczegółowy podział:
- Uszczelniacze penetrujące (Uszczelniacze impregnujące): Uszczelniacze wnikają w kamień, nie zmieniając wyglądu jego powierzchni. Tworzą barierę tuż pod powierzchnią, odpychając wodę, oleje i plamy, jednocześnie pozwalając kamieniowi oddychać. Ten typ jest idealny do kamieni porowatych, takich jak wapień, trawertyn i piaskowiec. Uszczelniacze penetrujące są również odporne na promieniowanie UV, dzięki czemu nadają się do stosowania na zewnątrz. Są szczególnie zalecane do wykończeń szlifowanych lub matowych, gdzie błyszcząca powierzchnia nie jest pożądana.
- Uszczelniacze powierzchniowe (uszczelniacze miejscowe): Tworzą warstwę ochronną na powierzchni kamienia, zapewniając zarówno ochronę, jak i poprawę estetyki. Uszczelniacze powierzchniowe mogą pozostawiać błyszczące lub matowe wykończenie, w zależności od produktu. Są powszechnie stosowane do polerowanych kamieni, takich jak granit czy marmur, poprawiając kolor i połysk, jednocześnie dodając ochrony. Jednakże uszczelniacze powierzchniowe zużywają się szybciej niż uszczelniacze penetrujące, szczególnie w obszarach o dużym natężeniu ruchu, co wymaga częstszego ponownego nakładania.
- Ulepszanie uszczelniaczy: Są to podzbiór penetrujących uszczelniaczy, które nie tylko chronią kamień, ale także poprawiają jego kolor, sprawiając, że wydaje się bogatszy i głębszy. Są popularne w przypadku kamieni takich jak łupek i płyta chodnikowa, które korzystają z ulepszonego koloru zapewnianego przez uszczelniacz.
- Uszczelniacze na bazie wody a uszczelniacze na bazie rozpuszczalnika: Uszczelniacze na bazie wody są przyjazne dla środowiska, mniej toksyczne i łatwiejsze w zastosowaniu, ale mogą nie wnikać tak głęboko, jak opcje na bazie rozpuszczalników. Uszczelniacze na bazie rozpuszczalników, choć mają większą penetrację i trwałość, mają zwykle silniejszy zapach i wymagają ostrożniejszego obchodzenia się podczas aplikacji.
Jak zbudować kamienną ścianę suchego stosu
Jak zainstalować patio z kamienia?
Jak ułożyć szaloną kostkę brukową: przewodnik krok po kroku
3. Przygotowanie: Czyszczenie kamienia naturalnego
Właściwe przygotowanie jest kluczem do zapewnienia skutecznego połączenia uszczelniacza z powierzchnią kamienia. Oto bardziej szczegółowy przewodnik na temat prawidłowego czyszczenia kamienia przed uszczelnieniem:
- Usuń luźne zanieczyszczenia: Zamiataj lub odkurzaj kamień, aby usunąć kurz, brud i wszelkie luźne materiały, które mogłyby zakłócać uszczelnienie. Na terenach zewnętrznych użyj dmuchawy do liści lub węża, aby usunąć większe zanieczyszczenia.
- Głębokie czyszczenie:
- W przypadku kamieni na zewnątrz rozważ użycie myjki ciśnieniowej, aby usunąć wrośnięty brud lub mech. Należy jednak uważać, aby nie uszkodzić bardziej miękkich kamieni, takich jak wapień czy piaskowiec.
- W pomieszczeniach zamkniętych należy stosować środek do czyszczenia kamienia o neutralnym pH, aby uniknąć uszkodzenia powierzchni kamienia. Unikaj kwaśnych środków czyszczących, takich jak ocet, ponieważ mogą one wytrawić niektóre kamienie, takie jak marmur i trawertyn.
- Punktowe leczenie plam: Plamy mogą utrwalić się w kamieniu, jeśli nie zostaną usunięte przed uszczelnieniem. Użyj okładu, aby usunąć plamy na bazie oleju lub organiczne (takie jak liście lub kawa) z kamienia. Przed wytarciem poczekaj, aż okład całkowicie wyschnie.
- Usuwanie wykwitów: W środowisku zewnętrznym lub wilgotnym na kamieniu mogą tworzyć się wykwity (białe osady mineralne). Przed uszczelnieniem użyj środka do czyszczenia wykwitów lub wody i szczotki, aby je zetrzeć.
- Wysuszenie: Po oczyszczeniu kamień należy pozostawić do całkowitego wyschnięcia. Wilgoć uwięziona pod uszczelniaczem może powodować zmętnienie powierzchni, a nawet rozwój pleśni. Może to zająć trochę czasu, w zależności od rodzaju kamienia i środowiska 24-48 godzin.
4. Jak nakładać uszczelniacz na kamień naturalny
Opieczętowanie Kamień naturalny to wieloetapowy proces, który wymaga starannego przygotowania i dbałości o szczegóły, aby uszczelniacz wniknął w powierzchnię i zapewnił długotrwałą ochronę. Oto bardziej szczegółowy przewodnik na temat skutecznego nakładania uszczelniacza na kamień naturalny:
Krok 1: Zbierz materiały
Zanim zaczniesz, upewnij się, że masz pod ręką odpowiednie narzędzia i materiały:
- Uszczelniacz kamienia: Upewnij się, że wybrałeś odpowiedni rodzaj uszczelniacza do kamienia (penetrujący lub powierzchniowy, na bazie wody lub rozpuszczalnika).
- Narzędzia aplikacji: W zależności od powierzchni będziesz potrzebować: pędzel, wałek, opryskiwacz, Lub piankowy aplikator. Opryskiwacz jest idealny do większych obszarów, natomiast pędzel lub wałek zapewnia większą kontrolę na mniejszych, skomplikowanych powierzchniach.
- Sprzęt ochronny: Noś rękawice, okulary ochronne i maskę, aby chronić się przed oparami, zwłaszcza jeśli pracujesz z uszczelniaczami na bazie rozpuszczalników. Dobrze wentyluj pomieszczenia wewnętrzne.
Krok 2: Przygotuj kamień naturalny
Przed uszczelnieniem powierzchnia kamienia musi być całkowicie czysta i sucha:
- Czyszczenie: Użyj środka do czyszczenia kamienia przeznaczonego specjalnie do kamieni naturalnych, aby usunąć kurz, brud i plamy. Unikaj kwaśnych środków czyszczących, takich jak ocet, ponieważ mogą one uszkodzić kamień. W przypadku uporczywych plam zastosuj okład.
- Wysuszenie: Pozwól kamieniowi wyschnąć 24 do 48 godzin. Wilgoć pozostawiona w kamieniu może zostać uwięziona pod uszczelniaczem, powodując zmętnienie, wykwity lub przebarwienia. Ten etap jest szczególnie istotny w przypadku kamieni porowatych, takich jak wapień i piaskowiec.
Krok 3: Przetestuj uszczelniacz na małej powierzchni
Przed nałożeniem uszczelniacza na całą powierzchnię przetestuj go na małej, niepozornej powierzchni, aby upewnić się, że zapewnia pożądane wykończenie i nie zmienia naturalnego koloru kamienia. Niektóre uszczelniacze mogą przyciemnić kamień lub dodać połysk, dlatego ważne jest, aby przed kontynuowaniem zobaczyć wynik na małym kawałku.
Krok 4: Nałóż uszczelniacz
Gdy kamień będzie czysty, suchy i przygotowany, możesz rozpocząć uszczelnianie:
- Zacznij od Krawędzi: Za pomocą pędzla nałóż uszczelniacz na krawędzie i narożniki kamienia. Dzięki temu obszary podatne na wnikanie wilgoci, takie jak złącza i narożniki, są w pełni chronione.
- Nałóż pierwszą warstwę:
- Aplikacja pędzlem lub wałkiem: Za pomocą pędzla lub wałka nałóż obficie warstwę uszczelniacza na powierzchnię kamienia. Nałóż go równomiernie i dokładnie, aby upewnić się, że pory kamienia są wypełnione. Poruszaj się w stałym kierunku, aby uniknąć smug.
- Aplikacja opryskiwacza: Jeśli używasz opryskiwacza, trzymaj go w odległości 6–12 cali od powierzchni i przesuwaj nakładającymi się ruchami, aby uzyskać równomierne pokrycie. Opryskiwacze idealnie nadają się do dużych powierzchni, takich jak kamienne ściany lub tarasy.
- Pozwól Uszczelniaczowi przeniknąć: Pozwól uszczelniaczowi odpocząć 10-15 minut (lub według instrukcji producenta). W tym czasie kamień wchłonie uszczelniacz. Zwróć uwagę na szybkość wchłaniania, ponieważ bardzo porowate kamienie mogą wymagać większej ilości uszczelniacza.
- Wytrzyj nadmiar uszczelniacza: Po okresie oczekiwania użyj czystej, suchej szmatki, aby wytrzeć nadmiar uszczelniacza. Nadmiar uszczelniacza pozostawiony na powierzchni może wyschnąć i uzyskać lepkie lub mętne wykończenie, dlatego należy uważać, aby kamień nie był przesycony.
Krok 5: Nałóż dodatkowe warstwy
W zależności od porowatości kamienia i użytego uszczelniacza może zaistnieć potrzeba nałożenia dodatkowych warstw. Oto jak:
- Sprawdź wchłanianie: Jeśli kamień dobrze wchłonął uszczelniacz, a powierzchnia wygląda na suchą, nałóż drugą warstwę. Jeśli kamień nadal wydaje się wilgotny lub lepki, odczekaj dłużej przed nałożeniem kolejnej warstwy.
- Druga i kolejne warstwy: Nałóż drugą warstwę w ten sam sposób, zapewniając równomierne krycie. Każdą warstwę pozostawić do wchłonięcia i wyschnięcia zgodnie z wytycznymi producenta. Niektóre kamienie, np piaskowiec I wapień, może wymagać trzech lub więcej warstw, podczas gdy granit I marmur zazwyczaj potrzeba tylko jednego lub dwóch.
Krok 6: Poleruj powierzchnię (opcjonalnie)
Jeśli uszczelniacz pozostawia błyszczącą lub lepką warstwę lub jeśli chcesz poprawić połysk kamienia, użyj miękkiej szmatki lub buforu, aby delikatnie wypolerować powierzchnię po wyschnięciu ostatniej warstwy. Ten krok zapewnia gładkie wykończenie i może uwydatnić naturalny połysk polerowanych kamieni, takich jak granit i marmur.
Krok 7: Pozwól, aby uszczelniacz stwardniał
Po zakończeniu aplikacji poczekaj, aż uszczelniacz całkowicie stwardnieje:
- Wstępne suszenie: Powierzchnia będzie zwykle sucha w dotyku 1-4 godziny, ale w tym okresie unikaj chodzenia i umieszczania na nim przedmiotów.
- Pełne utwardzanie: Większość uszczelniaczy bierze 24-72 godziny całkowicie wyleczyć. W tym czasie należy chronić powierzchnię przed wilgocią, brudem i dużym natężeniem ruchu. W przypadku projektów na zewnątrz należy pamiętać o deszczu lub ekstremalnych temperaturach, ponieważ mogą one mieć wpływ na proces utwardzania
Jak zbudować kamienną ścianę suchego stosu
Jak usunąć zewnętrzną okładzinę kamienną
Wskazówki dotyczące montażu przypadkowych, luźnych okładzin kamiennych
5. Suszenie i utwardzanie
Suszenie i utwardzanie mają kluczowe znaczenie, aby uszczelniacz utworzył trwałą barierę. Postępuj zgodnie z tymi wskazówkami:
- Wstępne suszenie: Większość uszczelniaczy wysycha w dotyku 1-4 godziny. Jednakże w tym okresie obszar ten powinien pozostać wolny od ruchu pieszego i wilgoci.
- Pełne utwardzanie: Całkowite utwardzenie może trwać od 24-72 godzinyw zależności od użytego uszczelniacza. W tym czasie kamień musi być suchy. W przypadku kamieni na zewnątrz sprawdź prognozę pogody i unikaj zasklepiania, zanim spodziewane są opady deszczu.
- Chronić podczas utwardzania: W razie potrzeby przykryj kamień folią lub plandeką, szczególnie w przypadku projektów na zewnątrz narażonych na działanie czynników atmosferycznych.
6. Utrzymanie szczelności Naturalny Kamień
Uszczelnienie nie jest trwałe i wymaga regularnej konserwacji, aby chronić kamień:
- Ponowne zamknięcie: Częstotliwość ponownego zamykania zależy od lokalizacji i zastosowania. Kamienie zewnętrzne narażone na działanie czynników atmosferycznych i ruchu pieszego należy co jakiś czas ponownie uszczelniać 1-2 lata, podczas gdy powierzchnie wewnętrzne, takie jak blaty, mogą zniknąć 3-5 lat pomiędzy ponownym uszczelnieniem.
- Czyszczenie: Do codziennego czyszczenia należy używać środka do czyszczenia kamienia o neutralnym pH, aby zachować skuteczność uszczelniacza. Unikaj ściernych środków czyszczących lub substancji kwaśnych, takich jak ocet, które z czasem mogą uszkodzić uszczelniacz.
- Rutynowa kontrola: Sprawdź, czy nie występują oznaki wskazujące, że kamień wymaga ponownego uszczelnienia, takie jak brak kropel wody na powierzchni lub częstsze przebarwienia.
7. Typowe błędy, których należy unikać
Istnieje kilka typowych pułapek podczas uszczelniania kamienia naturalnego:
- Nadmierne uszczelnienie: Nałożenie zbyt dużej ilości uszczelniacza lub nałożenie go zbyt często może spowodować zamglenie lub lepkość wykończenia. Jeśli to zauważysz, wypoleruj powierzchnię czystą szmatką, aby usunąć nadmiar uszczelniacza. Nadmierne uszczelnienie może również uniemożliwić kamieniowi oddychanie, co może zatrzymać wilgoć wewnątrz i doprowadzić do uszkodzeń.
- Użycie niewłaściwego uszczelniacza: Każdy rodzaj kamienia ma inne potrzeby. Na przykład użycie uszczelniacza powierzchniowego na bardzo porowatym kamieniu może skutkować nierównomierną aplikacją, natomiast użycie uszczelniacza penetrującego na polerowanym kamieniu może nie wniknąć prawidłowo.
- Uszczelnianie przed wyschnięciem kamienia: Uszczelniający wilgotny kamień może zatrzymać wilgoć pod powierzchnią, powodując pleśń, wykwity lub zmętnienie wykończenia.
- Pomijanie sprzątania: Nieprawidłowe oczyszczenie kamienia przed uszczelnieniem może spowodować uwięzienie brudu, oleju lub plam pod uszczelniaczem, czyniąc je trwałymi.
Wykonując te szczegółowe kroki, możesz mieć pewność, że Twój kamień naturalny będzie chroniony i zachowa swoje piękno przez wiele lat. Właściwe uszczelnienie zabezpieczy Twoją inwestycję, zarówno wewnątrz, jak i na zewnątrz, oraz zapewni długotrwały, wypolerowany wygląd powierzchni kamiennych.
8. Wniosek: długoterminowe korzyści z uszczelnienia
Opieczętowanie Kamień naturalny to niezbędny krok, aby chronić Twoją inwestycję i zachować jej atrakcyjność wizualną. Niezależnie od tego, czy uszczelniasz nową instalację, czy konserwujesz istniejącą powierzchnię, wykonanie poniższych kroków pomoże zapewnić, że kamień będzie chroniony przed plamami, wilgocią i zużyciem przez lata. Wybierając odpowiedni uszczelniacz i stosując odpowiednie techniki aplikacji, poprawisz zarówno trwałość, jak i wygląd swoich powierzchni kamiennych.
Jeśli szukaszproducenci i dostawcy kamienia ułożonego, polecamy sprawdzić nasze produkty.
Mamy ponad 15-letnie doświadczenie w eksporcie i oferujemy próbki przed złożeniem zamówienia. Aby otrzymać indywidualną wycenę,Skontaktuj się z nami teraz!
