
Chcesz dodać odrobinę ponadczasowego piękna do swojego krajobrazu? Wielu majsterkowiczów i wykonawców uważa, że instalowanie nieregularnych, naturalnych, przypadkowych luźnych kamieni jest zniechęcające ze względu na postrzeganą złożoność. Błędy prowadzą do niestabilnych ścieżek, nierównych powierzchni i wyglądu, który nie jest naturalny.
Ale nie bój się! Ten przewodnik dzieli proces na łatwe do wykonania kroki, dzięki czemu Twój projekt będzie wyglądał profesjonalnie. Od wyboru odpowiedniego kamienia po opanowanie zaprawy – dowiesz się, jak tworzyć wspaniałe tarasy, chodniki i nie tylko. Wybór wysokiej jakości nieregularnego, naturalnego, losowego kamienia z zaufanego źródła, takiego jak Top Source Stone, zapewnia precyzję wymiarową, integralność materiału i doskonałość estetyczną.
-
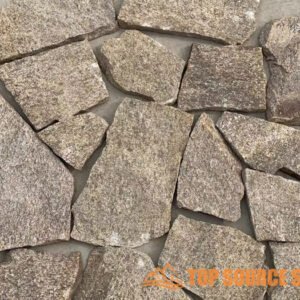
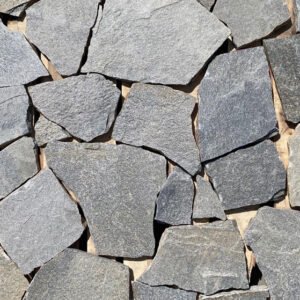 Naturalna, szara, kwarcytowa okładzina ścienna z dzieloną powierzchnią, luźna, kamienna okładzina ścienna
 -
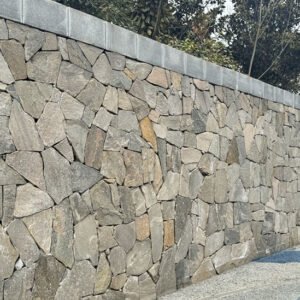 Naturalny kwarcyt, losowe, nieregularne kamienne płytki panelowe do okładzin ściennych
 -
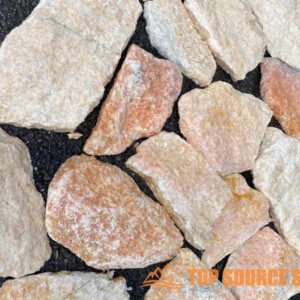
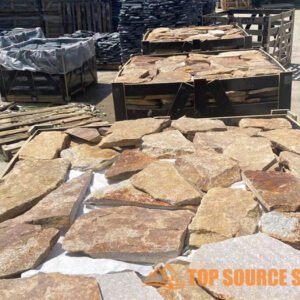
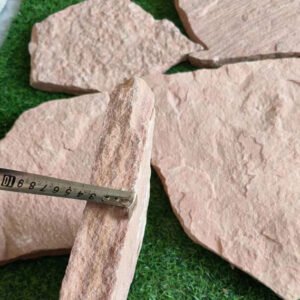 Hurtownia różowego piaskowca losowo luźna okładzina kamienna
 -
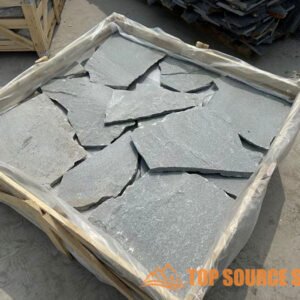
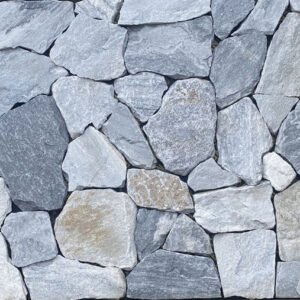 Hurtownia niebieskiego kwarcytu losowo luźna kamienna płytka do okładzin ściennych
 -
 Naturalny, luźny kamień do okładzin ściennych wewnętrznych i zewnętrznych
 -
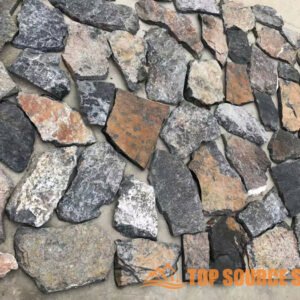 Losowy zewnętrzny kamień naturalny Luźny kamienny fornir Dekoracja okładzin ściennych
 -
 Naturalny, nieregularny, losowy, luźny fornir kamienny
 -
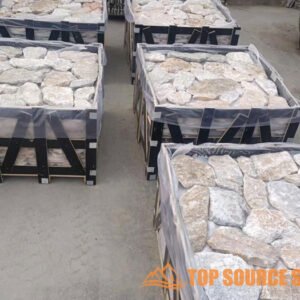
 Dostawa fabryczna w Chinach Zewnętrzne naturalne, losowe, luźne kamienne płytki elewacyjne
 -
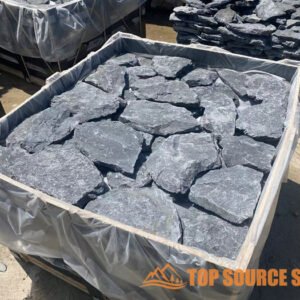
 Cena fabryczna Naturalna zewnętrzna, losowa, luźna okładzina ścienna z kamienia
 -
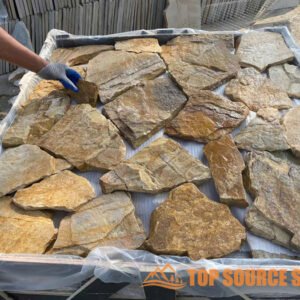
 Zewnętrzna żółta, szorstka, losowa, luźna okładzina ścienna z kamienia
 -
 Naturalny, losowy, luźny panel ścienny z kamienia do wnętrz i na zewnątrz
 -
 Naturalna luźna okładzina ścienna z kamienia do dekoracji ścian
Planowanie losowego projektu z luźnego kamienia: wybór i projekt
Planowanie nieregularnego projektu z naturalnego, luźnego kamienia obejmuje kilka kluczowych kroków, aby zapewnić piękny i trwały efekt. Od oceny krajobrazu po oszacowanie materiałów – dokładne planowanie jest niezbędne dla pomyślnego wyniku. Ten rozdział poprowadzi Cię przez początkowe etapy, koncentrując się na wyborze kamienia, rozważaniach projektowych i określeniu zakresu projektu. Właściwe planowanie pomaga uniknąć kosztownych błędów i gwarantuje, że Twoja wizja stanie się rzeczywistością.
“Używanie nieregularnego, naturalnego, losowego, luźnego kamienia w projekcie krajobrazu może dodać niepowtarzalny, naturalny akcent, który poprawia ogólną estetykę i uzupełnia otaczające środowisko.”
Ocena krajobrazu: ocena gleby, drenażu i przestrzeni
Zanim wybierzesz kamienie, oceń swój krajobraz. Sprawdź rodzaj gleby; czy to glina, piasek czy glina? Dobry drenaż ma kluczowe znaczenie, aby zapobiec uszkodzeniu wody przez wodę instalacja kamienia. Obserwuj przepływ wody podczas deszczu, aby zidentyfikować potencjalne obszary problematyczne. Zmierz także dostępną przestrzeń, aby określić obszar, który będziesz pokryć kamieniem. Znajomość tych szczegółów pomoże Ci wybrać odpowiednie kamienie i skutecznie przygotować grunt. Ten krok jest “bardzo ważne”, nie przegap tego!
Weź pod uwagę istniejące cechy swojego krajobrazu. Czy masz drzewa, krzewy lub inne rośliny, które będą miały wpływ na Twój projekt? Zwróć uwagę na nasłonecznienie w różnych obszarach, ponieważ z biegiem czasu może to wpłynąć na kolor i fakturę kamieni. Zrozumienie unikalnych cech krajobrazu pozwala stworzyć projekt, który harmonizuje z naturalnym otoczeniem.
Wybór odpowiedniego kamienia: kolor, tekstura i opcje materiału
Wybór odpowiedniego kamienia jest kluczowym krokiem w planowaniu projektu. Weź pod uwagę dostępne opcje koloru, tekstury i materiału. Kolory wahają się od ziemistych brązów i szarości po żywe czerwienie i żółcie. Tekstura może być różna, od gładkiej i wypolerowanej do szorstkiej i wytrzymałej. Dostępne materiały obejmują granit, wapień, piaskowiec i łupek. Każdy typ oferuje wyjątkową estetykę i poziom trwałości. Top Source Stone oferuje szeroką gamę opcji pasujących do każdego projektu.
Zastanów się, jaki ogólny styl chcesz osiągnąć. W stylu rustykalnym można zastosować kamienie o szorstkiej teksturze i ziemistej barwie, natomiast w nowoczesnym stylu można zastosować gładkie, szare kamienie. Odwiedź Top Source Stone, aby zapoznać się z różnymi próbkami i znaleźć produkt idealnie odpowiadający Twojej wizji. Dzięki ich usługom dostosowywania otrzymasz dokładnie to, czego potrzebujesz.
Układy projektowe: wzory i rozmieszczenie dla atrakcyjności wizualnej
Układ kamieni może znacząco wpłynąć na wizualny atrakcyjność Twojego projektu. Rozważ różne wzorce i opcje umieszczania. Losowy wzór może stworzyć naturalny, organiczny wygląd, a bardziej ustrukturyzowany wzór może dodać odrobinę formalności. Eksperymentuj z różnymi aranżacjami, aby zobaczyć, co najlepiej działa na twoją przestrzeń. Zrób zdjęcia swoich ulubionych układów, aby pomóc Ci wyobrazić sobie końcowy wynik. Właściwe planowanie jest kluczowe.
Pomyśl o odstępach między kamieniami. Ciasny układ może stworzyć solidną powierzchnię, a szersze odstępy mogą pozwolić na pokrywę naziemną lub dekoracyjnym żwirze między kamieniami. Rozważ funkcję projektowanego obszaru. Ścieżka może wymagać bardziej stabilnej, równomiernej powierzchni, podczas gdy obszar dekoracyjny może pozwolić na większą swobodę twórczą. Użyj nieregularnego naturalnego losowego luźnego kamienia, aby nadać Twojemu projektowi wyjątkowy akcent.
Materiały szacujące: Obliczanie potrzeb kamiennych i zapraw
Dokładne oszacowanie potrzeb materialnych ma kluczowe znaczenie, aby uniknąć wyczerpania kamienia lub nadmiernego wydatków. Zmierz obszar, który planujesz przykryć i obliczyć materiał kwadratowy. Użyj tego pomiaru, aby określić, ile kamienia potrzebujesz. Dodaj bufor 10-15%, aby uwzględnić cięcia i odpady. Oszacuj również ilość zaprawy lub żwiru wymaganego do ustawienia kamieni. Najlepszy kamień źródłowy może udzielić porad ekspertów na temat oszacowania materiałów.
Rozważ grubość kamieni podczas szacowania materiałów. Grubsze kamienie będą wymagały więcej zaprawy i mogą wpływać na całkowitą wysokość wykończonej powierzchni. Skonsultuj się z profesjonalistą w górnym kamieniu źródłowym, aby upewnić się, że masz dokładne pomiary i szacunki materialne. Ich wiedza specjalistyczna może zaoszczędzić czas i pieniądze na dłuższą metę. Zapewnia to, że nie zostaniesz złapany w połowie projektu.

Niezbędne narzędzia i materiały do instalacji kamienia
Przygotowanie projektu montażu kamienia wymaga zgromadzenia odpowiednich narzędzi i materiałów. Posiadanie wszystkiego pod ręką gwarantuje płynny i efektywny proces. W tym rozdziale opisano niezbędne narzędzia, zaprawę, materiały podstawowe i masy spoinowe potrzebne do pomyślnego montażu. Dobre przygotowanie to połowa sukcesu!
“Użycie właściwych narzędzi i wysokiej jakości materiałów ma kluczowe znaczenie dla trwałej i estetycznej instalacji nieregularnego naturalnego kamienia luzem.”
Narzędzia do zbierania: Młotek gumowy, kielnia, poziomica i sprzęt ochronny
Aby delikatnie wbić kamienie na miejsce, nie uszkadzając ich, niezbędny jest gumowy młotek. Do równomiernego nałożenia zaprawy służy kielnia. Poziomica zapewnia prawidłowe ułożenie kamieni. Sprzęt ochronny, w tym rękawice i okulary ochronne, ma kluczowe znaczenie dla ochrony podczas procesu instalacji. Dostęp do tych narzędzi znacznie ułatwi pracę. Nie zapomnij o zabezpieczeniu kolan!
Dodatkowe przydatne narzędzia to dłuto do kształtowania kamieni, miarka do dokładnego umieszczenia oraz taczka do transportu materiałów. Jeśli realizujesz duży projekt, rozważ wypożyczenie specjalistycznych narzędzi. Zawsze traktuj bezpieczeństwo jako priorytet, nosząc odpowiednie środki ochrony osobistej (PPE). Te proste kroki robią dużą różnicę.
Wybór zaprawy: Wybór odpowiedniej mieszanki pod kątem przyczepności kamienia
Wybór odpowiedniej zaprawy ma kluczowe znaczenie dla zapewnienia właściwej przyczepności kamienia. Weź pod uwagę rodzaj kamienia, którego używasz i warunki otoczenia. Często zaleca się zaprawę modyfikowaną polimerami ze względu na jej doskonałą siłę wiązania i elastyczność. Wygodne są wstępnie wymieszane zaprawy, ale samodzielne mieszanie pozwala na większą kontrolę nad konsystencją. Top Source Stone zaleca wysokiej jakości zaprawę zapewniającą długotrwałą trwałość wyniki.
Czynniki, które należy wziąć pod uwagę przy wyborze zaprawy, obejmują jej wytrzymałość na ściskanie, wodoodporność i czas wiązania. Upewnij się, że zaprawa jest kompatybilna z konkretnym rodzajem kamienia, którego używasz. Przeczytaj uważnie instrukcje producenta i ściśle ich przestrzegaj. Użycie niewłaściwej zaprawy może prowadzić do pękania i niestabilności. To nie jest żart!
Podstawowe materiały: żwir, kruszony kamień i piasek
Materiały bazowe zapewniają stabilną podstawę dla instalacji kamienia. Żwir jest zwykle używany jako podstawa do drenażu. Kruszony kamień zapewnia płaską powierzchnię, na której mogą spoczywać kamienie. Piasek służy do wypełniania małych szczelin i tworzenia gładkiej powierzchni. Top Source Stone oferuje szeroką gamę kruszyw dostosowanych do potrzeb Twojego projektu. Solidna podstawa jest kluczem do długotrwałej instalacji.
Aby zapobiec osiadaniu i przesuwaniu się kamieni, niezbędne jest odpowiednie przygotowanie podłoża. Dokładnie zagęścić materiały podstawowe za pomocą zagęszczarki płytowej lub ubijaka ręcznego. Upewnij się, że podstawa jest równa i dobrze osuszona. Źle przygotowana baza może prowadzić do poważnych problemów w przyszłości. Nie spiesz się i zrób to dobrze.
Masy łączące: opcje wypełniania szczelin i zwiększania stabilności
Masy spoinujące wypełniają szczeliny pomiędzy kamieniami, zwiększając stabilność i zapobiegając wzrostowi chwastów. Dostępne opcje obejmują piasek polimerowy, zaprawę i masy spoinujące na bazie epoksydów. Piasek polimerowy jest łatwy w montażu i zapewnia elastyczność. Zaprawa oferuje bardziej tradycyjny wygląd i większą trwałość. Związki na bazie epoksydów zapewniają doskonałą wytrzymałość i wodoodporność. Wybierz najlepszą opcję dla swoich konkretnych potrzeb.
Wybierając związek złącza, rozważ jego kolor, teksturę i łatwość zastosowania. Upewnij się, że związek jest kompatybilny z typem używanego kamienia. Uważnie postępuj zgodnie z instrukcjami producenta, aby zapewnić odpowiednią instalację. Związki połączenia nie tylko zwiększają stabilność, ale także poprawia ogólną estetykę twojego projektu. Dobre połączenie robi dużą różnicę!
Zalecane narzędzia i materiały do instalacji kamienia
| Narzędzie/materiał | Opis | Zamiar | Średni koszt | Najwyższy źródło kamiennego ekwiwalent |
|---|---|---|---|---|
| Gumowy młotek | Młot z gumową głową. | Stukanie kamieni na miejsce. | 15 USD – 30 USD | Nie dotyczy |
| Kielnia | Płaskie, spiczaste narzędzie do rozprzestrzeniania zapraw. | Równomierne stosowanie moździerza. | 10 USD – 20 USD | Nie dotyczy |
| Poziom | Narzędzie do zapewnienia powierzchni są poziome lub pionowe. | Zapewnienie wyrównania kamieni. | 20 USD – 50 USD | Nie dotyczy |
| Moździerz zmodyfikowany przez polimer | Mieszanka moździerza z polimerami do zwiększonego wiązania. | Przylegające razem kamienie. | 15 USD – 25 USD za torbę | Top Source Stone Stone Morta |
| Zmiażdżony kamień | Stopniowany kruszywa do przygotowania podstawowego. | Tworzenie poziomu i stabilnej bazy. | 30 USD – 50 USD za metr sześcienny | Najlepsze źródło kamiennej podstawy kruszywa |
| Piasek polimerowy | Piasek zmieszany z polimerami do napełniania stawów. | Wypełnianie luk i zapobieganie wzrostowi chwastów. | 20 USD – 30 USD za torbę | Top źródłowe kamienne połączenie piasku |

Przygotowanie miejsca: budowanie solidnego fundamentu
Właściwe przygotowanie miejsca ma kluczowe znaczenie dla stabilnej i długotrwałej instalacji nieregularnego kamienia naturalnego. Solidny fundament zapobiega przyszłym zmianom i zapewnia trwałość projektu. W tym rozdziale przedstawiono szczegółowy przewodnik dotyczący przygotowania terenu, w tym wykopów, montażu warstwy podstawowej, wyrównywania i rozwiązań drenażowych. Właściwe wykonanie tego zadania jest absolutnie niezbędne!
“Dobrze przygotowane miejsce jest podstawą udanej instalacji nieregularnego, naturalnego, luźnego kamienia, zapobiegającego problemom w przyszłości i zapewniającego piękny i trwały efekt.”
Wykopy: usuwanie wierzchniej warstwy gleby i gruzu
Pierwszym krokiem w przygotowaniu terenu są wykopy. Usuń całą wierzchnią warstwę gleby, trawę, korzenie i gruz z obszaru. Kopać na głębokość, która pozwala na warstwę podstawową i grubość kamieni, zwykle 6-8 cali. Dzięki temu mamy pewność, że wykończona powierzchnia będzie na pożądanym poziomie. Do usunięcia urobku użyj łopaty i taczki. Jest to pracochłonny, ale konieczny krok.
Przed rozpoczęciem kopania należy oczyścić wszelkie podziemne instalacje i przeszkody. Skontaktuj się z lokalnymi przedsiębiorstwami użyteczności publicznej, aby oznaczyć wszelkie zakopane linie. Weź pod uwagę nachylenie otaczającego terenu, aby zapewnić odpowiedni drenaż. Usunięcie całej materii organicznej zapobiega rozkładowi i osadzaniu się kamienia, co może zagrozić stabilności instalacji kamiennej.
Warstwa podstawowa: Układanie i zagęszczanie żwiru lub tłucznia kamiennego
Po wykopaniu ułóż warstwę bazową ze żwiru lub kruszonego kamienia. Warstwa ta zapewnia drenaż i stabilne podłoże. Użyj co najmniej 4 cali żwiru lub kruszonego kamienia, w zależności od warunków glebowych i zamierzonego wykorzystania obszaru. Materiał równomiernie rozprowadzić i dokładnie zagęścić za pomocą zagęszczarki płytowej lub ubijaka ręcznego. Wysokiej jakości materiały podstawowe od niezawodnych dostawców, takich jak Top Source Stone, są niezbędne dla stabilności.
Zagęszczenie warstwy podstawowej ma kluczowe znaczenie, aby zapobiec osiadaniu. Nałóż każde przejście zagęszczarką na głębokość co najmniej 6 cali, aby zapewnić równomierne zagęszczenie. Podczas zagęszczania dodawać wodę, aby ułatwić związanie materiału. Odpowiednio zagęszczona warstwa bazowa zapewni solidny fundament, który utrzyma ciężar kamieni i zapobiegnie przesuwaniu się.
Poziomowanie: uzyskanie gładkiej i równej powierzchni
Uzyskanie gładkiej i równej powierzchni jest niezbędne dla profesjonalnie wyglądającej instalacji kamienia. Do wyrównania warstwy bazowej użyj warstwy piasku lub drobnego żwiru. Rozprowadź równomiernie materiał i użyj poziomicy, aby sprawdzić, czy nie ma żadnych wysokich i niskich miejsc. W razie potrzeby dodaj lub usuń materiał, aby utworzyć idealnie płaską powierzchnię. Gładka powierzchnia znacznie ułatwia osadzanie kamieni.
Do wypoziomowania powierzchni użyj długiej, prostej deski lub poziomicy. Pomoże to uzyskać spójną i równą płaszczyznę. Aby zapewnić dokładność, sprawdź poziom w wielu kierunkach. Idealnie równa powierzchnia zapobiegnie nierównomiernemu osiadaniu kamieni oraz zapewni stabilność i wyrównanie kamieni. Wymaga to cierpliwości, ale warto!
Drenaż: zapewnienie prawidłowego odpływu wody
Prawidłowy drenaż ma kluczowe znaczenie, aby zapobiec uszkodzeniu instalacji kamiennej przez wodę. Upewnij się, że miejsce to posiada odpowiedni drenaż, który umożliwi odprowadzanie wody deszczowej i spływu. Rozważ zainstalowanie rur drenażowych lub drenów francuskich, aby odwrócić wodę z tego obszaru. Lekko nachyl warstwę podstawową, aby ułatwić spływ wody. Dobrze osuszone miejsce zapobiega uszkodzeniom spowodowanym przez wodę i przedłuża żywotność instalacji.
Obserwuj, jak woda płynie podczas deszczu, aby zidentyfikować potencjalne obszary problemowe. Zainstaluj roztwory drenażowe w obszarach, w których woda ma tendencję do gromadzenia się. Upewnij się, że system drenażowy jest odpowiednio podłączony do odpowiedniego gniazdka. Ignorowanie drenażu może prowadzić do kosztownych napraw w dół drogi. Nie bądź mądry i funta głupi!
Koszty materiałów przygotowywania miejsca
| Tworzywo | Opis | Koszt jednostkowy | Szacowana ilość | Całkowity koszt |
|---|---|---|---|---|
| Żwir | 3/4″ zmiażdżone żwir dla warstwy podstawowej. | 35 USD/metr sześcienny | 5 jardów sześciennych | 175 USD |
| Zmiażdżony kamień | 1/2″ zmiażdżony kamień do wyrównywania. | 40 $/MARDE CRABIC | 2 jardy sześcienne | 80 USD |
| Piasek | Drobny piasek do wyrównywania powierzchni. | 25 USD/metr sześcienny | 1 stoczni sześcienne | 25 USD |
| Rura drenażowa | 4″ Perforowana rura drenażowa. | 5 USD za stopę | 50 stóp | 250 USD |
| Filtruj materiał | Tkanina geotełułowa do drenażu. | 1 $/stopę kwadratową | 100 stóp kwadratowych | 100 USD |

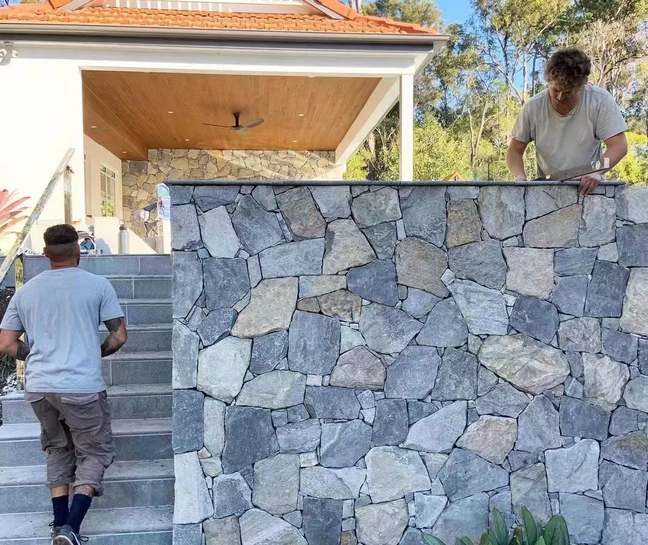
Instalacja krok po kroku: układanie nieregularnego kamienia dla naturalnego wyglądu
Instalacja nieregularnego, naturalnego, losowego luźnego kamienia wymaga szczególnej dbałości o szczegóły, aby uzyskać naturalny i profesjonalny wygląd. W tym rozdziale przedstawiono przewodnik krok po kroku dotyczący aplikacji zaprawy, układania kamienia i technik spoinowania. Przy właściwym podejściu możesz stworzyć oszałamiający element krajobrazu. To tutaj guma spotyka się z drogą!
“Właściwe techniki montażu są kluczem do ukazania naturalnego piękna nieregularnego, naturalnego, luźnego kamienia, zapewniając trwałe i atrakcyjne wizualnie wykończenie.”
Mieszanie zaprawy: uzyskanie właściwej konsystencji
Pierwszym krokiem jest wymieszanie zaprawy do odpowiedniej konsystencji. Postępuj dokładnie zgodnie z instrukcjami producenta. Do suchej zaprawy stopniowo dodawać wodę, ciągle mieszając, aż do uzyskania gładkiej, elastycznej konsystencji podobnej do masła orzechowego. Należy unikać dodawania zbyt dużej ilości wody, gdyż może to osłabić zaprawę. Aby uzyskać najlepsze rezultaty, użyj wiertarki mieszającej z nasadką łopatkową. Właściwe połączenie mieszanki jest kluczowe.
Po wymieszaniu zaprawę należy pozostawić na 10-15 minut do ostygnięcia. Pozwala to na pełną aktywację środków chemicznych i poprawia ich urabialność. Przed użyciem zaprawę należy krótko wymieszać. Wyrzucić zaprawę, która zaczyna twardnieć lub wysychać. Właściwa konsystencja zaprawy zapewnia dobrą przyczepność i zapobiega pękaniu.
Nakładanie zaprawy: Zapewnienie pełnego kontaktu z podłożem
Na przygotowane podłoże nałożyć obficie warstwę zaprawy za pomocą pacy. Zaprawa powinna być wystarczająco gruba, aby pomieścić nieregularny kształt kamieni, zwykle 1-2 cale. Należy zapewnić pełny kontakt zaprawy z tyłem kamienia. Każdy kamień mocno wciśnij w zaprawę, lekko nim poruszając, aby zapewnić dobre połączenie. Doskonała produkcja Top Source Stone zapewnia precyzję wymiarową, dzięki czemu ten krok jest płynniejszy.
Unikaj dostania się zaprawy na widoczne powierzchnie kamieni. Jeżeli zaprawa dostanie się na powierzchnię, należy ją natychmiast przetrzeć wilgotną gąbką. Pracuj małymi odcinkami, aby zapobiec wyschnięciu zaprawy przed ułożeniem kamieni. Dla trwałej instalacji niezbędne jest mocne połączenie kamienia z podłożem.
Umieszczanie kamieni: układanie kamieni w atrakcyjny wizualnie wzór
Układanie kamieni w atrakcyjny wizualnie wzór to sztuka. Przed trwałym ustawieniem kamieni poeksperymentuj z różnymi układami. Dąż do naturalnego, przypadkowego wyglądu, ale unikaj tworzenia dużych przerw i powtarzających się wzorów. Użyj kamieni o różnych rozmiarach i kształtach, aby stworzyć zainteresowanie wizualne. Często cofaj się, aby ocenić ogólny wygląd. To wymaga dobrego oka!
Dopasuj kamienie tak blisko siebie, jak to możliwe, pozostawiając spójne szczeliny do połączenia. Za pomocą gumowego młotka delikatnie wbij kamienie na miejsce. Sprawdź poziom każdego kamienia i wyreguluj w razie potrzeby. Użyj podkładek do podparcia kamieni, które nie są w pełni podparte zaprawą. Właściwe ułożenie kamienia jest kluczem do pięknej i naturalnie wyglądającej instalacji. Pamiętaj, że pracujesz z nieregularnym, naturalnym, losowym, luźnym kamieniem.
Łączenie: wypełnianie szczelin i zwiększanie stabilności
Gdy zaprawa stwardnieje przez 24-48 godzin, przychodzi czas na wypełnienie spoin. Za pomocą pacy ze spoinowaniem wprowadź zaprawę w szczeliny między kamieniami. Upewnij się, że złącza są całkowicie wypełnione i nie pozostawiają pustych przestrzeni. Wygładź spoiny zaprawy wilgotną gąbką, aby uzyskać spójne i profesjonalne wykończenie. Łączenie zwiększa stabilność i zapobiega wzrostowi chwastów.
Unikaj nadmiernego wypełniania spoin, ponieważ może to pogorszyć naturalny wygląd kamieni. Rozważ użycie kolorowej zaprawy do uzupełnienia kamieni. Natychmiast usuń nadmiar zaprawy z powierzchni kamiennych. Aby montaż był trwały i estetyczny, konieczne jest prawidłowe spoinowanie.
Szacunkowy czas instalacji krok po kroku
| Krok | Opis | Szacowany czas | Wymagane narzędzia |
|---|---|---|---|
| Mieszanie zaprawy | Przygotowanie zaprawy do odpowiedniej konsystencji. | 30 minut | Wiertło mieszające, przystawka do wiosła, wiadro |
| Nakładanie zaprawy | Rozprowadzenie zaprawy na podłożu. | 1 godzina | Kielnia, wiadro |
| Umieszczenie kamienia | Układanie i osadzanie kamieni w zaprawie. | 2-4 godziny | Młotek gumowy, poziomica, podkładki |
| Łączenie | Wypełnianie szczelin między kamieniami zaprawą. | 1-2 godziny | Paca wskazująca, wilgotna gąbka |
Wykończenie i konserwacja: zapewnienie długotrwałego piękna
Właściwe wykończenie i konserwacja są niezbędne dla zachowania piękna i integralności Twojego produktu Nieregularny Naturalny Losowa instalacja luźnego kamienia na nadchodzące lata. W tym rozdziale znajdują się istotne wskazówki dotyczące czyszczenia, uszczelniania i bieżącej konserwacji, dzięki którym powierzchnia kamienia wygląda jak najlepiej. Trochę opieki może bardzo pomóc!
Regularna konserwacja i odpowiednie techniki uszczelniania znacznie przedłużą żywotność i piękno Twojego montaż kamienia naturalnego.”
Czyszczenie: Usuwanie nadmiaru zaprawy i zanieczyszczeń
Po całkowitym utwardzeniu zaprawy usuń nadmiar zaprawy i gruz z powierzchni kamienia. Do delikatnego szorowania kamieni użyj sztywnej szczotki i łagodnego detergentu. Unikaj stosowania ostrych środków chemicznych lub ściernych środków czyszczących, ponieważ mogą one uszkodzić kamień. Dokładnie spłukać powierzchnię czystą wodą. Czysta powierzchnia to pierwszy krok do długotrwałego piękna.
W przypadku uporczywych plam z zaprawy spróbuj użyć specjalistycznego zmywacza do zapraw. Postępuj dokładnie zgodnie z instrukcjami producenta. Najpierw przetestuj zmywacz na małym, niepozornym obszarze, aby upewnić się, że nie uszkodzi kamienia. Mycie pod ciśnieniem może być również skuteczne, ale należy używać ustawienia niskiego ciśnienia, aby uniknąć uszkodzenia powierzchni.
Uszczelnianie: ochrona kamienia przed plamami i warunkami atmosferycznymi
Uszczelnianie powierzchni kamienia chroni ją przed plamami i uszkodzeniami atmosferycznymi. Wybierz wysokiej jakości Kamień naturalny uszczelniacza odpowiedniego dla rodzaju posiadanego kamienia. Nałożyć uszczelniacz zgodnie z instrukcją producenta. Zwykle polega to na nałożeniu cienkiej, równej warstwy za pomocą pędzla lub wałka. Top Source Stone oferuje porady dotyczące wyboru odpowiednich produktów uszczelniających.
Przed wystawieniem powierzchni na działanie wody lub ruchu drogowego należy pozostawić uszczelniacz do całkowitego wyschnięcia. Ponowną aplikację uszczelniacza co 1-3 lata, w zależności od stopnia narażenia. Uszczelnianie jest kluczowym krokiem w zachowaniu piękna i trwałości instalacji kamiennej. To naprawdę zrobi różnicę.
Bieżąca konserwacja: regularne czyszczenie i kontrola
Regularne czyszczenie i inspekcja są niezbędne dla bieżącej konserwacji. Regularnie zamiataj lub odkurzaj kamienną powierzchnię, aby usunąć brud i zanieczyszczenia. Natychmiast usuwaj rozlane ciecze, aby zapobiec plamom. Okresowo sprawdzaj powierzchnię pod kątem pęknięć lub uszkodzeń. Szybkie zajęcie się drobnymi problemami może zapobiec ich przekształceniu się w większe problemy.
Unikaj stosowania soli odladzających na powierzchniach kamiennych, ponieważ mogą one uszkodzić kamień. Zamiast tego użyj piasku lub żwiru do trakcji. Przytnij wszelką roślinność rosnącą w pobliżu powierzchni kamienia, aby zapobiec plamieniu i zatrzymywaniu wilgoci. Prosta konserwacja ma duże znaczenie.
Naprawa pęknięć i uszkodzeń: rozwiązywanie typowych problemów
Z biegiem czasu mogą pojawić się pęknięcia i uszkodzenia spowodowane warunkami atmosferycznymi lub dużym natężeniem ruchu. Napraw małe pęknięcia środkiem do naprawy kamienia pasującym do koloru kamienia. Postępuj dokładnie zgodnie z instrukcjami producenta. W przypadku większych pęknięć lub uszkodzonych kamieni należy rozważyć wymianę dotkniętego obszaru. Trwały, wysokiej jakości kamień Top Source Stone wymaga minimalnej konserwacji.
Przed nałożeniem środka naprawczego usuń wszelkie luźne zanieczyszczenia z uszkodzonego obszaru. Przed wystawieniem powierzchni na ruch drogowy należy poczekać, aż masa naprawcza całkowicie stwardnieje. Rozważ zatrudnienie specjalisty do bardziej kompleksowych napraw. Szybkie rozwiązywanie problemów chroni projekt.
Harmonogram konserwacji nieregularnego kamienia
| Zadanie | Częstotliwość | Potrzebne materiały | Szacowany czas |
|---|---|---|---|
| Zamiatanie/odkurzanie | Tygodnik | Miotła lub odkurzacz | 15 minut |
| Czyszczenie | Miesięczny | Łagodny detergent, sztywna szczotka, woda | 30 minut |
| Opieczętowanie | Co 1-3 lata | Uszczelniacz do kamienia, pędzel lub wałek | 1-2 godziny |
| Kontrola | Kwartalny | Nic | 10 minut |
| Naprawa pęknięć | W razie potrzeby | Masa do naprawy kamienia, kielnia | Różnie |
Wniosek
Po 15 latach pracy w branży kamieniarskiej nauczyłem się, że instalowanie nieregularnego, naturalnego, luźnego kamienia to nie tylko układanie kamieni; chodzi o stworzenie ponadczasowego krajobrazu. Chodzi o to, aby z pewnością przenieść dzieło sztuki natury na swoje podwórko.
Z mojego doświadczenia w Top Source Stone wynika, że kluczem do sukcesu są szczegóły: odpowiednie planowanie, wysokiej jakości materiały i odrobina cierpliwości. Zaufaj mi; jest odpowiednie przygotowanie fundamentów “gdzie to jest,” i gwarantuje, że Twój projekt przetrwa próbę czasu.
Pamiętaj, że każdy kamień opowiada historię, a przy odpowiednim podejściu możesz stworzyć coś naprawdę wyjątkowego. Jeśli zależy Ci na trwałym pięknie i kontakcie z naturą, zawsze warto poświęcić czas na zrobienie tego dobrze.
Często zadawane pytania
P1: Jakie są zalety stosowania nieregularnego, naturalnego, luźnego kamienia do kształtowania krajobrazu?
A1: Nieregularne, naturalne, luźne kamienie doskonale nadają się do kształtowania krajobrazu ze względu na ich unikalne kształty, które zapewniają estetykę i zainteresowanie wizualne. Są również trwałe, przyjazne dla środowiska i dodają naturalnego wyglądu Twoim projektom krajobrazu.
P2: Jak zainstalować nieregularny, naturalny, przypadkowy luźny kamień?
A2: Aby zainstalować nieregularny, naturalny, luźny kamień, najpierw przygotuj stabilną i wypoziomowaną podstawę z ubitego żwiru. Ułóż kamienie według własnego uznania, dopasowując je ściśle do siebie. Wypełnij szczeliny mniejszymi kamieniami lub żwirem i upewnij się, że powierzchnia jest równa.
P3: Jakie narzędzia są potrzebne do układania luźnego kamienia?
A3: Będziesz potrzebować podstawowych narzędzi do kształtowania krajobrazu, takich jak łopaty, grabie i zagęszczarka. Dodatkowo gumowy młotek może pomóc w dopasowaniu kamieni, a poziomica zapewnia ich równomierne ułożenie.
P4: W jaki sposób utrzymujesz luźne kamienne ścieżki lub tarasy?
A4: Regularna konserwacja obejmuje usuwanie gruzu, regulację kamieni, które mogły się przesunąć, i od czasu do czasu dodawanie świeżego żwiru w celu wypełnienia luk. Aby zachować ich wytrzymałość, konieczne może być również regularne zagęszczanie.
P5: Czy nieregularny, naturalny, luźny kamień nadaje się do obszarów o dużym natężeniu ruchu?
A5: Tak, przy prawidłowej instalacji, nieregularne, naturalne, luźne kamienie poradzą sobie w obszarach o dużym natężeniu ruchu. Upewnij się, że są dobrze zagęszczone, a wszelkie szczeliny wypełnione żwirem, aby zapewnić stabilność.
P6: Jakie są korzyści dla środowiska wynikające ze stosowania kamienia naturalnego?
A6: Kamienie naturalne są korzystne dla środowiska, ponieważ wymagają minimalnego przetwarzania i mogą być pozyskiwane lokalnie, co zmniejsza ślad węglowy. Nie emitują również LZO, co czyni je ekologicznym wyborem w budownictwie.
P7: Czy nieregularny, naturalny, luźny kamień można stosować w pomieszczeniach zamkniętych?
A7: Tak, kamienie te można stosować we wnętrzach, często jako okładziny ścienne lub podłogi w obszarach takich jak kuchnie i łazienki, zapewniając rustykalną, naturalną estetykę.
P8: Jak wybrać odpowiedni kamień do swojego projektu?
A8: Weź pod uwagę takie czynniki, jak zamierzone zastosowanie, pożądana estetyka, lokalna dostępność oraz naturalna trwałość kamienia i odporność na warunki atmosferyczne. Konsultacje z dostawcą kamienia mogą również zapewnić wgląd w najlepsze opcje dla Twoich potrzeb.
Linki zewnętrzne
- Losowy, luźny kamień: naturalny wybór w zakresie zrównoważonego projektowania
- Naturalny, nieregularny, losowy, luźny fornir kamienny
- Wszystko o kostkach brukowych z naturalnego kamienia – Najlepsza tablica źródłowa
- Odskocznia w ogrodzie | Krajobraz & Odskocznia na świeżym powietrzu
- Jesienne brązowe nieregularne odskocznię – Kamień SUI
- Nieregularne oznakowanie kamienia – Produkty z drewna kamiennego
- Szalone pomysły na kostkę brukową z kamienia naturalnego na Twoją przestrzeń zewnętrzną
- Płyta chodnikowa na sprzedaż w Ohio — Stone Center
