 Skip to content
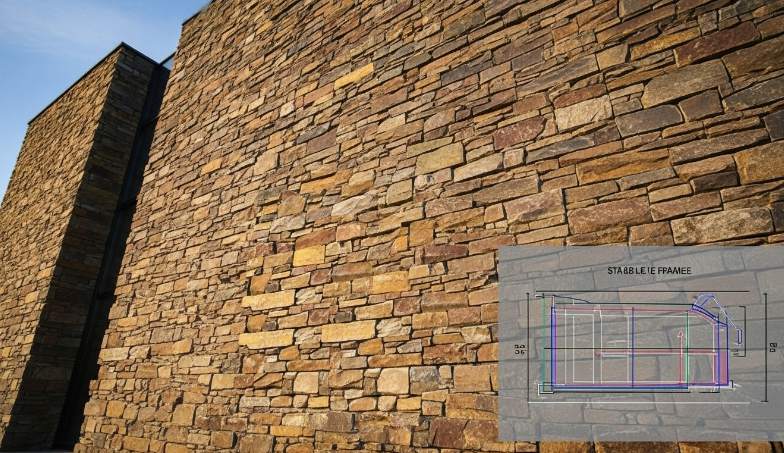
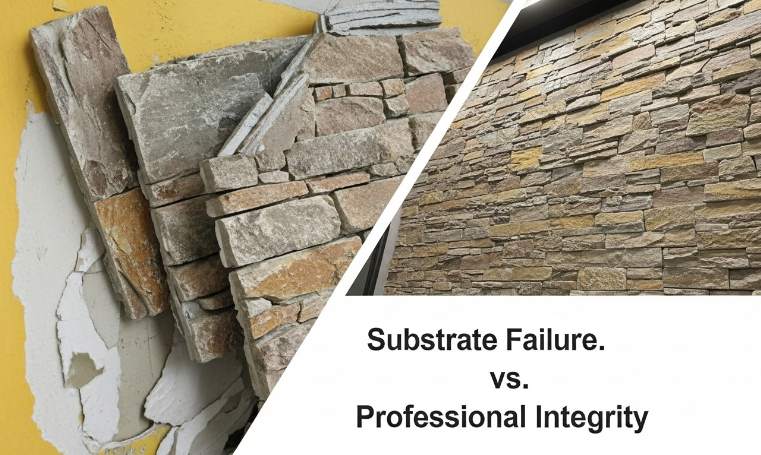
Adhering to 01. Substrate Requirements is the only way to prevent delamination and protect project margins in architectural stone cladding. For contractors, ignoring these standards leads to project failure and rework costs that frequently outpace the original installation budget.
This guide benchmarks substrate prep against our CNC diamond-blade precision and the 8-12 lbs/sq.ft load of natural panels. We evaluate L/360 deflection limits and mechanical keying to ensure Z-shape interlocking systems remain seamless and structurally secure over time.
Why Substrate Preparation is the Non-Negotiable Foundation of Success
Successful stone installation requires clean, flat surfaces to ensure high-strength bonding and perfect alignment of interlocking panels, eliminating visible vertical joints.
Skipping substrate preparation is the fastest way to guarantee project failure. In the B2B sector, where we deal with large-scale architectural cladding, the cost of rework due to delamination often exceeds the original installation budget. Proper preparation ensures that the adhesive makes direct contact with the wall structure rather than a layer of dust or loose paint.
Ensuring Chemical Bonding and Adhesion Integrity
Adhesive performance relies on a clean chemical bond. When installers ignore surface contaminants, they create a “false bond” where the stone attaches to a film of grease or oxides instead of the actual wall. This leads to peeling and premature failure, especially under the heavy loads associated with natural slate and quartzite.
- Contaminant Removal: Removing dust and grease prevents common defects like flaking and blistering.
- Porosity Management: Controlled surface preparation ensures consistent adhesive suction, which is vital for supporting heavy panels.
- Mechanical Keying: Roughening the substrate provides the mechanical grip needed to hold 30-40kg/m² of natural stone securely over time.
CNC Precision Edges and Substrate Flatness Requirements
At Top Source Stone, we use CNC diamond-blade edges to ensure our Z-shape and S-shape panels interlock with absolute precision. However, this “male-female” connection system only works if the wall is perfectly flat. Even minor surface irregularities will cause the panels to pivot, creating “stepped” gaps that ruin the seamless architectural finish.
- System Alignment: A flat substrate allows the interlocking system to seat correctly, concealing the substrate behind the stone.
- Joint Camouflage: Eliminating wall waves prevents visible vertical joints, maintaining the aesthetic of a continuous natural rock face.
- Weight Distribution: Ensuring a rigid and flat wall structure allows the 30-40kg/m² load to distribute evenly, preventing structural stress points.
For professional results, we recommend using cement backer board for interior natural stone. This provides a moisture-resistant and stable surface that can easily handle the weight of real slate or quartzite without the structural risks associated with traditional drywall.
Can You Install Natural Stone Directly Over Painted Drywall?
Installing natural stone directly on painted drywall leads to delamination. The stone’s weight compromises the paper layer; you must use cement backer board for a secure bond.
Adhesion and Structural Risks of Painted Surfaces
Standard drywall is engineered to support paint and light textures, not the significant dead load of natural minerals. When you apply heavy stone panels to a painted surface, you are relying on the bond between the paint and the drywall paper, which is almost always the weakest point in the wall assembly. Over time, the gravitational pull on the stone causes the paper facing to peel away from the gypsum core.
- Weight Limits: Drywall paper lacks the internal bond strength to support Top Source Stone panels, which weigh between 8 and 12 lbs/sq.ft (up to 55kg/m² for the Rough Series).
- Adhesion Barriers: Paint creates a non-porous film that prevents thin-set mortar from penetrating and forming a mechanical bond with the underlying material.
- Moisture Damage: The water content in cement-based mortars can soak into the drywall paper and soften the gypsum core, leading to structural softening before the adhesive even cures.
Reinforced Substrates for High-Weight Stone Panels
For professional B2B installations and large-scale architectural projects, we require a cement-based substrate. This provides the necessary rigidity and surface porosity to ensure that the “male-female” interlocking joints of our Z-Shape and S-Shape panels remain tight and seamless over the life of the building.
- Substrate Selection: Cement backer board is the industry standard for the Top Source Stone Rough Series to ensure stability under heavy loads.
- Mechanical Fastening: Screws must pass through the drywall and penetrate at least halfway into the wall studs (minimum 1-inch penetration) to anchor the system.
- Porosity and Suction: A cementitious surface offers high porosity, allowing the mortar to “grab” the substrate and create a permanent, monolithic bond with the stone.
If the project demands keeping the existing wall, installers should strip the paint mechanically or install a 0.25-inch cement board directly over the drywall before mounting the stone panels. This ensures the stone stays on the wall where it belongs, protecting your reputation and your client’s investment.
Premium Ledger Panels at Factory-Direct Prices

Evaluating Surface Flatness: The 1/8-Inch Rule for Seamless Panels
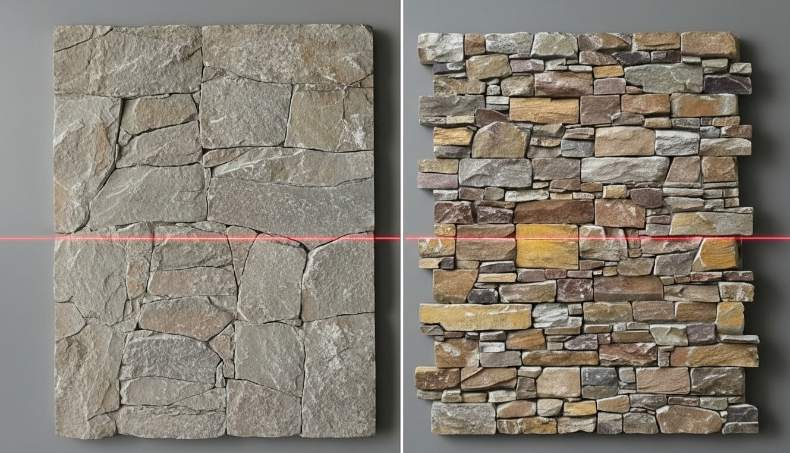
Substrates must maintain a maximum deviation of 1/8 inch over 10 feet. This precision prevents panel lippage and ensures Z-shape edges align for a gap-free natural stone finish.
Substrate preparation dictates the final aesthetic of a stone wall. While many installers focus on adhesive strength, surface flatness remains the primary factor in preventing “lippage”—the visible, stepped edges between adjacent panels. For B2B projects where architectural consistency is a requirement, meeting the 1/8-inch standard is non-negotiable for a professional result.
The 1/8-Inch Per 10-Foot Straightedge Requirement
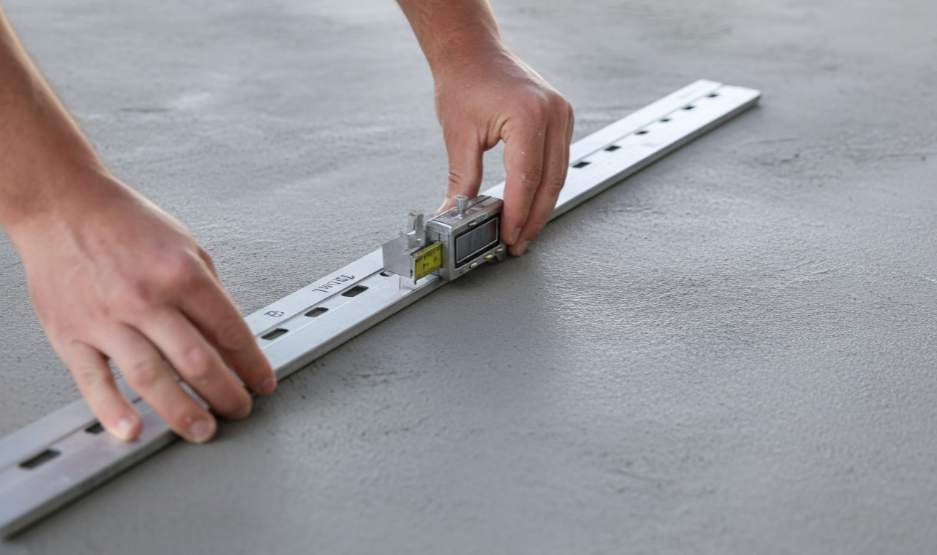
Before thinset hits the wall, installers must use a 10-foot straightedge to verify the plane. High spots act as fulcrums, causing panels to pivot and pull away from the substrate. Low spots create voids that weaken the bond and force the panel out of alignment. Maintaining this tolerance is the only way to keep 6×24 inch ledger panels perfectly horizontal across long spans.
- Measurement Tool: Use a 10-foot straightedge to identify deviations exceeding 1/8 inch.
- Pivot Prevention: Flat surfaces stop panels from rocking, which eliminates “stepped” gaps in the interlock.
- Alignment Control: Level substrates ensure the 6×24 inch modules stack without drifting off-level.
CNC Diamond-Blade Precision and Seamless Joint Alignment
Top Source Stone utilizes CNC diamond-blade cutting to produce modular pieces with microscopic tolerances. This factory precision only translates to the job site if the substrate is flat. When the wall is true, our Z-shape and S-shape panels engage their “male-female” connection system as intended, making vertical joints virtually disappear into the natural texture of the stone.
Uniform surfaces also ensure that the high-strength epoxy resin used in our manufacturing process bonds consistently. Gaps behind the panel lead to uneven pressure and potential delamination, particularly in large-scale commercial installations. A flat wall allows the adhesive to spread evenly across the entire back of the panel, securing the modular units into a monolithic architectural feature.
- Joint Camouflage: Z-shape and S-shape edges rely on substrate flatness to hide vertical seams.
- Bond Consistency: Flat walls enable 100% adhesive contact for the high-strength resin backings.
- Edge Fitting: CNC-cut edges require a level plane to lock tightly without manual grinding or on-site adjustments.

How to Handle Brick and Concrete Surfaces for Maximum Bond
Remove contaminants and achieve a Saturated Surface Dry (SSD) condition to prevent moisture loss in adhesives. A mechanical profile ensures 8-13 lbs/sq.ft stone panels bond permanently to masonry.
Surface Preparation and Mechanical Profiling Techniques
Standard masonry surfaces often carry laitance—a weak layer of concrete fines—or efflorescence that acts as a bond breaker. You cannot rely on chemical adhesion alone when installing heavy natural stone. The substrate needs a physical “key” to lock the mortar into the wall structure.
- Contaminant Removal: Use high-pressure washing (5,000–45,000 psi) or mechanical grinding to strip away oils, paint, and curing compounds until you expose the aggregate.
- Mechanical Roughening: Scabbling or scarifying the surface creates the microscopic “keys” required for the adhesive to grip the concrete.
- SSD Condition: Dampen the substrate so it is saturated but lacks standing water. This prevents the dry concrete from sucking the hydration out of your mortar, which would otherwise lead to a brittle bond.
- Standard Compliance: Follow ACI 318 protocols for cleaning construction joints to ensure the new material integrates with the existing structure.
Bonding Solutions for 8-13 lbs/sq.ft Natural Stone Panels
Natural stacked stone panels, like our 100% slate and quartzite ledgestone, carry significant dead weight. At 8-12 lbs/sq.ft for standard panels and up to 55kg/m² for rough profiles, the bonding agent must provide high shear strength and moisture resistance.
- High-Solids Agents: Select bonding agents with 45-55% solids content to ensure a thick, reliable film that supports heavy natural stone weight.
- Epoxy Systems: Use epoxy-based agents in high-load areas or environments exposed to extreme humidity and salinity, such as coastal or commercial builds.
- Open-Time Management: Set the stone panels while the bonding agent remains tacky. If the agent cures completely before the stone is applied, the installation will likely fail.
- Z-Shape Interlocking: Top Source Stone utilizes CNC-cut Z-shape edges. This precision “male-female” connection maximizes surface contact and helps distribute the panel’s weight across the prepared substrate, eliminating visible vertical joints.
Ensuring the substrate is prepared to these specifications allows the stone and masonry to behave as a monolithic unit. This stability is critical for B2B projects in North America and Australia where freeze-thaw cycles or high humidity can test the integrity of the bond over time.
When is a Metal Lath System Mandatory for High-Weight Veneers?
Building codes mandate 3.4 lb/sq yd metal lath for veneers exceeding 15 lbs/sq ft or when framing exceeds 16-inch centers to ensure structural integrity.
| Installation Condition | Lath Specification | Required Action |
|---|---|---|
| Standard Panels (< 15 lbs/sq ft) | 2.5 lb/sq yd | ASTM C1063 Baseline Compliance |
| Heavy Panels (> 15 lbs/sq ft) | 3.4 lb/sq yd | Mandatory Mechanical Bond Support |
| Open Stud Framing (> 16″ O.C.) | 3.4 lb/sq yd High-Rib | Minimize Substrate Deflection |
| Rigid Insulation (> 0.5″) | Engineered Anchoring | Specialty Washer Fastening |
Code Requirements for Adhered Masonry Veneers
Standardized building codes in 2026 establish strict parameters for substrate reinforcement. These regulations prevent the delamination of natural stone systems by ensuring the mechanical bond can support the dead load of the material over time.
- ASTM C1063 Standards: All adhered natural stone systems require corrosion-resistant galvanized or stainless steel lath to maintain structural compliance.
- Framing Spacing: Metal lath is mandatory whenever framing spacing exceeds 16 inches on center. This prevents the substrate from bowing under the weight of the masonry.
- Weight Thresholds: Building standards use 2.5 lb/sq yd lath as the baseline for stone panels under 15 lbs per square foot.
Supporting the 55kg/m² Rough Stacked Series
Heavier product lines, such as the Top Source Stone Rough Series, require upgraded reinforcement to manage the increased gravitational pull on the wall assembly. These panels often reach 55kg/m², pushing them into a higher tier of structural requirements.
- High-Rib Lath: For 55kg/m² panels, installers must use 3.4 lb/sq yd high-rib lath to provide the necessary rigidity for slate or quartzite panels.
- Deflection Control: In open stud applications, the heavier 3.4 lb/sq yd lath minimizes deflection, ensuring the mortar bed remains intact without cracking.
- Insulation Anchoring: If installing lath over rigid insulation thicker than 0.5 inches, you must use specialty washers and an engineered mechanical anchoring system to secure the load to the framing.
Understanding Deflection Limits: Why Wall Stiffness Matters
Walls must meet an L/360 stiffness ratio to prevent stone cracking. This means a structural member should not flex more than the span length divided by 360.
Standard Flex Ratios for Masonry Veneer
Engineering standards define how much a substrate can move before the finish fails. For natural stone installations, building codes focus on the structural members supporting the cumulative weight of the stone and mortar.
- IBC Standards: Wall girts and studs must maintain ratios between L/240 and L/360 to prevent panel bowing.
- Structural Movement: Excessive flex causes visible sagging, joint separation, and delamination of heavy masonry finishes.
- Stiffness Factors: The material’s modulus of elasticity and the distribution of the load across the span determine the final stiffness.
Substrates that fail to meet these ratios create “soft spots” in the wall. When the structure shifts under wind or seismic loads, the rigid stone cannot flex with the wall, leading to immediate fracture lines through the veneer.
Structural Stiffness for Lightweight Stone Panels
Lower weight does not reduce the need for a rigid foundation. Even engineered panels require a substrate that resists lateral drift to maintain the tight tolerances of a professional installation.
- Load Profile: Natural stacked stone panels weigh between 8-12 lbs/sq.ft, requiring a substrate that eliminates vibration and sway.
- Precision Alignment: Top Source Stone uses CNC diamond-blade edges for Z-Shape and S-Shape models; these rely on a rigid wall to maintain a seamless interlocking fit.
- Adhesive Stability: Proper wall stiffness ensures that the high-strength epoxy resin bond remains permanent throughout seasonal temperature cycles.
For B2B projects, verifying the L/360 ratio before installation protects the long-term integrity of the architectural finish. A stable wall allows the interlocking “male-female” connection system to camouflage vertical joints effectively without risk of the panels shifting over time.
The Impact of Surface Porosity on Adhesive Suction
Surface porosity determines adhesive penetration depth. We use high-strength epoxy resin systems to ensure permanent mechanical bonds across all stone densities, from porous slate to dense quartzite.
Mechanical Interlocking and Surface Capillary Action
The bond between a natural stone panel and its substrate relies on microscopic physical anchors. Capillary action draws liquid adhesive components into the stone’s natural cleft pores, creating what we call a mechanical root system. When the adhesive cures inside these voids, it locks the panel in place. Polished surfaces lack this depth, which is why we prioritize natural cleft and split-face finishes to maximize the available bonding area.
- Root System: Capillary action pulls resins into mineral pores to create deep physical interlocking.
- Peel Resistance: Surface roughness increases the total contact area, significantly raising the force required to detach the panel.
- Moisture Control: Regulated stone preparation prevents the mineral from drinking water out of the mortar too fast, which stops the bond from becoming brittle.
- Gap Sealing: High-viscosity conformance ensures the adhesive fills microscopic gaps below 10 microns, creating a full-surface seal.
Industrial Epoxy Resin Stability for Dense Stone Panels
Dense minerals like quartzite present a different challenge because they have fewer pores for traditional mortar to “grab.” For these materials, Top Source Stone applies a factory-grade, high-strength epoxy resin system. This is mandatory for our 2026 project specifications to prevent delamination in high-density models like Arctic Golden or Sierra Blue. This system provides a flexible bond that survives the thermal expansion of the stone during extreme weather cycles.
- Low-Porosity Performance: Our factory-applied epoxy is specifically formulated for dense minerals like quartzite and slate that reject standard thinset.
- Thermal Resilience: The adhesive maintains structural integrity during freeze-thaw cycles by absorbing the stress of stone expansion.
- Big 10 Consistency: Performance remains uniform across our entire inventory, including heavy-weight Arctic Golden and Sierra Blue quartzite.
- UV Stability: UV-stable bonding agents prevent the adhesive seal from yellowing or degrading when panels face direct sunlight on exterior facades.
Frequently Asked Questions
Can I install stacked stone directly over an existing brick wall?
You can install stone directly over brick if the surface is unpainted and structurally sound. Clean the brick thoroughly with a wire brush and use a polymer-modified mortar for the bond. If the brick is painted, sealed, or crumbling, you must install a metal lath system or apply a masonry skim coat to create a reliable bonding surface that can support the weight of the natural stone.
What is the correct way to prepare a painted wall for stone veneer?
You must remove all paint using mechanical stripping or sandblasting. Paint acts as a bond-breaker that prevents mortar from sticking to the substrate. After stripping the paint and cleaning away dust, prepare framed walls by installing a weather-resistant barrier and metal lath. Apply a scratch coat to provide the necessary structural support for natural stone panels.
Is cement board required for all interior stone installations?
Cement board is not mandatory but remains the preferred substrate for interior walls and fireplaces. Since natural stone is significantly heavier than standard tile, we recommend reinforcing the board with metal lath and a scratch coat. You can apply stone directly to the cement board only if you use high-performance polymer-modified mortars and ensure all joints are properly taped and sealed.
How does wall flatness affect the look of interlocking panels?
Substrate variations greater than 1/8 inch cause lippage, creating visible gaps between panels. Our CNC precision-cut Z-shape and S-shape panels use a male-female interlocking system designed to camouflage joints. A perfectly flat surface is required for these pieces to lock together tightly, ensuring the seamless architectural finish that distinguishes natural stone from cheaper alternatives.
Can stone panels be installed over wallpaper?
No. You must completely remove all wallpaper and adhesive residue before beginning. The moisture in the mortar will dissolve wallpaper paste, causing the stone panels to peel away and fail. Use a scoring tool and a professional removal solution to strip the wall down to the bare substrate to ensure a permanent bond.
Final Thoughts
Skipping rigorous substrate preparation creates a structural liability that erodes project margins through delamination and costly rework. Our CNC-cut interlocking panels and “Big 10” quarry-direct inventory provide the mechanical precision needed to maintain architectural integrity across large-scale builds. Investing in 100% natural stone with a verified L/360 stiffness ratio protects your reputation and ensures your installations remain permanent.
Start a 300-square-meter trial order or request a sample kit to verify our “male-female” interlocking fitment firsthand. We provide high-definition pre-shipment videos of your specific batch so you can confirm quality before the balance payment. Contact our team today to discuss private label packaging or to check current stock levels for immediate dispatch to your port.
