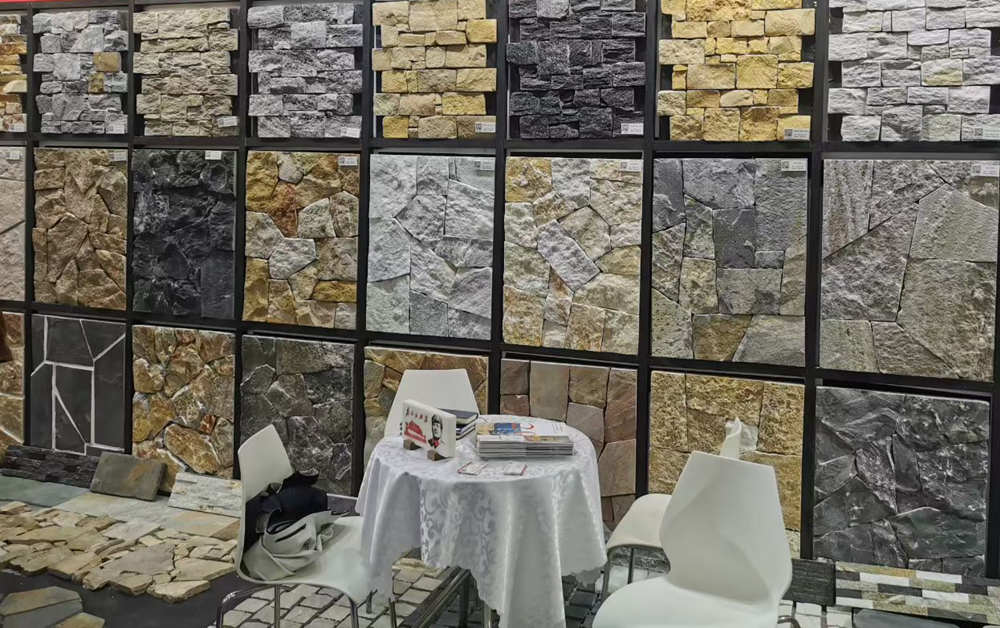
لقد قمت بتركيب مدفأة حجرية مكدسة مائة مرة. أنت تعرف التمرين: قم بتسوية الصف الأول، وامزج المجموعة الرفيعة، ثم قم بترتيب المفاصل. لكن عمليات الاسترجاعات التي تأكل ربحك - الحجر الذي تغير لونه، أو الملاط المتشقق، أو ارتفاع درجة حرارة التلفزيون - هذه ليست أخطاء مبتدئة. إنها نوع من الإخفاقات التي تتسلل إليك عندما تتوقف عن التساؤل عما يمكن أن يحدث من خطأ. يعد تغير لون السخام هو الشكوى الأولى في المواقد الحجرية الطبيعية، ويمكن الوقاية من معظمها باستخدام مادة مانعة للتسرب بقيمة 0.50 دولار لكل قدم مربع قبل رفع اللوحة الأولى. هذه ليست نظرية. هذا تقرير ميداني من نورستون.
يمكن أن تكلف عملية رد اتصال واحدة لإصلاح مدفأة غير مستوية ما بين 800 إلى 2500 دولار من العمالة والمواد - أكثر من التوفير الناتج عن شراء حجر رخيص. لذا، عندما تقوم بفحص أحد الموردين أو التخطيط لعملك التالي، فإن السؤال الحقيقي ليس ما إذا كان بإمكانك تثبيته أم لا. هذا ما تفتقده والذي سيكلفك. دعونا نستعرض الأخطاء السبعة التي تفصل بين التثبيت النظيف ومطالبة الضمان.
الخطأ رقم 1: تجاهل فحص الحرارة
قم بالقياس قبل التركيب.
يفترض معظم المقاولين المخضرمين أن الحجر نفسه سوف يفشل تحت الحرارة. التحقق من الواقع: الحجر الطبيعي يتحمل درجة حرارة 150 درجة فهرنهايت دون مشكلة. الفشل الحقيقي هو إزالة ترابط الملاط أو الركيزة تحت التكرار ركوب الدراجات الحرارية. هذا هو الضرر الناتج عن الحرارة الذي ستشاهده - المفاصل المتشققة، والألواح المجوفة، وعمليات الاسترجاعات.
- فحص درجة الحرارة القصوى: قم بتشغيل موقد الغاز على الاحتراق الكامل لمدة 30 دقيقة. قم بتوجيه مقياس حرارة يعمل بالأشعة تحت الحمراء على سطح صندوق الاحتراق. الذروة النموذجية: 150 درجة فهرنهايت، وأحيانًا أعلى بالقرب من القمة.
- رسم خرائط المنطقة الساخنة: مسح المنطقة المواجهة بأكملها. أي قراءة لسطح اللوحة أعلى من 140 درجة فهرنهايت تعني أنك بحاجة إلى درع حراري أو فجوة هوائية لا تقل عن 1 بوصة بين صندوق الاحتراق والقشرة الحجرية.
- اختيار الملاط: سوف تفشل المجموعة الرفيعة القياسية في ظل التدوير الحراري الذي يزيد عن 120 درجة فهرنهايت. قم بالتبديل إلى ملاط مرن ومقاوم للحرارة (على سبيل المثال، Laticrete 254 Platinum). يمتص التمدد دون أن يتشقق، ويمنع الترابط.
- موضع التلفزيون: إذا تم تركيب جهاز تلفزيون بالأعلى، فيجب أن تظل درجة الحرارة المحيطة أقل من 104 درجة فهرنهايت. استخدم رفًا لتشتيت الحرارة، وتحقق باستخدام مقياس الحرارة قبل وضع اللمسات النهائية.
لا يمكنك رؤية تلف التدوير الحراري حتى تسقط اللوحة. تخطي فحص الحرارة، وستقوم بالتسجيل للحصول على رد اتصال يتكلف 800 إلى 2500 دولار. قم بإجراء اختبار الحرق لمدة 30 دقيقة قبل أن يصعد أي حجر.
الخطأ رقم 2: تخطي منع تلطيخ السخام
تصبح بقع السخام دائمة بمجرد امتصاصها، حيث يقوم مانع التسرب المخترق بإيقافها قبل أن تبدأ.
الحجر الطبيعي مسامي. يحتوي سخام مدفأة الغاز على مركبات الكبريت من مادة المركبتان المضافة - والتي ترتبط بالحجر الخام بشكل أقوى من ارتباط سخام الخشب على الإطلاق. تخطي السداد وأنت تقوم بتسليم عميلك مكالمة في انتظار حدوثها. تُدرج بيانات نورستون الميدانية تغير لون السخام باعتباره الشكوى رقم 1 المواقد الحجرية الطبيعية.
- نوع السدادة: استخدم مادة مانعة للتسرب تخترق السيلان/السيلوكسان. تجنب المواد المانعة للتسرب التي تشكل الفيلم - فهي تحبس الرطوبة وتسبب الإزهار خلف الحجر.
- التغطية: ضعيه على كل وجه مرئي - الواجهة الأمامية والجوانب وأي حواف مكشوفة. لا بقعة الختم. تبلغ تكلفة التشبع الكامل حوالي 0.50 دولارًا لكل قدم مربع من الحجر.
- الاختبار أولا: قم دائمًا باختبار المادة المانعة للتسرب على قطعة عينة من نفس الكمية. يمكن لبعض المواد المانعة للتسرب أن تجعل الحجر داكنًا بنسبة 10-15%. إذا كان عميلك يريد المظهر الجاف، فانتقل إلى أداة التشريب ذات الأساس المذيب.
- عواقب التخطي: يمتص الحجر الطبيعي غير المختوم السخام بشكل دائم خلال موسم تسخين واحد. تتجاوز تكاليف التنظيف 1000 دولار ولا تزال تترك وصمة عار شبحية. تكلفة السداد هي جزء صغير من رد الاتصال.
معظم نصائح DIY تتجاهل الفرق الكيميائي: فالمركابتان الموجود في الغاز يخلق رابطة كبريتية لا يستطيع عمال النظافة المحترفون إزالتها إلا باستخدام كمادات عدوانية - ويمكنهم حفر الوجه الحجري. يحتاج طاقمك إلى معرفة ذلك قبل أن يقوموا بالختم، وليس بعد ثبات البقعة.
الخطأ رقم 3: الصف الأول غير محاذٍ
الخطأ بمقدار 1/8 بوصة عند الموقد يتحول إلى فجوة بمقدار 2 بوصة في الأعلى.
تعمل الارتفاعات العشوائية للأحجار المكدسة على تضخيم أي إمالة للصف السفلي. يتضاعف الانحراف بمقدار 1/8 بوصة عبر الدورة الأولى إلى أكثر من 2 بوصة في الجزء العلوي من وجه الموقد القياسي الذي يبلغ طوله 8 أقدام. تجبرك هذه الفجوة على حلاقة الألواح عند التاج، مما يؤدي إلى إنشاء حواف رفيعة تتشقق أثناء التدوير الحراري. إصلاح هذا بعد مجموعات الملاط يكلف يومين و800 إلى 2500 دولار من العمالة والمواد - وهو رد اتصال لا تريده.
- خط الطباشير 2″ فوق الموقد: ضع علامة على خط مرجعي 2″ لأعلى من سطح الموقد. وهذا يفسر السماكة المجمعة للحافة الحجرية (عادةً 1–1.5 بوصة) بالإضافة إلى طبقة ملاط مقاس ½ بوصة. التقط الخط بمستوى الليزر للتأكد من دقته؛ يتدلى خط السلسلة لأكثر من 4 أقدام ويسبب خطأ.
- عواقب التخطي: يؤدي تجاهل هذه الخطوات إلى ضمان صعود الدرج بشكل مرئي عند فتح صندوق الاحتراق. حتى مع الألواح المقطوعة بالأشعة تحت الحمراء من مصنع مثل Top Source Slate (الذي يحمل تفاوت حافة يبلغ ± 0.5 مم)، فإن الصف الأول غير المستوي يفسد الملاءمة. خطط لمدة 10-15 دقيقة إضافية في البداية لتوفير يوم كامل من إعادة العمل.
الخطأ رقم 4: قطع الزاوية الخاطئة
تعمل الزوايا على شكل حرف L الجاهزة على التخلص من أخطاء التلسين وتقليل النفايات بنسبة 15%.
يتطلب التلسين النظيف بزاوية 45 درجة على ألواح الدفتر الحجرية الطبيعية منشارًا رطبًا دقيقًا وشفرة ماسية في حالة جيدة. حتى الزاوية المنحرفة بمقدار 1/16 درجة في الزاوية تصبح فجوة مرئية بمجرد جفاف الألواح. يعد التقطيع على طول الحافة المقطوعة ثاني أكثر الشكاوى الميدانية شيوعًا - ويحدث ذلك عند استخدام شفرة مخصصة للخزف أو الحجر الطبيعي المقطوع. يشكل الغبار وحده (السيليكا البلورية) خطرًا قابلاً للتنفس تشير إليه إدارة السلامة والصحة المهنية (OSHA). إذا كنت تدفع القطع الجافة في الموقع، فإنك تحرق الشفرات بشكل أسرع وتخاطر بصحة الرئة لطاقمك.
- عقوبة ميتري الميدان: يستغرق تركيب قطعتين متريتين على زاوية مدفأة نموذجية من 15 إلى 20 دقيقة لكل زاوية ولا يزال ينتج مفصلًا يمكن أن يتحرك أثناء معالجة الملاط. يبلغ معدل الكسر عند الطرف الميتري 8-12% لكل مهمة.
- ميزة الزاوية L: قطع زاوية خارجية مسبقة الصنع (زوايا L) تصل إلى 90 درجة مقطوعة مسبقًا بحواف منتهية في المصنع. لا يوجد إعداد منشار ميتري، ولا توجد نقاط متكسرة، ولا يوجد تخمين للمحاذاة. تُظهر بيانات الإنتاج الداخلي أن الزوايا على شكل حرف L تقلل وقت التركيب في الموقع لكل زاوية بنسبة 55% وتقلل إجمالي النفايات الحجرية بنسبة 15% - تم التحقق من ذلك عبر أكثر من 40 مشروعًا تجاريًا للمواقد.
- متطلبات الأدوات: إذا كان يجب عليك استخدام أداة التلسين في الموقع، فاستخدم شفرة ماسية ذات حافة متواصلة مصنفة للكوارتزيت الصلب أو الرخام، وقم دائمًا بتغذية القطع بالمياه. يولّد القطع الجاف حرارة تؤدي إلى تشقق الحجر بشكل دقيق على طول خط القطع - وتنفتح هذه الشقوق لاحقًا تحت التدوير الحراري من المدفأة. يوفر تبديل الشفرة بقيمة 45 دولارًا وملحق الرش بقيمة 30 دولارًا أكثر من 300 دولارًا في أعمال رد الاتصال.
الخطأ رقم 5: نسيان التخطيط لتركيب التلفاز
إن قطع الحجر المثبت لإضافة حامل تلفزيون قد يؤدي إلى تشقق الألواح وإبطال الضمان.
لقد رأيت ذلك: مدفأة حجرية جاهزة، ثم رد اتصال لأن صاحب المنزل يريد جهاز تلفزيون. يمسك عامل التثبيت طاحونة، ويقطع قناة، ويكسر الحجر أو يضرب مسمارًا. الآن لديك الإصلاح. الخطوة الأكثر ذكاءً هي التخطيط للتركيب والأسلاك قبل رفع لوحة واحدة. يمكن أن تصل درجة حرارة أسطح مواقد الغاز إلى 150 درجة فهرنهايت، ومعظم الأجهزة الإلكترونية لديها درجة حرارة محيطة قصوى تبلغ 104 درجة فهرنهايت. تعني هذه الدلتا أن تصميم التركيب والتجويف ليسا اختياريين، بل هما إدارة هيكلية للحرارة.
- جبل مفصلي مقاوم للحريق: قم بتثبيت حامل مدفأة مدرج في قائمة UL والذي يسمح للتلفزيون بالإمالة والدوران بعيدًا عن مصدر الحرارة. قم بتثبيته مباشرة في المسامير أو في دعامات البناء، وليس فقط في الحجر. وهذا يمنع أحمال القص على الحجر ويتيح لك سحب التلفزيون للأمام لقياس درجة حرارة السطح قبل التثبيت.
- يجري الأسلاك ذات الجهد المنخفض قبل الحجر: اسحب كابلات HDMI والطاقة والبيانات من خلال قناة تمرير داخل الجدار (بقطر 1.5 بوصة على الأقل) قبل تكديس الحجر. افعل ذلك أثناء إعداد الإطار أو الركيزة. بمجرد تشغيل الحجر، فإن إضافة أي مسار للكابل يعني قطع الحجر أو سحب التركيب بالكامل - ليس أي منهما رخيصًا.
- تجويف تبديد الحرارة: قم ببناء فجوة هوائية عميقة بقياس 2 بوصة خلف الحامل باستخدام شرائط فراء أو صندوق معدني. يسمح هذا التجويف بتدفق الهواء الحملي لسحب الحرارة بعيدًا عن حجرة التلفزيون. بدونها، فإنك تحبس الحرارة وتسرع فشل الملاط. تمنع طبقة رقيقة مرنة ذات تصنيف حراري (على سبيل المثال، Laticrete 254 Platinum) الملاط من التفكك تحت التدوير الحراري المتكرر - وهو وضع الفشل الذي غالبًا ما يتم تشخيصه بشكل خاطئ على أنه تلف حجري.
الخطأ رقم 6: تغطية قذائف الهاون سيئة
تعد التغطية الرقيقة التي تقل عن 95٪ هي السبب الرئيسي لتصفيح القشرة الحجرية على المواقد.
بالنسبة لألواح الدفتر الحجرية المكدسة الطبيعية، فإن رابطة الملاط الكاملة ليست اختيارية. المعيار الصناعي للملاط ذو الطبقة الرقيقة هو تغطية 95% على الجزء الخلفي من كل لوحة. إذا هبطت إلى ما دون ذلك، فسوف تقوم بإنشاء بقع مجوفة سوف تتشقق تحت التدوير الحراري - تصل مواقد الغاز إلى درجة حرارة سطحية تصل إلى 150 درجة فهرنهايت، ويكشف هذا التوسع والانكماش اليومي عن ضعف الالتصاق خلال الموسم الأول.
- حجم المجرفة & زاوية: استخدم مجرفة ذات فتحة مربعة مقاس 1/2 بوصة مثبتة بزاوية 60 درجة. يؤدي هذا إلى ترسيب ارتفاع التلال الصحيح لحجر دفتر الأستاذ (الذي يزن 8-12 رطلاً لكل قدم مربع). زاوية 45 درجة تعطي حواف أرق وتقلل التغطية إلى أقل من 80%.
- دهن كل قطعة بالزبدة: الوجوه الحجرية المشقوقة الطبيعية لها ظهور غير منتظم. حتى لو كان ظهر اللوحة يبدو مسطحًا، فإن الأحجار الفردية داخل اللوحة تختلف. قم بدهن كل قطعة بالزبدة بطبقة رقيقة منزوعة الدسم قبل الضغط عليها في المجموعة الرقيقة الممسوحة. وهذا يضمن اتصال الملاط عبر السطح غير المنتظم بأكمله.
- لا تقم أبدًا بالسندات الفورية: قد توفر اللمسات أو نقاط الملاط الوقت على الجدران المسطحة، لكنها تضمن الفشل على المدفأة. الربط الموضعي يخلق جيوبًا هوائية؛ عندما تسخن المدفأة، يؤدي الهواء المتوسع إلى تفكك الحجر. من المعروف أن الألواح بأكملها تسقط في غضون 18 شهرًا في الوظائف التي يستخدم فيها عامل التثبيت كيس الجص بدلاً من المجرفة.
- اختيار الملاط مهم: بالنسبة لتركيبات المدفأة، لن تصمد المجموعة الرفيعة القياسية. استخدم ملاطًا رقيقًا مرنًا ومقاومًا للحرارة ومصممًا للقشرة الحجرية العمودية. تقاوم معدلات البوليمر التدوير الحراري بشكل أفضل من مخاليط الأسمنت الأساسية. إذا كانت المواصفات تتطلب Laticrete 254 Platinum أو ما يعادله، فلا تستبدله - ففارق الأكياس الذي يبلغ 30 دولارًا لكل مدفأة لا يستحق معاودة الاتصال.
تحقق من التغطية عن طريق سحب لوحة الاختبار بعد الصفوف القليلة الأولى. يجب أن يُظهر الجزء الخلفي تغطية بقذائف الهاون بنسبة 95% مع عدم وجود بقع عارية أكبر من الربع. أي أقل من ذلك، ستحتاج إلى ضبط زاوية المجرفة أو كمية الزبدة الخلفية.
الخطأ السابع: طلب حجر صغير جدًا
يحتاج تركيب المدفأة إلى 10% من النفايات، وليس 5% التي تستخدمها على الجدران المسطحة.
كل زاوية مقطوعة، كل شق حول فتحة صندوق الاحتراق، كل قطعة ذات شكل غريب تضيف نفايات. تشير بيانات الصناعة إلى أن عامل الهدر الحقيقي لتركيبات المواقد يبلغ 10%، أي ضعف نسبة الـ 5% التي تخطط لها للجدران العادية. اطلب أحجارًا أكثر بنسبة 10% من حساب قدمك المربع. نفاد لوحة واحدة ويتبقى لك الترقيع بقطعة غير متطابقة أو انتظار إعادة المخزون - وكلاهما يضمن معاودة الاتصال.
الجزء الثاني من الخطأ هو الطلب من حصص إنتاج مختلفة. يتغير لون الحجر الطبيعي ويتعرج بين الدفعات. إذا كان عليك إعادة ترتيب منتصف المهمة، فلن يتطابق الحجر الجديد. التخطيط للمستقبل: اطلب الكمية الكاملة من عملية إنتاج واحدة. يمكن للمصنع الذي يتتبع اتساق الدفعة - مثل تباين الاحتفاظ بـ Top Source Slate ضمن ±5% لكل دفعة - أن يشحن خلطات تم فرزها مسبقًا بحيث يبدو صندوقك الأول والأخير متطابقين.
خاتمة
إن تجاهل فحوصات الحرارة، أو تخطي مانع التسرب، أو محاذاة الصف الأول بشكل خاطئ يكلف أكثر من مجرد وقت. تسبب هذه الأخطاء السبعة غالبية عمليات الاسترجاعات على المواقد الحجرية المكدسة. قم بإصلاحها في البداية، وسيصمد التثبيت لعقود من الزمن دون تشقق أو تلطيخ أو تفكك الألواح.
يمكنك التخلص من الهدر ومشاكل مطابقة الألوان عن طريق اختيار الألواح ذات الحواف المقطوعة بالأشعة تحت الحمراء و مزيج الألوان التي تم فرزها مسبقًا. قم بمراجعة المواصفات الفنية لمجموعة التوريد التالية، واطلب عينات للتحقق من الاتساق قبل بدء المهمة.
الأسئلة المتداولة
ما هي إيجابيات وسلبيات الموقد الحجري المكدس؟
الإيجابيات: يوفر الحجر الطبيعي تشطيبًا متينًا وراقيًا يقاوم الحرارة ويضيف قيمة للممتلكات. السلبيات: الحجر غير المحكم يمتص السخام بشكل دائم ويمكن أن يتشقق إذا تجاوزت درجة حرارة السطح 140 درجة فهرنهايت بدون درع حراري. قم بالختم قبل التثبيت وقم دائمًا بقياس درجة حرارة صندوق الاحتراق القصوى أولاً.
هل يمكنك تركيب جهاز تلفزيون على مدفأة حجرية مكدسة؟
نعم، ولكن فقط إذا تأكدت من بقاء سطح الحجر أقل من 140 درجة فهرنهايت عند ذروة الاحتراق وقمت بتركيب درع حراري أو فجوة هوائية خلف التلفزيون. تجنب الحفر المباشر في الحجر الطبيعي. استخدم مقياس حرارة يعمل بالأشعة تحت الحمراء لرسم خريطة للنقاط الساخنة قبل تركيب الدعامة.
ما هي تكلفة تركيب مدفأة حجرية مكدسة؟
تختلف تكلفة التركيب حسب نوع الحجر وحجم الجدار ومعدلات العمالة، ولكن الميزانية تتراوح بين 15 إلى 30 دولارًا للقدم المربع للمواد والعمالة. خطط بمبلغ إضافي قدره 200 إلى 400 دولار أمريكي لاختراق المواد المانعة للتسرب وعوامل النفايات. احصل على عروض أسعار ثابتة للحجر والعمل قبل طلب المواد.
كم من الوقت يستمر الحجر المكدس؟
يمكن أن يستمر الحجر الطبيعي المكدس والمثبت بشكل صحيح لأكثر من 50 عامًا مع الحد الأدنى من الصيانة. يعتمد العمر الافتراضي على التعرض الداخلي والخارجي، ودورات التجميد والذوبان، وإعادة تطبيق مادة مانعة للتسرب كل 3-5 سنوات. تمنع الصيانة المنتظمة للمواد المانعة للتسرب تلف الرطوبة وتطيل عمر المنتج.
كيفية إخفاء أسلاك التلفزيون على الموقد الحجري؟
قم بتركيب قناة خلف الحجر مسبقًا أثناء البناء للحصول على مسار سلكي نظيف ومتوافق مع التعليمات البرمجية. بالنسبة للمواقد الموجودة، استخدم أغطية سلكية قابلة للطلاء تمتزج مع الملمس الحجري. استشر دائمًا كهربائيًا مرخصًا بخصوص الأسلاك الموجودة في الحائط.
