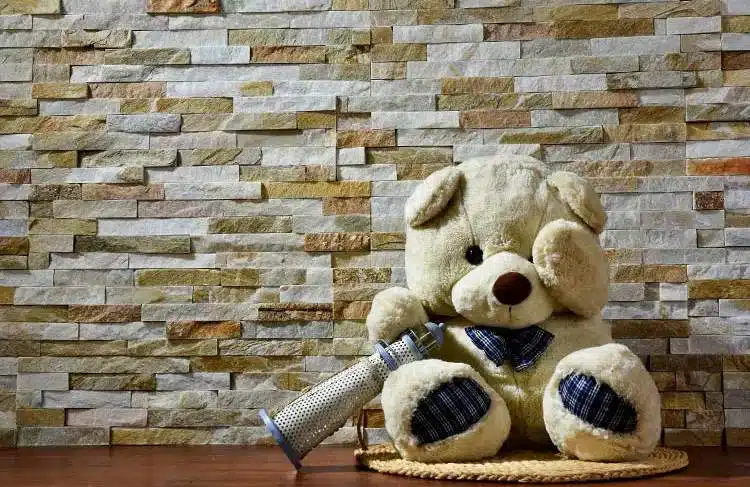
La riparazione di pannelli in pietra accatastati sciolti inizia ogni volta allo stesso modo: un appaltatore entra in una stanza e trova una pietra di registro da 12 libbre seduta sul focolare, pulita, senza residui di adesivo. Quella parte posteriore pulita racconta la storia: l'80% di questi fallimenti sono dovuti al substrato, non alla pietra. I muri di cemento verniciati con lattice non creano alcun legame meccanico, quindi la pietra si stacca facilmente sotto il suo stesso peso.
Prima di prendere l'adesivo, controlla il contenuto di umidità. IL Norma ASTM F2170 traccia il limite al 12%: qualsiasi valore superiore e il tuo adesivo per costruzioni in poliuretano da 450 psi sta combattendo una battaglia persa contro la migrazione dell'umidità. La tolleranza della qualità per una riparazione duratura inizia dalla lettura dell'umidità, non dalla scelta dell'adesivo. Scrivilo sull'ordine di lavoro prima di applicare un singolo tocco.
La soluzione in sé è semplice per una singola pietra sciolta. Un tubo di PL Premium a $ 6,49 batte ogni volta il viaggio minimo di $ 350 di un appaltatore. Ma la chiave è abbinare la riparazione alla modalità di guasto. Una singola pietra staccata da un supporto verniciato richiede un approccio diverso rispetto a tre pietre sciolte di fila, il che segnala il cedimento del substrato. Questa guida illustra entrambi gli scenari con le specifiche esatte dell'adesivo, i tempi di polimerizzazione e le formule di corrispondenza dei colori che mantengono la riparazione invisibile e permanente.
Diagnosi del motivo per cui la tua pietra impilata è saltata fuori
L'80% delle pietre sciolte risale ad un substrato verniciato, non alla pietra stessa.
Sollevi un pannello caduto dal pavimento, lo capovolgi e vedi il retro pulito senza residui di malta. Questo non è un difetto materiale: è un fallimento del legame. In nove chiamate su dieci per le quali ho ricevuto consulenza, la pietra non era il problema; cosa c'era dietro lo era. Esaminiamo le tre cause principali che effettivamente fanno staccare le pietre dai muri, iniziando da quella che viene ignorata più spesso.
Infiltrazione di umidità e i cicli di gelo-disgelo sono i killer silenziosi delle applicazioni esterne. L'acqua riesce a penetrare dietro il pannello attraverso giunti non sigillati o per azione capillare. Quando le temperature scendono sotto lo zero, l'acqua si espande di circa il 9%, generando una forza laterale sufficiente a tagliare un legame sottile valutato a soli 250 psi. Vedrai efflorescenze (depositi bianchi e polverosi) o macchie scure vicino al bordo inferiore della pietra caduta. Se stai riparando un muro esterno e noti uno dei segni, non limitarti a incollare nuovamente la pietra. Devi prima riparare il piano di drenaggio o farai la stessa riparazione il prossimo inverno.
- Soglia di umidità: Secondo ASTM F2170, l'umidità del substrato deve essere inferiore al 12% prima di qualsiasi applicazione di adesivo. Un misuratore di umidità del tipo a spillo da $ 30 si ripaga da solo al primo lavoro.
- Zona a rischio gelo-disgelo: Qualsiasi clima con più di 15 cicli di gelo-disgelo all'anno (zona di resistenza alle piante USDA 6 e più fredda) richiede una barriera al vapore e uno spazio di drenaggio di 1/4 di pollice dietro la pietra.
La forza inadeguata del legame di solito è dovuta a un errore: il legame spot invece del burro dell'estremo. È stato osservato che gli installatori applicavano cinque colpi di malta su un 12×Pannello registro da 6 pollici e lo definisco buono. La pietra naturale pesa tra 8 e 13 libbre per piede quadrato. Tali macchie potrebbero trattenere durante l'installazione, ma dopo aver indurito il ritiro e il movimento termico, trasportano solo circa il 40% dell'area di contatto richiesta. La soluzione è meccanica: distribuire il thinset modificato con polimero utilizzando una spatola dentata da 1/2 pollice sia sul substrato che sul retro della pietra, quindi premere fino a quando non appare la compressione su tutti e quattro i bordi.
Integrità del substrato i problemi sono quelli in cui la maggior parte degli appaltatori viene bruciata da cose che non hanno costruito da soli. Il muro a secco verniciato con lattice è il peggior trasgressore: la vernice crea una superficie liscia con presa meccanica pari a zero per i prodotti cementizi. Se stai riattaccando la pietra su un muro dipinto esistente, devi scarificare la superficie con carta vetrata a grana 36 o installare sopra un pannello di supporto in cemento. Anche i substrati flessibili come OSB o compensato causano problemi perché il rivestimento rigido in pietra non può sopportare una deflessione oltre L/360. Verificare la presenza di crepe sottili nel substrato prima di mescolare qualsiasi adesivo; se li trovi, affronta prima il movimento strutturale o la riparazione fallirà entro sei mesi.
Metodo di riparazione passo passo per singole pietre sciolte
La diagnosi precoce è fondamentale: l’80% delle pietre sciolte risale a supporti verniciati o sigillati, non alla pietra stessa.
Se hai una sola pietra allentata e il substrato è solido, la riparazione è semplice. Salta il set sottile per le correzioni localizzate: hai bisogno di un adesivo per costruzioni in poliuretano (PL Premium) che offra una resistenza al taglio di 450 psi, quasi il doppio dei 250 psi del set sottile standard. La superficie posteriore di fabbrica dei nostri pannelli ha una struttura aperta di 3–5 mm che afferra la resina epossidica in modo migliore del 40% rispetto a un retro verniciato o sigillato, quindi non è necessario molare la pietra.
- Passaggio 1: rimozione della vecchia malta: Raschiare ogni granello di vecchio adesivo o malta dal retro della pietra e dalla cavità del muro utilizzando una spazzola metallica e una spatola. Qualsiasi residuo, anche una pellicola sottile, crea un piano di cedimento. Aspirare la polvere; una superficie pulita è l'unica superficie che si lega.
- Passaggio 2: applicazione dell'adesivo: Utilizzare un adesivo da costruzione in poliuretano classificato per la pietra (come PL Premium). Stendere uno strato uniforme sia sul retro della pietra che sul muro utilizzando una spatola da 1/4″ x 1/4″ x 1/4″ spatola a denti quadrati. Ciò garantisce una copertura completa e una resistenza al taglio di 450 psi. La pietra pesa 8-13 libbre per piede quadrato, quindi l'incollaggio puntuale non è sufficiente: imburrare l'intera superficie.
- Passaggio 3: bloccaggio e polimerizzazione: Premi saldamente la pietra in posizione. Utilizzare distanziatori per fossette per cartongesso senza pizzicare per applicare una pressione di serraggio uniforme senza rompere la pietra. Lasciare i morsetti in posizione per 24 ore a una temperatura ambiente di 50°F o superiore. Se la temperatura scende sotto i 40°F, raddoppia il tempo di polimerizzazione portandolo a 48 ore. Non effettuare il lavaggio a pressione in prossimità della riparazione per almeno 14 giorni.
Riempimento degli angoli scheggiati & Volti senza ripannellatura
Il liquame preparato in fabbrica nasconde i trucioli in meno di 20 minuti senza rimuovere un singolo pannello.
La maggior parte degli installatori presuppone che un angolo scheggiato significhi sostituire l'intera pietra. Si tratta di una perdita materiale di $ 50-$ 80 più manodopera per ripannellare. La soluzione di fabbrica è una sospensione pigmentata che si lega meccanicamente alla frattura e si asciuga per adattarsi al taglio della vena originale. Non è necessario estrarre la pietra o sfumare un'intera sezione.
- Base per liquami: Inizia con la polvere per malta secca per piastrelle n. 400: non è carteggiata e accetta il pigmento senza formare grumi. Rapporto di miscelazione: 3 parti di malta per 1 parte di pigmento di ossido di ferro grezzo in volume. L'ossido di ferro è stabile ai raggi UV; la vernice acrilica del negozio di artigianato svanirà con l'esposizione esterna entro 6 mesi.
- Scelta del legante: Utilizzare il liquido adesivo acrilico invece dell'acqua. L'acqua evapora troppo velocemente e lascia una superficie gessosa. Il liquido acrilico offre un tempo di lavorazione di circa 12 minuti prima che l'impasto liquido si irrigidisca, il che è sufficiente per tre o quattro chip per lotto.
- Prova di consistenza: Mescolare finché l'impasto non mantiene la consistenza del burro di arachidi: abbastanza rigido da rimanere in una scheggiatura verticale senza cedimenti, abbastanza bagnato da poter essere liscio con la spatola. Se si sbriciola sulla spatola, aggiungere il liquido legante in gocce da 5 ml.
Quando chiamare un professionista o aggiustarlo da soli
Un singolo tubo di adesivo costa $ 6,49.
I conti sono semplici. Una pietra sciolta, un tubo di adesivo per costruzioni in poliuretano: $ 6,49 in qualsiasi negozio di ferramenta. Se possiedi già una pistola per calafataggio e una pinza, la tua spesa totale è inferiore a $ 10. Un appaltatore di restauro addebiterà una tariffa minima di viaggio di $ 350 prima di toccare una singola pietra. Con una riparazione su una sola pietra, il percorso fai-da-te consente di risparmiare $ 340. Questo è il 98% del costo pro e l’adesivo stesso fornisce una resistenza al taglio di 450 psi – più che sufficiente per una pietra mastro da 10 libbre.
Ma il calcolo cambia quando si osservano più di tre pietre sciolte nella stessa area. A quel punto, il problema raramente è l’adesivo. È un cedimento del substrato. Il costo per riparare il muro a secco, sostituire il pannello di cemento o risolvere un problema di umidità dietro il muro consumerà tutti i risparmi derivanti dal fai-da-te. Il minimo di 350 dollari di un appaltatore inizia a sembrare una tassa di ispezione che impedisce una riparazione strutturale di 5.000 dollari in futuro.
Ecco la dura verità che la maggior parte degli articoli tralascia: se hai una sola pietra sciolta, il 90% delle volte il retro di quella pietra è pulito, senza malta attaccata ad essa. Ciò significa che il legame originale non è riuscito perché il substrato era verniciato o sigillato. Puoi riparare quella pietra con un tubo da $ 6,49 di PL Premium e una cura di 24 ore a 50 ° F o superiore. Se ci sono diverse pietre che si staccano con la malta ancora attaccata al retro, il substrato stesso si sta muovendo o sta cedendo. Questa non è una soluzione da $ 6,49.
- 1–2 pietre sciolte in un'area: Fai da te con adesivo per costruzioni poliuretanico. Costo totale inferiore a $ 15. Tempo di polimerizzazione 24 ore a 50°F+.
- 3+ pietre sciolte di fila: Chiama un professionista. Probabile cedimento del substrato, infiltrazione di umidità o movimento strutturale. La tariffa minima di viaggio di $ 350 è un'assicurazione economica.
- Angolo o faccia scheggiata: Fai da te con liquame abbinato in fabbrica. Malta #400, pigmento di ossido di ferro, liquido adesivo acrilico. Sotto i 10 dollari, si miscela in 20 minuti.
- Danni causati dall'acqua visibili dietro il pannello: Chiama un professionista. Richiede la rimozione della sezione del pannello, la sostituzione della barriera al vapore e la risoluzione della fonte di umidità. Non è un progetto del fine settimana fai-da-te.
L'errore più comune riscontrato è che gli appaltatori tentano di utilizzare chiodi liquidi standard sulla pietra accatastata esterna. La temperatura massima di servizio su LN standard è 120°F. Su un muro esposto a sud in estate, la superficie della pietra raggiunge i 150°F. Il legame si ammorbidisce, la pietra scivola. Usa il grado FRP LN-2000 se segui questa strada, oppure mantieni il poliuretano in due parti. La resistenza al taglio di 450 psi resiste a 180°F.
Segni che necessitano di aiuto professionale: più pietre sciolte in linea retta (indica un guasto della giuntura del substrato), substrato incrinato o sgretolato dietro la pietra caduta, efflorescenze bianche o macchie di acqua scura sulle pietre adiacenti o qualsiasi pietra che si è staccata con la malta ancora completamente attaccata al retro. Quelli non sono guasti adesivi. Quelli sono fallimenti strutturali. Un appaltatore prenderà un misuratore di umidità e controllerà le letture ASTM F2170. Se la lastra di cemento o il pannello di supporto hanno un contenuto di umidità superiore al 12%, nulla di ciò su cui incollerai rimarrà.
Conclusione
Un singolo pannello di pietra sciolto non deve significare uno strappo completo del muro. Il costo della riparazione è di 6,49 dollari per un tubo di PL Premium e 20 minuti di lavoro con liquame, contro un viaggio minimo di 350 dollari da parte dell'appaltatore. L'80% dei fallimenti è dovuto alla preparazione del substrato, non alla pietra stessa. Controlla il livello di umidità, usa l'adesivo poliuretanico giusto e abbina il colore con una sospensione pigmentata. Questa è la differenza tra una correzione una tantum e una richiamata ricorrente.
Prima di iniziare la prossima riparazione, prendi la tabella di compatibilità degli adesivi dal nostro sito. Elenca i tempi esatti di polimerizzazione, i limiti di temperatura e quali prodotti funzionano con il tuo tipo di pietra. Puoi anche richiedere un campione corrispondente alla patch spedito entro 48 ore. In questo modo, il corrispondenza dei colori è garantito prima di mescolare un singolo lotto.
Domande frequenti
Posso utilizzare i chiodi liquidi per installazioni esterne di pietre accatastate?
Dovresti evitare le formulazioni standard di unghie liquide perché il loro limite massimo di temperatura di servizio è limitato a 120°F. Nelle calde giornate estive, la pietra naturale esterna esposta a sud può facilmente superare i 150°F, causando l'ammorbidimento e il cedimento degli adesivi standard. Per le applicazioni esterne, devono essere utilizzati solo prodotti specializzati per carichi pesanti come il grado FRP LN-2000 o gli adesivi poliuretanici strutturali.
Un pannello contabile rattoppato o riattaccato rimarrà visibile dopo la riparazione?
Un pannello riparato può rimanere completamente invisibile se viene seguito un protocollo di corrispondenza dei colori adeguato. Invece della malta grigia standard, dovresti applicare una sospensione personalizzata composta da polvere di malta secca per piastrelle n. 400, pigmenti di ossido di ferro grezzo e liquido legante acrilico. L'abbinamento dei codici dei toni di base allo specifico taglio della vena naturale garantisce un perfetto occultamento di crepe o scheggiature.