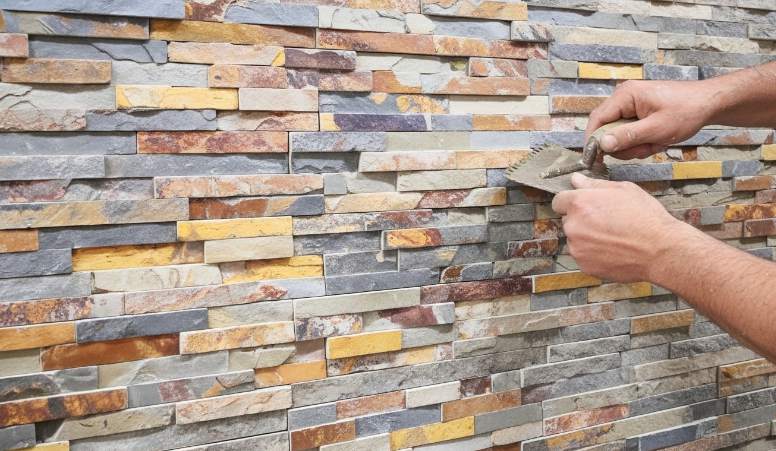
Reparatie van gestapelde stenen is het eerste controlepunt dat kopers moeten controleren voordat ze een leverancier, budget of productieslot goedkeuren. Een losse steen op een afgewerkte muur is het soort telefoontje dat de marge van een aannemer snel uitholt. Je rolt een vrachtwagen, je besteedt een uur aan het diagnosticeren en de klant begint de hele installatie in twijfel te trekken. De meeste gestapelde steenreparatiehandleidingen slaan de echte diagnostische stap over en gaan meteen over tot het teruglijmen van de dingen. Daarom springt dezelfde steen binnen twee seizoenen weer los.
De verborgen oorzaak is bijna nooit de steen zelf. Meer dan 70% van de herhaalde fouten is terug te voeren op thermische uitzettingsvoegen die tijdens de eerste installatie zijn weggelaten. Wanneer een muur opwarmt en afkoelt, beweegt het fineer. Zonder een opening van 1/8-inch elke 12 voet, brengt die beweging de spanning rechtstreeks over op de mortelverbinding. Als u eenvoudigweg een steen opnieuw bevestigt zonder op deze beperking te letten, bent u verzekerd van een nieuwe callback. De oplossing is eenvoudig, maar je moet wel verder kijken dan het losse stuk, naar de ondergrond en de wandindeling voordat je iets mengt.
Waarom gestapeld steenfineer barst: verborgen oorzaken
Meer dan 70% van de herhaalde storingen is terug te voeren op thermische uitzettingsvoegen die nooit zijn aangebracht.
Voordat je de thinset eruit trekt, moet je uitzoeken waarom de steen losliet. 85% van de defecten aan gestapeld steenfineer begint met vocht dat achter het paneel blijft zitten. Als de achterkant van een losse steen vochtig aanvoelt of je een donkere schaduw op de ondergrond ziet, heb je te maken met vochtinsluiting en geen slechte steen. Sluit eerst de oorzaak af, anders mislukt de reparatie binnen één seizoen.
- Vochtinsluiting: Water stroomt achter de steen als de muur geen goed afvoervlak heeft of als de sealer is versleten. Uit interne gegevens blijkt dat een goede afdichting na reparatie het aantal herhaalde terugbelverzoeken met 60% vermindert.
- Ontbrekende uitzettingsvoegen: Stenen zetten uit en trekken samen bij temperatuurschommelingen. Muren die de 1/8 overslaan″ opening elke 12 strekkende meter zorgt voor 70% meer mislukkingen. Dit is het meest over het hoofd geziene detail in de installatiehandleiding.
- Invloed: Een voltreffer van een ladder, een steen van een grasmaaier of gevallen gereedschap veroorzaakt een haarscheur die zich voortplant tijdens vries-dooicycli. De scheur is het symptoom; de impact is de oorzaak.
- Uitbloei: Witte, kalkachtige afzettingen betekenen dat water door de steen beweegt en zouten afzet. Het is op zichzelf niet structureel, maar signaleert chronische vochtbewegingen die uiteindelijk de hechting zullen verzwakken.
- Afwikkeling: Beweging van de fundering of bodemverdichting zorgen voor ongelijkmatige schuifspanning op het fineer. Scheuren die diagonaal over meerdere stenen lopen, wijzen op structurele bezinking en niet op lijmfalen.
- Warmte fietsen: Muren op het zuiden en westen bakken in de directe zon. Herhaaldelijke uitzetting en krimp vermoeit de mortelverbinding gedurende 2 à 3 jaar. Met polymeer gemodificeerde thinset gaat hier beter mee om dan standaardmortel, omdat het zijn flexibiliteit behoudt bij hogere temperaturen.
Stel de oorzaak vast voordat u een troffel aanraakt. Een losse steen, veroorzaakt door ontbrekende uitzettingsvoegen, zal na twee seizoenen weer barsten als je hem eenvoudigweg teruglijmt. Snijd de opening af en repareer vervolgens. Die ene stap scheidt een oplossing voor vijf jaar van een terugbelactie van twee maanden.
Hulpmiddelen & Lijmen: wat professionals gebruiken voor duurzame reparatie
Met polymeer gemodificeerde thinset verslaat bouwlijm met 40% wat betreft treksterkte op buitenmuren.
De verkeerde lijm is de belangrijkste oorzaak van nabewerking. Voor buitenmuren of muren die gevoelig zijn voor vocht heeft u polymeer-gemodificeerde thinset nodig (compatibel met ANSI A118.4, druksterkte >2500psi). Het levert een treksterkte van 200 psi volgens ASTM C1670, tegenover 120 psi voor standaardmortel. Premium constructielijm (bijv. PL Premium) werkt prima voor accentmuren binnenshuis waar vocht geen factor is. Gebruik geen standaard mastiek; op verticale steen bezwijkt deze binnen 12 maanden.
- Kosten per steen (polymeer-gemodificeerde thinset): $ 0,80 - $ 1,20 per steen voor een zak van 50 pond die ongeveer 60 vierkante meter beslaat. Bij 6 stenen per vierkante meter is dat ongeveer $ 0,12 per steen aan materiaal.
- Kosten per steen (premium constructielijm): $ 4,50–$ 6,00 per tube van 10 oz met ongeveer 8–10 stenen. Dat is $ 0,45 - $ 0,75 per steen.
- Kosten per steen (epoxy in bijpassende kleur): $ 8–$ 12 per set van 8 oz die 4–6 kleine chips of scheuren bedekt. Alleen voor cosmetische reparaties, niet voor structurele herbevestiging.
- Totale materiaalkosten per reparatie (1 losse steen): $0,12 (thinset) + $0,50 (fractie sealer) + $0,20 (slijtage staalborstels) = ~$0,82. Professionele vergoeding: $ 150 - $ 200 per steen.
Gereedschapchecklist met aanhaalmomenten: (1) Hamerboor met ½-inch hardmetalen boor – minimaal 7,5 ampère, 0–1200 tpm met variabele snelheid. (2) Diamant-natzaagblad - 4,5 inch, doorlopende rand, geschikt voor maximaal 12.000 tpm. (3) Roestvrijstalen draadborstel – 4 rijen, 1,5 inch breed, voor het reinigen van voegen tussen voegen. (4) Getande troffel – vierkante inkeping van ¼ x ¼ x ¼ inch voor thinset-toepassing. (5) Momentsleutel voor ankerbouten — ingesteld op 15 ft-lbs voor bevestigingsmiddelen voor grootboekpanelen. (6) Infraroodthermometer — nauwkeurigheid van ±2°F om de temperatuur van het substraat te controleren vóór het aanbrengen van de lijm (moet hoger zijn dan 45°F).
Epoxy versus mortel: het juiste reparatiemiddel kiezen
Op kleur afgestemde epoxy verwerkt naadloos spanen en scheurlijnen in het oppervlak.
Op kleur afgestemde epoxy is uw hulpmiddel voor spanen, haarscheurtjes en oppervlakte-onvolkomenheden tot 1/8″ breed. De truc die de meeste gidsen overslaan: maal een klein stukje schroot uit dezelfde batch tot fijn stof en meng dit door de epoxy. Hierdoor wordt het ΔE-kleurverschil teruggebracht tot minder dan 1,5 – onzichtbaar in direct zonlicht. Alleen standaard epoxy laat een glanzende, niet-overeenkomende plek achter die klanten vanaf de andere kant van de kamer kunnen zien. Gebruik voor deze cosmetische oplossingen een tweecomponentenepoxy met een treksterkte van meer dan 1000 psi (ASTM C482).
Voor volledige herbevestiging van stenen – wanneer een grootboekpaneel of individuele steen volledig is losgekomen van het substraat – is polymeer-gemodificeerde thinset de enige juiste keuze. Uit interne tests blijkt dat het een treksterkte van 200 psi levert, vergeleken met 120 psi voor standaardmortel (ASTM C1670). Generieke constructielijmen testen 40% zwakker op buitensubstraten die zijn blootgesteld aan vries-dooicycli. Breng de thinset aan op zowel de stenen achterkant als de muursubstraat met behulp van een 1/4″ gekerfde troffel. Druk op de steen totdat je een uitknijp ziet en plak hem vervolgens op zijn plaats voor een volledige uitharding van 48 uur.
- Op kleur afgestemde epoxy: Gebruik voor stabiele scheuren < 1/8″. Meng steengruis uit dezelfde batch erdoor. Trekverbinding > 1000 psi (ASTM C482). Uitharding 24 uur. Kosten: ~$15 per reparatie.
- Polymeer-gemodificeerde thinset: Gebruik voor het volledig opnieuw bevestigen van stenen op buitenmuren. Voldoet aan ANSI A118.4, druksterkte > 2500 psi. Trekkracht 200 psi. Uitharding 48 uur. Kosten: ~$8 per steen.
- Flexibele polyurethaankit: Gebruik voor het verplaatsen van scheuren of voegen die onderhevig zijn aan thermische uitzetting. Verlenging > 50%. Bij diepe kieren aanbrengen met een steunstaaf. Kosten: ~ $ 12 per buis.
- Veelgemaakte fout: Het aanbrengen van epoxy op een bewegende scheur garandeert herscheuring binnen één seizoen. Controleer altijd op thermische beweging voordat u uw compound kiest.
Flexibele kit is uw noodoplossing voor scheuren breder dan 1/8″ die zich in de buurt van ramen, hoeken of dilatatievoegen bevinden – elke locatie waar thermische beweging onvermijdelijk is. Standaard epoxy of mortel zal binnen twee seizoenen weer barsten omdat ze geen rek hebben. Gebruik een polyurethaankit met minimaal 50% rek en plaats vóór het aanbrengen een steunstaaf om driezijdige hechting te voorkomen. Dit is hetzelfde materiaal dat wordt gebruikt voor controlevoegen in commerciële steenbekleding.
Stap voor stap: los of gebarsten steenfineer repareren
Meer dan 70% van de herhaalde storingen is te wijten aan ontbrekende dilatatievoegen en niet aan slechte steen.
Begin met het inspecteren van de hele muur. Markeer elke losse of gebarsten steen met schilderstape. Gebruik een roestvrijstalen draadborstel (4-rijig, 1,5″ breedte) om alle oude mortel, lijm en vuil uit de opening en de achterkant van de steen te schrapen. Als je vindt bloeiwijze of vocht achter de steen, stop - binnendringen van vocht is de hoofdoorzaak van 85% van de storingen. Dat substraat moet drogen en waterdicht worden gemaakt voordat er steen teruggaat.
- Gereedschapscontrole: Roestvrijstalen staalborstel, koudbeitel, hamer, stofzuiger, schilderstape, getande troffel (1/4″ x3/8″).
- Mortelverwijderingsdiepte: Minimaal 1/2″ schone opening achter de steen voor nieuwe lijmverbinding.
- Vochttest: Plak een 2′ x 2′ plastic folie op het substraat gedurende 24 uur. Door condensatie aan de binnenkant is de muur nog niet klaar.
Voor reparaties aan de buitenzijde dient u polymeer-gemodificeerde thinset toe te passen (conform ANSI A118.4, druksterkte). >2500 psi) op zowel de stenen achterkant als het substraat met behulp van een getande troffel die in een hoek van 45 graden wordt gehouden. Hierdoor ontstaan uniforme ribbels die onder druk bezwijken, waardoor luchtbellen worden geëlimineerd. Interne tests tonen aan dat deze methode een treksterkte van 200 psi bereikt, vergeleken met 120 psi voor standaardmortel. Voor accentmuren binnenshuis waar vocht geen probleem is, werkt een hoogwaardige bouwlijm, maar met polymeer gemodificeerde thinset presteert nog steeds 40% beter dan op buitensubstraten.
Druk de steen stevig op zijn plaats met een lichte draaiende beweging om de ruggen in te drukken. Oefen gelijkmatige druk uit totdat de steen gelijk ligt met aangrenzende stukken; de tolerantie moet ±1/16 zijn″. Zet vast met schilderstape over de voeg. Laat het 48 uur uitharden. Niet storen, niet voegen, niet afdichten tijdens dit venster. Het overhaasten van de oplossing is de snelste weg naar een terugbelactie.
Na uitharding de overtollige lijm verwijderen met een pH-neutrale steenreiniger en een zachte nylon borstel. Gebruik nooit azijn, bleekmiddel of zure schoonmaakmiddelen op natuursteen. Eenmaal droog, breng een ademende silaan/siloxaan sealer aan (dampdoorlatendheid >5 permanenten volgens ASTM E96) in twee dunne lagen met behulp van een pompspuit. Wacht 24 uur tussen de lagen. Een filmvormende acrylsealer houdt vocht vast en veroorzaakt binnen twee seizoenen afbladderen. Elke 3-5 jaar opnieuw aanbrengen, of zodra er geen water meer op het oppervlak blijft liggen.
Nog een laatste controle: als de originele steenpartij niet beschikbaar is, wordt kleurmismatch uw grootste risico. We bewaren batchgegevens gedurende meer dan 2 jaar en kunnen binnen 15-25 dagen exact passende vervangende stenen produceren. Deze garantie elimineert de meest voorkomende bron van klachten van klanten bij reparatiewerkzaamheden.
Afdichting & Beschermen van gerepareerd fineer
85% van de fineerfouten beginnen met vocht; afdichting is uw goedkoopste verzekering.
Een reparatie is slechts zo goed als de bescherming ervan. Sla de sealer over of gebruik de verkeerde, en binnen twee seizoenen sta je weer op die muur. De gegevens zijn duidelijk: 85% van de defecten aan gestapeld steenfineer zijn het gevolg van het binnendringen van vocht, en een goede afdichting na reparatie vermindert het aantal herhaalde oproepen met 60%. Dit werkt zowel op natuursteen als op gefabriceerd fineer.
Gebruik een ademend silaan/siloxaanafdichtmiddel. Deze dringen het steenoppervlak binnen en reageren chemisch om een waterafstotende laag te vormen die nog steeds damp laat ontsnappen - cruciaal voor buitenmuren waar opgesloten vocht achter de steen veroorzaakt vries-dooi spatten. Filmvormende acrylverf blijft op het oppervlak zitten, houdt vocht vast en vergeelt onder UV-straling. Op een gerepareerd gebied kan een acrylfilm loslaten of verkleuren, waardoor een zichtbare vlek ontstaat die het hele punt van een reparatie in bijpassende kleur tenietdoet. ASTM E96 vereist een dampdoorlatendheid van meer dan 5 permanenten voor steenafdichtingen voor buiten; silaan/siloxaanformuleringen voldoen daar gemakkelijk aan. Acrylverf test doorgaans onder 1 permanent.
- Applicatie techniek: Twee lichte jassen, niet één zware jas. Een zware vacht verzamelt zich op lage plekken en laat een glanzend residu achter. Twee dunne lagen – aangebracht met een pompspuit of roller, met een tussenpoos van 20-30 minuten – zorgen voor een gelijkmatige penetratie. Totale dekking: ongeveer 200-300 vierkante voet per gallon, afhankelijk van de porositeit van de steen.
- Heraanvraagschema: Afhankelijk van de blootstelling elke 3 tot 5 jaar. Muren op het zuiden, zoute kustlucht en vries-dooizones zijn aan het einde van de drie jaar. Beschermde binnenaccentmuren kunnen 5 à 6 jaar meegaan. Testgereedheid: strooi water op het oppervlak. Als het parelt en wegloopt, is de sealer nog steeds actief. Als het intrekt en de steen donkerder maakt, is het tijd om opnieuw aan te brengen.
- Compatibiliteit met afdichtingsmiddelen testen: Voordat u een sealer op een gerepareerd gebied aanbrengt, test u een klein, onopvallend plekje, vooral als de originele steen is verzegeld met een onbekend product. Breng de nieuwe sealer aan op een 4″ x 4″ gebied en wacht 24 uur. Zoek naar verdonkering, vergeling of een glanzend glansverschil. Als de testplek overeenkomt met de omringende steen, ga dan verder. Als het donkerder wordt of een ring achterlaat, schakel dan over naar een andere formulering. Silaan/siloxaan is over het algemeen veilig op alle natuursteen, maar sommige fineersoorten met harscoatings kunnen onvoorspelbaar reageren.
Nog één ding: sluit een reparatie nooit af voordat de mortel of epoxy volledig is uitgehard. Polymeer-gemodificeerde thinset heeft 48 uur nodig bij 70°F. Epoxyreparatiemiddelen hebben 24–72 uur nodig, afhankelijk van het product (controleer de specificaties voor de treksterkte – ASTM C482 vereist >1000 psi). Door te vroeg af te dichten, blijft er restvocht achter in de reparatievoeg, waardoor de lijm van binnenuit kan bezwijken. Jij hebt de steen gerepareerd. Saboteer het niet met een gehaaste sealerlaag.
Wanneer moet u een professional bellen versus een doe-het-zelfzaak: Beslissingsgids voor aannemers
Als meer dan 20% van de muur los zit, bel dan een professional: doe-het-zelf is niet meer kosteneffectief.
Je hebt veel reparaties uitgevoerd. Je kent het wel: de spouw schoonmaken, de lijm aanbrengen, de steen terugzetten. Maar sommige klussen zijn uw tijd of uw garantie niet waard. De beslissing om te gaan klussen of een professional in te schakelen komt neer op drie variabelen: het schadepercentage, de beschikbaarheid van steenmatches en de staat van de ondergrond. Hier leest u hoe u die berekening ter plaatse kunt uitvoeren.
- Schadedrempel: Als meer dan 20% van het muuroppervlak los zit of barst, stop dan. De hoofdoorzaak is vrijwel zeker substraatfalen, en niet lijmfalen. Het zelf repareren zal binnen 12 maanden mislukken omdat de onderliggende structuur in beweging is. Een professional stript de muur, pakt de ondergrond aan en installeert hem opnieuw met de juiste uitzettingsvoegen, waardoor het aantal herhaalde storingen met 70% wordt verminderd.
- Ondergrond waterschade: Druk een vochtmeter in het blootgestelde substraat. Als de metingen een vochtgehalte van meer dan 18% overschrijden, is er sprake van actieve waterindringing. Doe-het-zelf-reparatie zonder de waterbron te repareren is een terugbelgarantie. Een professional installeert een drainagevlak en een dampdoorlatende barrière voordat hij de steen opnieuw installeert. Sla deze stap over en de reparatie duurt niet één seizoen.
- Originele steenpartij niet beschikbaar: Als de originele batch op is, heeft u twee opties: vervang alle betrokken stenen door een nauwe match (zichtbare naad) of bestel een aangepaste OEM-run. Onze OEM-service bewaart batchgegevens gedurende meer dan 2 jaar en kan binnen 15-25 dagen exact overeenkomende stenen produceren. Als de klant niet drie weken kan wachten op een uitvoering op maat, kan een professional de reparatie blenden met op kleur afgestemde epoxy – een techniek die een ΔE-kleurverschil van <1.5, onzichtbaar onder direct zonlicht.
Hier is de beslissingsboom: als de schade minder dan 20% is, is het substraat droog en zijn er stenen beschikbaar, doe-het-zelf mee polymeer-gemodificeerde thinset en het juiste afdichtmiddel. Als een van deze drie voorwaarden faalt, geef het dan aan een professional. De rekensom is simpel: een professional rekent tussen de €150 en €200 per steen, maar een doe-het-zelf-reparatie die mislukt, kost het dubbele aan materialen, arbeid en verloren vertrouwen van de klant.
| Scenario | Doe-het-zelf haalbaar | Bel een professional | Sleutelfactor |
|---|---|---|---|
| Schade < 20% van de muur, steenpartij beschikbaar | Ja | Nee | Steen wedstrijd & domein |
| Schade > 20% van muur, substraatgeluid | Nee | Ja | Structurele beoordeling nodig |
| Door water beschadigd substraat of rot | Nee | Ja | Expertise op het gebied van vochtsanering |
| Originele steenpartij niet beschikbaar | Nee | Ja | OEM-kleurmatch vereist |
| Enkele steenscheur < 1/8″ breed | Ja | Nee | Epoxyreparatie voldoende |
| Bewegende scheur of thermisch probleem | Nee | Ja | Correctie van dilatatievoegen |
| Klantgarantie in het geding | Nee | Ja | Betrouwbaarheid & documentatie |
Conclusie
Een reparatie die binnen twee seizoenen mislukt, is geen oplossing; het is een terugbelactie die nog moet plaatsvinden. Als u de thermische uitzettingscontrole overslaat of de verkeerde lijm gebruikt, bent u gegarandeerd weer ter plaatse en betaalt u de arbeidskosten. De vier stappen hier – diagnosticeren, verbinden, matchen, verzegelen – verkleinen dat risico als je de specificaties volgt.
Als voor de reparatie stenen moeten worden vervangen en de originele batch is verdwenen, wordt kleurafwijking uw volgende hoofdpijn. Dat is waar batchretentie van belang is. Bekijk de pagina met OEM-steenoplossingen op maat om te zien hoe exacte vervangingen een naadloos beeld behouden bij meerfasige projecten.
Veelgestelde vragen
Hoe gebarsten steenfineer repareren?
Maak de scheur en het omliggende gebied schoon en vul deze vervolgens met een bijpassende epoxy- of steenreparatieplamuur. Bij structurele scheuren moet je ook de oorzaak aanpakken, zoals ontbrekende uitzettingsvoegen, anders zal de scheur binnen één tot twee seizoenen weer verschijnen. Stel altijd de oorzaak vast voordat u filler aanbrengt.
Welke lijm gebruik je voor gestapelde steen?
Gebruik polymeer-gemodificeerde thinset voor buiten- of vochtgevoelige installaties; het biedt een 40% betere treksterkte dan standaard constructielijm. Voor droge ruimtes binnenshuis werkt een hoogwaardige constructielijm sneller en is acceptabel. Pas de lijm aan het blootstellingsniveau van de muur aan.
Hoe sluit je een gestapelde steen af?
Breng een ademende, doordringende sealer op waterbasis aan met behulp van een pompspuit of roller, werk in kleine secties om plassen te voorkomen. Veeg overtollig materiaal onmiddellijk weg om een wazige film te voorkomen en laat 48 uur volledig uitharden. Test de sealer eerst op een verborgen steen om het kleureffect te bevestigen.
Welk type mortel gebruiken voor gestapelde steen?
Gebruik een met polymeer gemodificeerde thinset-mortel die geschikt is voor steenfineer. Standaard type N- of S-mortel is te zwak en zal falen bij verticale toepassingen. Het polymeeradditief geeft de flexibiliteit die nodig is om thermische bewegingen aan te kunnen. Vervang nooit baksteenmortel door thinset van steenfineer.
Moet ik een gestapelde steen verzegelen?
Ja, als de steen buiten of in een natte ruimte zoals een douche wordt geïnstalleerd; afdichting voorkomt vochtopname, uitbloeiing en schade door vries-dooi. Droge muren binnenshuis hoeven mogelijk niet te worden afgedicht, maar een sealer beschermt tegen stof en vlekken. Sla het afdichten alleen over op binnenmuren zonder blootstelling aan vocht.